Swagger
swagger는 API명세서 작성 자동화와 라이브러리가 애플리케이션을 분석하여 API를 호출 할 수 있는 웹 기반 UI가 제공된다
새로운 프로젝트를 진행하며 더 간단한 API 호출을 위해 Swagger를 적용시켜보기로 결정했다
현재 진행하고 있는 다른 프로젝트들과 달리 비교적 4명이서 진행하는 비교적 소규모 프로젝트이다보니 빠르게 적용시킬 수 있었다

Swagger를 설정해주기 위한 라이브러리는 두 가지가 존재한다.
- SpringFox
- SpringDoc
Spring Fox는 2015년에 나온 라이브러리로 오래된 라이브러리고 2020년 7월 이후로 업데이트가 멈추었기 때문에 Spring Boot 특정 버전부터는 제대로 적용되지 않는 문제가 존재한다
SpringDoc은 2019년에 나온 라이브러리이고 현재까지도 계속해서 업데이트를 하고 있는 라이브러리이다. Spring 3.x 버전도 지원해주고 있다
본 글에서는 SpringDoc을 사용할 것이다
SpringDoc 의존성 추가
나는 springdoc-openapi-ui 1.7.0 버전을 사용하였다
implementation 'org.springdoc:springdoc-openapi-ui:1.7.0'
plugins {
	id 'java'
	id("org.springframework.boot") version "2.7.16"
	id("io.spring.dependency-management") version "1.1.4"
}

group = 'JavaProject'
version = '0.0.1-SNAPSHOT'

java {
	toolchain {
		languageVersion = JavaLanguageVersion.of(17)
	}
}

configurations {
	compileOnly {
		extendsFrom annotationProcessor
	}
}

repositories {
	mavenCentral()
}

dependencies {

	//swagger
	implementation 'org.springdoc:springdoc-openapi-ui:1.7.0'


	//lombok
	compileOnly 'org.projectlombok:lombok'
	runtimeOnly 'com.mysql:mysql-connector-j'
	annotationProcessor 'org.projectlombok:lombok'
	testImplementation 'org.springframework.boot:spring-boot-starter-test'

	testRuntimeOnly 'org.junit.platform:junit-platform-launcher'
}

tasks.named('test') {
	useJUnitPlatform()
}
SwaggerConfig 작성
- 기본적인 설정
@OpenAPIDefinition(
        info =
        @Info(
                title = "테스트 : 테스트용 API 명세서",
                description = "안녕하세요"))
@Configuration
public class SwaggerConfig {}- JWT 를 사용하는 경우
@OpenAPIDefinition(
    info = @Info(
        title = "테스트 : 테스트용 API 명세서",
        description = "안녕하세요"
    ),
    security = @SecurityRequirement(name = "bearerAuth")
)
@SecurityScheme(
    name = "bearerAuth",
    type = SecuritySchemeType.HTTP,
    scheme = "bearer",
    bearerFormat = "JWT"
)
@Configuration
public class SwaggerConfig {
}
추가적인 설정
위의 설정처럼 한 다음, 프로젝트를 실행시키고 해당 url로 들어간다면 swagger UI가 나올것이다
http://localhost:8080/swagger-ui/index.html
(swagger2.0과 달리 swagger3.0은 접속 url이 http://localhost:8080/swagger-ui 로 변경되었다)
하지만 추가적인 설정을 yml 파일과 controller에서 해줄 수 있다.
yml 파일
spring:
  springdoc:
    swagger-ui:
      path: /swagger-ui.html

      groups-order: DESC #

      operationsSorter: method

      disable-swagger-default-url: true

      display-request-duration: true
    api-docs:
      path: /api-docs
    show-actuator: true
    default-consumes-media-type: application/json
    default-produces-media-type: application/json
    paths-to-match:
- /v1/**- spring doc
- path: /swagger-ui.html
- swagger-ui 접근 경로의 별칭을 설정해줄 수 있다. 설정해준 주소로 접근해도 http://localhost:8080/swagger-ui/index.html로 리다이렉션 된다
- groups-order: DESC
: path, query, body, response 순으로 나온다
- operationsSorter: method
: 태그 내 각 api의 정렬 기준을 설정한다.
alpha(알파벳 오름차순), method(Http 메소드 순)
- disable-swagger-default-url
: petstore html 문서 비활성화 여부
- default-produces-media-type
: response media type 의 기본값 (기본값 : /)
- default-consumes-media-type
: request media type 의 기본값 (기본값 : application/json)
- paths-to-match:
: swagger-ui에 표시할 api의 엔드포인트 패턴
- path: /swagger-ui.html
Controller
컨트롤러에서의 설정에 대해 설명하겠다
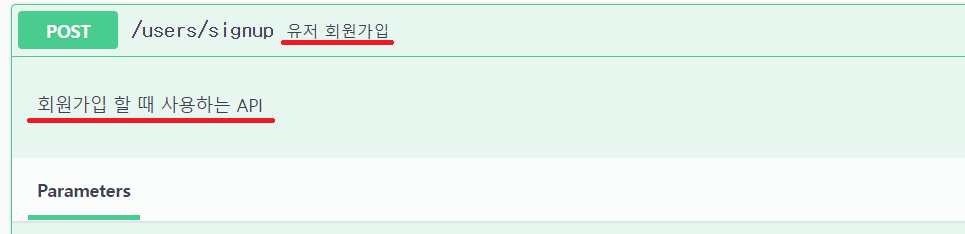
@Operation 어노테이션을 사용해 API의 설명을 적을 수 있다.
    @PostMapping("/signup")
    @Operation(summary = "유저 회원가입", description = "회원가입 할 때 사용하는 API")
    public TokenResponse signup(@RequestBody @Valid SignupRequest signupRequest) {
        return signupService.signUp(signupRequest);
    }
summary에는 간단히 API가 무엇인지 적고, description에 자세한 설명을 적을 수 있다.
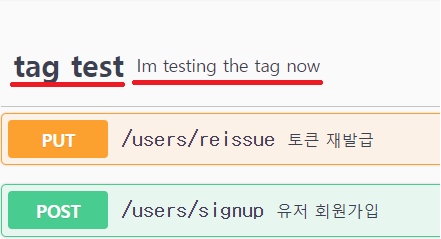
@Tag 어노테이션을 사용하여 API를 그룹화하고, 그룹의 이름을 지정해 줄 수 있다.
@RestController
@Tag(name = "tag test", description = "Im testing the tag now")
@RequiredArgsConstructor
@RequestMapping("/users")
public class UserController {
태그의 이름을 "tag test", 설명을 "Im testing the tag now" 라고 적었다
실행시키기
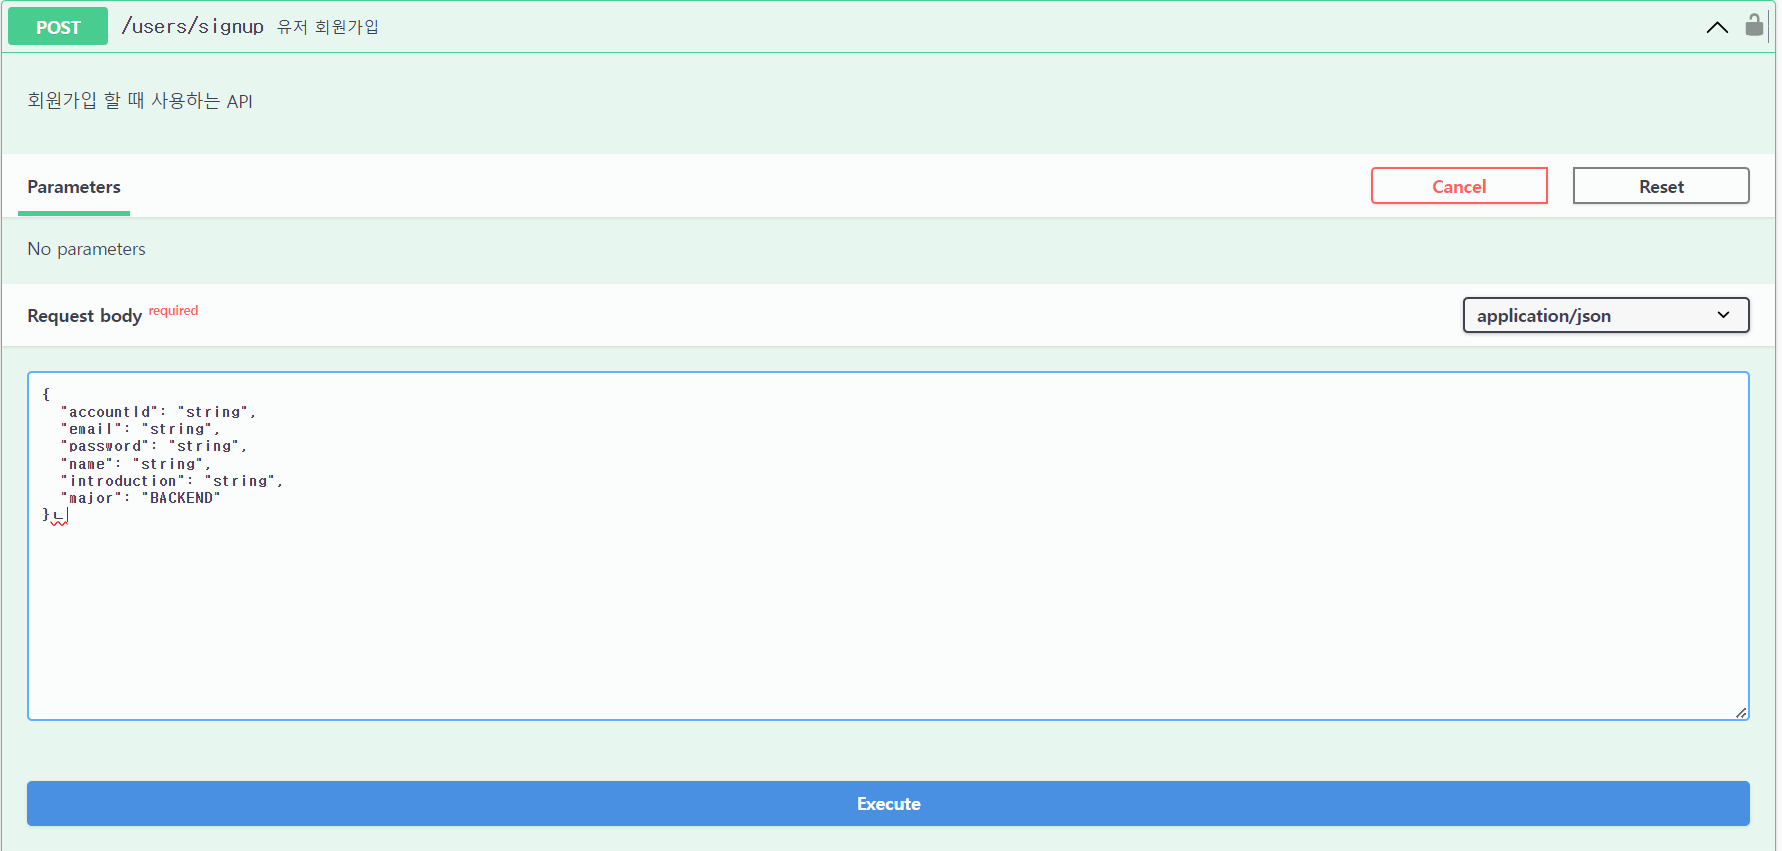
Try it out을 누르면 다음 사진과 같이 요청을 수정할 수 있는데, 원하는대로 수정후 Execute를 누르면 API가 실행된다
JWT 토큰 넣기
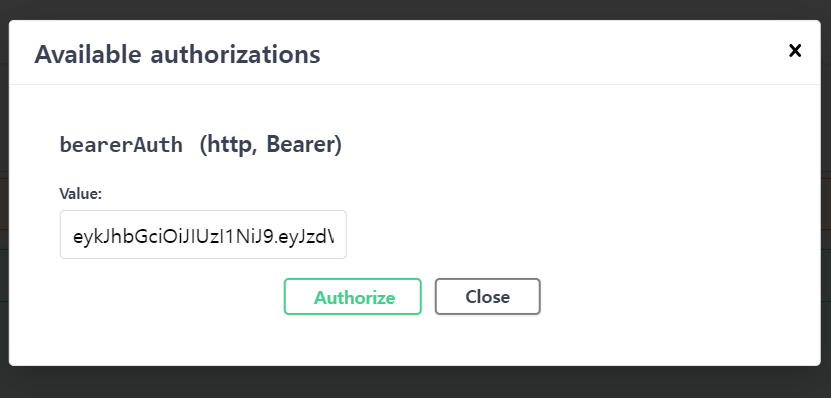
JWT 토큰을 추가하였다면 우측 상단에 Authorize🔓가 보일것이다
이곳에 JWT토큰을 넣어주면 API를 실행 시킬때마다 토큰과 함께 API가 실행 될 것이다.
답변이 이상하다?
나는 계정에서 문제가 생겼는지 email을 보내도 답변이 오지 않는데.. 그래서 aws 관리자에게 IAM 권한을 받아서 확인해보니 IAM에서도 권한 허락을 받는 글을 보낼 수 있었다. 그곳에 보내니 바로 풀렸다.
이 글을 보는 사람들은 그냥 바로 IAM에 글을 넣는게 좋을 것 같다.
마무리
postman을 사용하지 않고 빠르게 api를 테스트 할 수 있고, 자동으로 API 문서를 작성해준다는 점에서 소규모 프로젝트에 잘 어울릴것 같다. fast API에서는 swagger를 기본 지원한다고 하는데 fast API에 대해서도 알아보고 싶다.
참고 자료 👇👇
https://woo-chang.tistory.com/80
https://velog.io/@gmlstjq123/SpringBoot-%ED%94%84%EB%A1%9C%EC%A0%9D%ED%8A%B8%EC%97%90-Swagger-UI-%EC%A0%81%EC%9A%A9%ED%95%98%EA%B8%B0
https://jeonyoungho.github.io/posts/Open-API-3.0-Swagger-v3/