Html Study
출처 : https://www.w3schools.com/html/html_intro.asp
HTML Introduction
HTML 이란?
- Hyper Text Markup Language
- 웹 페이지 만들 때 기준이 되는 마크업 언어
예제
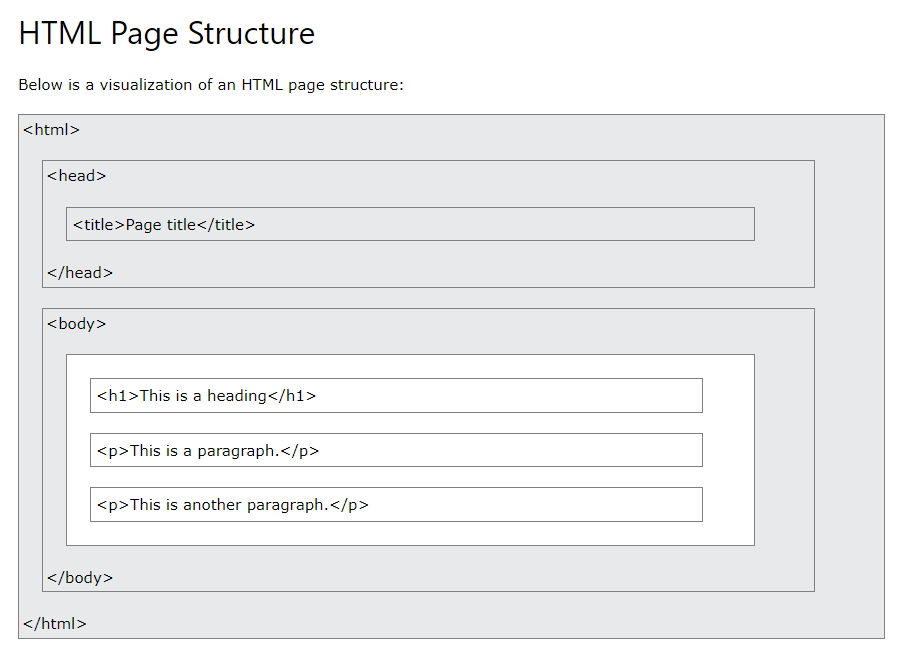
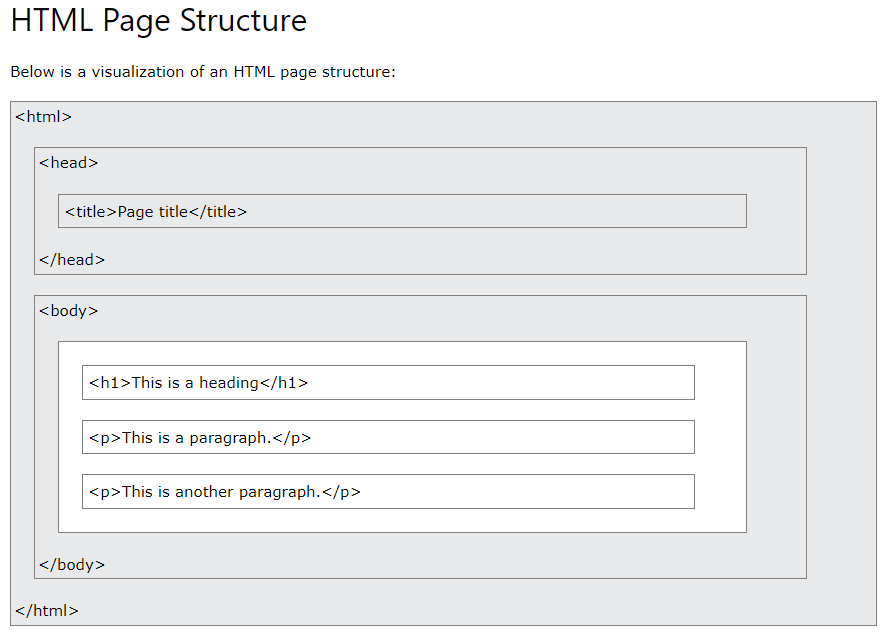
<!DOCTYPE html>
<html>
<head>
<title>Page Title</title>
</head>
<body>

<h1>My First Heading</h1>
<p>My first paragraph.</p>

</body>
</html>
<!DOCTYPE html> html 문서임을 명시
<html></html> html 영역
<head></head> html 의 보이지 않는 정보, 메타 정보가 담긴 영역
<title></title> 페이지의 제목, 타이틀
<body><body> 사용자에게 보여지는 영역
<h1> 은 큰 제목
<p> 는 텍스트 단락HTML의 기본 구조
HTML Editors
웹사이트 만들고 코드를 온라인에 저장하는 법
https://www.w3schools.com/spaces/
HTML Basic Examples
<!DOCTYPE html>
<html>
<body>

<h1>My First Heading</h1>
<p>My first paragraph.</p>

</body>
</html><!DOCTYPE>는 대소문자를 구분하지 않는다<h1> ~ <h6>는 제목 태그<p>태그는 단락 태그<a>태그는 앵커 태그, href에 링크 주소를 넣으면 클릭시 그 주소로 이동한다<img>태그는 이미지 태그, src로 이미지 주소를 넣는다. alt, width, height 속성
HTML Elements
- 기본적인 태그들
<h1>제목을 나타내는 태그<p>단락을 나타내는 태그<br>nextLine 태그, 이 태그는 닫는 태그가 없다.
HTML Attributes
HTML 요소들은 속성을 가질 수 있다.
속성들은 요소들의 추가적인 정보를 제공하며, 시작 태그 안에 명시해주어야 한다.
속성들은 보통 이름과 값이 쌍을 이룬다. ex) name="value"
ex) <a href=="https://www.w3schools.com">Visit W3Schools</a>
<img src="img_girl.jpg">
- 절대경로와 상대경로
- 절대경로 : Links to an external image that is hosted on another website. Example: src="https://www.w3schools.com/images/img_girl.jpg"
다른 웹 사이트에서 제공되는 외부 이미지. 경로를 통해 가져온다. 외부 이미지이기 때문에, 갑자기 변경사항이 생길 수 있다. - 상대경로 : Links to an image that is hosted within the website.
해당하는 웹 사이트에서 제공되는 내부 이미지. 이 방법이 권장된다.
- style 속성
<p style="color:red;">This is a red paragraph.</p>
p태그에 다음과 같은 속성으로 글자 색을 바꿀 수 있다.
- lang 속성
<!DOCTYPE html>
<html lang="en">
<body>
...
</body>
</html>
HTML Headings
Heading 태그
<h1>Heading 1</h1>
<h2>Heading 2</h2>
<h3>Heading 3</h3>
<h4>Heading 4</h4>
<h5>Heading 5</h5>
<h6>Heading 6</h6>- Heading 태그에도 style을 추가할 수 있다.
<h1 style="font-size:60px;">Heading 1</h1>
HTML Paragraphs
<p> 태그는 단락을 의미한다.
<p>This is a paragraph.</p>
<p>This is another paragraph.</p>
<p> 태그 안에서는 여분의 공백이나 줄을 추가해도 반영이 안 된다.
- HTML Horizontal Rules
<hr>는 수평선을 긋는 태그이다. - HTML Line Breaks
<br>는 줄을 추가하는 태그이다. - The HTML
<pre>Element
<pre>태그를 사용하면 줄과 여분의 공백을 반영할 수 있다.

HTML Style
Style 속성은 CSS 속성이다.
- 예제 코드
<!DOCTYPE html>
<html>
<body>

<p>I am normal</p>
<p style="color:red;">I am red</p>
<p style="color:blue;">I am blue</p>
<p style="font-size:50px;">I am big</p>

</body>
</html>- 기본 사용법
<tagname style="property:value;"> - 배경 색
<body style="background-color:powderblue;"> </body> - 텍스트 색상
<h1 style="color:blue;">This is a heading</h1>
<p style="color:red;">This is a paragraph.</p>- 글꼴
font-family 속성을 사용한다.
<h1 style="font-family:verdana;">This is a heading</h1>
<p style="font-family:courier;">This is a paragraph.</p>- 글자 크기
font-size 속성을 사용한다.
<h1 style="font-size:300%;">This is a heading</h1>
<p style="font-size:160%;">This is a paragraph.</p>- 글자 정렬
text-align 속성을 이용한다.
<h1 style="text-align:center;">Centered Heading</h1>
<p style="text-align:center;">Centered paragraph.</p>
HTML Text Formatting
<b> - Bold text
<strong> - Important text
<i> - Italic text
<em> - Emphasized text
<mark> - Marked text
<small> - Smaller text
<del> - Deleted text
<ins> - Inserted text
<sub> - Subscript text
<sup> - Superscript text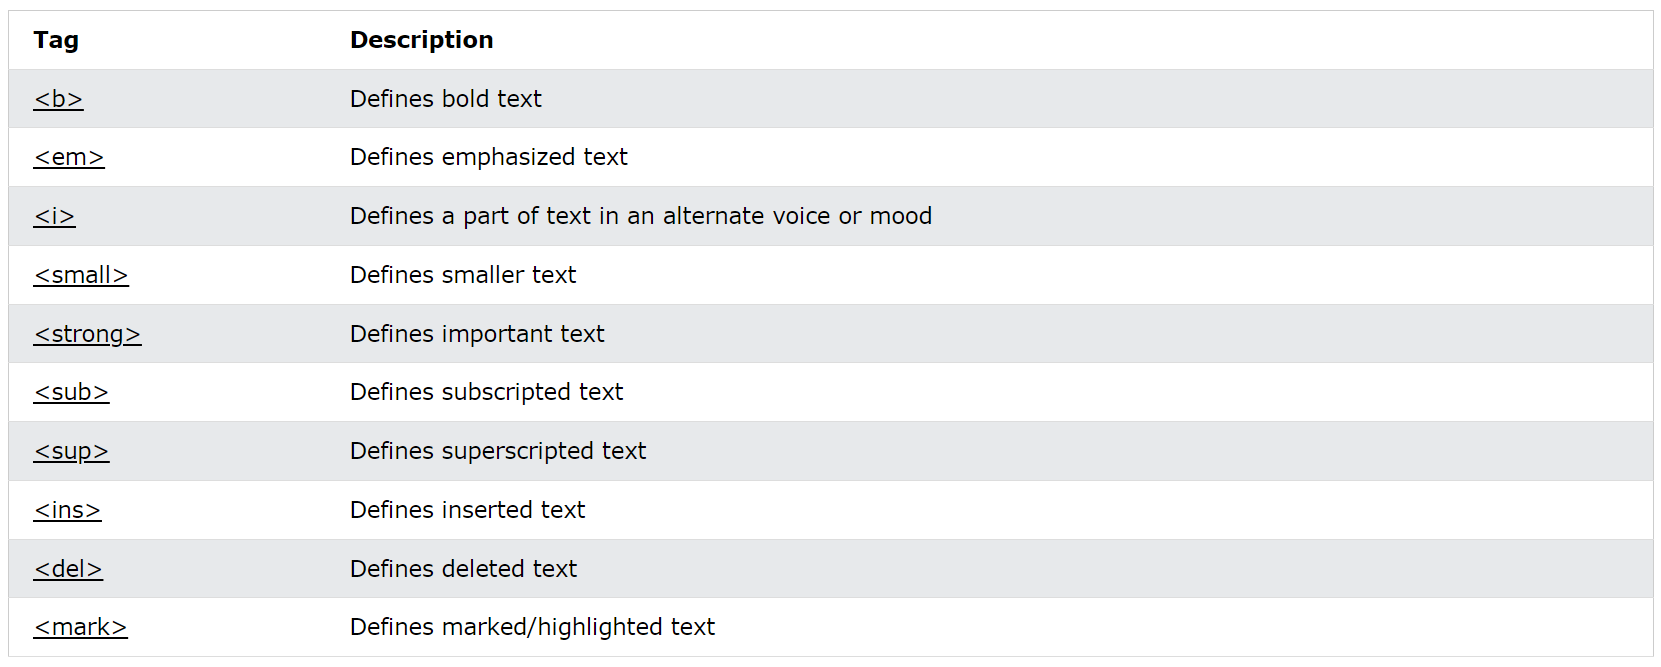
HTML Quotation and Citation Elements
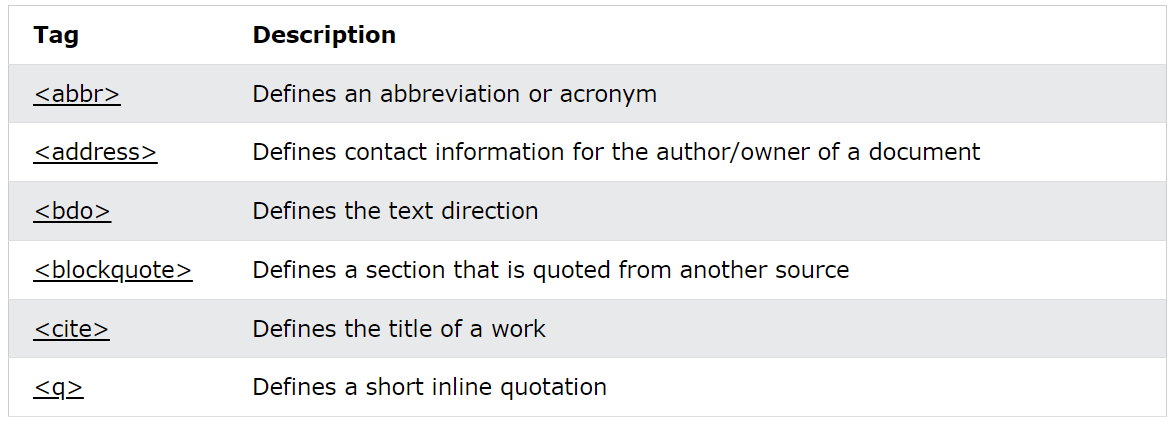
<abbr>약어를 정의하는 태그
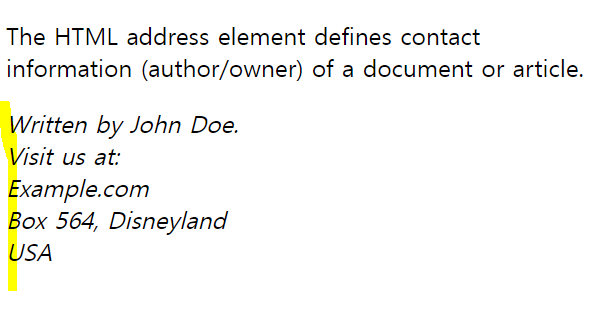
<address>연락처 정보 (기울임꼴 + 줄바꿈)
<bdo>양방향 재정의 (텍스트 방향)

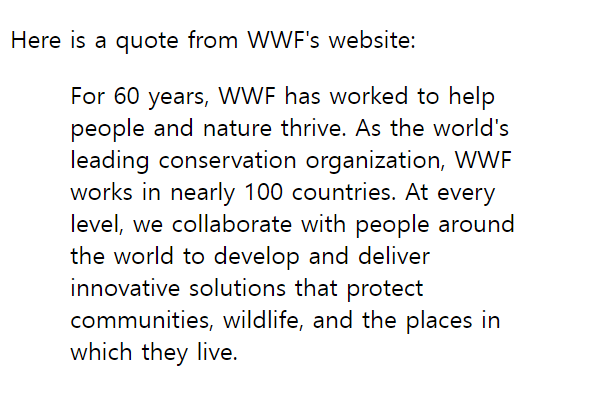
<blockquote>인용문 (들여쓰기)
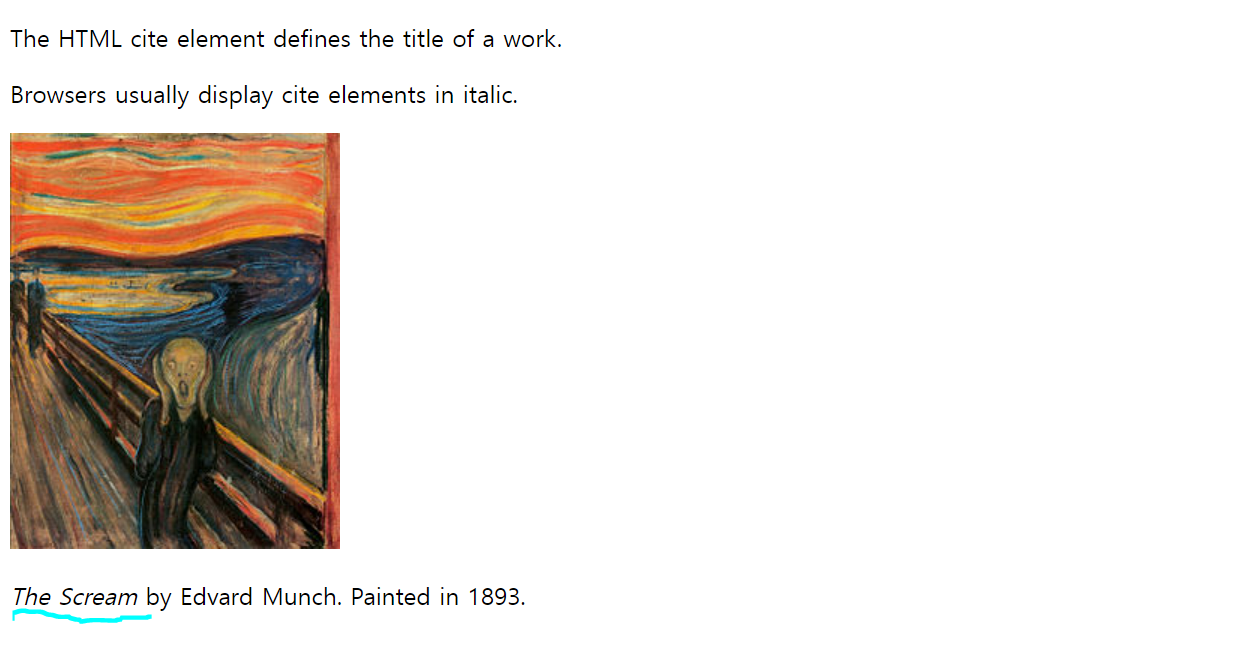
<cite>작품 제목 (기울임꼴)
<q>짧은 인용글 (따옴표)

HTML Comments (주석)
<!-- Write your comments here -->
HTML Colors
RGB, HEX, HSL, RGBA, HSLA 등의 방식으로 표현 가능하다. 컬러의 이름으로도 지정가능하다. A는 불투명도이다.
- RGB > rgb(255, 99, 71)
- HEX > #ff6347
- HSL > hsl(9, 100%, 64%)
- RGBA > rgba(255, 99, 71, 0.5)
- HSLA > hsla(9, 100%, 64%, 0.5)
HTML RGB and RGBA Colors
RGB = Red + Green + Blue
A = Alpha
HTML HEX Colors
Red + Green + Blue
RGB의 값을 16진수로 나타낸 것이다.
HTML HSL and HSLA Colors
hsl(hue, saturation, lightness)
색상 + 채도 + 명도
HTML Styles - CSS
CSS(Cascading Style Sheets) 는 웹 페이지의 레이아웃 형식을 지정한다. 색상, 글꼴, 텍스트 크기, 요소 사이의 간격, 위치 및 배치 방법 등 다양한 디스플레이 설정을 할 수 있다.
- CSS의 사용방법 3가지
- 인라인style - HTML 요소 내부의 속성을 사용
- 내부 - 섹션
<style>의 요소 사용<head> - 외부 - 요소를 사용하여
<link>외부 CSS 파일에 연결
가장 일반적인 방법은 외부 요소를 사용하는 방법이다.
color텍스트 색상에 CSS 속성 사용
font-family텍스트 글꼴에 CSS 속성 사용
font-size텍스트 크기에 CSS 속성 사용
border테두리에 CSS 속성 사용
padding테두리 안의 공간에 CSS 속성 사용
margin테두리 밖의 공간에 CSS 속성 사용
HTML Links
<a href="url">link text</a>
- target 속성
_self- 기본. 클릭한 것과 동일한 창/탭에서 문서를 엽니다.
_blank- 새 창이나 탭에서 문서 열기
_parent- 상위 프레임에서 문서를 엽니다.
_top- 창 전체에서 문서를 엽니다.- 절대경로와 상대경로
<h2>Absolute URLs</h2>
<p><a href="https://www.w3.org/">W3C</a></p>
<p><a href="https://www.google.com/">Google</a></p>

<h2>Relative URLs</h2>
<p><a href="html_images.asp">HTML Images</a></p>
<p><a href="/css/default.asp">CSS Tutorial</a></p>- 그 외
<img>요소( 내부 )를 사용하여 <a>이미지를 링크로 사용
mailto:속성 내부의 체계를 사용하여 href사용자의 이메일 프로그램을 여는 링크를 만듭니다.
HTML Links - Different Colors
<a>태그의 색상 설정
<style>
a:link {
  color: green;
  background-color: transparent;
  text-decoration: none;
}

a:visited {
  color: pink;
  background-color: transparent;
  text-decoration: none;
}

a:hover {
  color: red;
  background-color: transparent;
  text-decoration: underline;
}

a:active {
  color: yellow;
  background-color: transparent;
  text-decoration: underline;
}
</style><a>태그 button 처럼 만들기
<style>
a:link, a:visited {
  background-color: #f44336;
  color: white;
  padding: 15px 25px;
  text-align: center;
  text-decoration: none;
  display: inline-block;
}

a:hover, a:active {
  background-color: red;
}
</style>
HTML Links - Create Bookmarks
id 값을 이용해서 특정 태그로 이동하게 할 수 있다.
- 예제 (
<a>태그를 클릭하면 C4인<h2>태그로 이동한다. (자동 스크롤))
<a href="#C4">Jump to Chapter 4</a>
~~~
<h2 id="C4">Chapter 4</h2>
HTML Images
<img> 태그를 이용해서 웹 페이지에 이미지를 삽입할 수 있다.
<img src="pic_trulli.jpg" alt="Italian Trulli">
src는 주소를, alt는 대체 텍스트를 나타낸다.
width, height로 가로 세로 크기를 지정할 수 있고, CSS를 통해서도 지정가능하다.
float 속성으로 이미지를 왼쪽이나 오른쪽으로 띄울 수 있다.
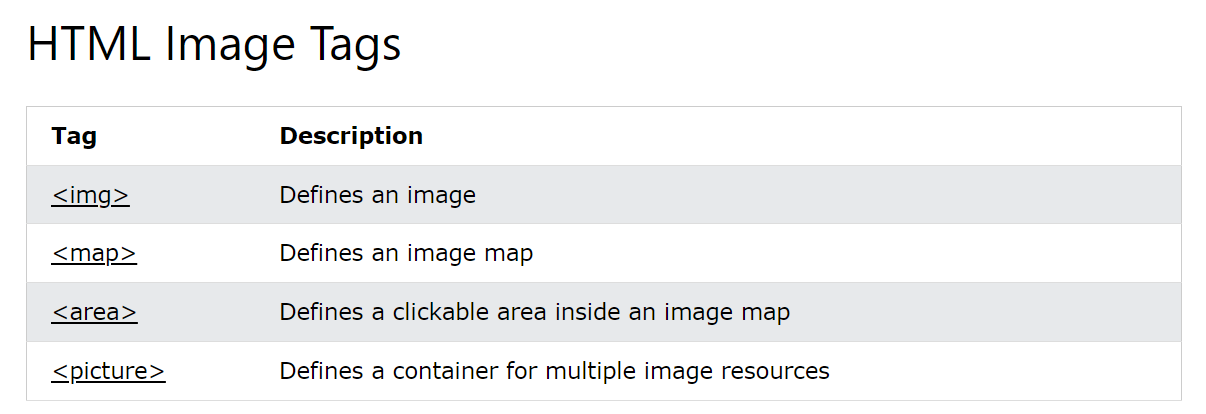
HTML Image Maps
maps를 사용해서 이미지의 특정 부분만 클릭할 수 있도록 할 수 있다.
- 기본 예제

사진 속의 노트북과 휴대폰, 커피잔만 클릭 가능하고, 나무 배경은 클릭 불가능하다.
<img src="workplace.jpg" alt="Workplace" usemap="#workmap">

<map name="workmap">
  <area shape="rect" coords="34,44,270,350" alt="Computer" href="computer.htm">
  <area shape="rect" coords="290,172,333,250" alt="Phone" href="phone.htm">
  <area shape="circle" coords="337,300,44" alt="Coffee" href="coffee.htm">
</map>
usemap 속성을 <img> 태그 내에 추가해야한다.
rect- 직사각형 영역을 정의합니다. (죄측상단의 x,y 우측하단의 x,y)
circle- 원형 영역을 정의합니다. (중심좌표 x,y 반지름)
poly- 다각형 영역을 정의합니다. (여러 점의 x,y 좌표를 나열)
<area shape="poly" coords="140,121,181,116,204,160,204,222,191,270,140,329,85,355,58,352,37,322,40,259,103,161,128,147" href="croissant.htm">
default- 전체 지역을 정의합니다.
위의 방법으로 클릭 가능한 영역을 잡은 뒤 JavaScript 함수 이벤트를 추가할 수 있다.
HTML Background Images
<p style="background-image: url('img_girl.jpg');">
<style>
body {
  background-image: url('img_girl.jpg');
  background-repeat: no-repeat;
  background-attachment: fixed;
  background-size: 100% 100%;
}
</style>
HTML <picture> Element
<picture>
  <source media="(min-width: 650px)" srcset="img_food.jpg">
  <source media="(min-width: 465px)" srcset="img_car.jpg">
  <img src="img_girl.jpg">
</picture><picture>태그의 사용 목적
- Bandwidth (대역폭)
디바이스의 화면이 작은 경우, 큰 이미지를 로드할 필요가 없다.<picture>태그를 사용하면, 브라우저는 속성 값과 일치하는 첫 번째<source>요소를 사용하고, 다음 요소들은 무시한다. - Format Support (형식 지원)
몇몇 브라우저나 디바이스들은 이미지 형식을 지원하지 않는다. 이때,<picture>태그를 사용하여 모든 형식의 이미지를 추가할 수 있다. 브라우저는 첫 번째 형식을 인지하며 다음 요소들은 모두 무시한다.
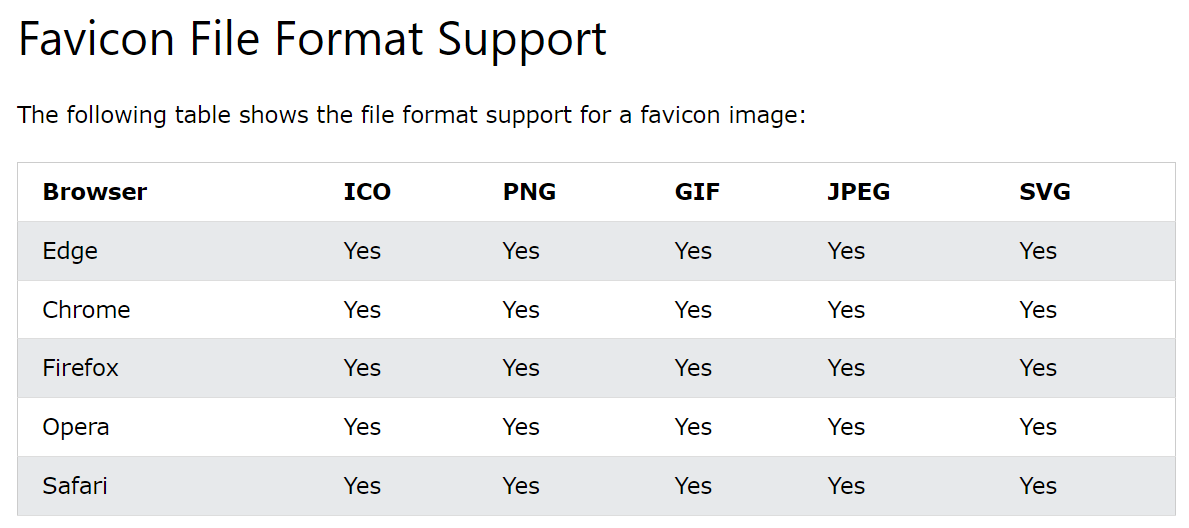
HTML Favicon
브라우저의 타이틀 옆에 있는 작은 아이콘
- 기본 사용법
<!DOCTYPE html>
<html>
<head>
  <title>My Page Title</title>
  <link rel="icon" type="image/x-icon" href="/images/favicon.ico">
</head>
<body>

<h1>This is a Heading</h1>
<p>This is a paragraph.</p>

</body>
</html>
<title> 태그 옆에 <link> 태그를 달아서 페이지 아이콘을 추가할 수 있다.
HTML Page Title
<title>HTML Tutorial</title>
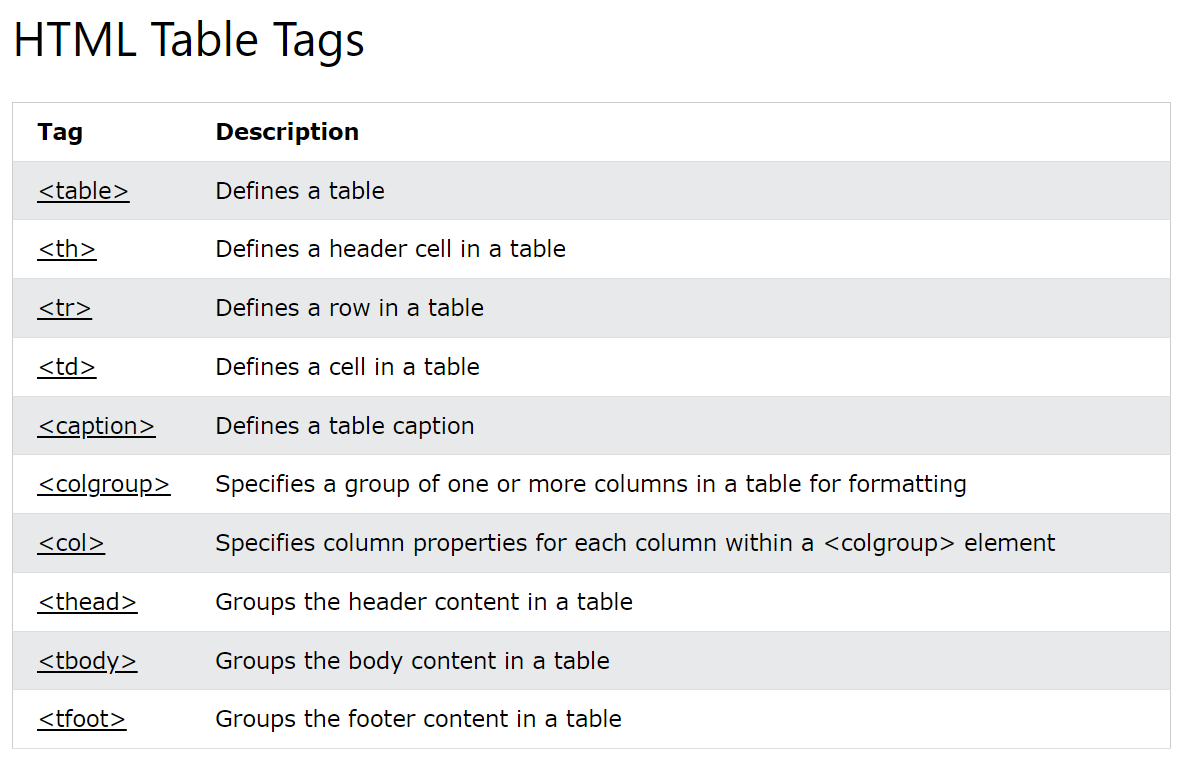
HTML Tables
- 기본 사용법
<table>
  <tr>
    <th>Company</th>
    <th>Contact</th>
    <th>Country</th>
  </tr>
  <tr>
    <td>Alfreds Futterkiste</td>
    <td>Maria Anders</td>
    <td>Germany</td>
  </tr>
  <tr>
    <td>Centro comercial Moctezuma</td>
    <td>Francisco Chang</td>
    <td>Mexico</td>
  </tr>
</table>
<tr> 태그는 행을, <td> 태그는 열을 나타낸다.
<th> 태그를 사용하면 테이블의 제목을 표시할 수 있다.
HTML Table Borders
css로 테이블의 경계를 수정할 수 있다.
https://www.w3schools.com/html/html_table_borders.asp
HTML Table Sizes
css 속성을 사용하여 테이블의 크기를 변경할 수 있다.
https://www.w3schools.com/html/html_table_sizes.asp
HTML Table Headers
테이블 헤더의 다양한 표시 방법
https://www.w3schools.com/html/html_table_headers.asp
HTML Table Padding & Spacing
테이블 태그 border의 두께를 지정할 수 있다.
https://www.w3schools.com/html/html_table_padding_spacing.asp
HTML Table Colspan & Rowspan
테이블 태그의 열과 행의 일부를 합칠 수 있다. (행/열 합치기)
https://www.w3schools.com/html/html_table_colspan_rowspan.asp
HTML Table Styling
테이블의 스타일 변경하기
https://www.w3schools.com/html/html_table_styling.asp
HTML Table Colgroup
테이블의 일부(열 단위)의 속성을 변경하고 싶은 경우, colgroup으로 묶을 수 있다.
<table>
  <colgroup>
    <col span="2" style="background-color: #D6EEEE">
  </colgroup>
  <tr>
    <th>MON</th>
    <th>TUE</th>
    <th>WED</th>
    <th>THU</th>
...
https://www.w3schools.com/html/html_table_colgroup.asp
HTML Lists
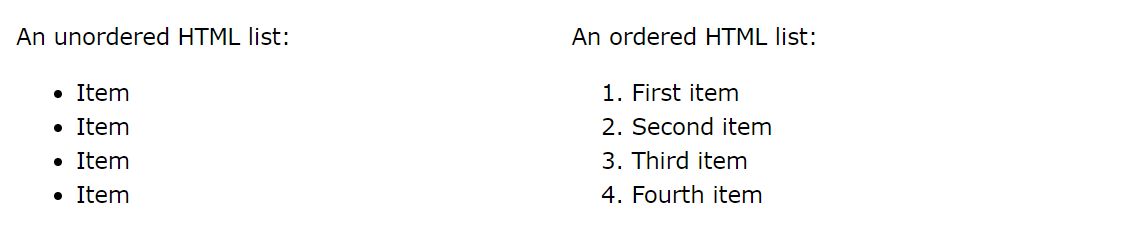
- Unordered HTML List
<ul> <li></li> </ul>
https://www.w3schools.com/html/html_lists_unordered.asp - Ordered HTML List
<ol> <li></li> </ol>
https://www.w3schools.com/html/html_lists_ordered.asp - HTML Description Lists (설명하는 리스트, 들여쓰기)
<dl>
  <dt>Coffee</dt>
  <dd>- black hot drink</dd>
  <dt>Milk</dt>
  <dd>- white cold drink</dd>
</dl>- HTML Other Lists
https://www.w3schools.com/html/html_lists_other.asp
HTML Block and Inline Elements