CollectionViewCell Size에 대해
UICollectionViewCell을 사용해서 이미지를 불러올 때 각 Cell간의 간격을 조정하기 위해 개인적으로 알아본 내용입니다.
부족한 내용이나 틀린 내용이 있다면 지적해주시면 감사하겠습니다.

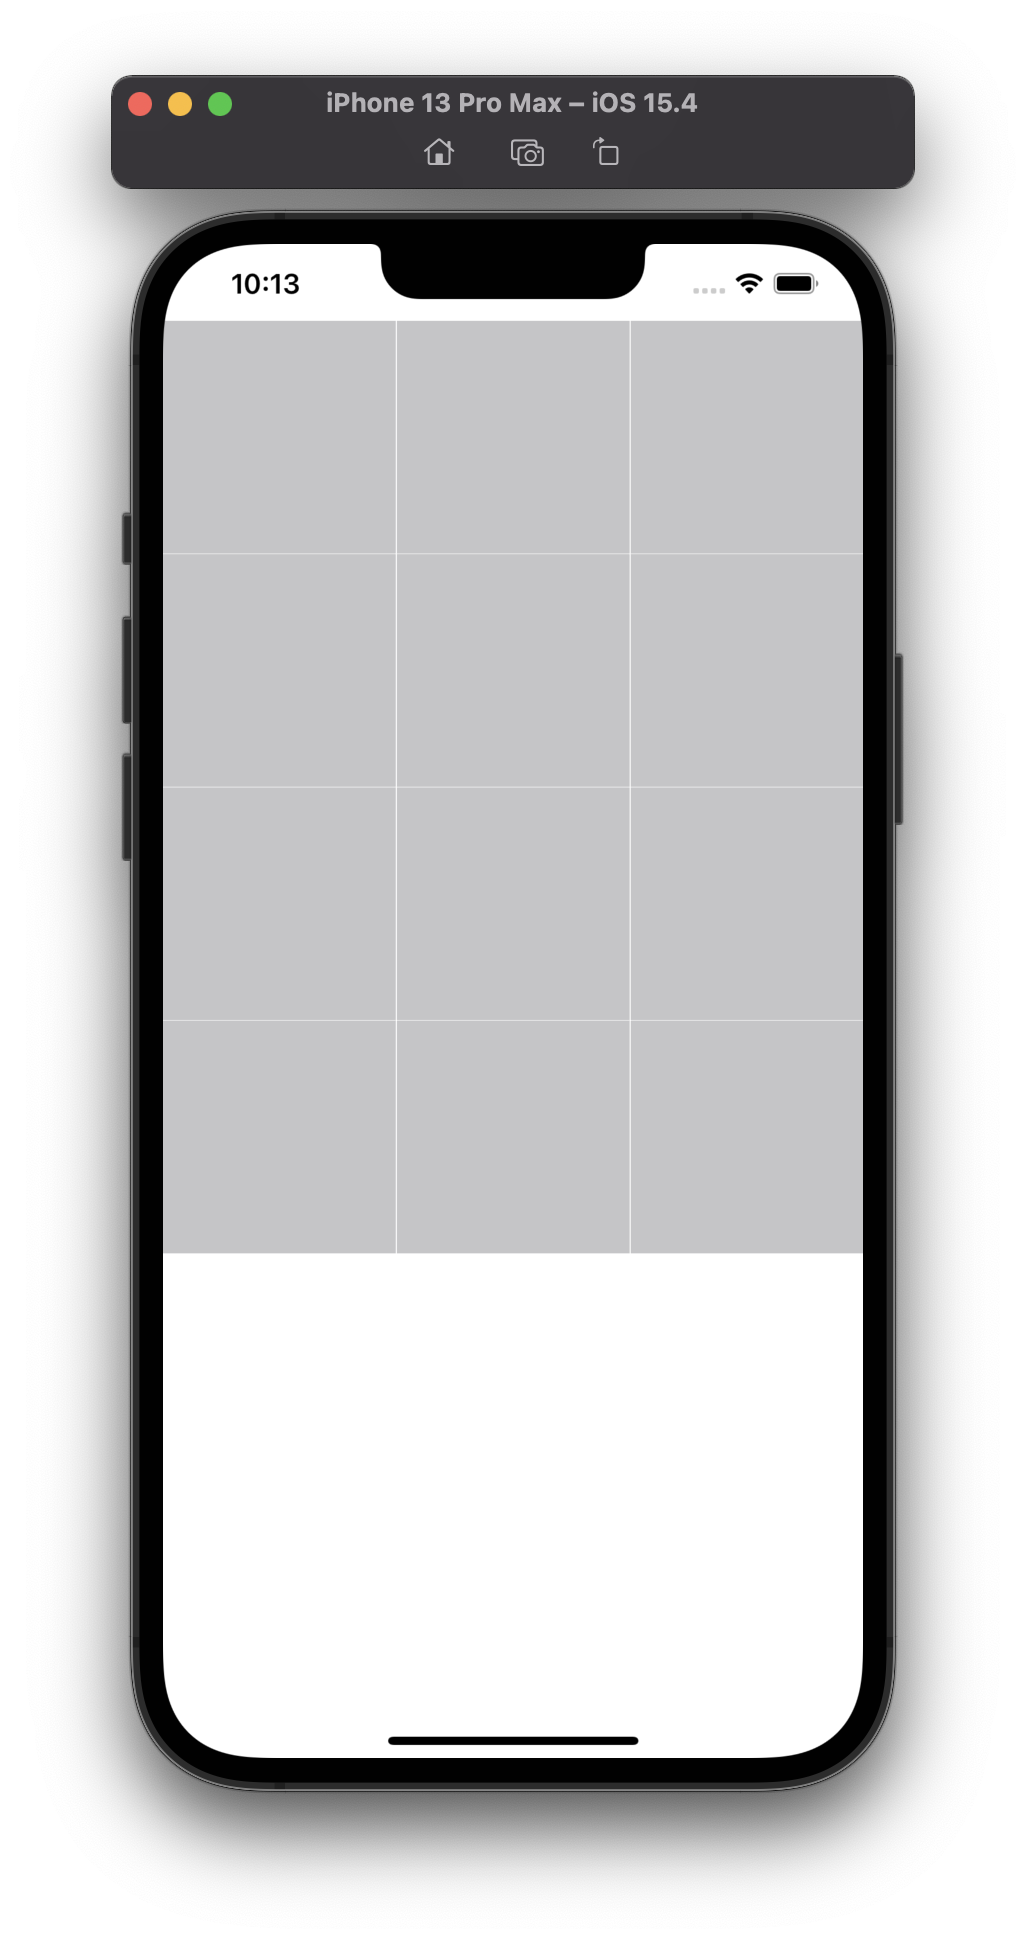
이 글의 목표는 위와 같은 간단한 CollectionView를 구성하는 걸 목표로 하면서 개념까지 알아보자 🤓
- Snapkit 사용
UICollectionView 생성
lazy var로 선언 및 초기화
layout은 UICollectionViewFlowLayout
UICollectionViewCell class 생성 및 register
dataSourece, delegate 설정
    private lazy var collectionView: UICollectionView = {
        let layout = UICollectionViewFlowLayout()

        let collectionView = UICollectionView(frame: .zero, collectionViewLayout: layout)
        collectionView.backgroundColor = .systemBackground
        collectionView.register(CollectionViewCell.self, forCellWithReuseIdentifier: "CollectionViewCell")
        collectionView.dataSource = self
        collectionView.delegate = self

        return collectionView
    }()
UICollectionViewCell class
final class CollectionViewCell: UICollectionViewCell {
    private let imageView = UIImageView()

    func setup(with image: UIImage) {
        addSubview(imageView)
        imageView.snp.makeConstraints {
            $0.edges.equalToSuperview()
        }
        imageView.backgroundColor = .tertiaryLabel
    }
}
UICollectionView DataSource
extension ViewController: UICollectionViewDataSource {
    func collectionView(_ collectionView: UICollectionView, numberOfItemsInSection section: Int) -> Int {
        return 12 //화면에 표시 될 cell 개수
    }

    func collectionView(_ collectionView: UICollectionView, cellForItemAt indexPath: IndexPath) -> UICollectionViewCell {
        let cell = collectionView.dequeueReusableCell(withReuseIdentifier: "CollectionViewCell", for: indexPath) as? CollectionViewCell //다운캐스팅
        cell?.setup(with: UIImage())

        return cell ?? UICollectionViewCell()
    }
}
CollectionViewCell Size 설정
여기서 UICollectionViewDelegateFlowLayout 프로토콜을 채택하여
sizeForItemAt method로 CollectionViewCell 각각의 크기를 정하기
extension ViewController: UICollectionViewDelegateFlowLayout {

    func collectionView(_ collectionView: UICollectionView, layout collectionViewLayout: UICollectionViewLayout, sizeForItemAt indexPath: IndexPath) -> CGSize {

        let width: CGFloat = (collectionView.frame.width / 3) - 0.5

        return CGSize(width: width, height: width)
    }
}
let width: CGFloat = (collectionView.frame.width / 3) - 1.0여기서 한 라인에 3개의 Cell을 표시하기 위해
collectionView 프레임의 width에 3을 나누고 간격을 0.5씩 설정
viewDidLoad 추가
    override func viewDidLoad() {
        super.viewDidLoad()
        view.addSubview(collectionView)
        collectionView.snp.makeConstraints {
            $0.leading.trailing.equalToSuperview()
            $0.top.equalToSuperview()
            $0.bottom.equalToSuperview()
        }
    }
요롬코롬 addSubview 해주고, layout 설정도 해주면 지금까지 모습은

이렇게 된다!
layout minimumLineSpacing & minimumInteritemSpacing
앞서 살펴본 내용은 사실 UICollectionView를 쓰면서 알고있었던 내용인데,,
minimumLineSpacing & minimumInteritemSpacing 은 이번에 처음 알게됐다.
애플 공식문서를 통해 개념 및 사용법을 알아보자.
minimumLineSpacing
The minimum spacing to use between lines of items in the grid.
그리드 안 items의 최소 간격을 설정하기위해 사용
var minimumInteritemSpacing: CGFloat { get set }CGFloat를 채택하고 있다.
그림으로 살펴보면

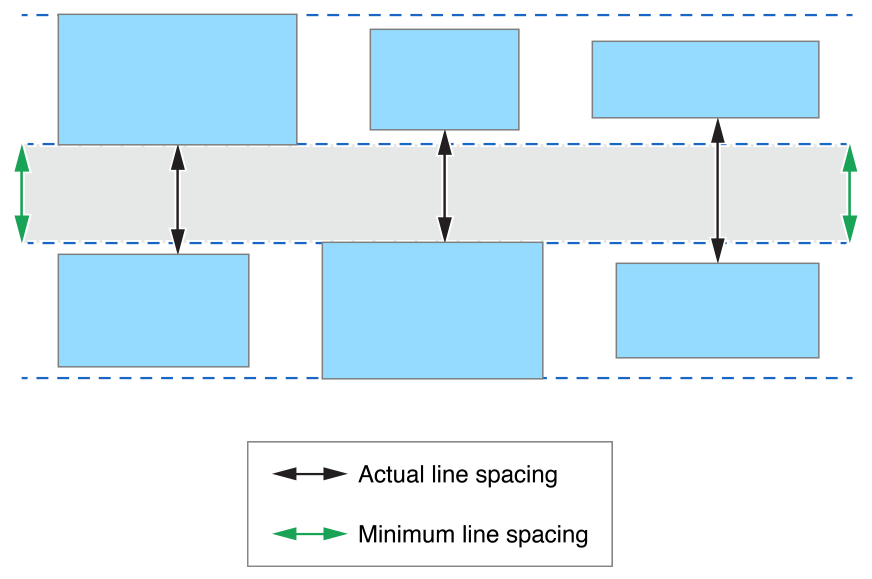
Scroll layout이 vertical인 상태에서 minimum line spacing
셀이 추가되기 시작하면 아래쪽에 줄이 생기게 되는데
만약 셀크기가 다양할 때, 줄과 줄간의 최소 간격을 설정할 때 사용!
Default: 10.0
또한 공식문서를 보면
If the delegate object does not implement the collectionView(_:layout:minimumLineSpacingForSectionAt:) method,
the flow layout uses the value in this property to set the spacing between lines in a section.
CollectionViewDelegateFlowLayout protocol의 collectionView(_:layout:minimumLineSpacingForSectionAt:) 메소드를 사용해서 설정하지 않는다면,
UICollectionViewFlowLayout으로 설정한 layout에서 프로퍼티를 불러와서 설정할 수 있다는 얘기!
minimumLineSpacing
The minimum spacing to use between items in the same row.
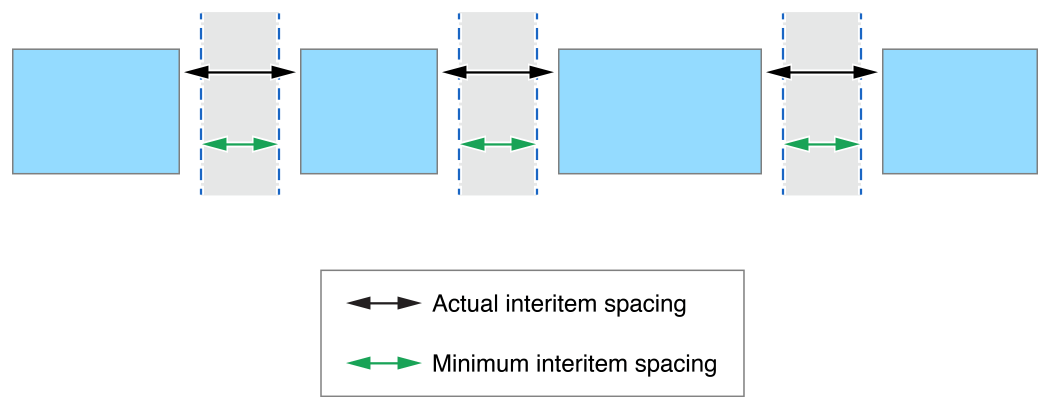
같은 행의 아이템 사이의 최소 간격 설정
var minimumInteritemSpacing: CGFloat { get set }마찬가지로 CGFloat 채택

셀 좌우간격의 최소 간격을 설정한다.
If the delegate does not implement the
collectionView(_:layout:minimumInteritemSpacingForSectionAt:) method,
the flow layout object uses the value of this property to set the spacing between items in the same line.
위 두 가지 프로퍼티를 실제로 적용해보면
    private lazy var collectionView: UICollectionView = {
        let layout = UICollectionViewFlowLayout()
        layout.minimumLineSpacing = 0.5
        layout.minimumInteritemSpacing = 0.5

		//...중략...

        return collectionView
    }()
이렇게 UICollectionViewFlowLayout을 선언한 부분에서 앞서 두 가지 메서드 사용없이 flow layout object인 layout이 프로퍼티를 사용하게끔 설정하면 된다!
완성모습

벨로그 이미지 크기 조정 왜 안 되는데 -ㅅ-;;
