Use UIViewControllerRepresentable to convert UIKit controllers to SwiftUI | Advanced Learning #14
UIViewControllerRepresentable
구현 목표
UIViewController를 SwiftUI 환경에서 사용할 수 있도록 커스텀 컴포넌트를 구현한다.- 간단한
UIViewController를 시트 모달로 표현하기 - 간단한
UIImagePickerController를 시트 모달로 표현하기 - 커스텀 뷰 컨트롤러 내에 바인딩 값을 전달, 기존
SwiftUI뷰에서 데이터 연동하기
구현 태스크
UIViewController커스텀 구조체를UIViewControllerRepresentable프로토콜을 통해 구현UIViewController중UIImagePickerController의 선택 이미지 바인딩을 위한Coordinator클래스 선언 및 델리게이트 연결SwiftUI부모 뷰와 커스텀UIViewController뷰 간의 데이터 바인딩- 이미지 선택 시
dismiss를 위한showScreen불리언 변수 데이터 바인딩
핵심 코드
    func makeUIViewController(context: Context) -> some UIImagePickerController {
        let viewContoller = UIImagePickerController()
        viewContoller.allowsEditing = false
        viewContoller.delegate = context.coordinator
        return viewContoller
    }
...
    class Coordinator: NSObject, UIImagePickerControllerDelegate, UINavigationControllerDelegate  {
        @Binding var image: UIImage?
        @Binding var showScreen: Bool

        init(image: Binding<UIImage?>, showScreen: Binding<Bool>) {
            self._image = image
            self._showScreen = showScreen
        }

        func imagePickerController(_ picker: UIImagePickerController, didFinishPickingMediaWithInfo info: [UIImagePickerController.InfoKey : Any]) {
            guard let image = info[.originalImage] as? UIImage else { return }
            self.image = image
            showScreen = false
        }
}UIKit이 제공하는 기본적인 이미지 피커의 델리게이트를 연결, '선택된 데이터가 무엇인지 커스텀으로 구현한 현재 구조체가 파악할 수 있도록 바인딩Coordinator클래스는NSObject를 준수하는UIImagePickerControllerDelegate역할.SwiftUI뷰에 표현될 이미지가 바인딩으로 넘어오고 곧바로dismiss하기 위해sheet의 불리언 변수 플래그 비트로 달려 있는showScreen값 역시 바인딩- 기존의
UIImagePickerDelegate가 제공하는 모든 함수를 현재Coordinator가 프로토콜 델리게이트를 준수하고 있기 때문에 사용 가능
소스 코드
struct BasicUIViewControllerRepresentable: UIViewControllerRepresentable {
    let labelText: String
    func makeUIViewController(context: Context) -> some UIViewController {
        let viewController = MyFirstViewController()
        viewController.labelText = labelText
        return viewController
    }

    func updateUIViewController(_ uiViewController: UIViewControllerType, context: Context) {

    }
}

class MyFirstViewController: UIViewController {
    var labelText: String = "Starting Value"

    override func viewDidLoad() {
        super.viewDidLoad()
        setView()
    }

    private func setView() {
        view.backgroundColor = .blue
        let label = UILabel()
        label.text = labelText
        label.textColor = UIColor.white
        label.translatesAutoresizingMaskIntoConstraints = false
        view.addSubview(label)
        label.centerYAnchor.constraint(equalTo: view.centerYAnchor).isActive = true
        label.centerXAnchor.constraint(equalTo: view.centerXAnchor).isActive = true
    }
}- 기본적인 백그라운드 컬러만을 입힌 커스텀 뷰 컨트롤러를 구현한 코드
- 현재
SwiftUI의 특정 값을 해당 클래스를 이니셜라이즈할 때 프로퍼티로 넘겨서 라벨 등에 적용 가능 - 실제
UIKit의viewDidLoad등 생명 주기 관련 뷰 함수를 사용하는 것과 동일
struct UIImagePickerControllerRepresentable: UIViewControllerRepresentable {
    @Binding var image: UIImage?
    @Binding var showScreen: Bool
    func makeUIViewController(context: Context) -> some UIImagePickerController {
        let viewContoller = UIImagePickerController()
        viewContoller.allowsEditing = false
        viewContoller.delegate = context.coordinator
        return viewContoller
    }

    // from SwiftUI to UIKit
    func updateUIViewController(_ uiViewController: UIViewControllerType, context: Context) {

    }

    // from UIKit to SwiftUI
    func makeCoordinator() -> Coordinator {
        return Coordinator(image: $image, showScreen: $showScreen)
    }

    class Coordinator: NSObject, UIImagePickerControllerDelegate, UINavigationControllerDelegate  {
        @Binding var image: UIImage?
        @Binding var showScreen: Bool

        init(image: Binding<UIImage?>, showScreen: Binding<Bool>) {
            self._image = image
            self._showScreen = showScreen
        }

        func imagePickerController(_ picker: UIImagePickerController, didFinishPickingMediaWithInfo info: [UIImagePickerController.InfoKey : Any]) {
            guard let image = info[.originalImage] as? UIImage else { return }
            self.image = image
            showScreen = false
        }
    }
}UIImagePickerController는 이전 뷰 컨트롤러와 다르게 현재 자식 뷰 상태에서SwiftUI라는 부모 뷰에 데이터를 넘겨주기 위하여 데이터 바인딩을 한 상태Coordinator를 통해 델리게이턴 패턴을 구현, 해당 델리게이트가UIImagePickerControllerDelegate프로토콜을 준수하기 때문에 사용 가능한 여러 함수를 커스텀 가능 → 선택한 이미지를 바인딩하는 데 사용, 이미지 선택 완료 시 즉각적인dismiss를 위해 바인딩으로 넘겨받은showScreen값을 곧바로 비트 변경하는 데 사용
import SwiftUI
struct UIViewControllerRepresentableBootCamp: View {
@State private var showScreen: Bool = false
@State private var showScreen2: Bool = false
@State private var image: UIImage? = nil
var body: some View {
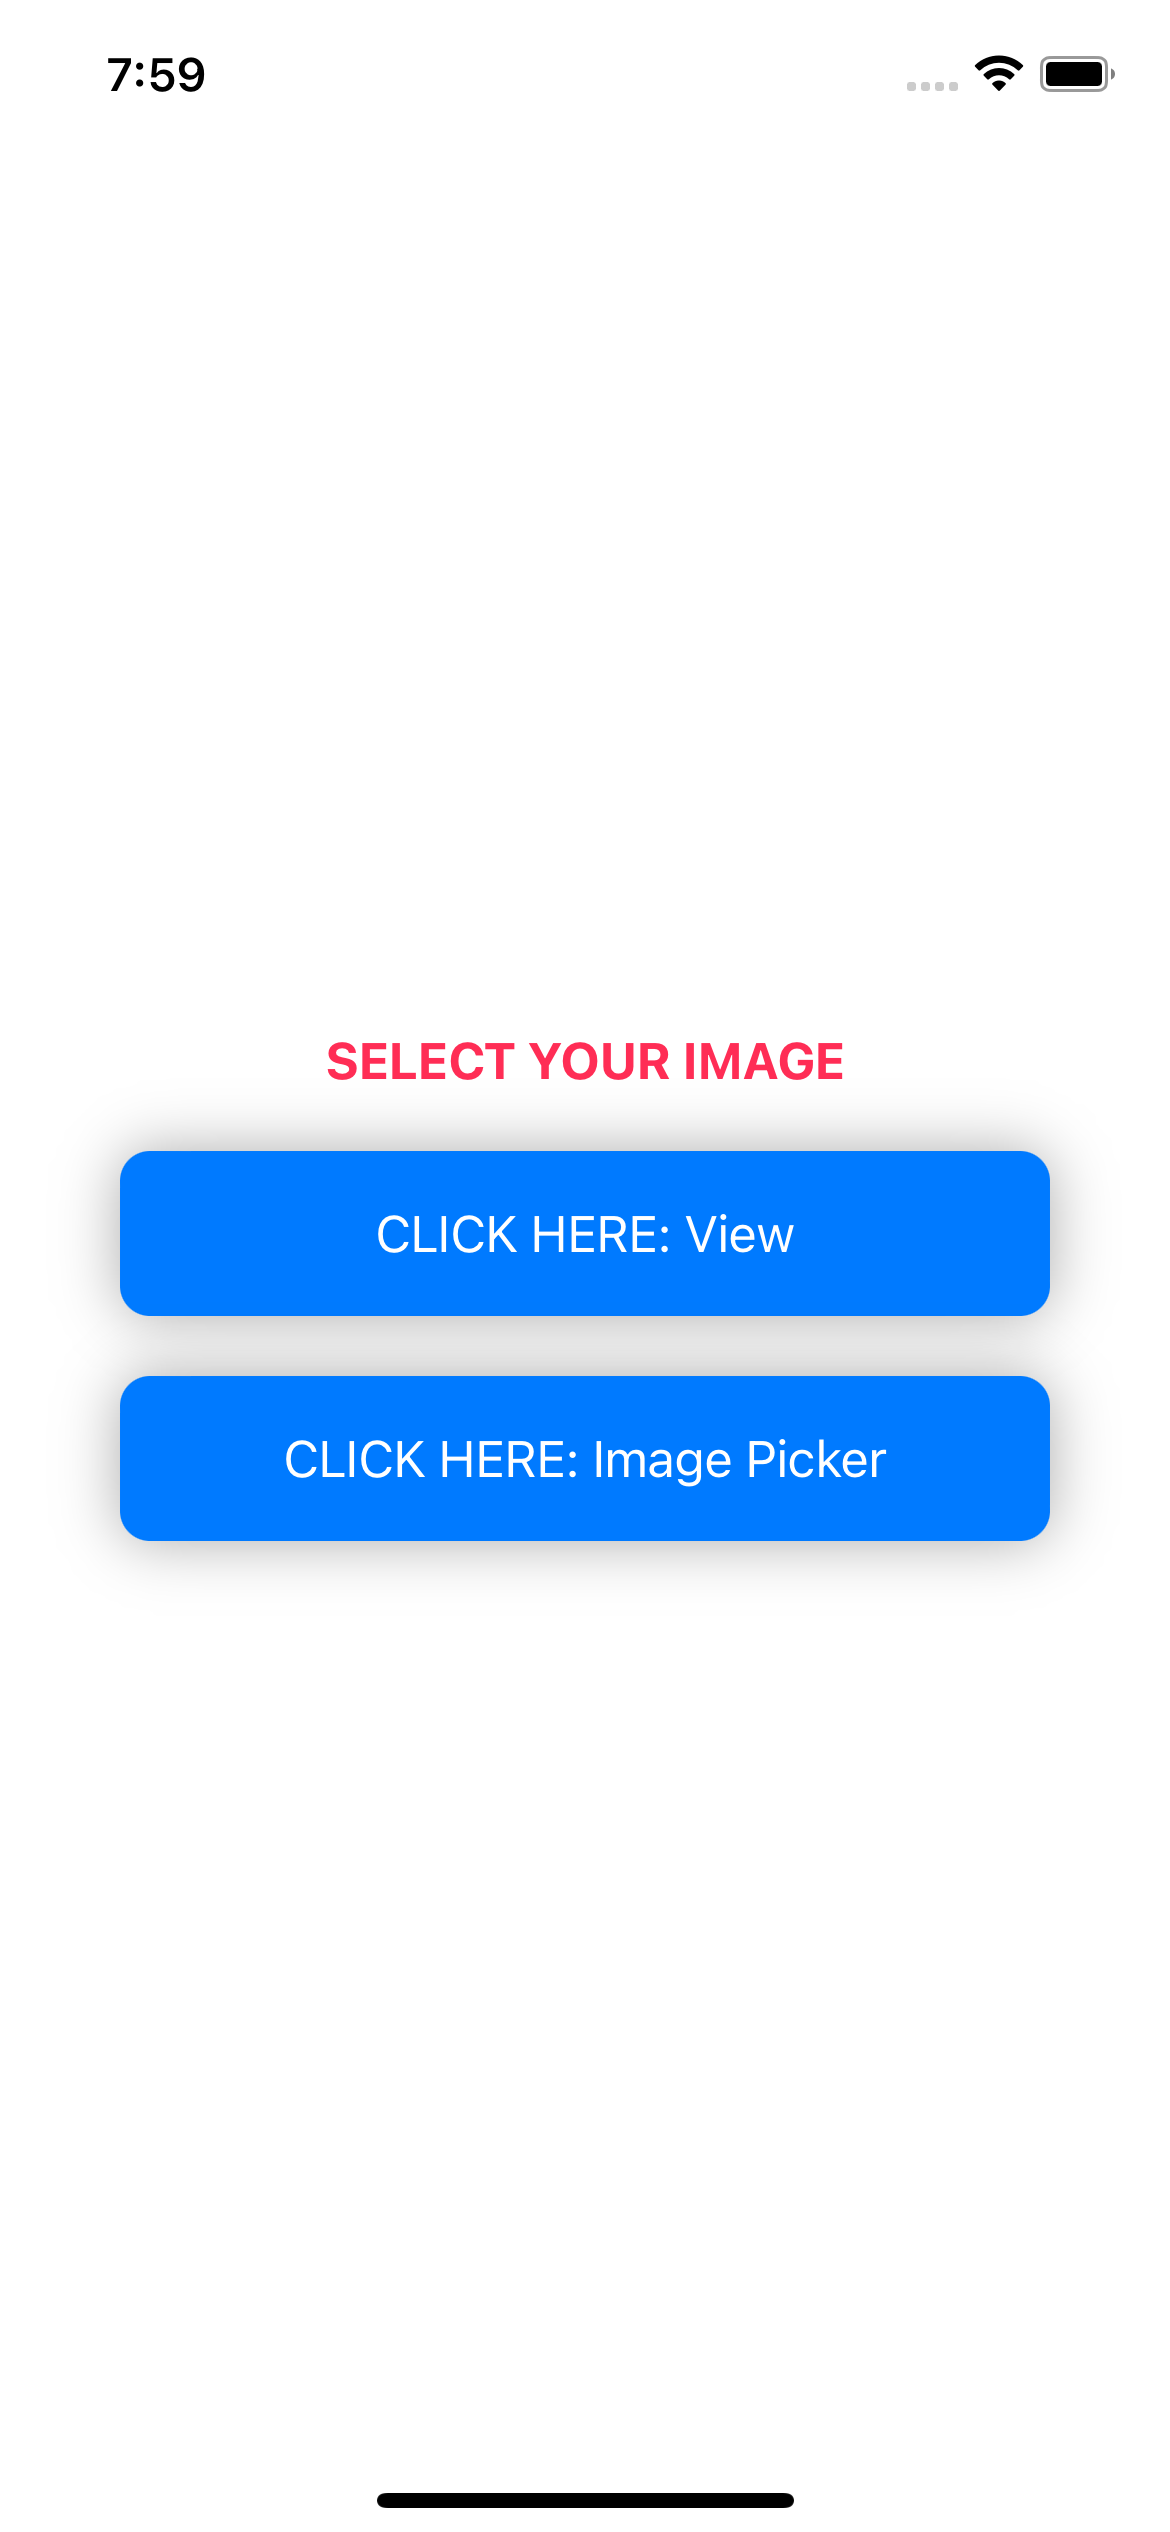
VStack(spacing: 20) {
Text(image == nil ? "SELECT YOUR IMAGE" : "SELECTED IMAGE")
.font(.headline)
.fontWeight(.bold)
.foregroundColor(.pink)
if let image = image {
Image(uiImage: image)
.resizable()
.scaledToFit()
.frame(width: 200, height: 200)
}
Button {
showScreen2.toggle()
} label: {
Text("CLICK HERE: View")
.withDefaultButtonFormmating(Color.blue)
.padding(.horizontal, 40)
}
.withPressableStyle(0.8)
.sheet(isPresented: $showScreen2) {
BasicUIViewControllerRepresentable(labelText: "HELLO WORLD!")
}
Button {
showScreen.toggle()
} label: {
Text("CLICK HERE: Image Picker")
.withDefaultButtonFormmating(Color.blue)
.padding(.horizontal, 40)
}
.withPressableStyle(0.8)
.sheet(isPresented: $showScreen) {
UIImagePickerControllerRepresentable(image: $image, showScreen: $showScreen)
}
}
}
}
구현 화면

JUST DO IT