
iOS Dev 38: Interactive Animator with UIViewPropertyAnimator | Swift 5, XCode 13
Animations: UIViewPropertyAnimator
구현 목표
UIViewPropertyAnimator구현
구현 태스크
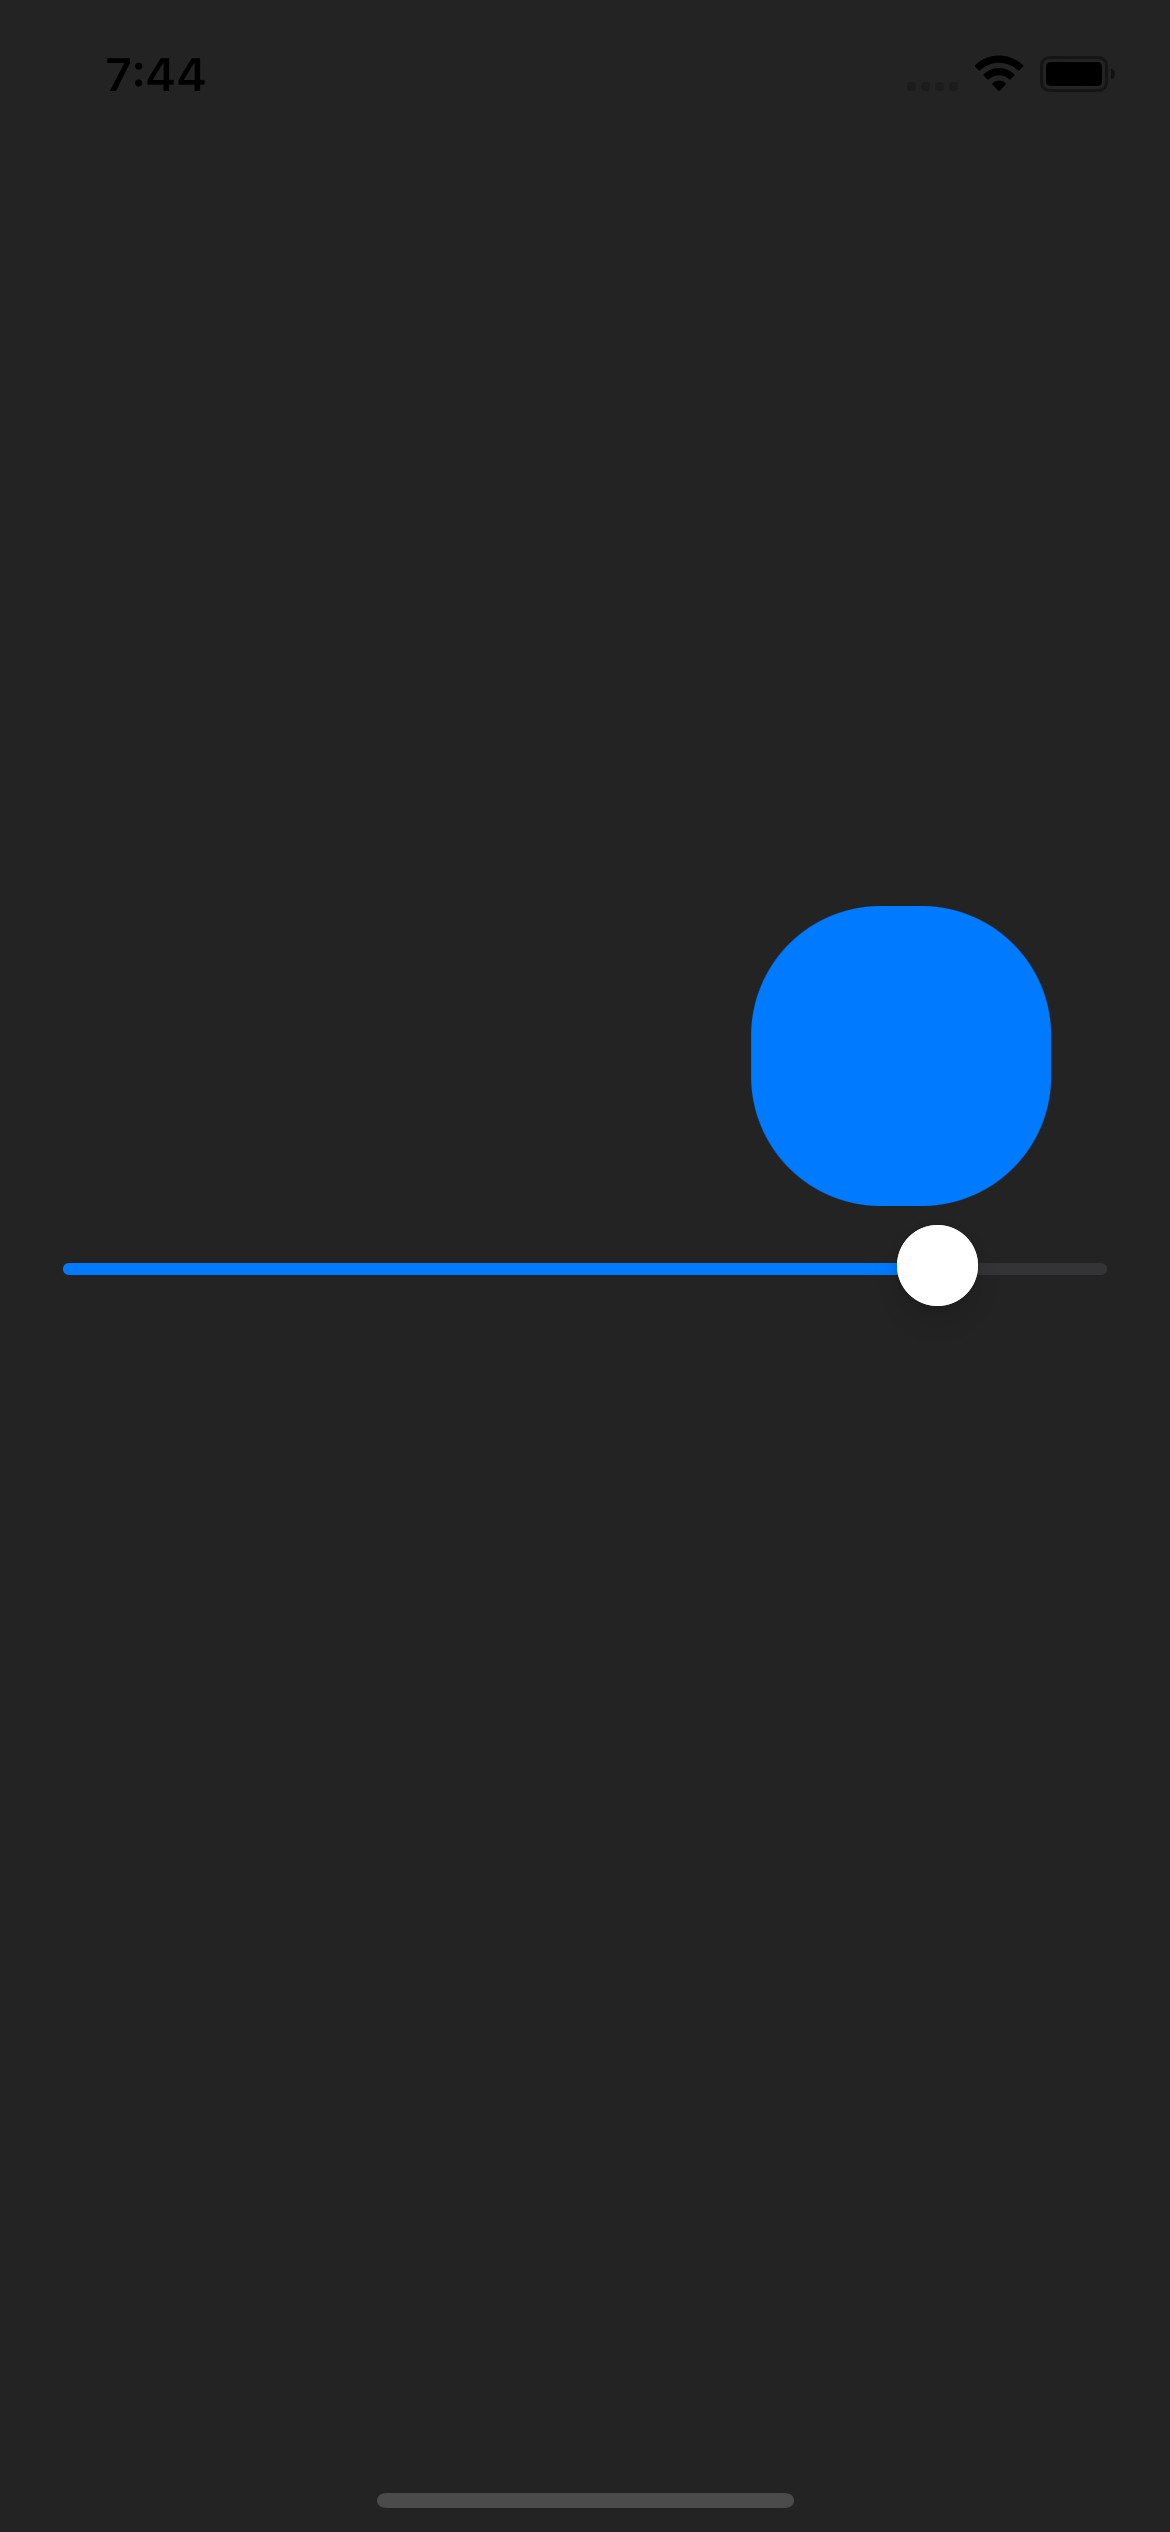
UISlider값에 따라 박스 부의 위치 및 모서리 각도 조정UIViewPropertyAnimator의fractionComplete프로퍼티 적용
핵심 코드
private func configureAnimation() {
        animation = .init(duration: 1, curve: .easeInOut, animations: { [weak self] in
            guard let self = self else { return }
            self.animationView.layer.cornerRadius = self.animationView.frame.width / 2
            self.animationView.frame.origin.x = self.view.frame.width - 100
            self.view.backgroundColor = .label
        })
}UIViewPropertyAnimator를 구성하는 함수- 최종적으로 구현될 부분(100%)은 박스 뷰가 원 형태(즉 모서리 각도가 정사각형의 한 변 길이의 절반), x축 위치 값이 우측으로 이어지는 부분
@objc private func didSliderValueChanged() {
        animation?.fractionComplete = CGFloat(slider.value)
}fractionComplete에 들어가는 값은 곧 해당 애니메이션을 몇 퍼센트 정도 구현할 것인지 결정UISlider의 슬라이더 값이 변경될 때마다 해당 함수가 호출되므로 0~100퍼센트 정도의 애니메이션을 곧바로 적용 가능
소스 코드
import UIKit

class PropertyAnimationViewController: UIViewController {
    private lazy var slider: UISlider = {
        let slider = UISlider()
        slider.translatesAutoresizingMaskIntoConstraints = false
        slider.minimumValue = .zero
        slider.value = .zero
        slider.addTarget(self, action: #selector(didSliderValueChanged), for: .valueChanged)
        return slider
    }()
    private let animationView: UIView = {
        let view = UIView()
        view.backgroundColor = .systemBlue
        return view
    }()
    private var animation: UIViewPropertyAnimator?

    override func viewDidLoad() {
        super.viewDidLoad()
        setUI()
        configureAnimation()
    }

    override func viewDidLayoutSubviews() {
        super.viewDidLayoutSubviews()
        let size: CGFloat = 100
        animationView.frame = CGRect(x: 0, y: view.center.y - size - 20, width: size, height: size)
    }

    private func setUI() {
        view.backgroundColor = .systemBackground
        view.addSubview(slider)
        view.addSubview(animationView)
        applyConstraints()
    }

    private func applyConstraints() {
        let sliderConstraints = [
            slider.leadingAnchor.constraint(equalTo: view.safeAreaLayoutGuide.leadingAnchor, constant: 20),
            slider.trailingAnchor.constraint(equalTo: view.safeAreaLayoutGuide.trailingAnchor, constant: -20),
            slider.centerYAnchor.constraint(equalTo: view.centerYAnchor)
        ]
        NSLayoutConstraint.activate(sliderConstraints)
    }

    @objc private func didSliderValueChanged() {
        animation?.fractionComplete = CGFloat(slider.value)
    }

    private func configureAnimation() {
        animation = .init(duration: 1, curve: .easeInOut, animations: { [weak self] in
            guard let self = self else { return }
            self.animationView.layer.cornerRadius = self.animationView.frame.width / 2
            self.animationView.frame.origin.x = self.view.frame.width - 100
            self.view.backgroundColor = .label
        })
    }

}
구현 화면
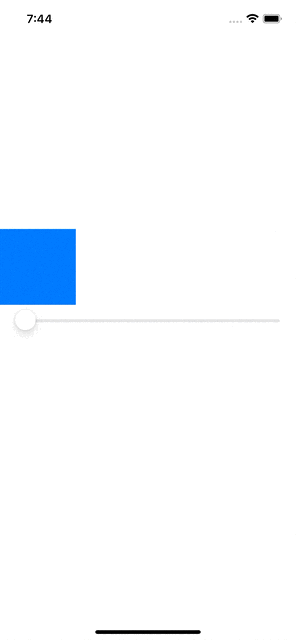
슬라이더 바 움직임에 따라 도형의 변화를 그때 봐야하기 때문에 SwiftUI의 프리뷰를 UIViewControllerRepresentable을 매개로 사용해 적용시킬 때 매우 편리한 상황이다!

JUST DO IT