
Swift: Create Floating Button (2021, Xcode 12, Swift 5) - iOS Development
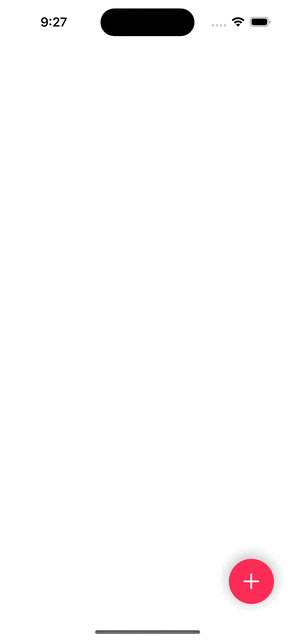
Floating Button
구현 목표
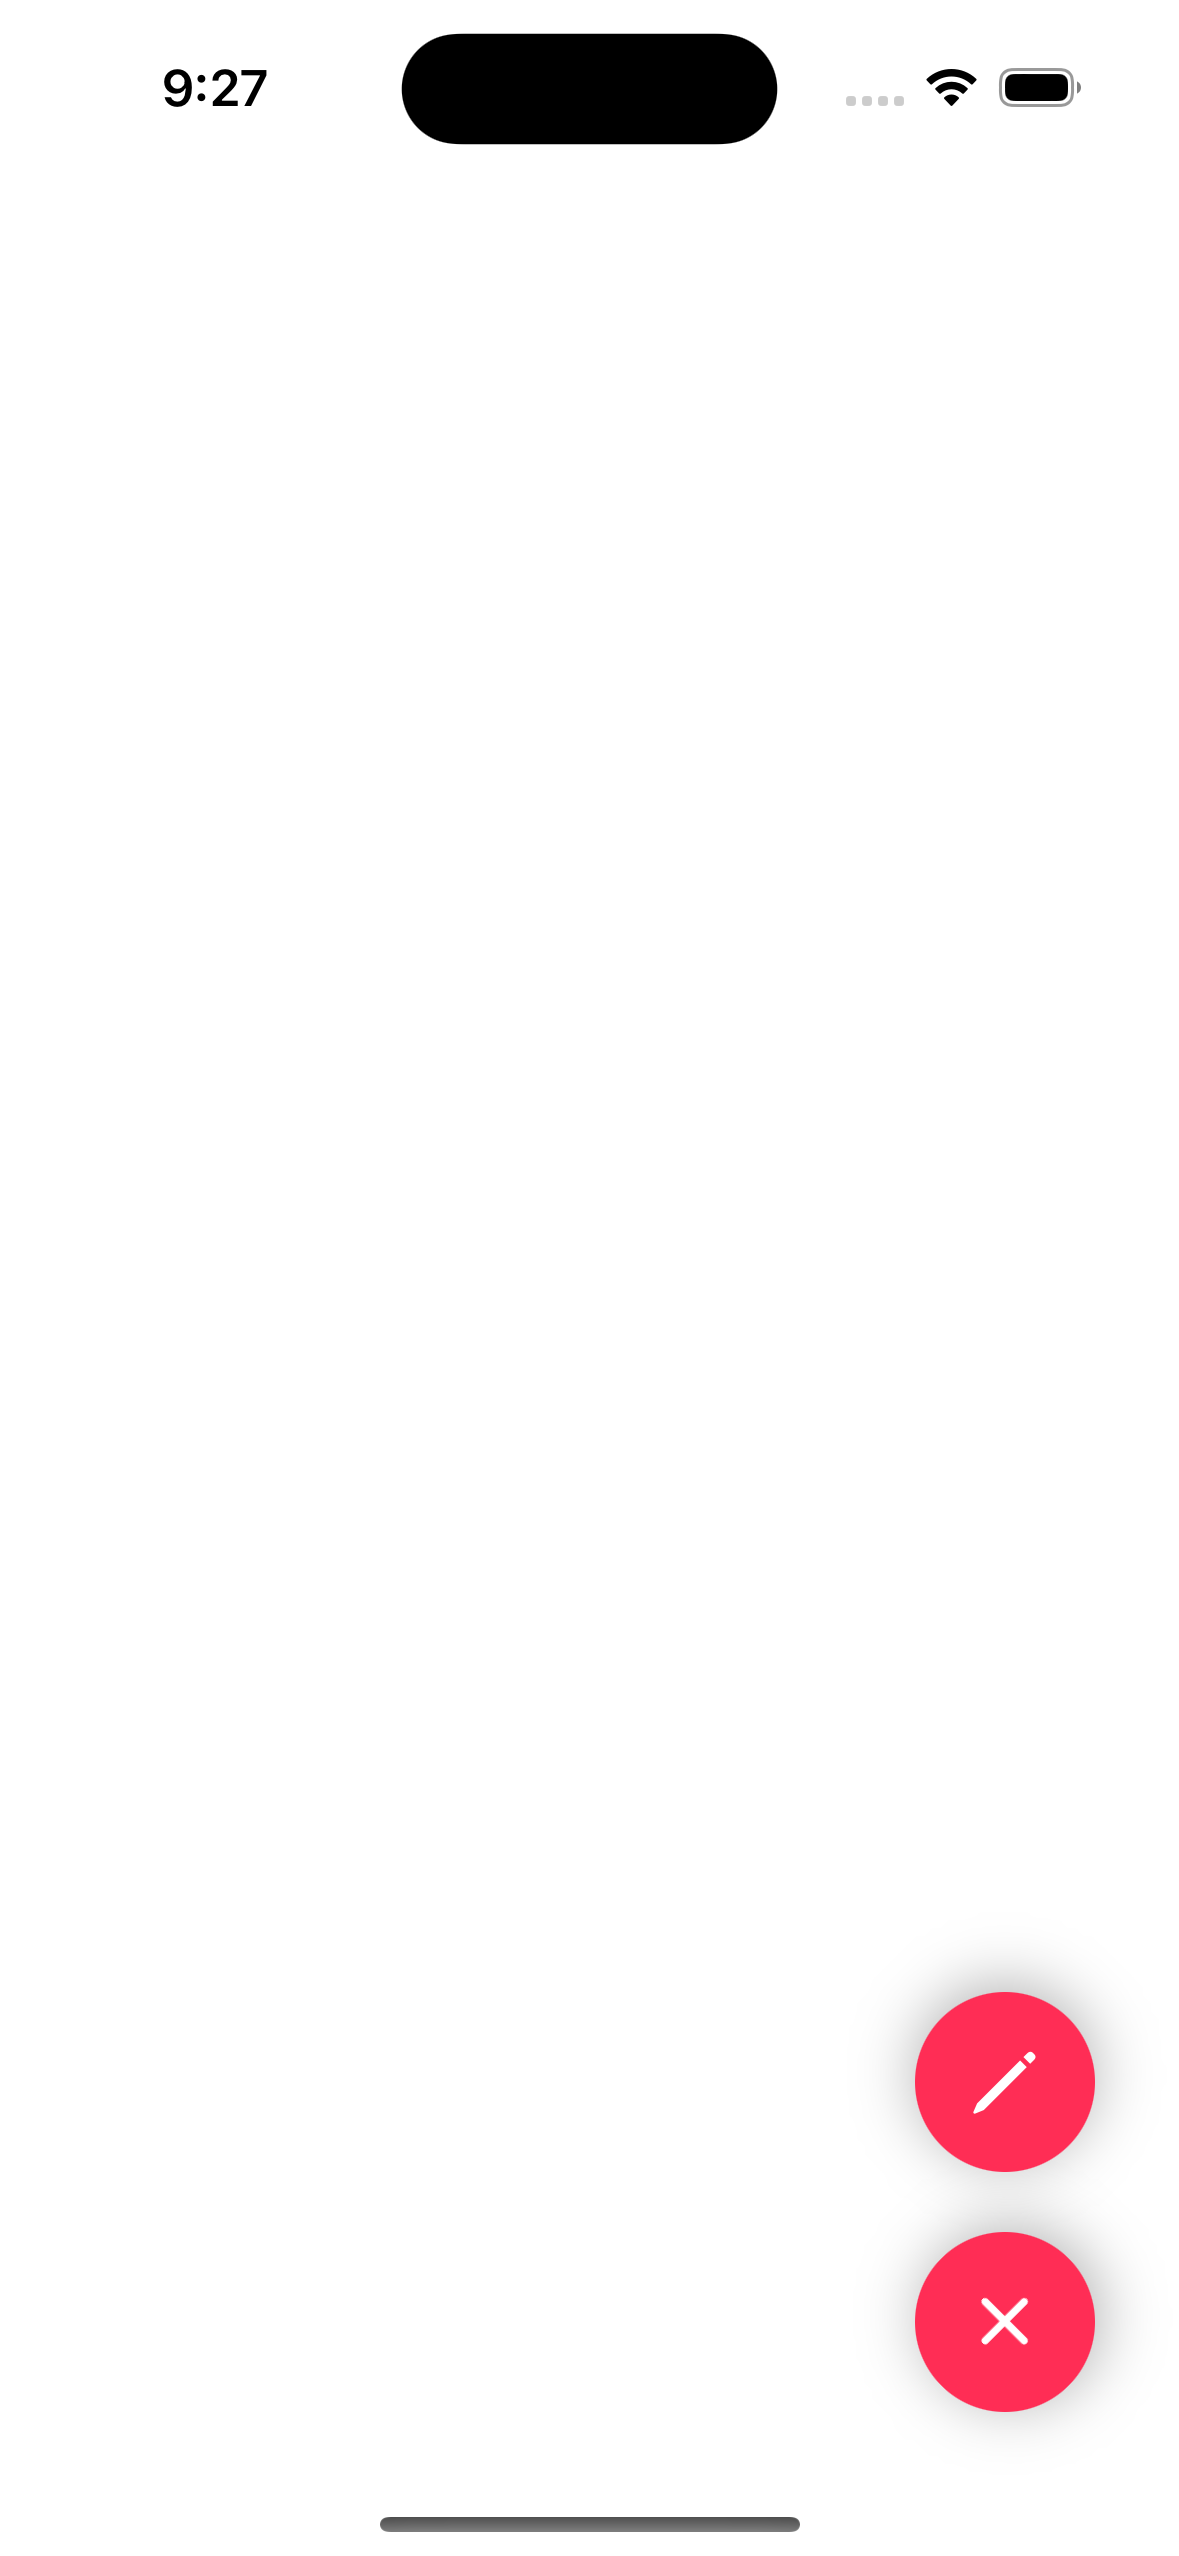
- 플로팅 버튼 구현
구현 태스크
- 플로팅 버튼 UI 구현
- 회전 애니메이션 구현
- 팝업 애니메이션 구현
핵심 코드
private func rotateFloatingButton() {
        let animation = CABasicAnimation(keyPath: "transform.rotation.z")
        let fromValue = isActive ? 0 : CGFloat.pi / 4
        let toValue = isActive ? CGFloat.pi / 4 : 0
        animation.fromValue = fromValue
        animation.toValue = toValue
        animation.duration = 0.3
        animation.fillMode = .forwards
        animation.isRemovedOnCompletion = false
        floatingButton.layer.add(animation, forKey: nil)
}- 현재 토글 변수 값에 따라 플러스 버튼을 45도 회전하는 애니메이션 함수
CABasicAnimation을 통해 구현- 시작 값과 끝 값을 토글 값을 통해 조정, 회전 방향 또한 설정 가능
private func popButtons() {
        if isActive {
            writeButton.layer.transform = CATransform3DMakeScale(0.4, 0.4, 1)
            UIView.animate(withDuration: 0.3, delay: 0.2, usingSpringWithDamping: 0.55, initialSpringVelocity: 0.3, options: [.curveEaseInOut], animations: { [weak self] in
                guard let self = self else { return }
                self.writeButton.layer.transform = CATransform3DIdentity
                self.writeButton.alpha = 1.0
            })
        } else {
            UIView.animate(withDuration: 0.15, delay: 0.2, options: []) { [weak self] in
                guard let self = self else { return }
                self.writeButton.layer.transform = CATransform3DMakeScale(0.4, 0.4, 0.1)
                self.writeButton.alpha = 0.0
            }
        }
}- 플로팅 버튼 클릭 시 팝업 형식으로 뜨는 애니메이션 구현
- 알파 값을 통해 해당 버튼이 보이도록, 스케일 이펙트를 통해 확장/축소되는 듯한 효과 적용
소스 코드
import UIKit

class FloatingButtonViewController: UIViewController {
    private lazy var floatingButton: UIButton = {
        let button = UIButton()
        var config = UIButton.Configuration.filled()
        config.baseBackgroundColor = .systemPink
        config.cornerStyle = .capsule
        config.image = UIImage(systemName: "plus")?.withConfiguration(UIImage.SymbolConfiguration(pointSize: 20, weight: .medium))
        button.configuration = config
        button.layer.shadowRadius = 10
        button.layer.shadowOpacity = 0.3
        button.addTarget(self, action: #selector(didTapFloatingButton), for: .touchUpInside)
        return button
    }()
    private let writeButton: UIButton = {
        let button = UIButton()
        var config = UIButton.Configuration.filled()
        config.baseBackgroundColor = .systemPink
        config.cornerStyle = .capsule
        config.image = UIImage(systemName: "pencil")?.withConfiguration(UIImage.SymbolConfiguration(pointSize: 20, weight: .medium))
        button.configuration = config
        button.layer.shadowRadius = 10
        button.layer.shadowOpacity = 0.3
        button.alpha = 0.0
        return button
    }()
    private var isActive: Bool = false {
        didSet {
            showActionButtons()
        }
    }
    private var animation: UIViewPropertyAnimator?

    override func viewDidLoad() {
        super.viewDidLoad()
        setUI()
    }

    override func viewDidLayoutSubviews() {
        super.viewDidLayoutSubviews()
        floatingButton.frame = CGRect(x: view.frame.size.width - 60 - 8 - 20, y: view.frame.size.height - 60 - 8 - 40, width: 60, height: 60)
        writeButton.frame = CGRect(x: view.frame.size.width - 60 - 8 - 20, y: view.frame.size.height - 60 - 80 - 8 - 40, width: 60, height: 60)
    }

    private func setUI() {
        view.backgroundColor = .systemBackground
        view.addSubview(floatingButton)
        view.addSubview(writeButton)
    }


    @objc private func didTapFloatingButton() {
        isActive.toggle()
    }

    private func showActionButtons() {
        popButtons()
        rotateFloatingButton()
    }

    private func popButtons() {
        if isActive {
            writeButton.layer.transform = CATransform3DMakeScale(0.4, 0.4, 1)
            UIView.animate(withDuration: 0.3, delay: 0.2, usingSpringWithDamping: 0.55, initialSpringVelocity: 0.3, options: [.curveEaseInOut], animations: { [weak self] in
                guard let self = self else { return }
                self.writeButton.layer.transform = CATransform3DIdentity
                self.writeButton.alpha = 1.0
            })
        } else {
            UIView.animate(withDuration: 0.15, delay: 0.2, options: []) { [weak self] in
                guard let self = self else { return }
                self.writeButton.layer.transform = CATransform3DMakeScale(0.4, 0.4, 0.1)
                self.writeButton.alpha = 0.0
            }
        }
    }

    private func rotateFloatingButton() {
        let animation = CABasicAnimation(keyPath: "transform.rotation.z")
        let fromValue = isActive ? 0 : CGFloat.pi / 4
        let toValue = isActive ? CGFloat.pi / 4 : 0
        animation.fromValue = fromValue
        animation.toValue = toValue
        animation.duration = 0.3
        animation.fillMode = .forwards
        animation.isRemovedOnCompletion = false
        floatingButton.layer.add(animation, forKey: nil)
    }
}- UI를 그리는 과정은 그리 어렵지 않지만, 원하는 팝업 이펙트를 주고자 할 때 어떤 함수를 써야 할지 고민이 되었다. SwiftUI를 통해 먼저 애니메이션 함수를 공부해서 그런지.
구현 화면

JUST DO IT