포스팅의 목적
스프링 시큐리티를 적용하는 것은 어려운 일은 아니다. 하지만 그 구조를 이해하고 사용해야 이슈가 생겼을 때, 해결법에 쉽게 접근할 수 있을 것이다. 또 막연히 사용하는 것은 무척이나 지루한 일이지만, 구조를 이해하고 사용하는 것은 쾌감을 주기도 한다. 그래서, 스프링 시큐리티의 전반적인 아키텍쳐를 살펴보고 다시 찾아보기 쉽게끔 기록해두도록 하겠다.
1. SecurityContextHolder 와 Authentication
- Authentication 정보는 어디에 저장이되고 어떻게 사용하는가?
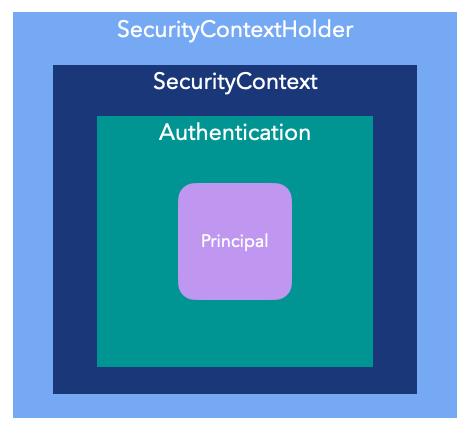
가장 큰 그림부터 살펴보자면, 인증된 유저 정보 Principal 을 Authentication 이 가지고 있고, Authentication 은 SecurityContext에 담겨있다. 그리고 SecurityContext는 SecurityContextHolder 가 Threadlocal 로 가지고 있는 형태이다. 간단하게 그림으로 나타내면 다음과 같다
SecurityContextHolder 는 Authentication 을 ThreadLocal 을 사용해 가지고 있음으로, Authentication은 thread 내에서 공유되는 자원이다. 즉, thread 안에서는 어디서든 SecurityContextHolder 로 부터 Authentication 객체를 가져올 수 있게 된다.
Servlet 기반의 웹 프로그래밍에서 요청이 오면 servlet container 가 thread 를 생성해 작업을 처리하게 되는데, 이 전반적인 과정에서 Authentication 을 공유할 수 있게 되는 것이다.
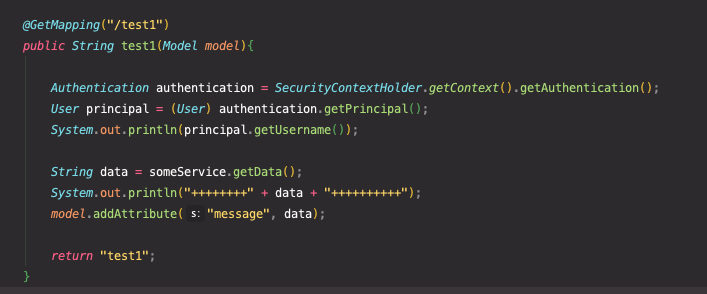
다음코드를 보면 요청을 처리하는 핸들러에서 SecurityContextHolder 에서 getContext().getAuthentication()을 통해 Authentication 을 꺼내와 authentication 의 principal 까지 꺼내오는 모습을 볼 수 있다.
그리고 someService 라는 서비스단에서도 같은 작업을 해볼 것이다. 파라미터로 넘긴다거나, setter 를 사용한다거나, 생성자를 사용하지 않아도

해당 서비스단에서도 마찬가지 작업이 가능하다. 이것이 가능한 이유가 바로, SecurityContextHolder 가 SecurityContext를 ThreadLoacal 로 제공하기 때문이다.
2. AuthenticationManager 와 Authentication
Authenticate 는 어떻게 이루어지는가?
스프링 시큐리티에서 인증은 AutheticationManager 가 하게 된다.
일반적으로, AuthenticationManage 의 구현체 ProviderManager 를 사용하는데 ProviderManager 는 이름처럼 직접 인증 처리를 하는 것이 아니라 여러 AuthenticationProvider 에게 인증 처리를 위임하게 되는데,
폼 로그인시에는 UsernamePasswordAuthenticationToken 을 가지고 DaoAuthenticationProvider 가 인증처리를 하게된다. 인증처리 과정에서 UserDetailsService 를 사용해 UserDetails 을 Principal에 넣은 UsernamePasswordAuthenticationToken 을 반환하고 해당 토큰이 Security Context의 Authentication 으로 들어가게되는 것이다.
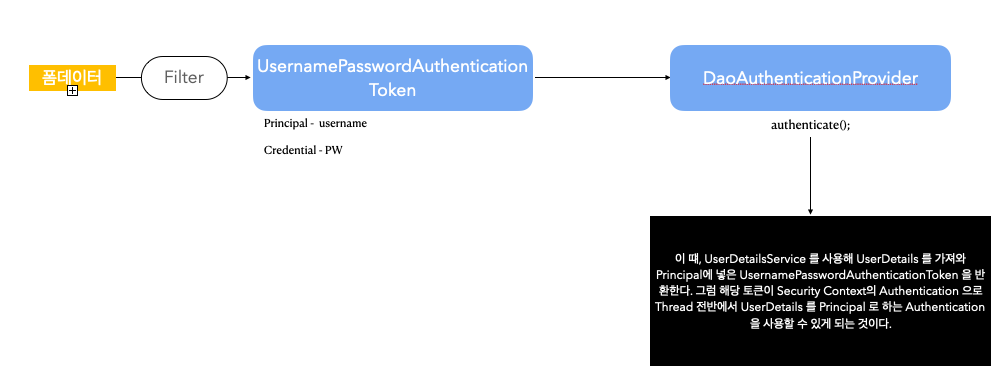
대략적인 flow 는 위의 그림과 같은 형태이다.
디버거를 통해 flow 를 추적해보자
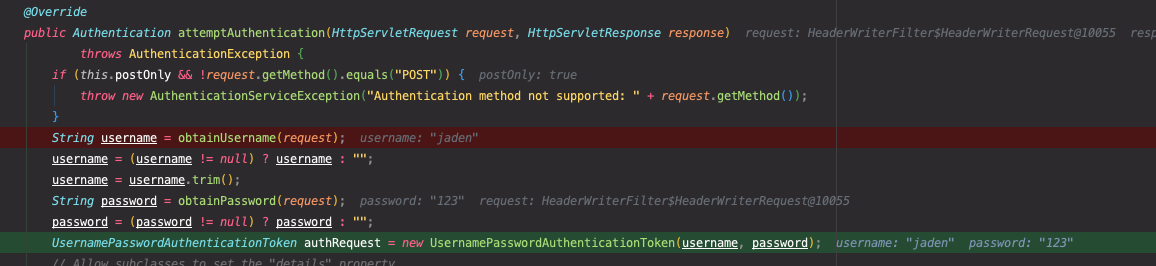
우선, UsernamePasswordAuthenticationFilter 에서 request된 폼데이터를 바탕으로 UsernamePasswordAuthenticationToken이 생성되는 것을 확인 할 수 있다.
그 다음, ProviderManager 에서 해당 토큰을 인증처리할 수 있는 provider를 찾게되는데 처음에는 
AnonymouseAuthenticationProvider 가 호출되지만 이 Provider는 UsernamePasswordAuthenticationToken을 인증처리할 수 없기 때문에 넘어가게되고

다음 DaoAuthenticationProvider 가 UsernamePasswordAuthenticationToken를 인증처리하게 된다.

authenticate()를 수행하는 과정을 따라가다 보면
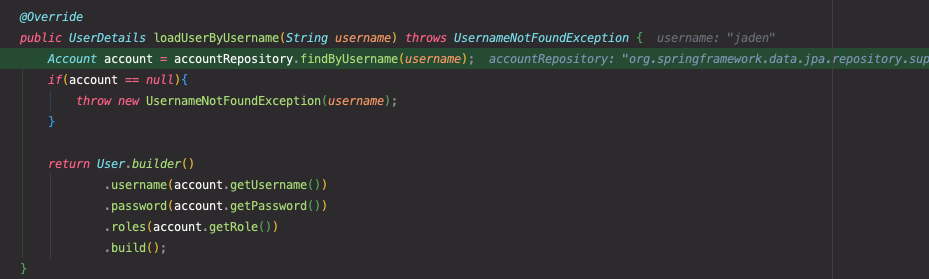
UserDetailsService 를 구현했던 곳에서 UserDetails 를 반환하는 코드를 만나게 되는 것을 확인할 수 있다.
*참고: 이 포스팅은 백기선님의 스프링시큐리티 강의를 듣고, 제 나름대로 다시 공부하고 정리한 포스팅 입니다. 만약, 조금 더 자세한 내용을 듣고 싶으시다면 이곳의 강의를 참고해보시기 바랍니다