
⬅️ 로그인 구현(1) - 프로젝트 생성 및 Prisma 설정
Next.js API 구현
Next.js 앱에서 내부 API를 사용하려면 /app/api 경로에 로직을 구현하면 된다.
13 버전부터는 API 파일은 route.js 로 명명해야 한다.
회원가입(SignUp) 구현
app/api/user/route.ts 파일을 만들고
https://localhost:3000/api/user 를 호출해 사용할 수 있다.
//app/api/user/route.ts

import prisma from '@/app/lib/prisma'

interface RequestBody {
  name: string;
  email: string;
  password: string;
}

export async function POST(request: Request) {
  const body: RequestBody = await request.json()

  const user = await prisma.user.create({
    data: {
      name: body.name,
      email: body.email,
      password: body.password,
    },
  })

  // user 객체에서 password 값은 제외
  const { password, ...result } = user
  return new Response(JSON.stringify(result))
}
POST methods 의 body를 request.json()을 통해 추출하고
prisma.user.create 명령어를 통해 User 테이블에 데이터를 넣는다.
데이터가 정상적으로 들어가면 해당 객체를 반환하게 되는데
여기서 비밀번호를 제외한 값을 최종 Response 로 리턴해준다.
🚨 비밀번호를 평문으로 저장하는 방법은 보안적으로 문제가 있다.
자바스크립트에서 많이 사용하는 bcrypt를 통해 비밀번호를 Hash로 암호화할것이다.
$npm install bcrypt
$npm i --save-dev @types/bcrypt
//app/api/user/route.ts
import prisma from '@/app/lib/prisma'
import * as bcrypt from 'bcrypt'
~
export async function POST(request: Request) {
~
const user = await prisma.user.create({
data: {
~
password: await bcrypt.hash(body.password, 10) // 변경
},
})
~
}회원가입 API 테스트
위에서 만든 api의 request url은 https://localhost:3000/api/user 이다.
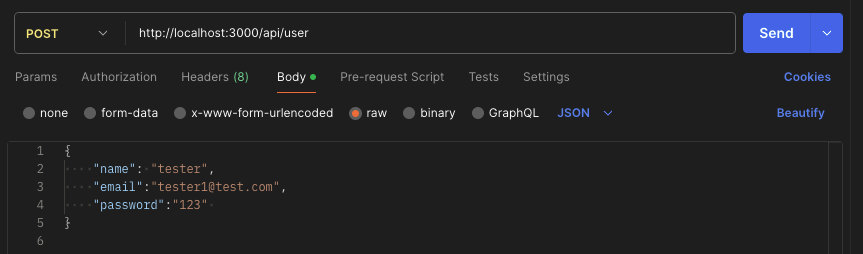
request url을 https://localhost:3000/api/user 로 설정해주고, email, password, name을 JSON으로 전달해주면 된다.
성공했다면 등록된 유저 정보를 리턴해준다.

prisma studio를 확인해봐도 값이 제대로 들어왔다.

🚨 attempt to write a readonly database
위와 같은 에러가 발생했다면 /prisma/dev.db 파일에 쓰기 권한이 없기 때문이다.$chmod 777 경로/dev.db명령어를 통해 쓰기 권한을 추가해주면 된다.

로그인(SignIn) 구현
회원가입과 마찬가지로 /app/api/signin 경로에 route.ts 파일을 만들어 준다.
//app/api/signin/route.ts

import prisma from '@/app/lib/prisma'
import * as bcrypt from 'bcrypt'

interface RequestBody {
  username: string;
  password: string;
}

export async function POST(request: Request) {
  const body: RequestBody = await request.json()

  const user = await prisma.user.findFirst({
    where: {
      // 입력받은 username 과 테이블 email 컬럼 값이 같은 데이터 추출
      email: body.username,
    },
  })

  // 패스워드도 동일한지 확인
  if (user && (await bcrypt.compare(body.password, user.password))) {
    const { password, ...userWithoutPass } = user
    return new Response(JSON.stringify(userWithoutPass))
  } else return new Response(JSON.stringify(null))
}
findFirst 를 통해 입력받은 username 과 email 컬럼 값이 동일한 유저를 먼저 찾은 후
bcrypt.compare 함수를 통해 비밀번호를 비교한다.
로그인 API 테스트
위에서 만든 api의 request url은 https://localhost:3000/api/signin 이다.
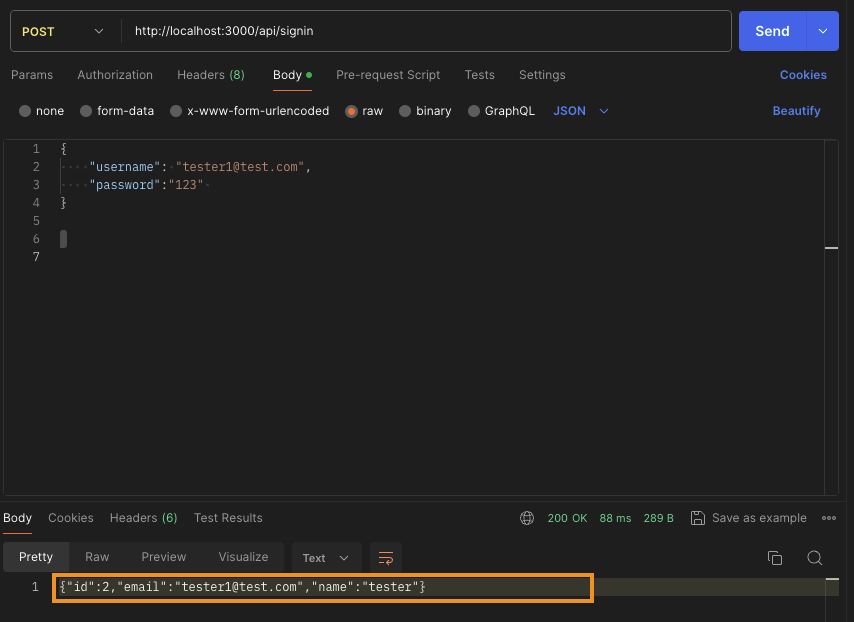
username, password을 JSON으로 전달해주면 된다.
정보가 일치하면 해당 유저 정보를 return 해준다.
로그인 API, NextAuth에 적용하기
우리는 next-auth 를 사용해 로그인 기능을 구현하는 것이 목표기 때문에
만든 API를 next-auth에 적용해야 한다.
// app/api/auth/[...nextauth]/route.ts
import NextAuth from 'next-auth/next'
import CredentialsProvider from 'next-auth/providers/credentials'

const handler = NextAuth({
    providers: [
        CredentialsProvider({
            name: 'Credentials',
            credentials: {
                username: { label: '이메일', type: 'text', placeholder: '이메일 주소를 입력해 주세요.' },
                password: { label: '비밀번호', type: 'password' },
            },
            async authorize(credentials, req) {
                const res = await fetch(`${process.env.NEXTAUTH_URL}/api/signin`, {
                    method: 'POST',
                    headers: {
                        'Content-Type': 'application/json',
                    },
                    body: JSON.stringify({
                        username: credentials?.username,
                        password: credentials?.password,
                    }),
                })
                const user = await res.json()
                console.log('$$$user: ', user)

                if (user) {
                    // Any object returned will be saved in `user` property of the JWT
                    return user
                } else {
                    // If you return null then an error will be displayed advising the user to check their details.
                    return null

                    // You can also Reject this callback with an Error thus the user will be sent to the error page with the error message as a query parameter
                }

            },
        }),
    ],
})

export { handler as GET, handler as POST }
authorize() 함수를 통해 로그인을 제어한다고 이전에 설명했다.
위에서 만든 API를 fetch하고 받아온 사용자 정보를 user에 저장해 리턴한다.
✅ Next-Auth 는 null & false를 리턴하지 않으면 로그인에 성공했다고 판단한다. ✅
화면에서 직접 테스트하기 위해 이전에 만든 클론코딩 프로젝트의 로그인 화면을 적용해봤다.
// /app/(beforeLogin)/_component/Main.tsx
"use client"
import styles from "@/app/(beforeLogin)/_component/main.module.css";
import Image from "next/image";
import nextAuth from "../../../../public/next-auth.png";
import Link from "next/link";
import {signIn} from "next-auth/react";
export default function Main() {
return (
<>
<div className={styles.left}>
<Image src={zLogo} alt="logo" />
</div>
<div className={styles.right}>
<h1>Next-Auth Login</h1>
<h2>지금 가입하세요.</h2>
<Link href="/signup" className={styles.signup}>계정 만들기</Link>
<h3>이미 가입하셨나요?</h3>
<button className={styles.signup} onClick={()=>signIn()}>로그인하기</button>
</div>
</>
)
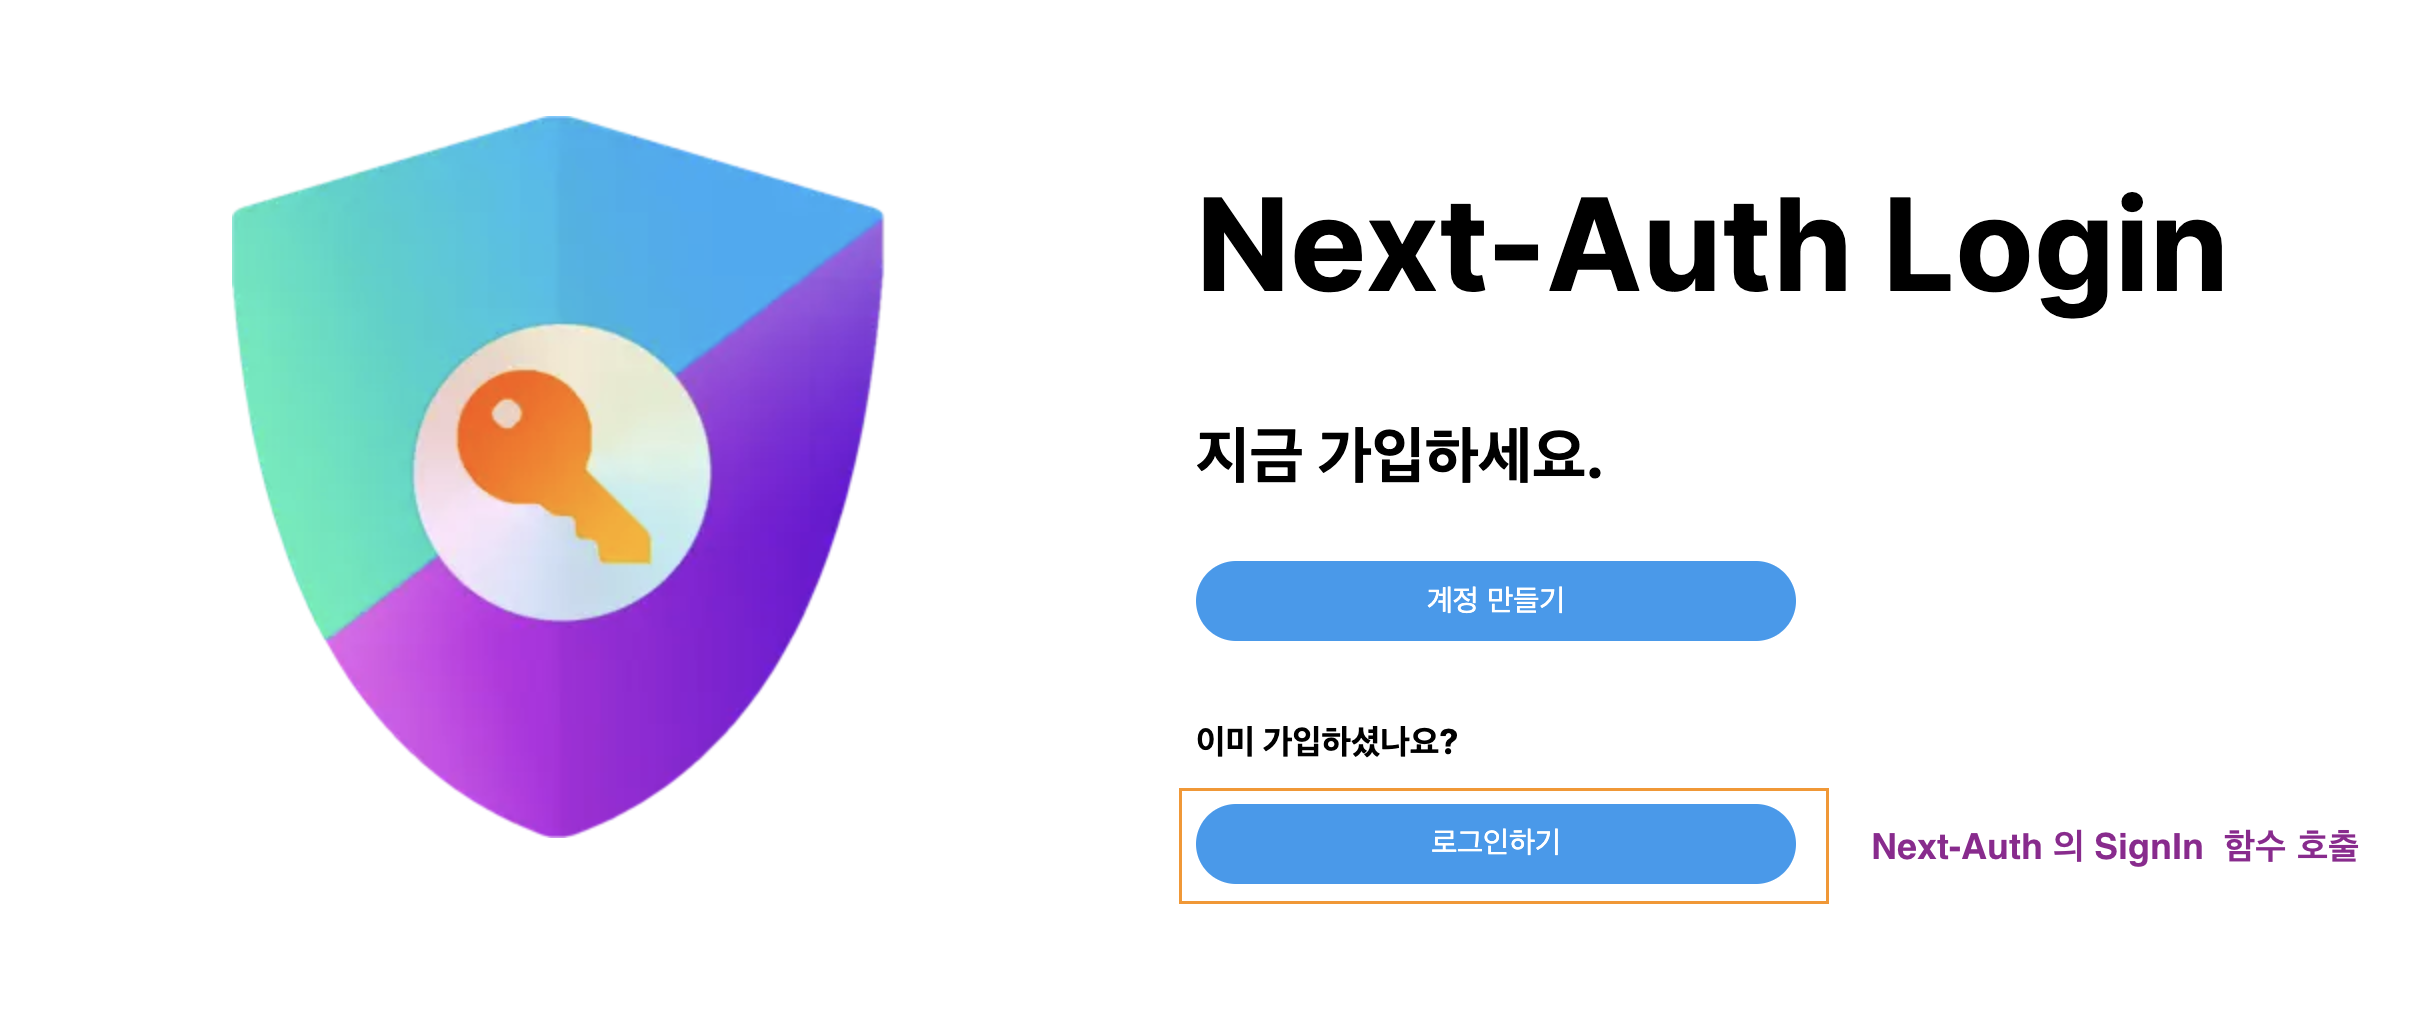
}signIn() 함수는 next-auth 에서 제공하는 함수이고, 클릭 시 이전에 봤던 Login Form 화면으로 이동시켜준다.
로그인에 성공할 경우 next-auth 는 💡브라우저 쿠키에 Session 을 저장한다.
☝🏻 Next Auth 자체를 클라이언트 사이드 세션으로도 볼 수 있다.
앱에 Session 적용하기
SesseionProvider 로 컴포넌트를 감싸 하위 컴포넌트들에게 Session 을 공유할 수 있다.
//app/_components/Providers.tsx

"use client";

import { SessionProvider } from "next-auth/react";
import React, { ReactNode } from "react";

interface Props {
  children: ReactNode;
}
function Providers({ children }: Props) {
  return <SessionProvider>{children}</SessionProvider>;
}

export default Providers;
Providers.tsx 컴포넌트를 만들고 /app/layout.tsx에 적용한다.
// app/layout.tsx

import type { Metadata } from "next";
import { Inter } from "next/font/google";
import Providers from "./_component/Providers";
import "./globals.css";

const inter = Inter({ subsets: ["latin"] });

export const metadata: Metadata = {
  title: "Create Next App",
  description: "Generated by create next app",
};

export default function RootLayout({
  children,
}: Readonly<{
  children: React.ReactNode;
}>) {
  return (
    <html lang="en">
      <body className={inter.className}>
      <Providers>{children}</Providers>
      </body>
    </html>
  );
}
로그인 전/후 화면 구현
// /app/(beforeLogin)/_component/Main.tsx
"use client"
import styles from "@/app/(beforeLogin)/_component/main.module.css";
import Image from "next/image";
import nextAuth from "../../../../public/next-auth.png";
import Link from "next/link";
import {signIn, signOut, useSession} from "next-auth/react";
export default function Main() {
const { data: session } = useSession();
return (
<>
<div className={styles.left}>
<Image src={nextAuth} alt="logo" />
</div>
<div className={styles.right}>
<h1>Next-Auth Login</h1>
<h2>지금 가입하세요.</h2>
<Link href="/signup" className={styles.signup}>계정 만들기</Link>
{
(session && session.user) ? (
// 로그인 되어있을 경우
<>
<h3>{session.user.name}님 안녕하세요!</h3>
<button className={styles.signup} onClick={()=>signOut()}>
{session.user.name}님 LogOut
</button>
</>
) :
(
<>
<h3>이미 가입하셨나요?</h3>
<button className={styles.signup} onClick={()=>signIn()}>로그인하기</button>
</>
)
}
</div>
</>
)
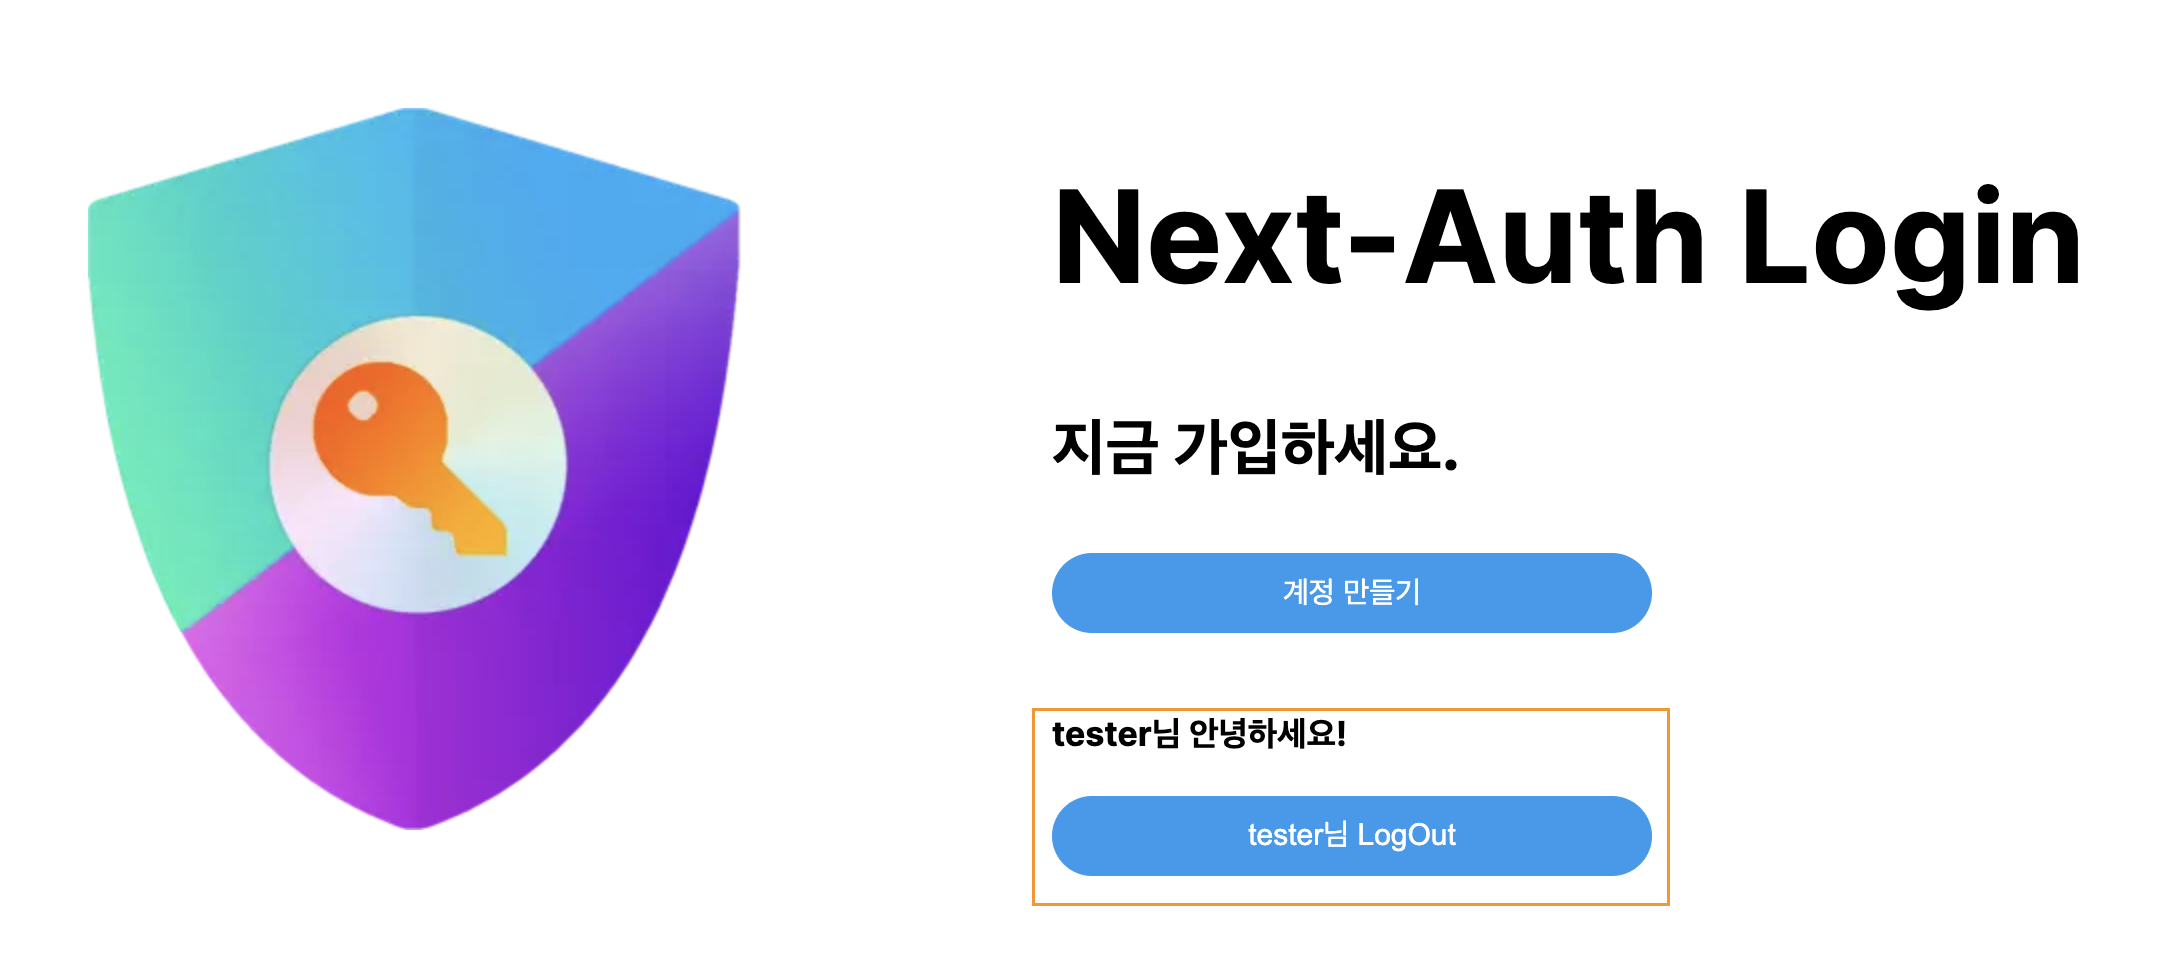
}useSession 훅에서 리턴하는 data에는 user 객체가 들어 있어, 이 값을 가지고 로그인 여부를 확인할 수 있다.
☝🏻 로그인 전

✌🏻 로그인 후

로그인 API, NextAuth에 적용하기
위 섹션에서 문제가 있습니다.
const res = await fetch(
${process.env.NEXTAUTH_URL}/api/login이 아니라const res = await fetch(
${process.env.NEXTAUTH_URL}/api/signin으로 수정해야 합니다.이유는 맥락상 우리가 생성한 폴더 구조는 app/api/signin/route.ts 이기 때문입니다.