Vault 공부를 하게 된 이유: 개발자나 엔지니어가 코드 작업이나 시크릿 관리를 위한 추가적인 작업 필요없이 더 강력한 보안 아래에서 편리하게 데이터 접근 및 사용을 위함. 과연 이게 아니엇다면 우리가 일일이 수동으로 관리를 해야하는데 어떻게 중간에서 관리를 해줄까 하는 고민
Installing Vault
1. Install Vault on Debian 12 (GCP)
-
Download Vault
- developer.hashicorp.com/vault
- releases.hashicorp.com/vault
-
Install Vault using package manager
wget -O- https://apt.releases.hashicorp.com/gpg | sudo gpg --dearmor -o /usr/share/keyrings/hashicorp-archive-keyring.gpg
echo "deb [signed-by=/usr/share/keyrings/hashicorp-archive-keyring.gpg] https://apt.releases.hashicorp.com $(lsb_release -cs) main" | sudo tee /etc/apt/sources.list.d/hashicorp.list
sudo apt update && sudo apt install vault- Use the Vault helm Chart to install/configure Vault on Kubernetes
mkdir ~/vault-packer
cd ~/vault-packer
# Create the file here
touch vault.pkr.hcl- Packer file
# vault.pkr.hcl
packer {
  required_plugins {
    googlecompute = {
      version = ">= 1.1.1"
      source  = "github.com/hashicorp/googlecompute"
    }
  }
}

variable "project_id" {
  type    = string
  default = "project-257582de-eea9-496f-8ed"
}

variable "zone" {
  type    = string
  default = "asia-northeast3-a"
}

source "googlecompute" "vault-debian" {
  project_id          = var.project_id
  source_image_family = "debian-12"
  source_image_project_id = ["debian-cloud"]
  zone                = var.zone
  image_name          = "vault-custom-debian-{{timestamp}}"
  image_description   = "Vault - Debian 12 Custom Image"
  ssh_username        = "packer"
  machine_type       = "n2d-standard-4"
  use_internal_ip     = false
  omit_external_ip    = false
}

build {
  sources = ["source.googlecompute.vault-debian"]

  provisioner "shell" {
    inline = [
      "sudo apt-get update",
      "sudo apt-get install -y gpg wget",
      "wget -O- https://apt.releases.hashicorp.com/gpg | sudo gpg --dearmor -o /usr/share/keyrings/hashicorp-archive-keyring.gpg",
      "echo \"deb [signed-by=/usr/share/keyrings/hashicorp-archive-keyring.gpg] https://apt.releases.hashicorp.com $(lsb_release -cs) main\" | sudo tee /etc/apt/sources.list.d/hashicorp.list",
      "sudo apt-get update && sudo apt-get install -y vault"
    ]
  }
}
packer validate vault.pkr.hcl- A packer file defines the entire process of creating a Machine Image(like an AWS, AMI or a GCP Image). It automates 3 things
- Provisioning : It starts a temporary VM and installs software, updates the OS, and moves files.
- Immutability : It ensures every server you launch is exactly the same because they all come from this one ‘Golden Image’.
- Automation : Instead of you SSHing into a server and typing commands, Packer does it all in the background and saves the result as a reusable templates.
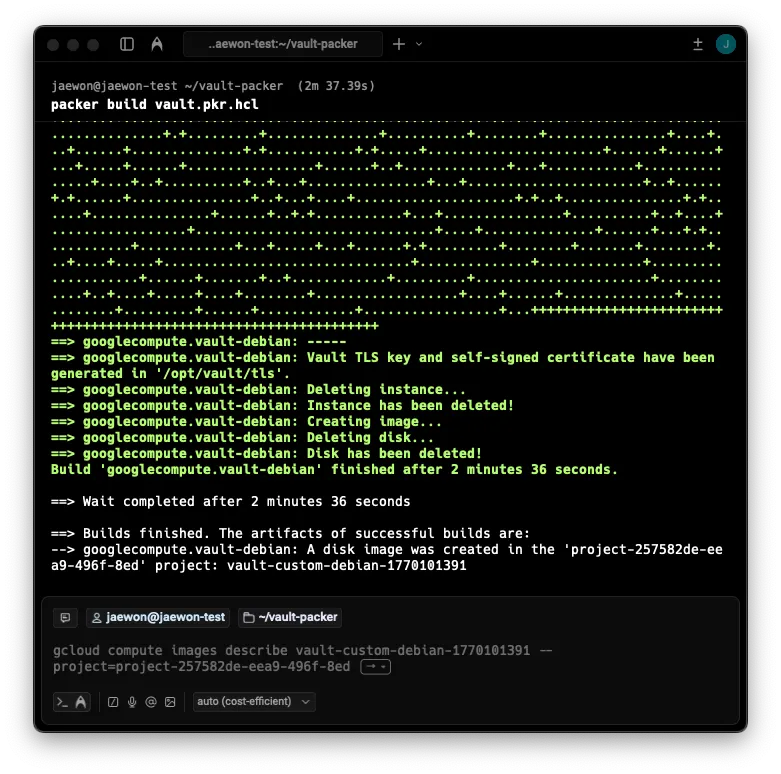
The main purpose of
packer buildis to create pre-configured template that has HashiCorp Vault already installed and optimized. Instead of manually setting up every new server, you use this image to lanuch 100% identical servers instantly.
- Source Image : Packer pulls the ‘Base’ Debian 12 image from Google’s public library.
- Temporary VM : Packer creates a temp VM(The one you saw being created in the logs) and runs your shell script to install Vault.
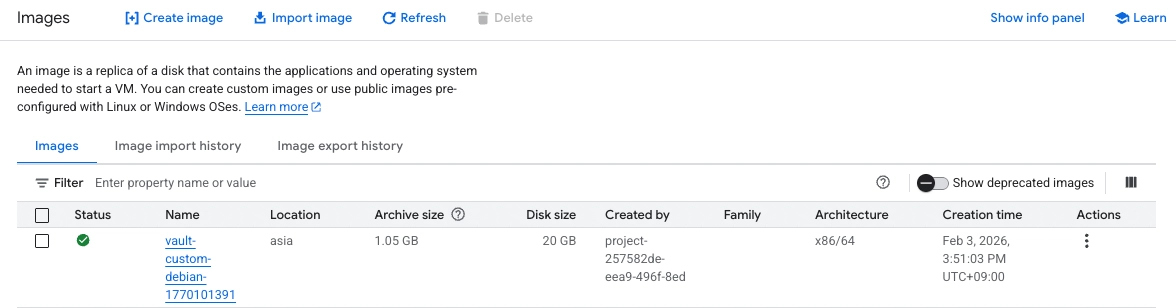
- Create Image : Once the installation finishes, Packer shuts down the VM and “freezes” the disk into the
vault-custom-debianimage - Delete : Packer deletes the temp VM to save your money. This is why you see “nothing” in your VM list.
-
What to do with the Image?
- Launch Instance
- Configuration : Once the VM starts, vault is already there. You just need to create the
vault.hclfile - Initialize & Unseal : You run
vault operator initto get your keys and start using the vault.
-
Firewall Rules
- Name : allow-vault-ui
- Target tags : vault-server
- Source IPv4 ragnes : 0.0.0.0
- Protocaols and ports : Specified protocols and ports → tcp → 8200
2. Create Configuration File(vault.hcl on Vault server )
sudo mkdir -p /opt/vault/data
sudo chown -R vault:vault /opt/vault
# sudo vi /etc/vault.d/vault.hcl
# Basic setup for your GCP Lab
ui = true
storage "file" {
path = "/opt/vault/data"
}
# We use HTTP (tls_disable = 1) for now to make learning easier
listener "tcp" {
address = "0.0.0.0:8200"
tls_disable = 1
}
# Helps Vault know its own address
api_addr = "http://127.0.0.1:8200"tls_disable = 1is important for the first setup. It allows me to access the Vault UI using a standardhttp://address instead of having to deal with complex SSL certificate errors in my browser right away.
- Final Prep before Step 3(Initialization) Once the file is saved, I need to make sure the servier is ready to run. Run these 3 commands.
# 1. Create the data directory defined in your config
sudo mkdir -p /opt/vault/data
sudo chown -R vault:vault /opt/vault

# 2. Give Vault permission to handle secure memory
sudo setcap cap_ipc_lock=+ep $(readlink -f $(which vault))

# 3. Start the service
sudo systemctl restart vault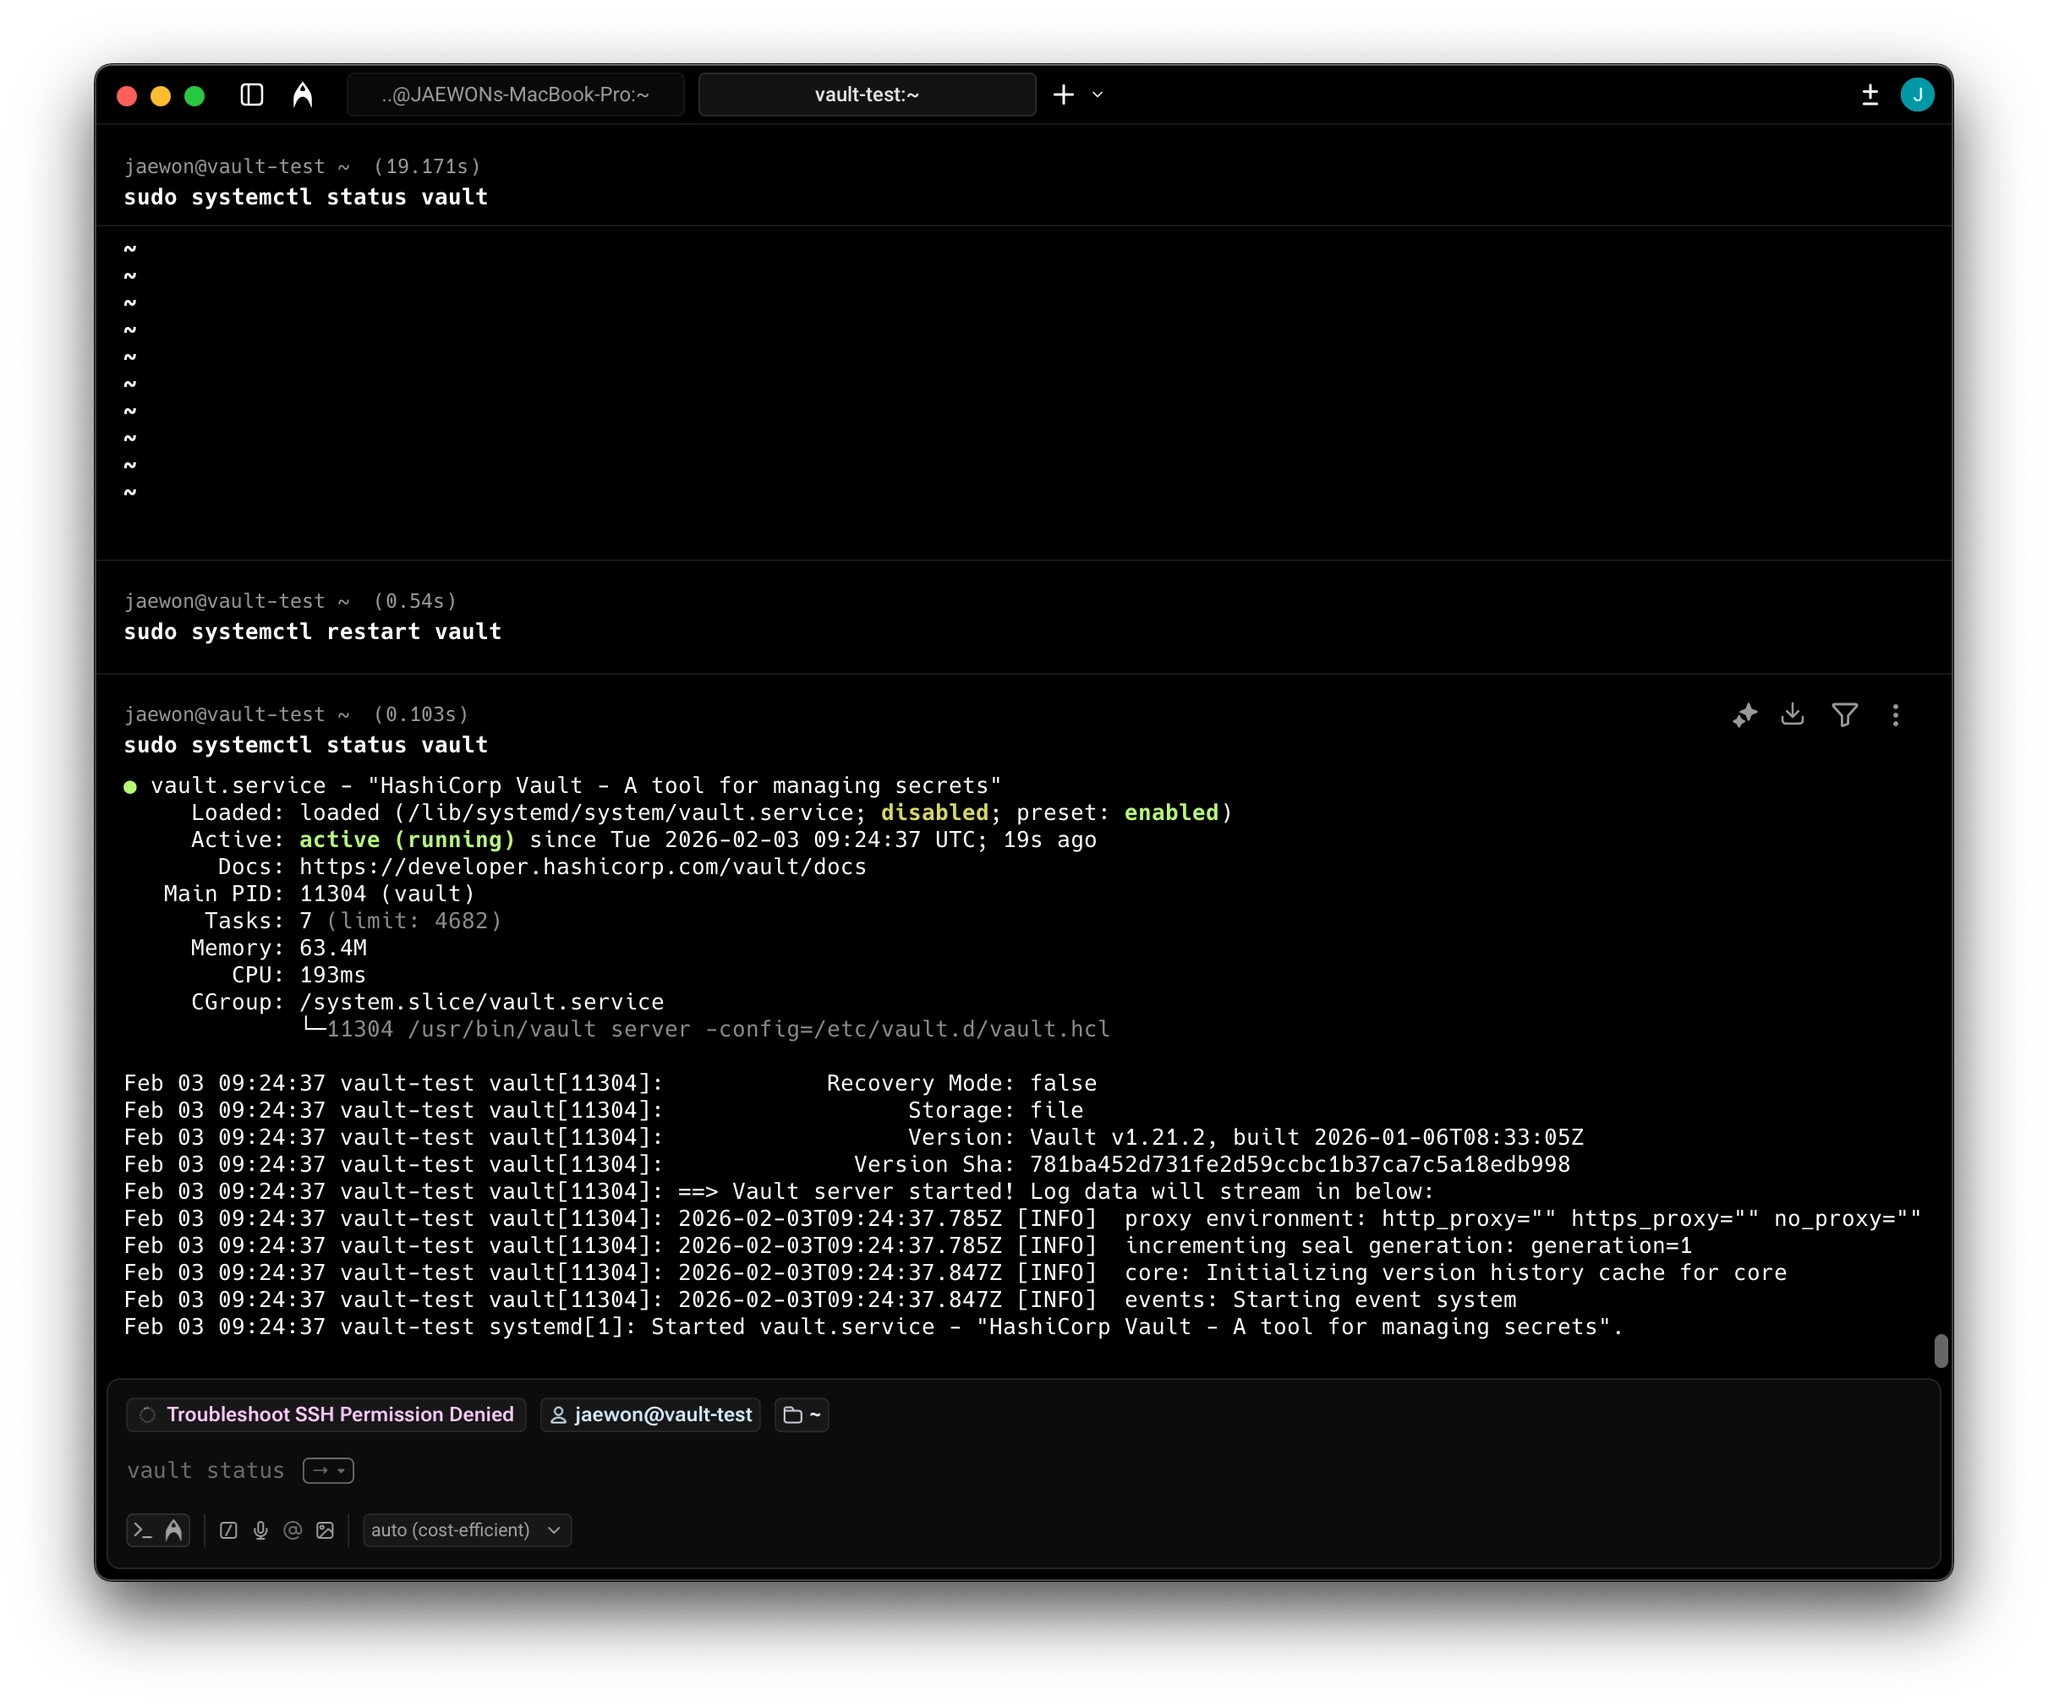
Its officially Active (running). This confirms that my vault.hclconfiguration is correct and the service has successfully started on my GCP instance.
3. Initialize Vault (Master Keys & Root Token)
It’s Configuration Step. You must do this before you can run init, unseal, or any other vault command, otherwise the CLI won’t know how to talk to the server. Where to find the vault server, run the initialization
export VAULT_ADDR='http://127.0.0.1:8200'

vault operator init

Unseal Key 1: DfmIXA0+g7l1vjMwAgz9n3n2FpEnq61aVNdFtmtjGLJl
Unseal Key 2: ugW+BBMrh0cjLAZultApe3qJXMFeefnYuEKFuRW+i4LH
Unseal Key 3: sCCaWlj5rMcXGX7Dnk3HjXL5k9p9Umiv32A6N+e3xd0q
Unseal Key 4: YFRwUNxr2gru4y9bCG1N8rCBgtjQ6CiKdGo/pvG5frVf
Unseal Key 5: CregfAjZavUHi8BOC52PXthp8BRdwd2j1rnk4WcAPRcx

Initial Root Token: hvs.dWUa8ieOE76DnINMPyXwVtGf

Vault initialized with 5 key shares and a key threshold of 3. Please securely
distribute the key shares printed above. When the Vault is re-sealed,
restarted, or stopped, you must supply at least 3 of these keys to unseal it
before it can start servicing requests.

Vault does not store the generated root key. Without at least 3 keys to
reconstruct the root key, Vault will remain permanently sealed!

It is possible to generate new unseal keys, provided you have a quorum of
existing unseal keys shares. See "vault operator rekey" for more information.- The Output : 5 Unseal Keys and 1 Initial Root Token
- Copy everything and save it in a secure text file on my local computer
UNRECOVERABLEexport VAULT_ADDR='http://127.0.0.1:8200'This command is setting an environment variable. It’s about telling the Vault CLI(client) where the Vault Server is listening, which protocol to use. By addinghttp://, you fix the mismatch.
Error
Fixing vault secrets list
The error http: server gave HTTP response to HTTPS client occurs because the Vault CLI defaults to using HTTPS for security, but your server is configured with tls_disable = 1, which means it only speaks HTTP. It is like trying to speak to someone in English(HTTPS) when they only understand Korean(HTTP)
Why no HTTPS?
You explicitly set tls_disable = 1 in your vault.hcl file. This tells Vault to run in “unsecured mode” for easier testing. In this mode, Vault does not encrypt data while it travels from the server to my browser or terminal. While this is fine for a lab, in a real environment, you would never do this because sensitive data could be intercepted.
It happens because your terminal is trying to use Secure HTTPS, but we configured your server to use Regular HTTP (tls_disable = 1).
4. Unseal Vault
As the output says, my vault is currently Sealed. It’s like a locked bank vault where the door is shut and the contents are encrypted. I provide 3 out of the 5 keys to open it.
- First Key : Run
vault operator unsealand paste Unseal Key 1 - Second Key : Run
vault operator unsealagain and paste Unseal Key 2 - Third Key : Run
vault operator unsealone last time and paste Unseal Key 3
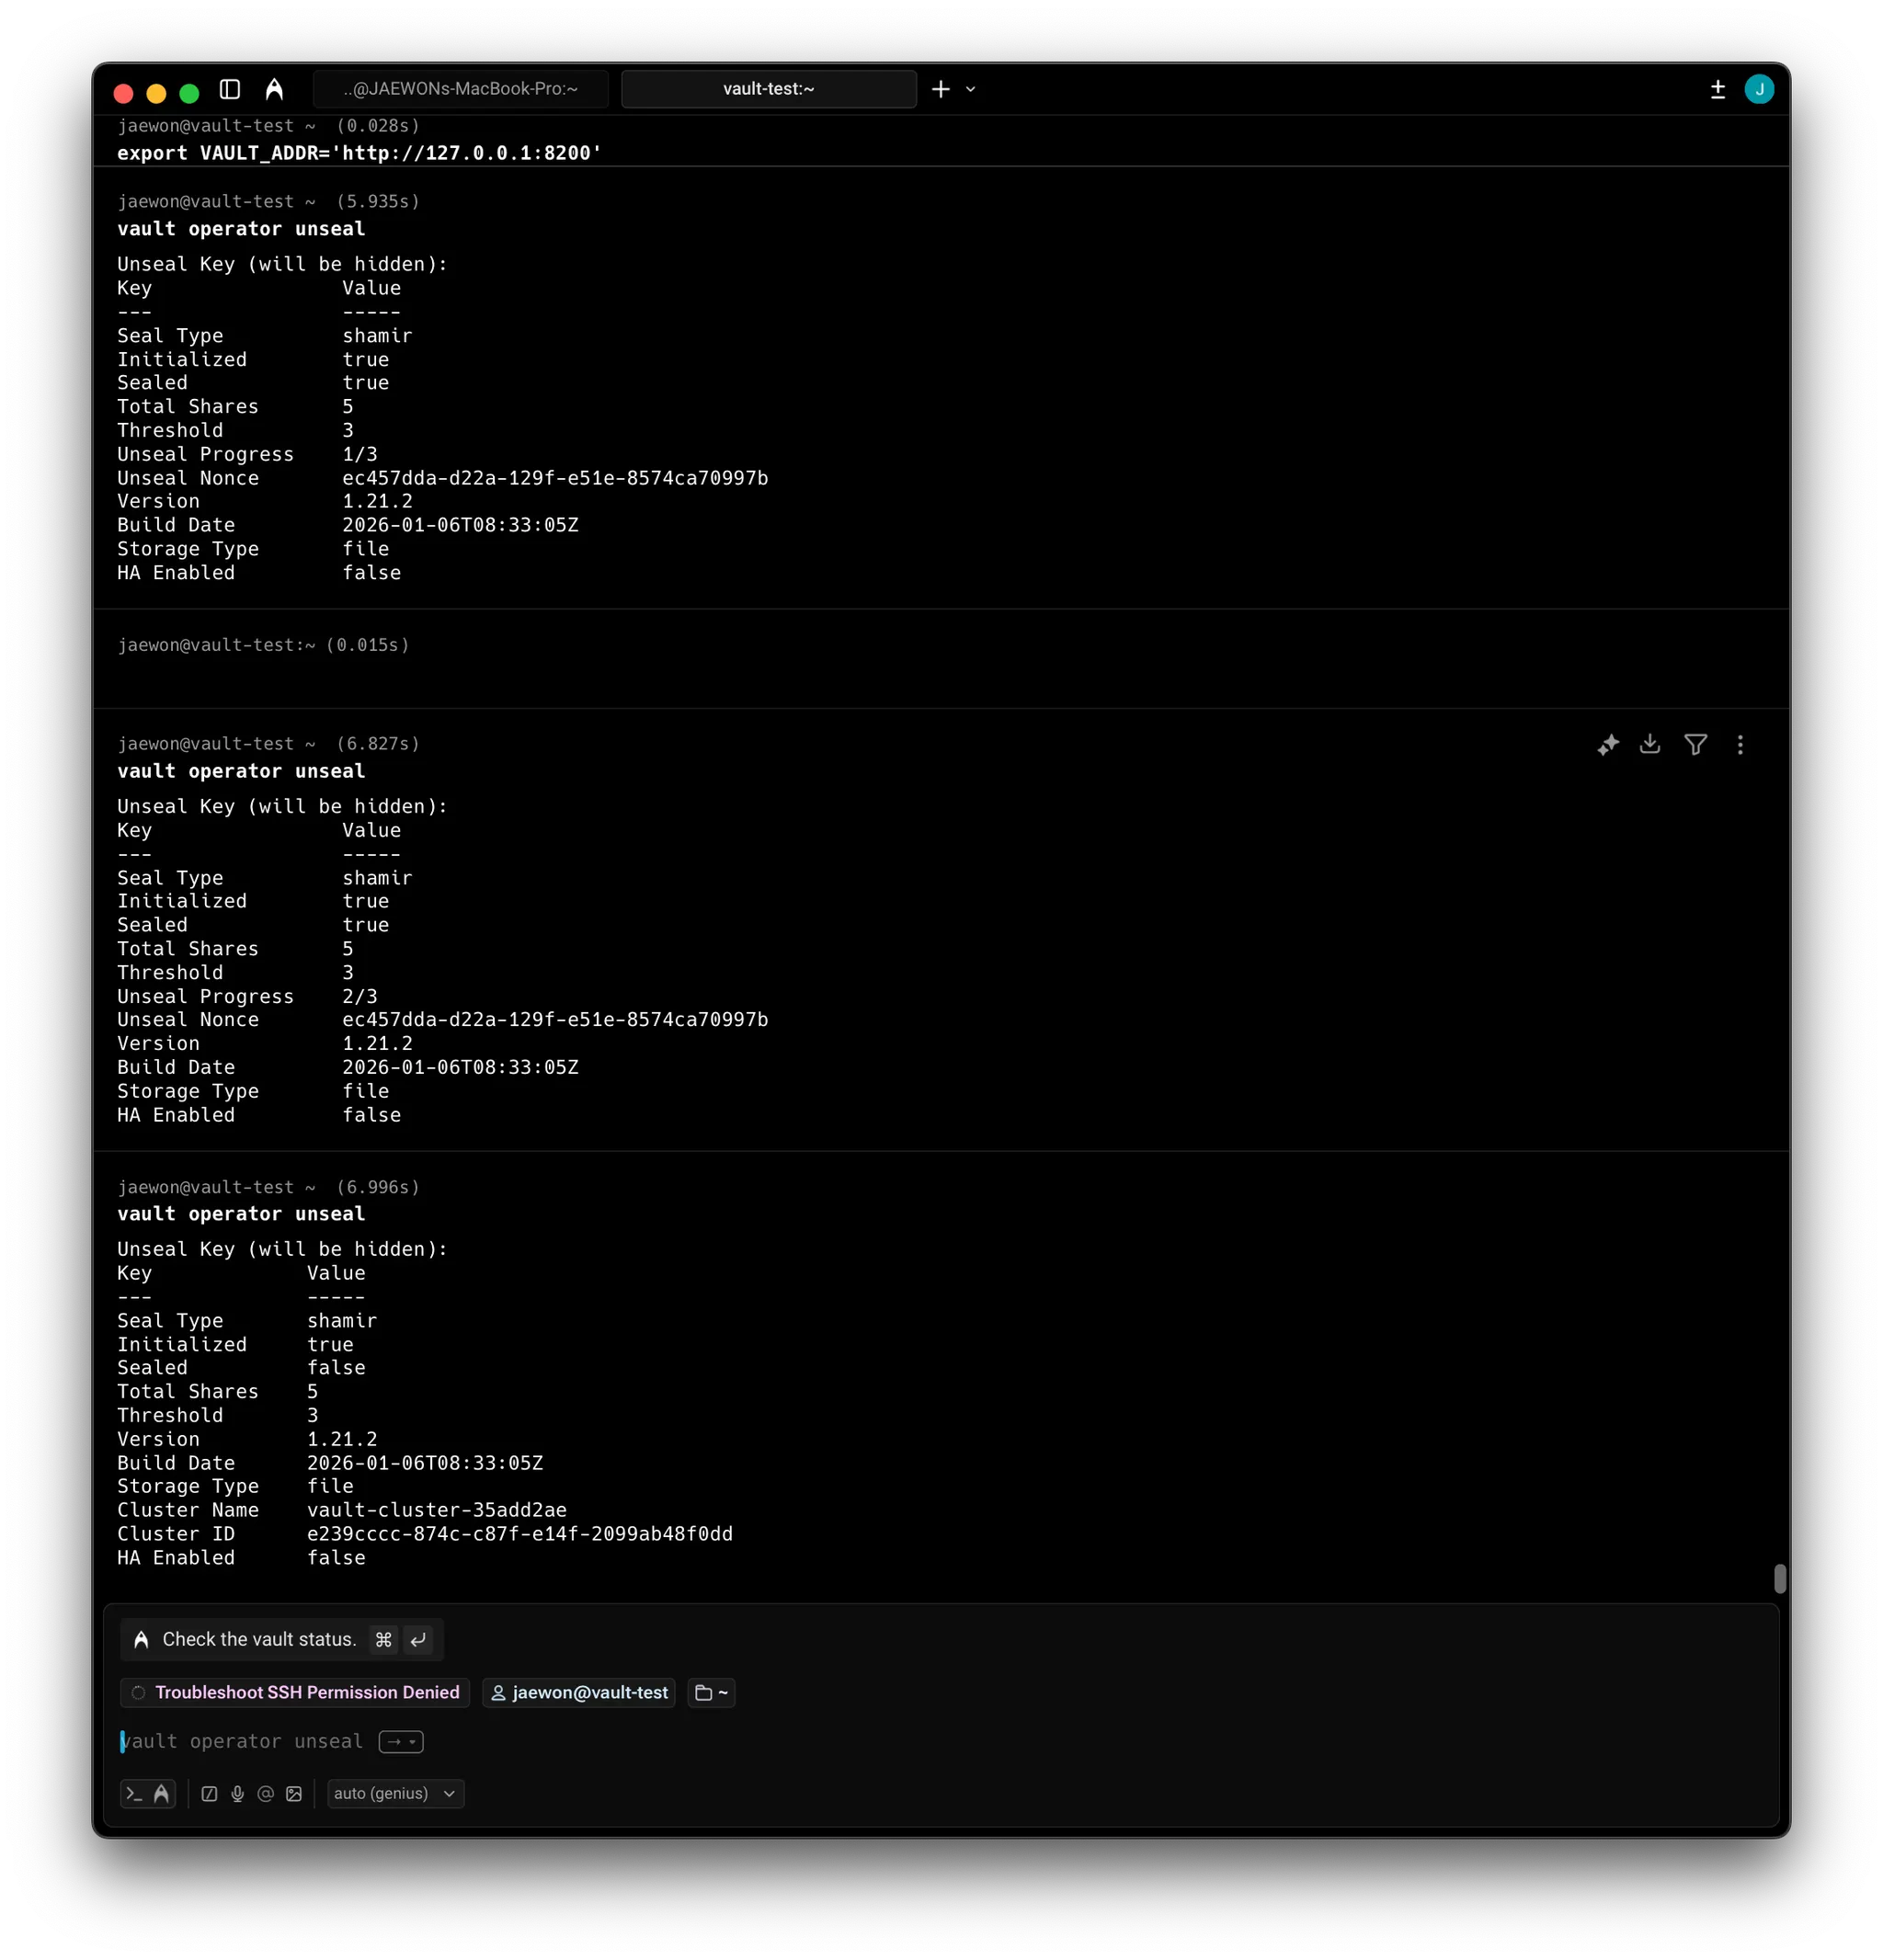
Since we set tls_disable = 1 in my vault.hcl file, Vault is expecting http If I don’t fix this, the command will likely fail with a connection error after I paste the key.
So, Vault is now in an active state. The encryption key has been reconstructed in the server’s RAM, allowing it to decrypt the data stored in my /opt/vault/data directory. I can log in and perform administrative tasks.
5. Logging into the web UI
After setting the firewall rule, enter http://<EXTERNAL_IP>:8200 And, you are being asked for a Token. Copy the initial Root Token you generated during the vault operator init step
5.1. Logging in with root token
vault login hvs.dWUa8ieOE76DnINMPyXwVtGf
Success! You are now authenticated. The token information displayed below
is already stored in the token helper. You do NOT need to run "vault login"
again. Future Vault requests will automatically use this token.

Key                  Value
---                  -----
token                hvs.dWUa8ieOE76DnINMPyXwVtGf
token_accessor       tmv4cW1fGBHokTXQVnlxUk6F
token_duration       ∞
token_renewable      false
token_policies       ["root"]
identity_policies    []
policies             ["root"]
vault secrets list
Path          Type         Accessor              Description
----          ----         --------              -----------
cubbyhole/    cubbyhole    cubbyhole_83cf589f    per-token private secret storage
identity/     identity     identity_babdfd52     identity store
sys/          system       system_b9193fe0       system endpoints used for control, policy and debugging
Vault Dev Server
- Automatic Setup : It is automatically initialized and unsealed upon startup.
- Non-Persistent : It runs entirely in memory. If you close the terminal or restart the service, all data is wiped.
- Security Risk : It is insecure because it does not use TLS(unencrypted traffic) and only listen on
127.0.0.1:8200by default. - Pre-configured : It automatically enables the Web UI and mounts a KV(Key-Value) version 2 secrets engine at the
/secretpath - Root Access : It provides a pre-generated root token and automatically logs the user in
- Production Warning : It should never be used in production because it does not follow the Vault security model and data is temporary.
| Feature | Lecture (Dev Mode) | My Setup (Server Mode) |
|---|---|---|
| Persistence | None. Data dies with the process | Persistent. Data is saved to /opt/vault/data |
| Initialization | Automatic | Manual. You ran vault operator init |
| Unsealing | Automatic | Manual. You provided 3 out of 5 Shamir keys |
| Security | Insecure (No TLS/Local only) | More Secure (Configurable listener/VPC Firewall) |
| Secrets Engine | Pre-mounted at /secret | Empty. You must enable engines manually |
| Usage | Testing/Local development only | Real-world applications and learning |
Vault operator init manually handled the “birth” of the Vault. A Dev Server skips this entirely.
Initialization : You manually ran init to get 5 keys. A Dev Server does this automatically and logs you in instantly.
Persistence : You configured storage “file” in my vault.hcl. If I start my VM, my data is still there. A Dev Server uses in-memory storage; if it stops, everything is deleted.
Command : I started Vault using systemctl start vault (which runs vault server -config =…). The lecture uses vault start -dev
| Use Case | Vault Dev Server (vault server -dev) | Your Setup (Manual/Packer Image) |
|---|---|---|
| Duration | Short-term (1-2 hours). | Long-term (Weeks/Months). |
| POC Type | Quick feature testing (e.g., Vault 1.21 features). | Proof of Concept for a real pipeline integration. |
| Safety | None. Sent in clear text. | High. Configurable for TLS and internal VPCs. |
| Best For | Testing a specific Secrets Engine on your laptop. | Learning "The Vault Way" and building a persistent lab. |
In the lecture, the vault server -dev commands shows a list of detailes like API address, listener, and storage: in-memory
When you checked your status with sudo systemctl status vault
6. Data
6.1. KV Engine activate
# KV Engine activate
vault secrets enable -path=secret kv-v2

vault secrets list
Path          Type         Accessor              Description
----          ----         --------              -----------
cubbyhole/    cubbyhole    cubbyhole_83cf589f    per-token private secret storage
identity/     identity     identity_babdfd52     identity store
secret/       kv           kv_6686aa68           n/a
sys/          system       system_b9193fe0       system endpoints used for control, policy and debugging
6.2. Data Ingestion
vault kv put secret/vaultcourse/jaewon jaewon=jaewon
========= Secret Path =========
secret/data/vaultcourse/jaewon

======= Metadata =======
Key                Value
---                -----
created_time       2026-02-09T01:56:46.836422377Z
custom_metadata    <nil>
deletion_time      n/a
destroyed          false
version            1
6.3. Confirmation
vault kv get secret/vaultcourse/jaewon
========= Secret Path =========
secret/data/vaultcourse/jaewon

======= Metadata =======
Key                Value
---                -----
created_time       2026-02-09T01:56:46.836422377Z
custom_metadata    <nil>
deletion_time      n/a
destroyed          false
version            1

===== Data =====
Key       Value
---       -----
jaewon    jaewon
6.4. Vault Status
vault status
Key             Value
---             -----
Seal Type       shamir
Initialized     true
Sealed          false
Total Shares    5
Threshold       3
Version         1.21.2
Build Date      2026-01-06T08:33:05Z
Storage Type    file
Cluster Name    vault-cluster-35add2ae
Cluster ID      e239cccc-874c-c87f-e14f-2099ab48f0dd
HA Enabled      false