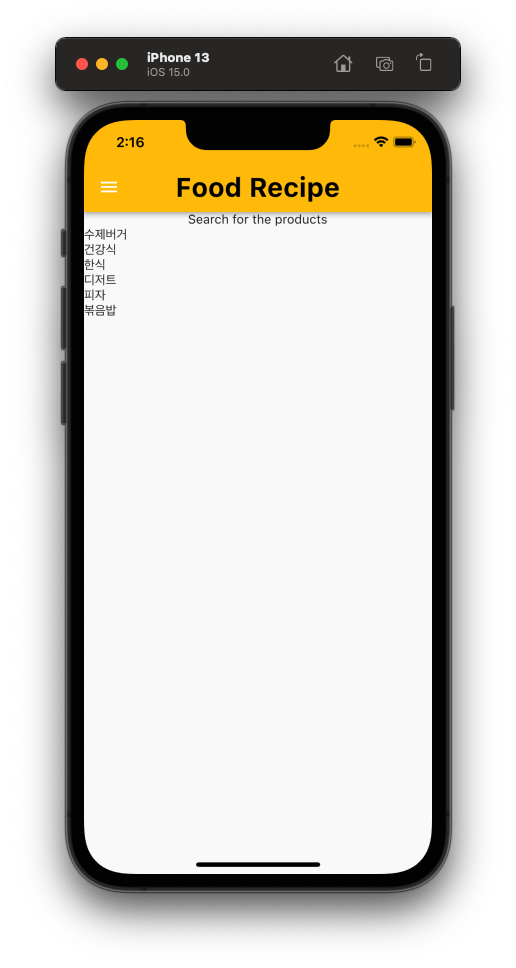
Food Recipe App
Appbar
Appbar 그림자 없애기
해당 그림자를 없애기 위해서는
return Scaffold(
	appBar: AppBar(
    	elevation: 0.
    ),
Appbar의 icon 색 변경
Icon이 기본적으로 하얀색 default이기 때문에, 색을 변경을 원할시 IconThemeData widget사용 필요
iconTheme: IconThemeData(color: Colors.black),CenterTitle
아이폰의 경우 appbar의 title이 기본적으로 중앙에 오게 배치, 이를 false로 만들어주면 왼쪽 정렬 되게 됨.
centerTitle: false,
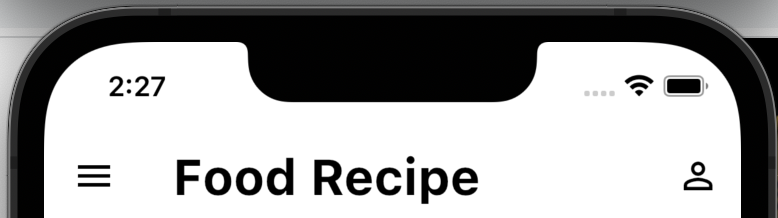
지금까지의 Appbar code
return Scaffold(
      appBar: AppBar(
        elevation: 0,
        backgroundColor: Colors.white,
        centerTitle: false,
        iconTheme: IconThemeData(color: Colors.black),
        title: Text("Food Recipe",
            style: TextStyle(
              color: Colors.black,
              fontSize: 28,
              fontWeight: FontWeight.bold,
            )),
        actions: [
          IconButton(
              onPressed: () {},
              icon: Icon(
                Icons.person_outline,
              ))
        ],
      ),
Body
항목들이 세로로 배열이 되는 경우
Column(
	children: [],
),
Textbox를 만들고 싶은 경우
TextField(),
Scoll 가능 영역을 부분적으로 설정하고 싶을 경우
해당 영역에 대해서 ListView(), 를 생성해주며, 다른 요소들과 섞인 Column 영역에 들어갈 경우 반드시 expanded라는 요소로 묶어주어야 에러가 나지 않음.
( 왜? ListView가 어느 영역까지 차지 할지에 대한 정의를 해주지 않았기 때문.)
( 왜 expanded? : 가능한 한 최대한의 영역까지 볼 수 있도록 )
* 이럴 경우 error 발생
TextField와 함께 있는데도 Listview에 대한 영역 지정 없기 때문
body: Column(
	childred: [
    	TextField(),
        ListView(),
    ]
* ListView를 widget으로 묶어준 후, Expanded로 변경 필요
body: Column(
	childred: [
    	TextField(),
        Expanded(chile: ListView()),
]- ListView속에 들어갈 내용은 dataList에 있는 상황
그러면 dataList에 있는 요소들을 하나씩 순회해서 띄워주면 됨.
이를 위해서 ListView.builder() 사용.
ListView.builder()의 2가지 핵심인자
- itemBuilder
-각각의 요소는 무엇을 만들어줄 것인가?
-함수가 들어와 주어야 함.
-(context, index) 를 무조건 받고, return값을 내놓음
-어떤 요소가 반복될 지 정의하는 부분 - itemCount
그래서 그걸 몇번을 그릴 것인가?
dataList.length
//datalist의 길이만큼
* dataList의, index번째에 있는 요소의 category나 image url을 프린트하도록 한다 :
Expanded(
          child: ListView.builder(
              itemCount: dataList.length,
              itemBuilder: (context, index) {
                return Text(dataList[index]['category']!);
              }),
        )
Textfield 꾸미기
- padding을 8만큼 준다.
-> Textfield를 Padding으로 묶음
TextField(),
에서 묶으면
Padding(
          padding: const EdgeInsets.all(8.0),
          child: TextField(),
        ),
이렇게 묶임.
- Textbox안에 text 넣기
decoration을 넣고, inputDecoration 내에 hintText를 사용
실제 inputbox가 잘 보이게 하려면, 테두리를 넣어줘야 하므로 borderSide에 색을 넣어 적용
Padding(
          padding: const EdgeInsets.all(8.0),
          child: TextField(
            decoration: InputDecoration(
                hintText: "상품을 검색해주세요.",
                border: OutlineInputBorder(
                  borderSide: BorderSide(color: Colors.black),
                )),
          ),
        ),
Inputbox안에 icon 넣기
IconButton안에 icon을 불러서, 불러낼 icon을 Icon으로 묶어줌.
그리고 icon의 경우 onPressed함수 무조건 있어야 에러 발생하지 않음.
suffixIcon: IconButton(
                  icon: Icon(Icons.search),
                  onPressed: () {},
                )
Divider 추가 (구분선 추가하기)
Divider(height: 1),요소들을 중첩 시키기 = Stack
Stack는 children을 받음.
뒤에 오는 것 - 위에 깔림
앞 - 아래에 깔림
다음과 같이 요소가 중첩되어야 할때 사용
카드 설정
return Card(
child: Stack(
alignment: Alignment.center,
children: [
Image.network(
imgUrl,
width: double.infinity,
height: 120,
),
Text(category),
],
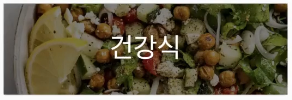
));Boxfit
이미지가 상자에 꽉차도록 설정
children: [
                    Image.network(
                      imgUrl, //imgUrl에 있는 이미지 불러옴
                      width: double.infinity, //좌우로는 확장될 수 있는 곳까지 노출되도록 설정
                      height: 120, //높이는 한정해줌
                      fit: BoxFit.cover, //사진이 크기에 맞지 않아도, 높이에 맞춰 좌우를 잘라먹는게 아니라 최대한 펼쳐서 꽉차게 보이게 노출되도록 설정
                    ),
반투명한 text container
기존 이미지 위에 올라와야하기 때문에, 이미지랑 동일한 크기로 설정
이후 반투명한 효과를 주고 싶다면, color.black.withOpacity(0.5), 설정 부여
 Container(
                      width: double.infinity,
                      height: 120,
                      color: Colors.black.withOpacity(0.5),
                    ),
Text style
style: TextStyle로 묶은 후 하얀색으로 설정
Text(
category,
style: TextStyle(
color: Colors.white,
fontSize: 36,
),
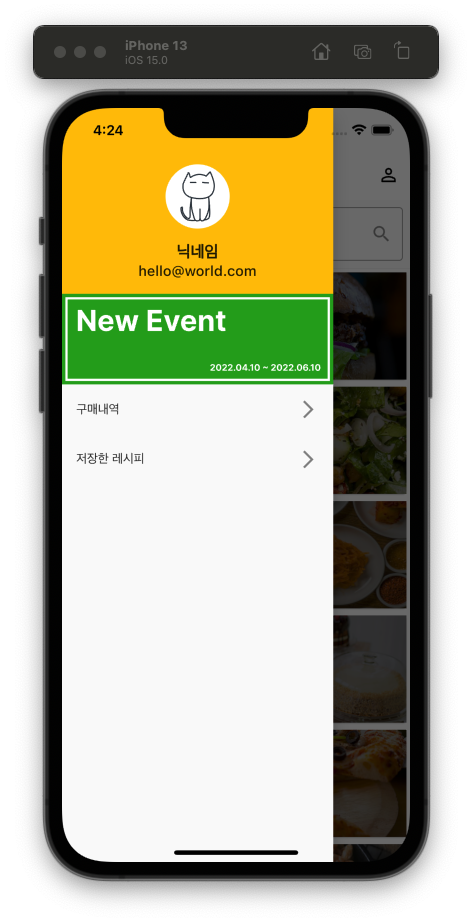
),Drawer
DrawerHeader안에 사진 넣기
- CircleAvatar() 사용
 drawer: Drawer(
        child: Column(
          children: [
            DrawerHeader(
              decoration: BoxDecoration(color: Colors.amber),
              child: SizedBox(
                width: double.infinity,
                child: Column(children: [
                  CircleAvatar(
                    radius: 36,
                    backgroundColor: Colors.white,
                    child: Image.network(
                      "https://i.ibb.co/CwzHq4z/trans-logo-512.png",
                    ),
                  )
                ]),
              ),
),- 만약 이미지 패딩을 주고 싶다면, image.network를 패딩으로 묶음.
아이콘과 텍스트 간 여백 주고 싶을 때

SizedBox 활용
child: Column(children: [
CircleAvatar(
radius: 36,
backgroundColor: Colors.white,
child: Padding(
padding: const EdgeInsets.all(8.0),
child: Image.network(
"https://i.ibb.co/CwzHq4z/trans-logo-512.png",
),
),
),
SizedBox(height: 16), //이렇게 SizedBox를 넣어주면 여백이 생김!
Text(
"닉네임",
style: TextStyle(
fontSize: 18,
fontWeight: FontWeight.bold,
),
),
Text(
"hello@world.com",
style: TextStyle(fontSize: 16),
)
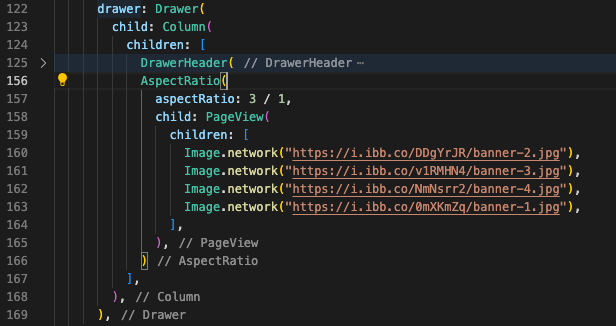
]),Drawerheader와 pageview간 여백 지우기

Drawerheader안에 margin 넣어주면 됨.
margin: const EdgeInsets.all(0),- 그 안에 pageview들을 넣기 위해 설정한 AspectRatio 및 child 정보
Drawer안에 list 만들기
예)
- ListTile() 사용
- icon은 뒤쪽에 들어오기 때문에 trailing을 넣어 icon 추가

ListTile 선택했을 때 행동 지정
- onTab 사용
ListTile(
              title: Text(
                "저장한 레시피",
                style: TextStyle(fontSize: 18),
              ),
              trailing: Icon(
                Icons.arrow_forward_ios,
                color: Colors.black,
              ),
              onTap: () {
                Navigator.pop(context);
              },
            ),
홈으로 가도록 설정한 예시
해설 강의 듣기 전 나의 진도
drawer 정도까지 만듬..
- 어려웠던 점
당최 어디가 틀려서 제대로 실행이 안되는지 모르겠음.
괄호가 너무 많아서 괄호 정리가 필요.
return Scaffold(
      appBar: AppBar(
          elevation: 0,
          title: Text(
            'Food Recipe',
            textAlign: TextAlign.left,
            style: TextStyle(
                fontSize: 30, color: Colors.black, fontWeight: FontWeight.bold),
          ),
        backgroundColor: Colors.amber,
        actions: [
          IconButton(
            onPressed: () {},
            icon: Icon(
            Icons.person_outline,
          ))
          IconButton(
            icon: Icon(
              Icons.perm_identity,
              Icons.settings,
              color: Colors.black,
            ),
          ),
        ],
      ),
      body: Column(children: [
        Text('Search for the products'),
        Expanded(
          child: ListView.builder(
              itemCount: dataList.length,
              itemBuilder: (context, index) {
                return Text(dataList[index]['category']!);
              }),
        )
      ]),
      drawer: Drawer(
        child: ListView(
          padding: EdgeInsets.zero,
          children: [
            const DrawerHeader(
              decoration: BoxDecoration(
                color: Colors.blue,
              ),
              child: Text('Drawer Header'),
            ),
            ListTile(
              title: const Text('구매내역'),
            )
          ],
        ),
      ),
    );