nGrinder란?
네이버에서 만들고 관리하는 오픈소스 성능 테스트 툴이다.
agent들이 만드는 접속자들을 통해 서버에 많은 부하를 주어 성능을 테스트 할 수 있다.
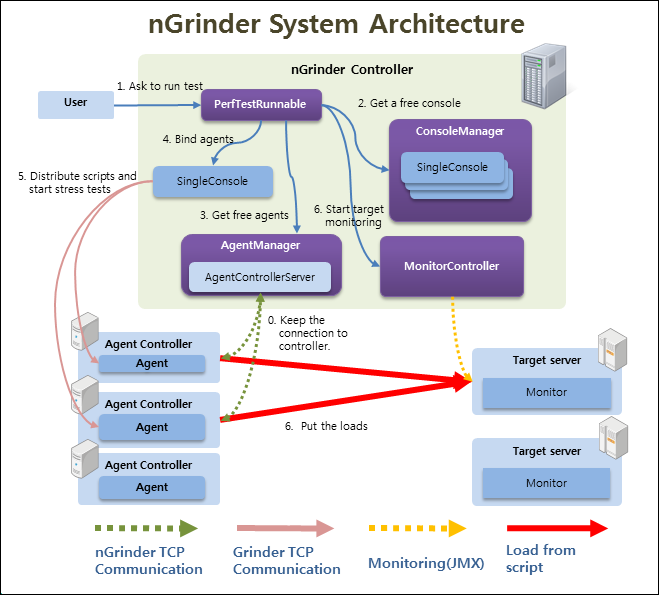
controller와 agent로 구성되어있으며 필요에 따라 monitor도 구성 가능하다.
- Controller
- 성능 테스트를 위한 웹 인터페이스를 제공합니다.
- 테스트 프로세스를 조정합니다.
- 테스트 통계를 수집하고 표시합니다.
- 사용자가 스크립트를 만들고 수정할 수 있습니다.
- Agent
- 에이전트 모드에서 실행할 때 대상 시스템에 부하를 주는 프로세스 및 스레드를 실행합니다.
- 모니터 모드에서 실행할 때 대상 시스템 성능(예: CPU/메모리)을 모니터링합니다.
controller 설치 방법
로컬에서 작동을 시키는 것이 아닌 클라우드 상의 인스턴스에서 작업을 하는 경우로 설명을 진행하겠다.
개발 환경
NHN Cloud Instance c4m4
Ubuntu 20.04 LTS
인스턴스를 생성한 직후 설치 과정
sudo apt update
sudo apt install openjdk-11-jre-headless # 버전은 상관없는 듯하다
wget https://github.com/naver/ngrinder/releases/download/ngrinder-3.5.5-p1-20210531/ngrinder-controller-3.5.5-p1.war
다운로드를 진행한 후에 controller를 실행시켜준다.
nohup &을 이용하여 백그라운드에서 실행시키겠다.
nohup java -jar ngrinder-controller-3.5.5-p1.war &백그라운드에서 nGridner Controller가 실행되었다.
실행 할때 --port 80과 같은 방법으로 포트를 변경하여 실행할 수 있지만 기본은 8080에서 실행된다.
toast에선 Floating IP, aws에선 public IP를 통해 http://서버주소:8080으로 접속하면 다음과 같은 로그인 창이 나온다.
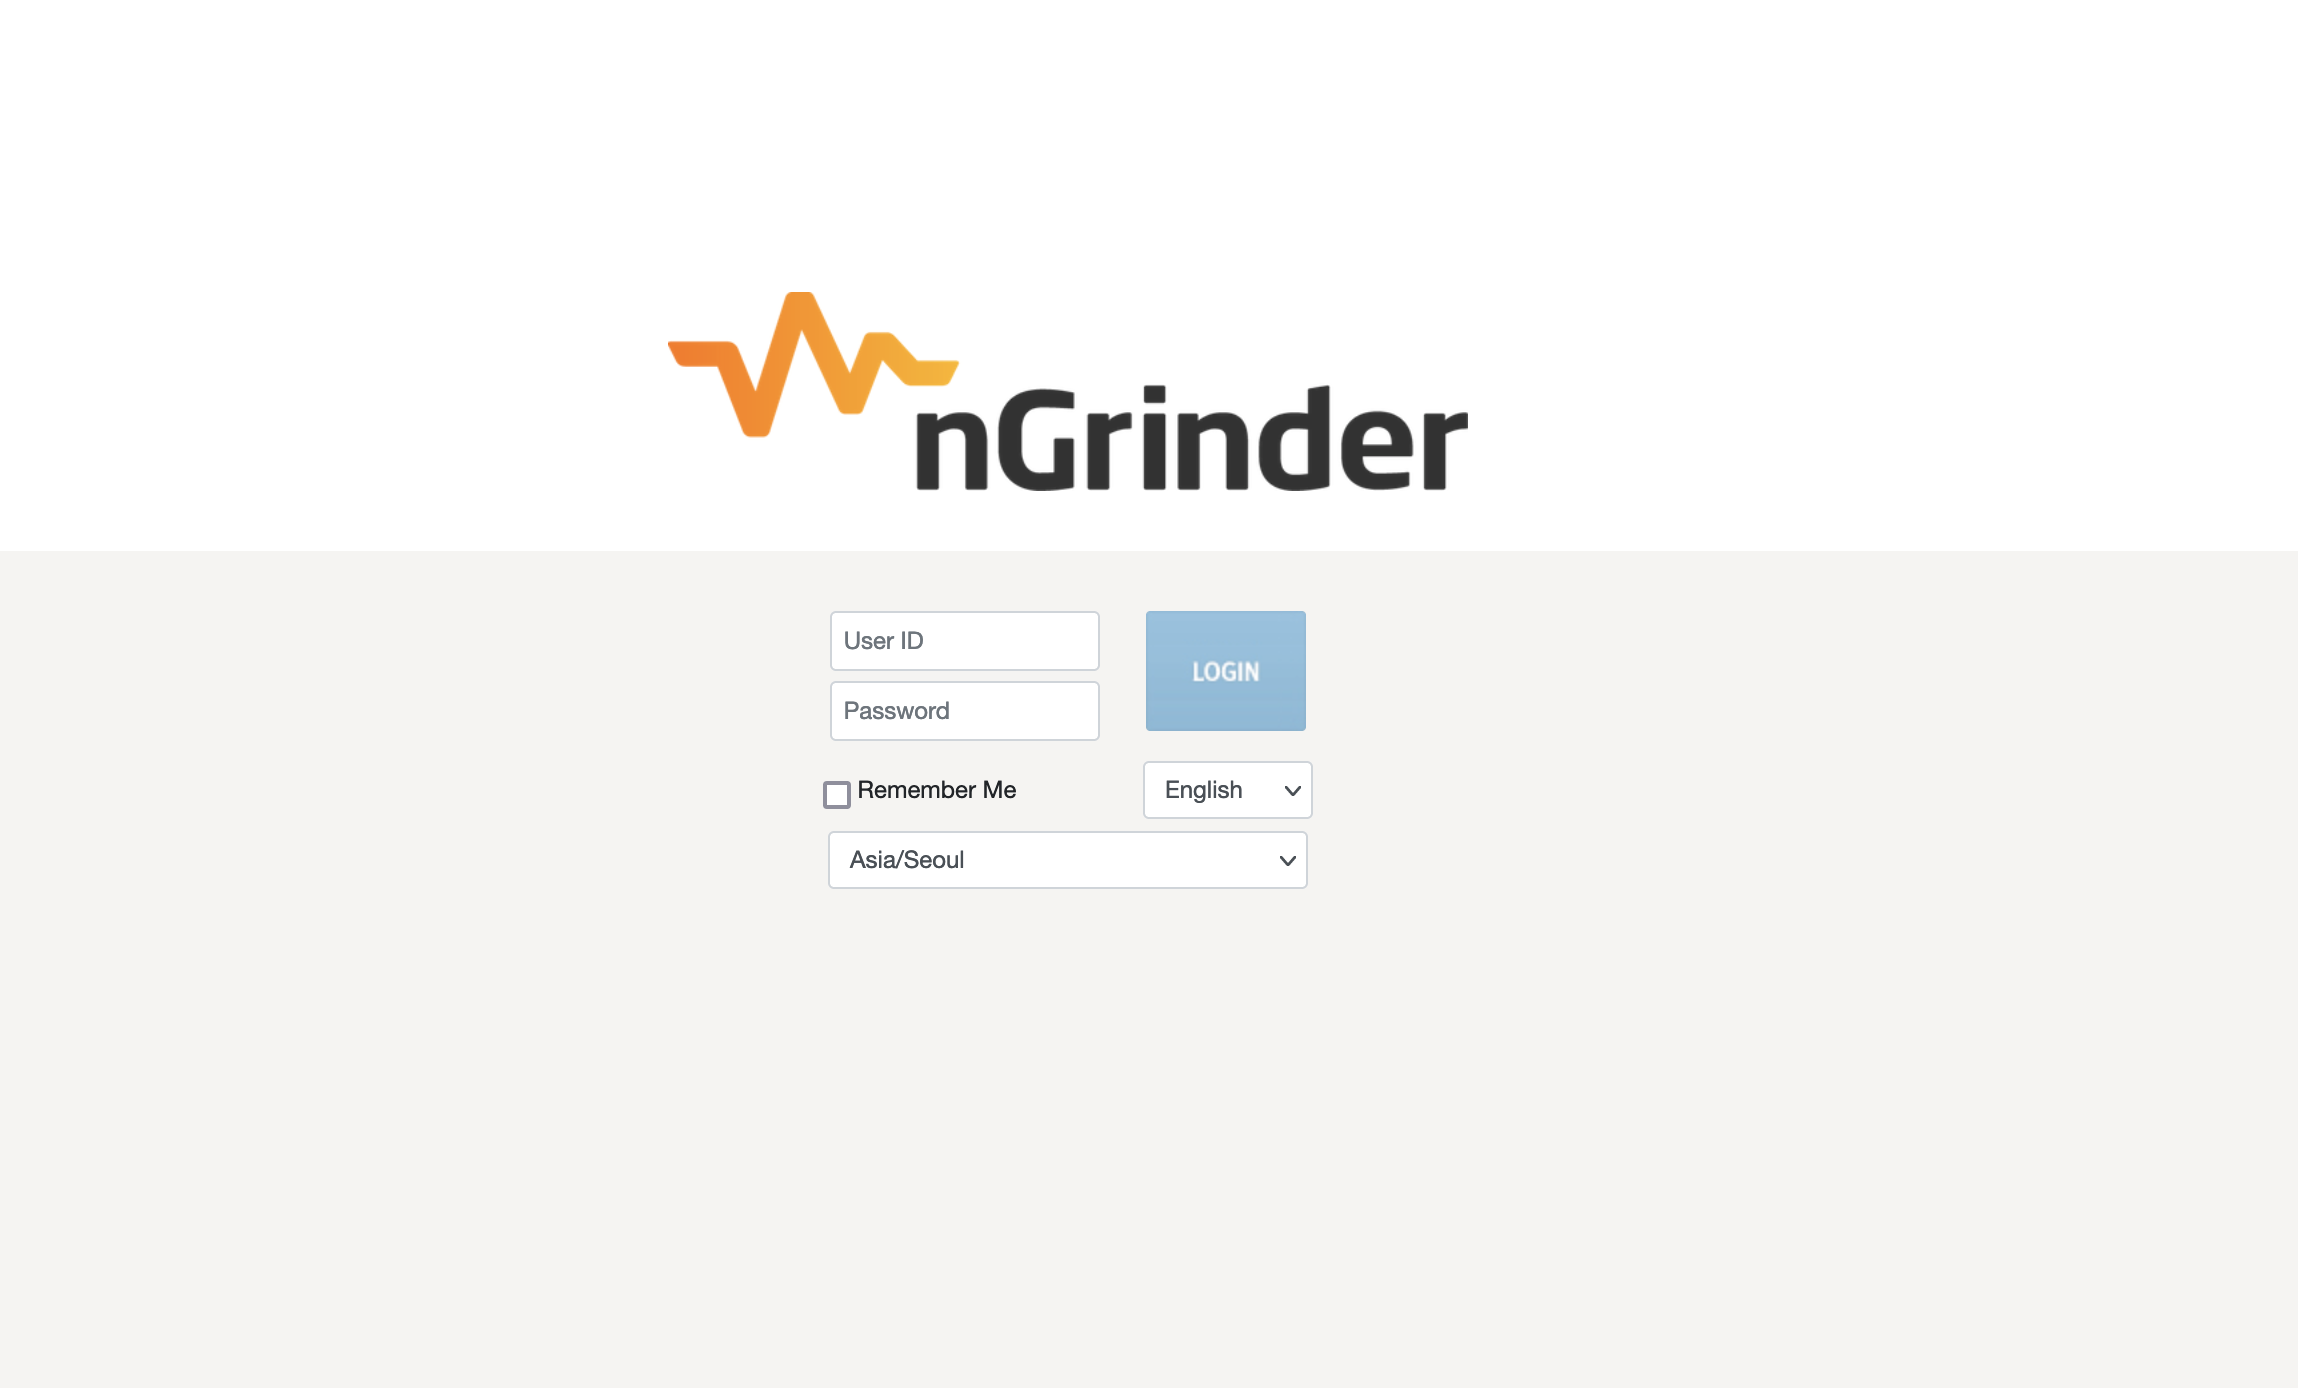
기본 아이디와 비밀번호는 id=admin pw=admin이니 입력하여 로그인하면 된다.
이 화면이 나오면 설치 완료 !!!
Agent 설치 방법
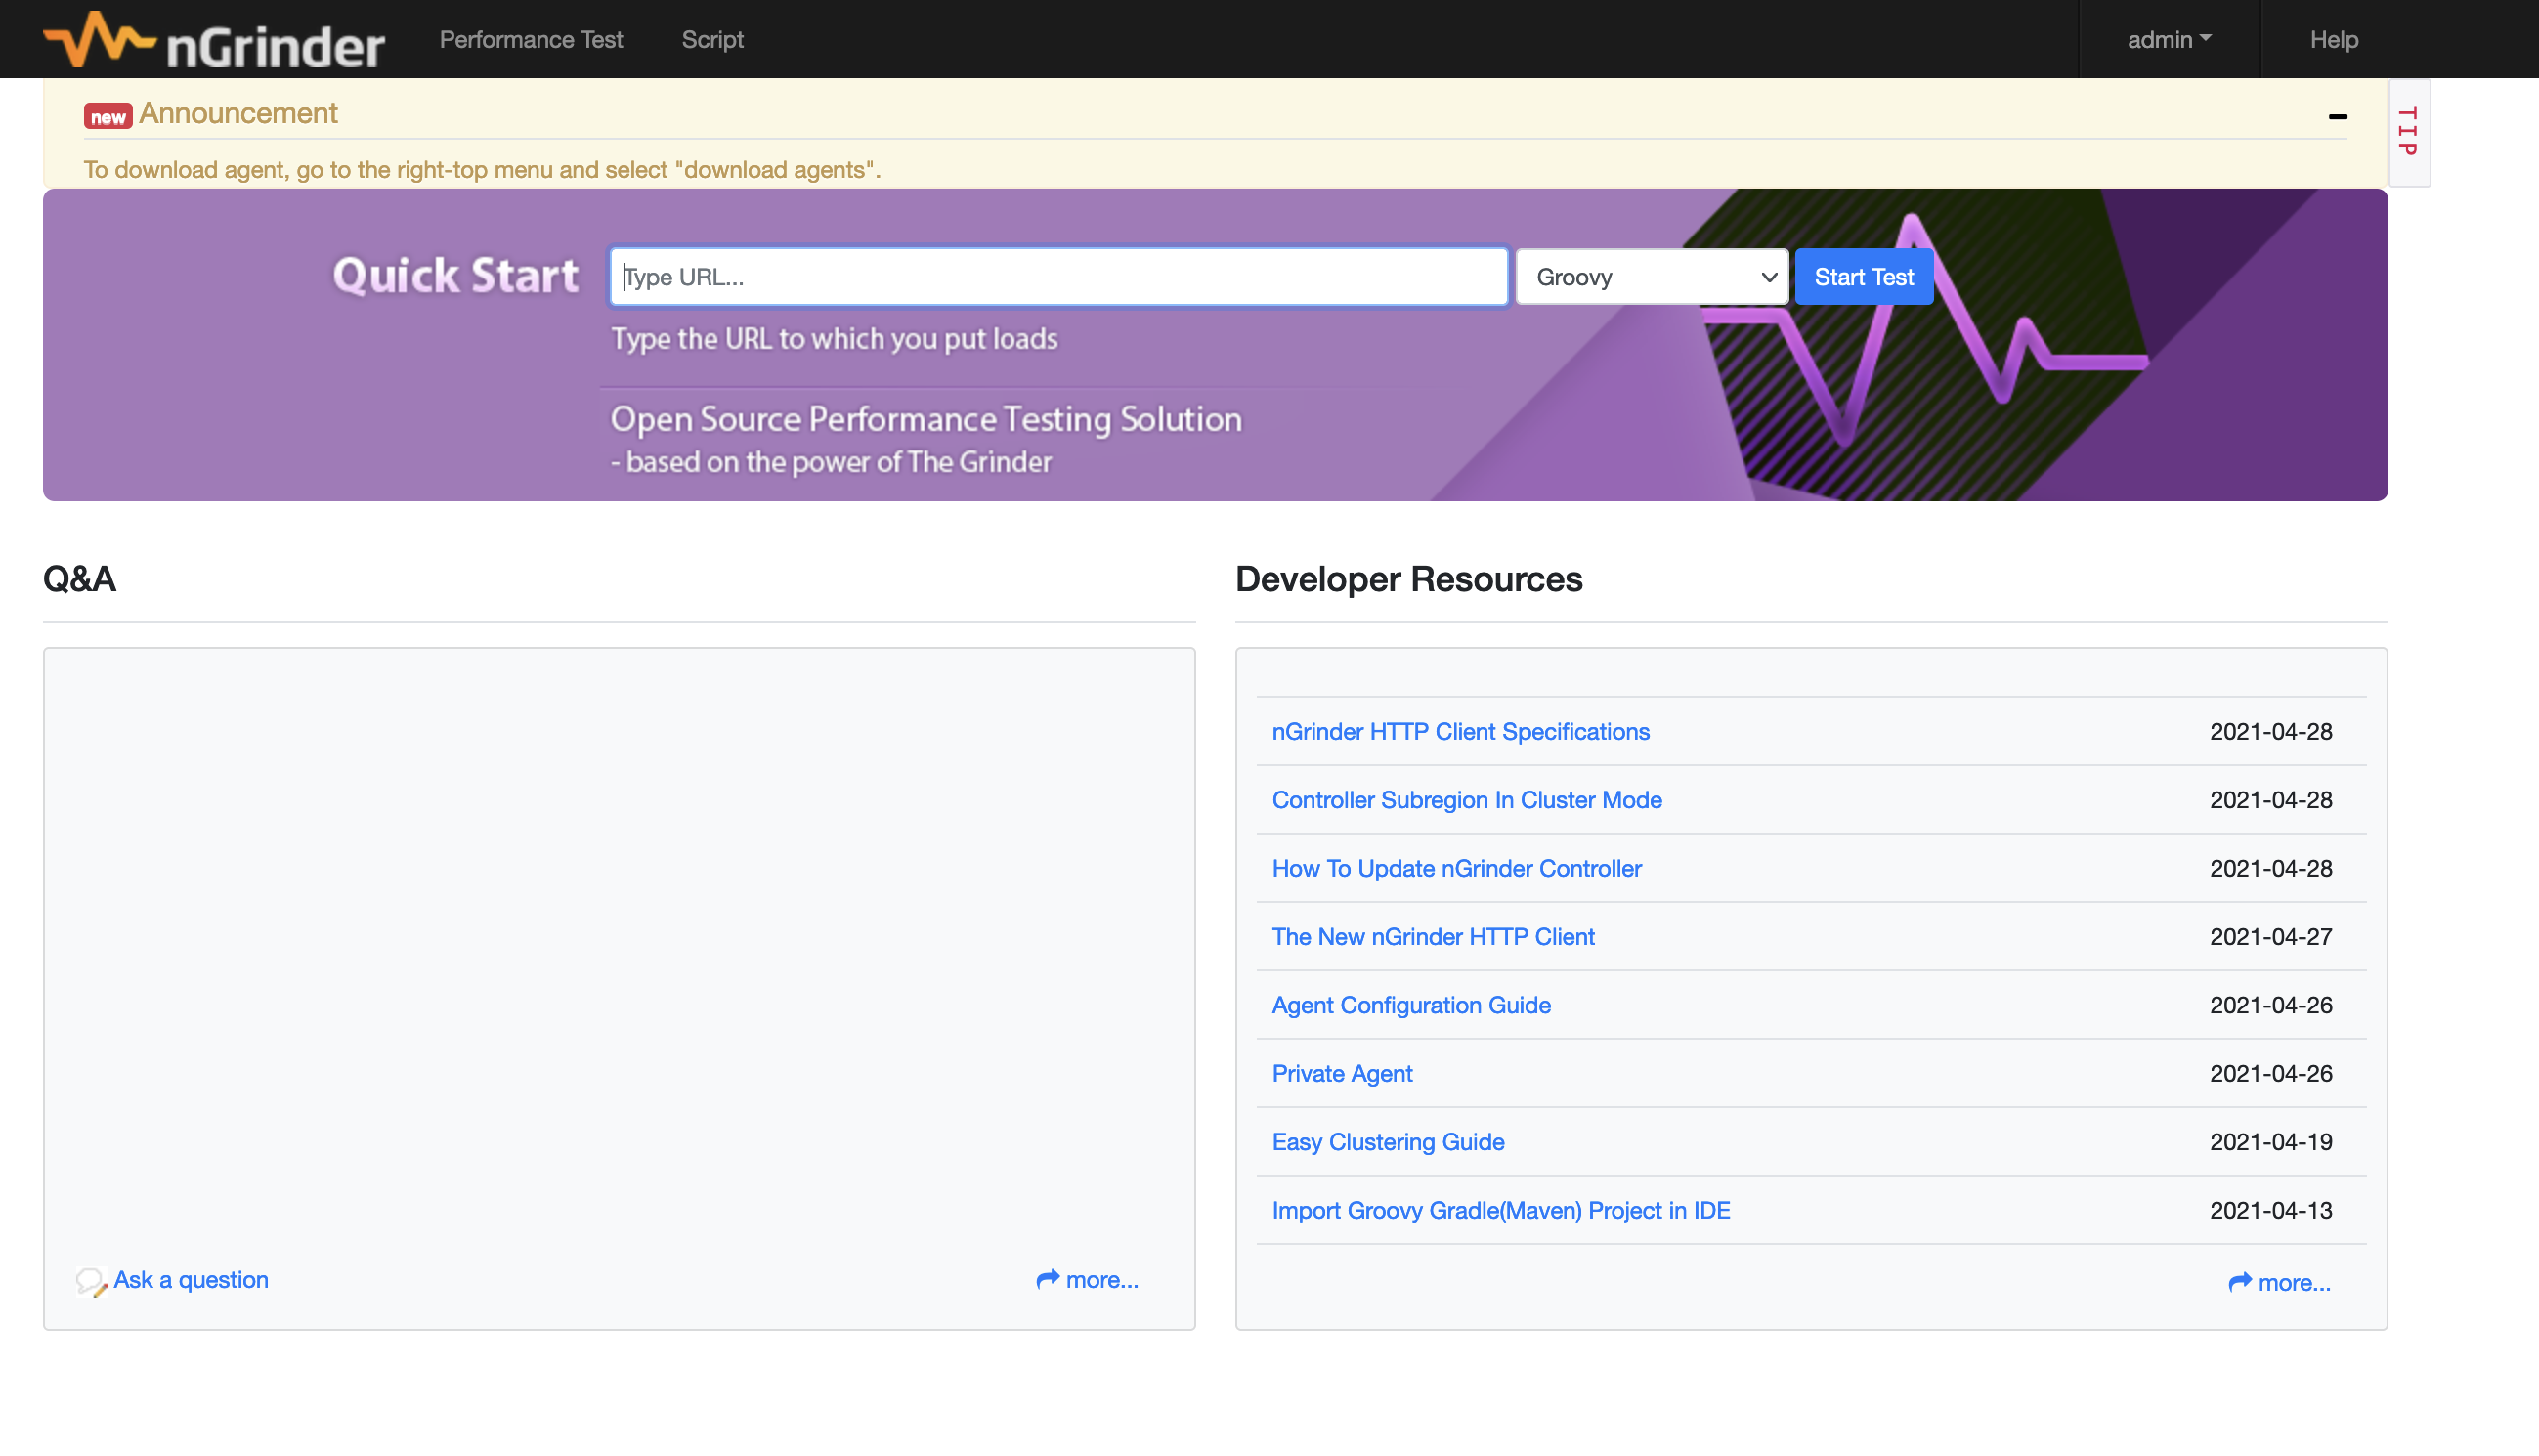
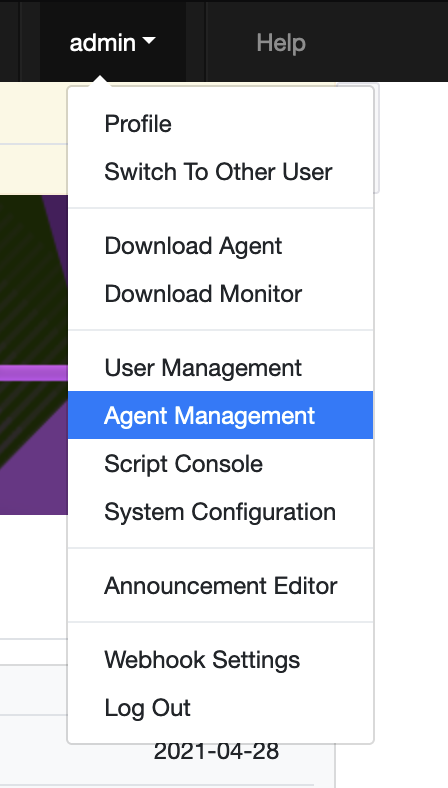
로그인을 완료하면 오른쪽 메뉴에서 Agent Management로 이동하여 Agent를 설치하면 된다.
이동하면 다음과 같은 페이지가 나온다.
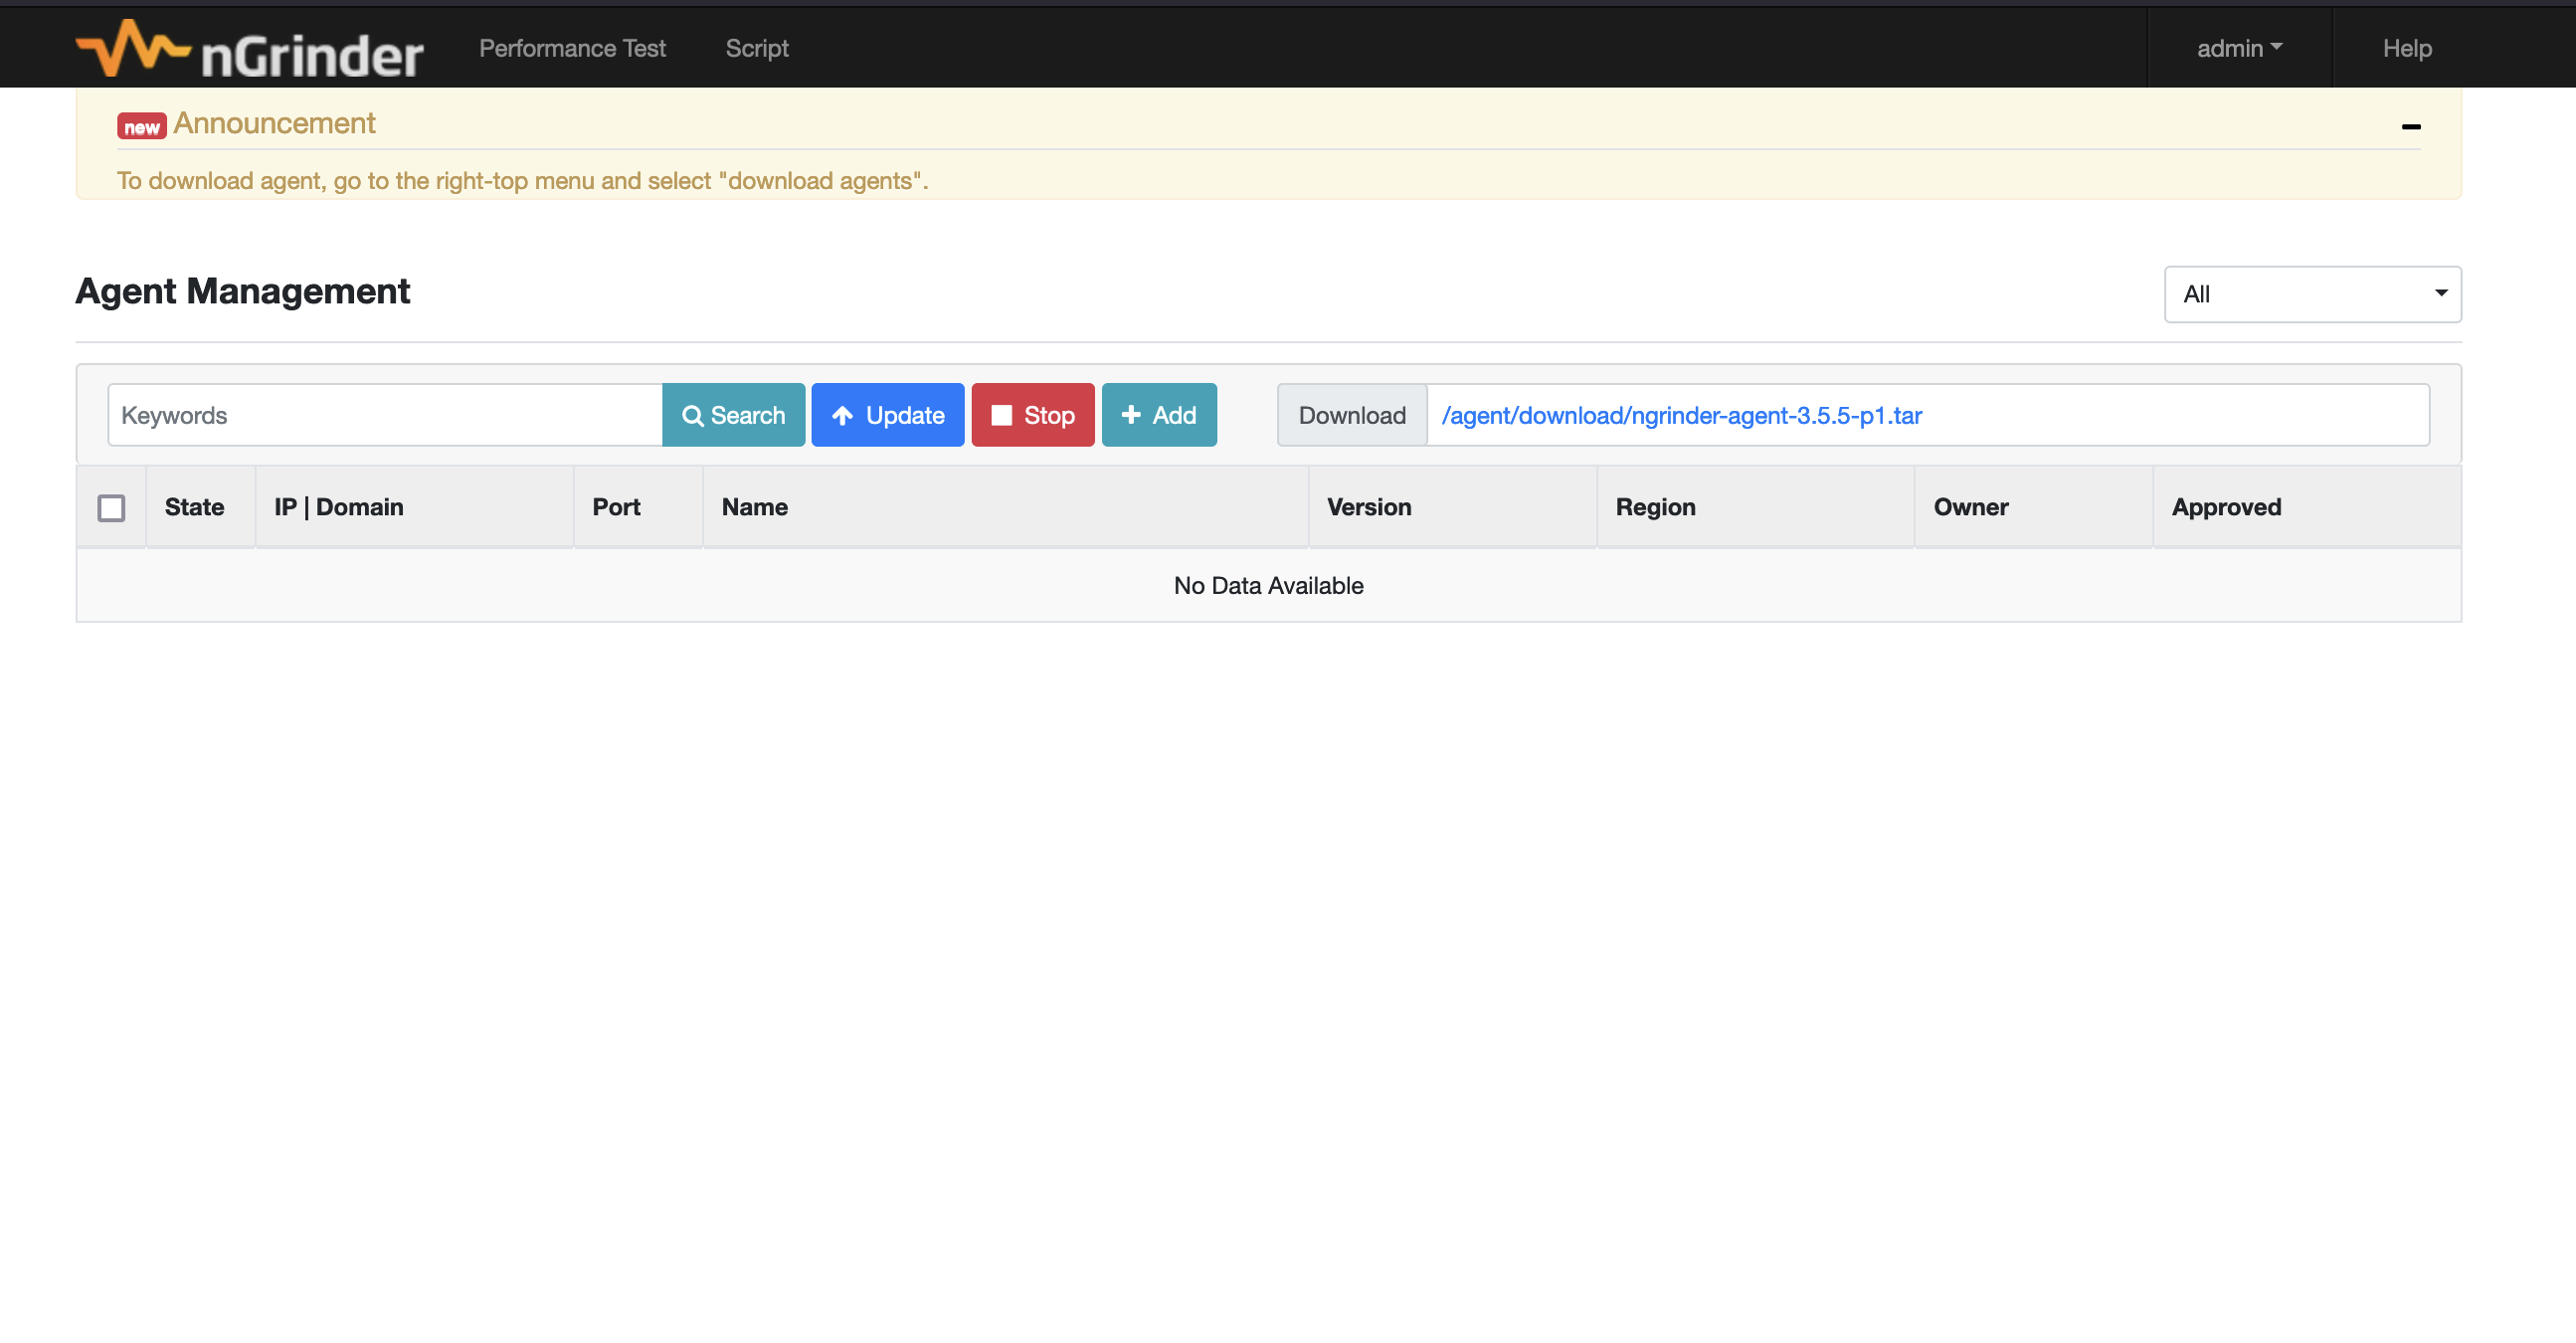
다운로드 주소는 오른쪽 부분에 있으니 복사하여 사용하면 된다.
wget http://서버주소:8080/agent/download/ngrinder-agent-3.5.5-p1.tarAgent들은 controller를 설치하지 않아도 다운로드를 받을 수 있으니 여러 Agent들을 구성할것이면 아래와 같이도 사용 가능하다.
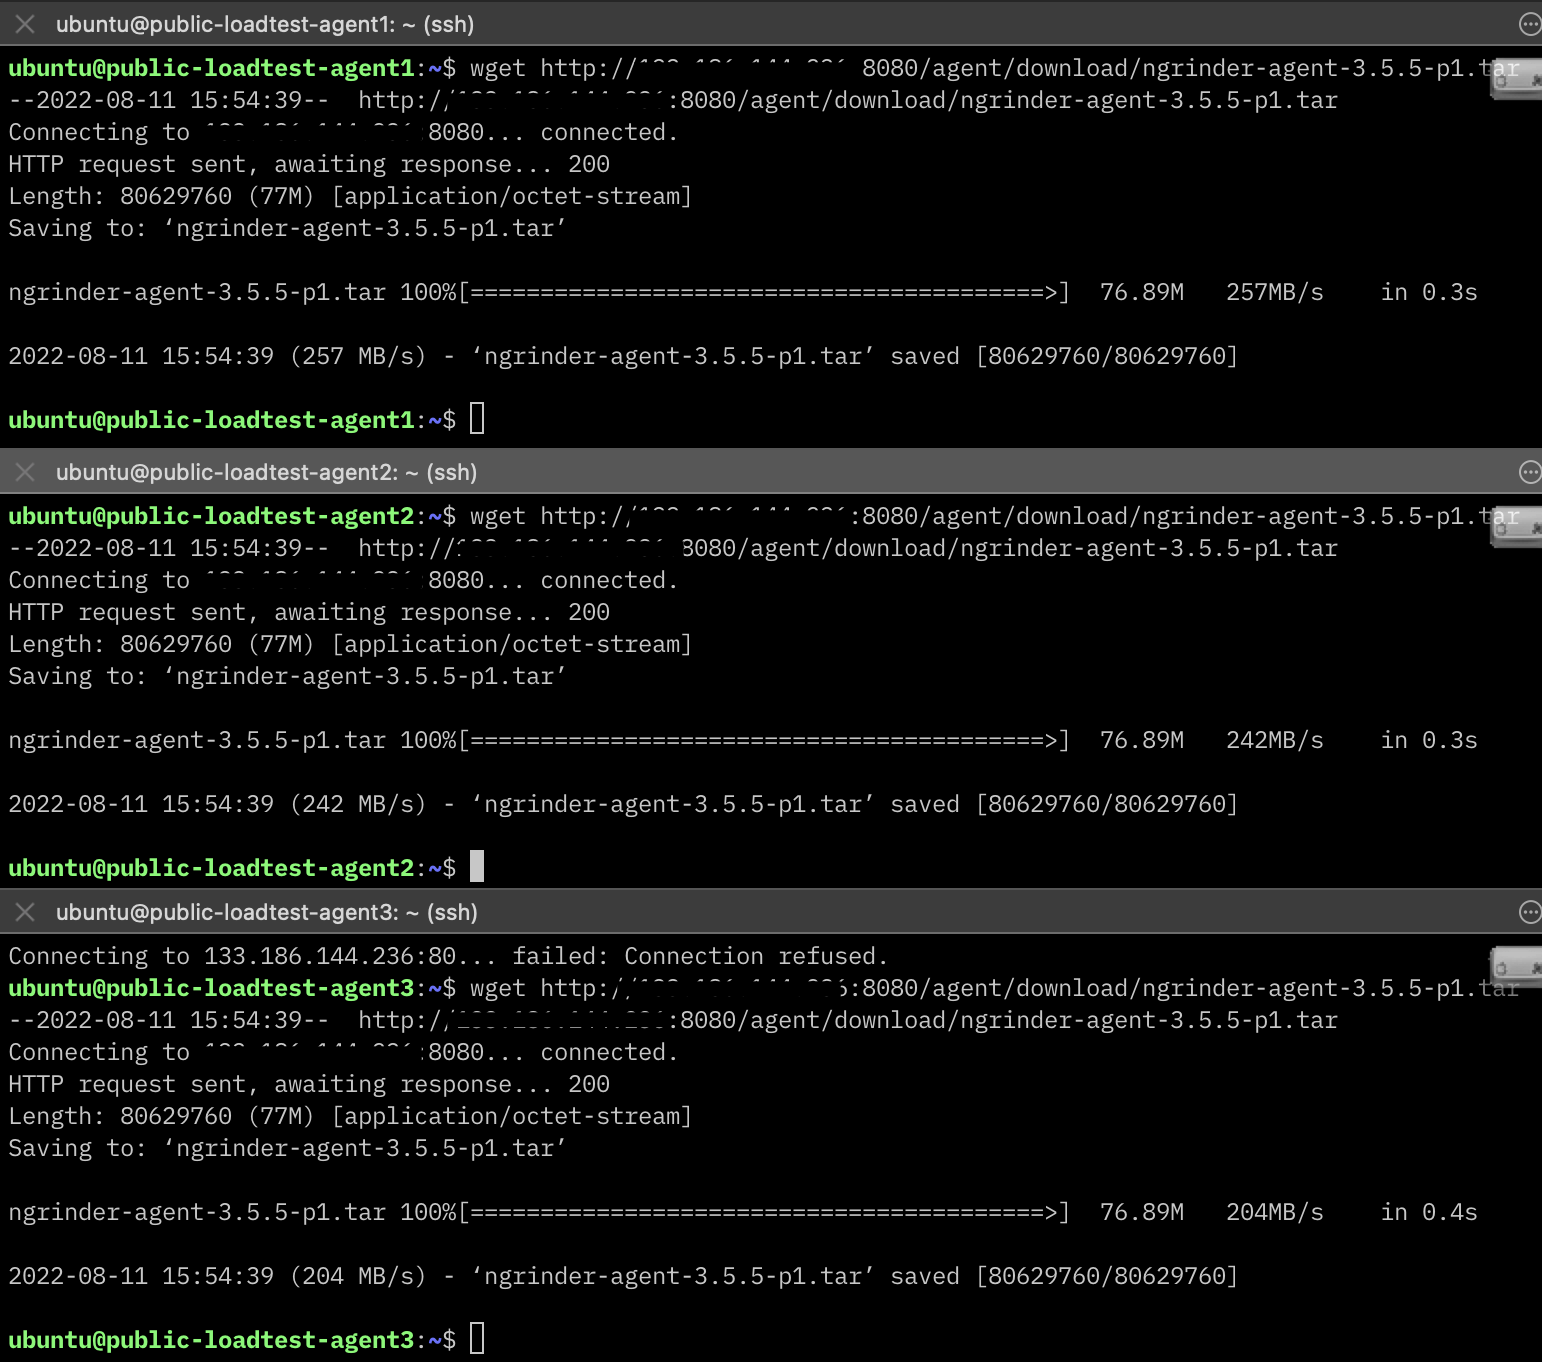
다운로드를 받은 후 압축을 풀어주고 폴더로 이동한다.
tar -xvf ngrinder-agent-3.5.5-p1.tar
cd ngrinder-agent
이동하면 agent들이 사용할 conf파일을 만들어줘야한다.
vi __agent.conf

common.start_mode=agent
agent.controller_host= (Controller IP주소)
agent.controller_port=16001 # (설정을 바꾸지 않았다면 기본적으로 16001이다)
agent.resion = NONE
#agent.subregion=
agent.owner= (사용자 id)
#agent.host_id=
#agent.server_mode=true

# provide more agent java execution option if necessary.
#agent.java_opt=
# set following false if you want to use more than 1G Xmx memory per a agent process.
#agent.limit_xmx=true
# please uncomment the following option if you want to send all logs to the controller.
#agent.all_logs=true
# some jvm is not compatible with DNSJava. If so, set this false.
#agent.enable_local_dns=false
# please uncomment the following option if you want to run controller_to_agent connection mode agent.
#agent.connection_mode=controller_to_agent
#agent.connection_port=14000
# set following with the ip you want to broadcast yourself. Set this option if the agent needs to be discovered as public ip.
#agent.broadcast_ip=
만들어주고 Shell 파일을 실행하면 Agent들이 작동한다.
# 로그 확인용 실행
./run_agent.sh
# 백그라운드 실행
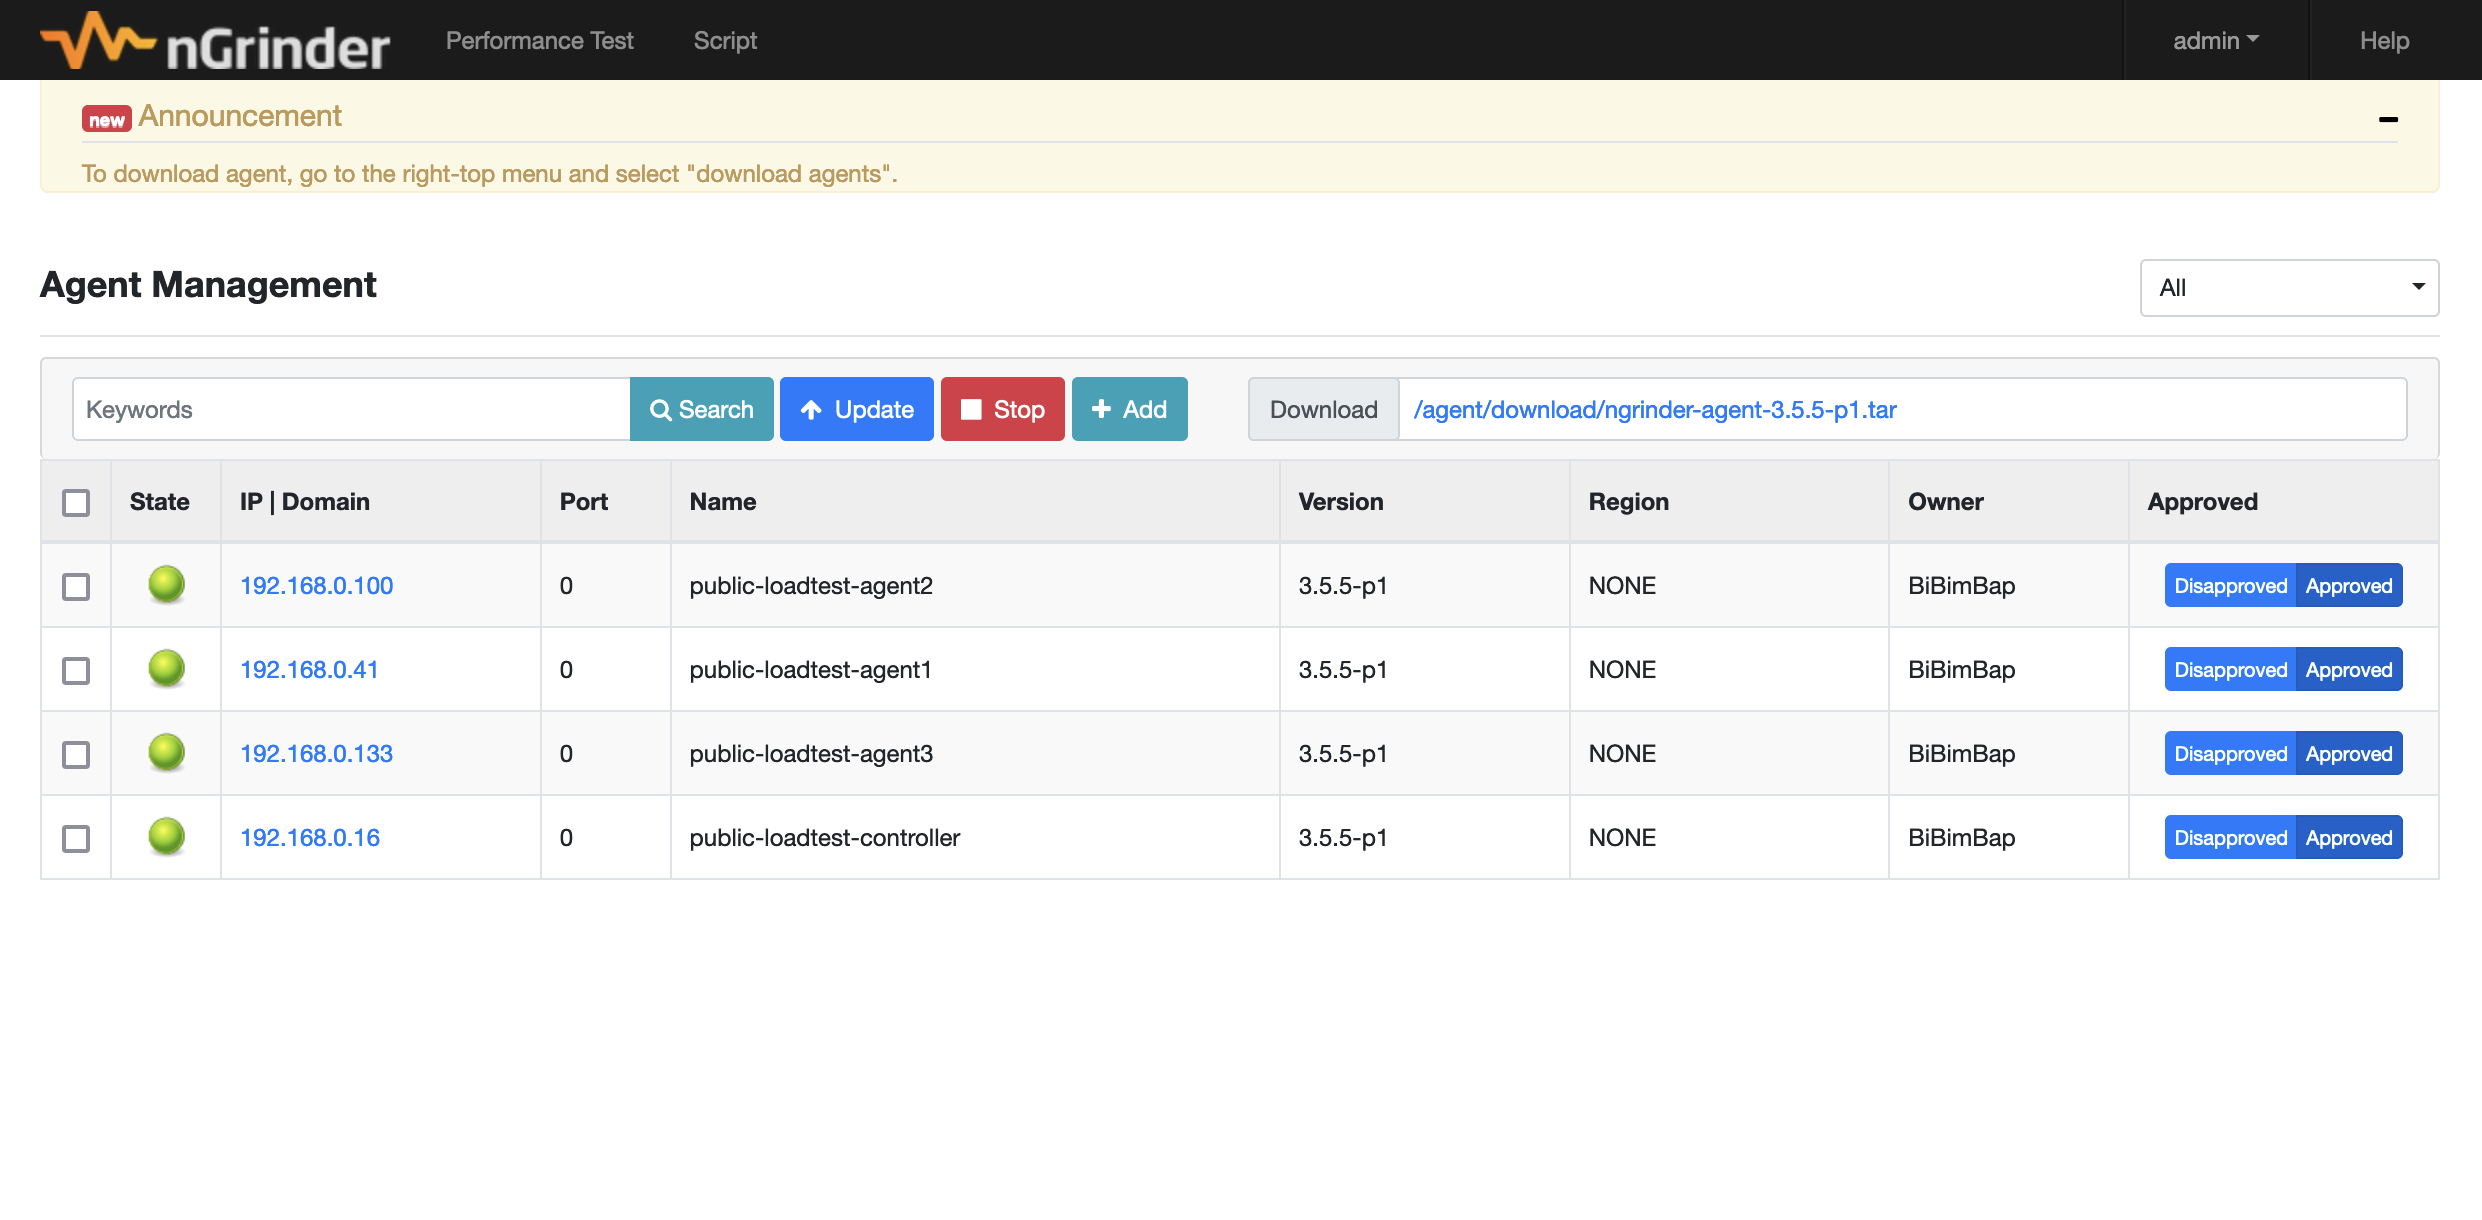
./run_agent_bg.shagent들이 사용할 컴퓨터에 만들어주고 연결해주면 다음과 같이 구성이 완료된다.

잘보고 가요~ ^^