[Visual Studio] C++ Unittest with MS Native Unit Test Faramework
Visual Studio
VS Code에서 C++를 사용하다가, unit test를 하기 위해 Visual studio를 설치하였다.
Unit Test
환경설정
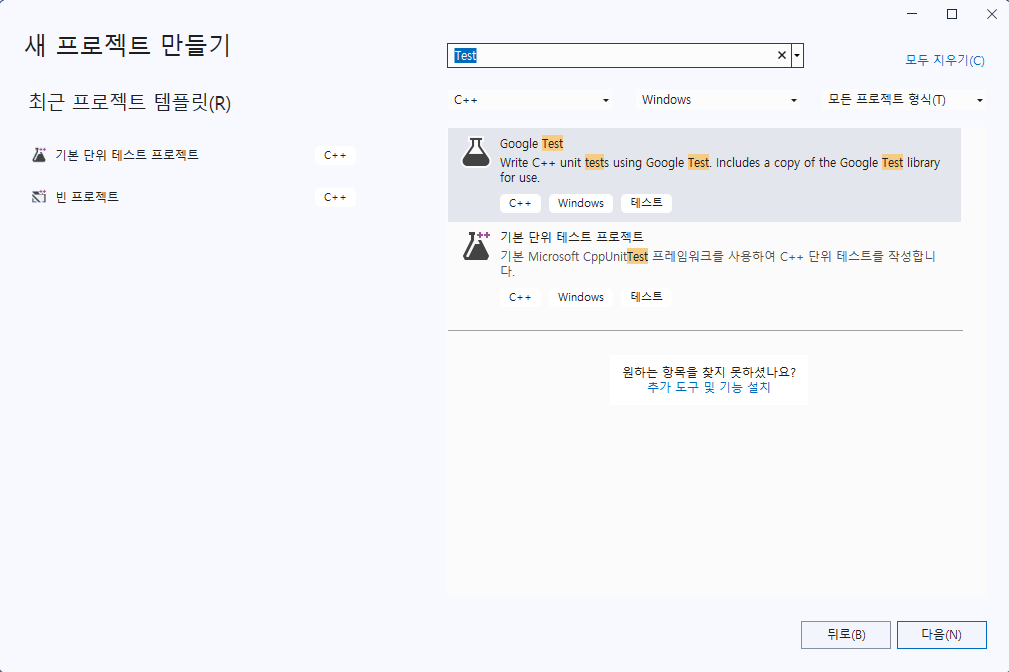
01 테스트용 프로젝트를 생성한다.
여기서는 기본 단위 테스트 프로젝트를 선택한다.
테스트 코드
02 테스할 클래스/함수와 단위테스트 하는 코드이다.
따로 작성해서 호출해도 되지만, 간단한 테스트에서는 하나로 써도 좋은 거 같다.
- 테스트할 클래스/함수 코드
#include "pch.h" 			// 자동 생성
#include "CppUnitTest.h"	// 자동 생성
#include <iostream>			// 코드 추가
using namespace std;		// 코드 추가
using namespace Microsoft::VisualStudio::CppUnitTestFramework; // 자동 생성

//테스트를 위한 클래스
class Solution {
public:
	int calculator(int a, int b) {
		return a + b;
	}

	string brand(string str) {
		return str;
	}
};

namespace UnitTest
{
	TEST_CLASS(UnitTest)
	{
	public:

		TEST_METHOD(TestMethod1)
		{
			int expected = 7;
			Solution solution;

			//Assert::AreEqual(expected, actual);
			Assert::AreEqual(expected, solution.calculator(4, 3));
		}

		TEST_METHOD(TestMethod2)
		{
			string expected = "3M";
			Solution solution;

			Assert::AreEqual(expected, solution.brand("3M"));
		}
	};
}
테스트 실행
테스트 > 모든 테스트 실행(Ctrl+R,A)
코드를 실행하면 아래 화면처럼 테스트케이스 2개가 실행된 것을 확인할 수 있다. 여기서 오른쪽 마우스를 클릭하면 테스트 디버그도 가능하다.


Everyday Research & Development