pop-up
html
<!DOCTYPE html>
<html lang="kr">
<head>
    <meta charset="UTF-8">
    <meta http-equiv="X-UA-Compatible" content="IE=edge">
    <meta name="viewport" content="width=device-width, initial-scale=1.0">
    <title>세팅마무리하기</title>
    <link rel="stylesheet" href="https://cdn.jsdelivr.net/npm/reset-css@5.0.1/reset.min.css">
    <link rel="stylesheet" href="./css/layout03.css">
    <script
			src="https://code.jquery.com/jquery-2.2.4.min.js"
			integrity="sha256-BbhdlvQf/xTY9gja0Dq3HiwQF8LaCRTXxZKRutelT44="
			crossorigin="anonymous"></script>
</head>
<body class="popupShow">
    <!-- ::before -->
    <div id="popup">
        <button id="btn">닫기</button>
    </div>

    <script src="./js/common.js"></script>
    <!-- ::after -->
</body>
</html>
js(jQuery)
<script>
$(document).ready(function(){
    $("#btn").click(function(){
        $("body").removeClass("popupShow");
    });
});
</script>
왼쪽으로 사라짐
translate(x, y) 사용
<style>
body::before {
	/* 안 보임 */
    content: "";
    position: fixed;
    background-color: rgba(0,0,0,0.5);
    left: -100%; width: 100%;
    top: 0; bottom: 0;
    transition: left 0.5s;
}
.popupShow::before {
	/* 보임 */
    left: 0;
}

#popup {
	/* 안 보임 */
    position: absolute;
    width: 600px;
    height: 600px;
    background-color: aquamarine;
    left: 0; top: 50%;
    transform: translate(-100%, -50%);
    transition: 0.5s;
}
.popupShow #popup {
	/* 보임 */
    left: 50%;
    transform: translate(-50%, -50%);
}
</style>
화면 가운데를 기준으로 오른쪽 왼쪽 양쪽에 각각 100%씩 있다고 하고
왼쪽에서 75% 움직여야 중간이라고 하면left 50%로 움직이면 25%가 남고,
x축은 left/right 모두 고려되므로 50%만큼 돌아오는 것이
left 기준에서는 25% 움직이는 게 됨그래서 75% 움직이니까 중간에 팝업이 딱~
끝~
(이걸 반대로 생각해서 popup이 사라지는 걸 연출)
translateX() 사용
<style>
body::before {
	/* 안 보임 */
    content: "";
    position: fixed;
    background-color: rgba(0,0,0,0.5);
    left: -100%; width: 100%;
    top: 0; bottom: 0;
    transition: left 0.5s;
}
.popupShow::before {
	/* 보임 */
    left: 0;
}
#popup {
	/* 안 보임 */
    position: absolute;
    width: 600px;
    height: 600px;
    background-color: aquamarine;
    left: 0;
    top: 0; bottom: 0; margin: auto 0;
    transform: translateX(-100%);
    transition: 0.5s;
}
.popupShow #popup {
	/* 보임 */
    left: 50%;
    transform: translateX(-50%);
}
</style>
top 고려 안 하고 left만 생각하면 됨 (더 쉽다!!)
위쪽으로 사라짐
<style>
body::before {
    /* 안 보인다 */
    content: "";
    position: fixed;
    background-color: rgba(0,0,0,0.5);
    left: 0; width: 100%;
    top: 0; height:0;
    transition: 0.5s;
}
.popupShow::before {
    /* 보인다 */
    height: 100%;
}

#popup {
    /* 안 보인다 */
    position: absolute;
    width: 600px;
    height: 600px;
    background-color: aquamarine;
    transition: 0.5s;

    /* 머리통 상단에 붙이고 */
    top: 0;
    left: 0; right: 0; margin: 0 auto;
    /* 너의 키만큼 더 위로 */
    transform: translateY(-100%);

    /* left: 50%; top: 0%;
    transform: translate(-50%, -100%); */
}
.popupShow #popup {
    /* 보인다 */
    /* top: 50%;
    transform: translate(-50%, -50%); */
    top: 50%;
    transform: translateY(-50%);
}
</style>
left에 썼던 기준을 top에 적용시키면 됨!!
서서히 사라짐 (fade-out)
<style>
body::before {
    /* 안 보인다 */
    content: "";
    position: fixed;
    background-color: rgb(0,0,0,0.5);
    transition: 0.5s;
    left: 0; width: 100%;
    top: 0; height: 100%;
    opacity: 0;
    visibility: hidden;
}
.popupShow::before {
    /* 보인다 */
    opacity: 1;
    visibility: visible;
}

#popup {
    /* 안 보인다 */
    position: absolute;
    width: 600px;
    height: 600px;
    left: 0; right: 0; top: 0; bottom: 0;
    margin: auto;
    background-color: aquamarine;
    transition: 0.5s;
    opacity: 0;
    visibility: hidden;
}
.popupShow #popup {
    /* 보인다 */
    opacity: 1;
    visibility: visible;
}
</style>opacity와 visibility는 세트!!
안 보일 땐 기능이 안 먹히도록 visibility: hidden;을 해주고
보일 땐 다시 기능 먹혀야 하니까 visible
transition 세팅
안정스타일 -> 디테일하게 세팅 + transition
변화스타일 -> 변화값만 부여
toggle
버튼 누를 때 버튼 안 컨텐츠 변하게 만들기
html
<!DOCTYPE html>
<html lang="kr">
<head>
    <meta charset="UTF-8">
    <meta http-equiv="X-UA-Compatible" content="IE=edge">
    <meta name="viewport" content="width=device-width, initial-scale=1.0">
    <title>세팅마무리하기</title>
    <link rel="stylesheet" href="https://cdn.jsdelivr.net/npm/reset-css@5.0.1/reset.min.css">
    <link rel="stylesheet" href="./css/layout.css">
    <script
			src="https://code.jquery.com/jquery-2.2.4.min.js"
			integrity="sha256-BbhdlvQf/xTY9gja0Dq3HiwQF8LaCRTXxZKRutelT44="
			crossorigin="anonymous"></script>
</head>
<body>
    <button id="allMenu">햄버거</button>


    <script src="./js/common.js"></script>
</body>
</html>
js(jQuery)
<script>
$(document).ready(function(){
  $("#allMenu").click(function(){
    $("#allMenu").toggleClass("open");
  });
});
</script>
addClass, removeClass, toggleClass
toggleClass는 class를 줬다 뺐다 할 때 쓰는 용도
<style>
#allMenu::after {
  content: "OPEN";
}
#allMenu.open::after{
  content: "X";
}
</style>
::before ::after과 같은 가상 선택자는 코드를 가볍게 만들며
content를 꼭 넣어야 작동하는데, 안에 쓸 것이 없을 경우에도
content: ""; 라도 쓰도록 해야 한다!
결과
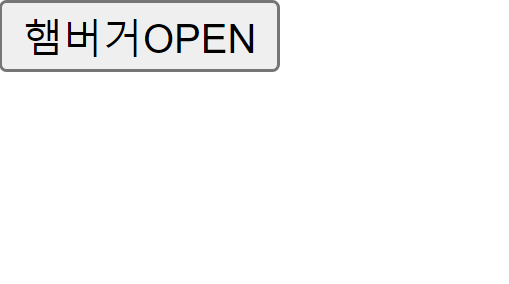
클릭하기 전에는
"햄버거OPEN"이라는 글자가 button 안에 담겨서 보임

클릭 후에는 class="open" 이 #allMenu가 있는 button태그에 적용돼서
"햄버거X"라는 글자로 바뀜
다시 클릭하면 "햄버거OPEN"으로 돌아옴
jQuery 맛보기
$('스타일 선택자와 동일')
$("a.d2:not(.first)") 는
<script>
<a class="d1 first"></a> <- .first가 들어있는 얘만 빼고 나머지는 다 선택됨
<a class="d1"></a>
<a class="d1"></a>
<a class="d1"></a>
</script>
을 의미한다
※가상 선택자는 제이쿼리 선택자 불가능!!
메서드 -> 동사: addClass, removeClass, toggleClass 등
구체적인 처리
이벤트 -> click, ready, scroll, mouseover, mouseenter, mouseleave 등
시점ex)
$(선택자).이벤트(function(){
실행문들...................
});