0. 소개
이번 장에서는 지난 블로그에 이어서 첫 번째 목표였던 Jupyter notebook을 설치한다. 세부 목표는 다음과 같다.
- 아나콘다 설치하기
- 주피터 실행하기
1. 아나콘다 설치하기
먼저, GCP에서 서버를 켜고 MobaXterm에 들어가서 해당 서버에 들어간다.
1 단계. 아나콘다 링크 주소 복사
- 다음의 사이트에서 Anaconda3-2023.07-2-Linux-x86_64.sh의 링크 주소 복사를 한다.
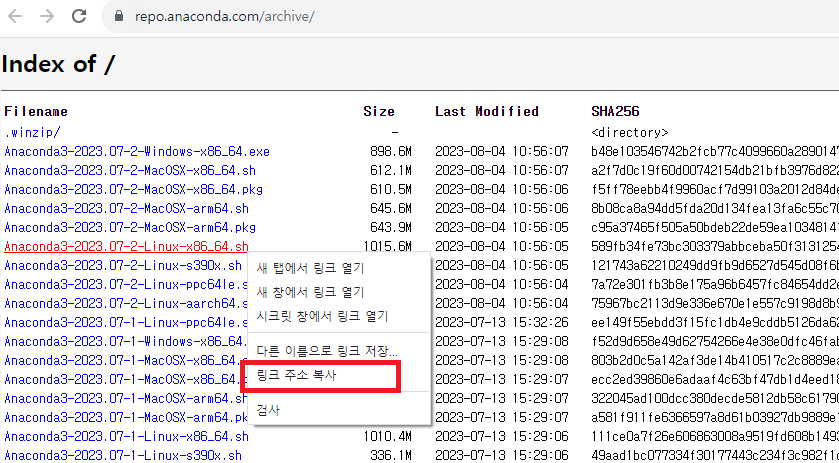
- MobaXterm에서 다음과 같이 wget를 작성하고 복사했던 링크 주소를 붙여넣기를 하고 엔터를 눌러 설치를 진행한다. (엔터를 계속 입력한다.)
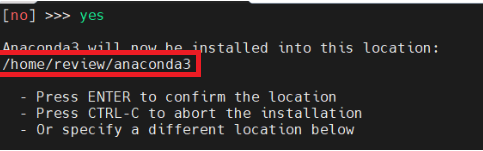
$ wget https://repo.anaconda.com/archive/Anaconda3-2023.07-2-Linux-x86_64.sh- 설치를 진행하다가 마지막에 다음과 같은 문구가 나오면
yes를 작성하고 엔터를 누른다.

- 아나콘다가 설치되는 위치를 복사 혹은 기억해두어야 한다.
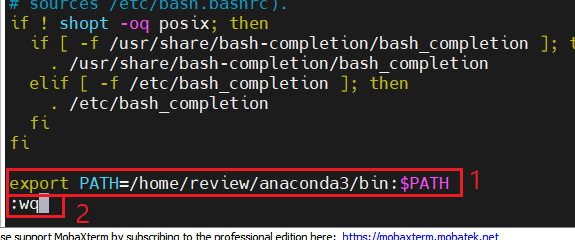
2 단계. 아나콘다의 환경 설정
- 다음의 코드를 작성한다.
vi ~/.bashrca를 눌러 insert 모드로 들어가 제일 하단에 내려가 다음을 입력한다.
주의) /home/review/anaconda3는 앞에서 기억해두어야 한다고 했던 위치이다.
export PATH=/home/review/anaconda3/bin:$PATH-
esc+shift+;를 같이 누른다. -
wq를 입력한다.
- 다음의 코드를 입력해서 환경 변수를 실행한다.
$ source ~/.bashrc3 단계. 버전 확인하기
다음의 코드를 통해 잘 설치되었는지 확인한다.
$ conda --version
2. 주피터 실행하기
1 단계. 비밀번호 설정하기
- 다음과 같이 코드를 작성한다.
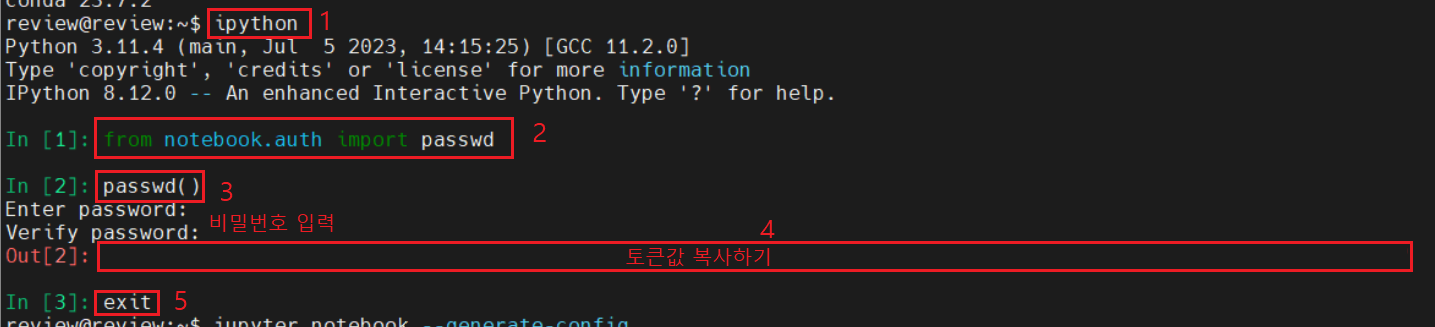
$ ipython- 다음의 코드를 작성한다.
In[1]: from notebook.auth import passwd- 다음의 코드를 입력한 후에 주피터 노트북의 비밀번호를 입력한다. 비밀번호 확인을 위해서 한 번 더 비밀번호를 입력한다. 주의) 비밀번호는 입력해도 변화가 없으므로 주의해야한다.
In[2]: passwd()-
토큰값을 복사해둔다.
-
exit를 입력한다.
2 단계. 주피터 파일 설정하기
- 다음과 같이 코드를 작성한다.
$ jupyter notebook --generate-config
$ vi ~/.jupyter/jupyter_notebook_config.py-
a버튼을 눌러 insert 모드로 바꾼다. -
다음의 코드를 삽입한다.
.NotebookApp.allow_root=True
c.NotebookApp.ip='0.0.0.0'
c.NotebookApp.notebook_dir='/home/review'
c.NotebookApp.password= 복사해 둔 토큰값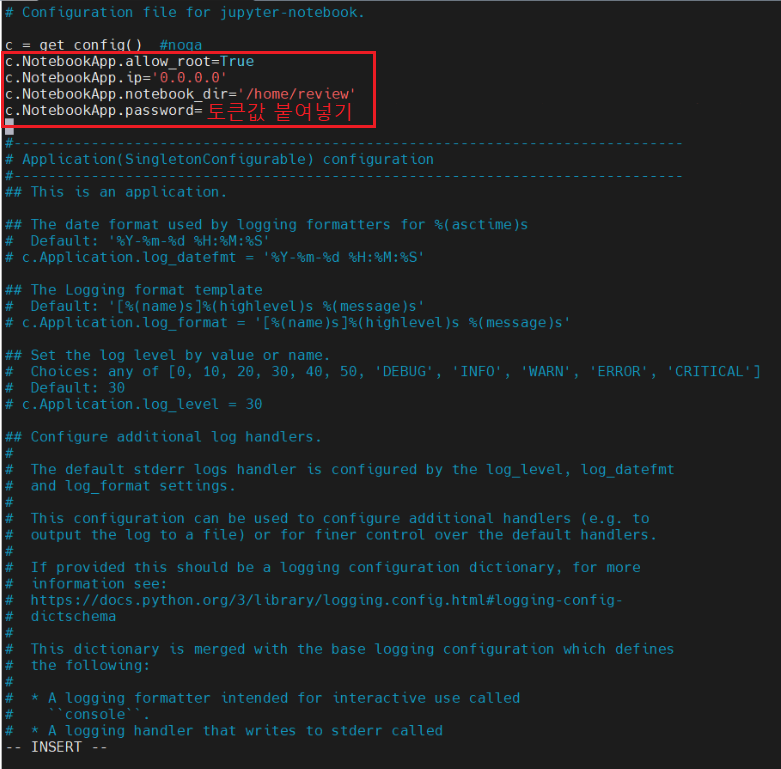
-
esc+shift+;를 같이 누른다. -
wq를 입력한다.
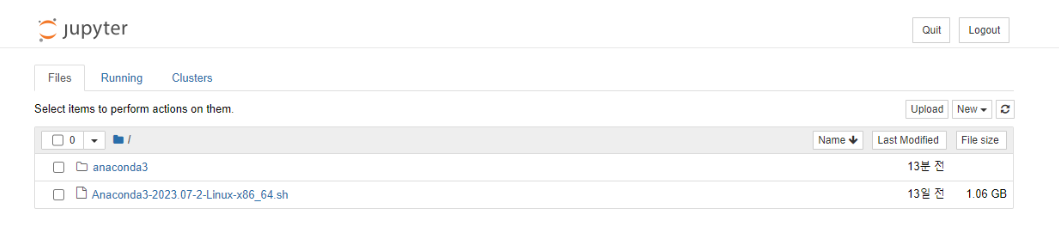
3 단계. 주피터 노트북 실행하기
- 다음과 같이 코드를 작성한다.
jupyter notebook- 인터넷 창에 다음과 같이 서버의 고정 IP주소를 넣어 입력한다.
고정 IP주소:8888

- 1 단계에서 설정한 주피터 노트북 비밀번호를 입력한다. 그러면 다음과 같이 주피터 노트북을 사용할 수 있게 된다.