1편에서 api 설계한 것을 토대로 한번 프로젝트를 만들어보자
06. 상세 페이지 전체 모습 만들기
기본적인 배경배너 html css코드를 입력했다.
특별한 것으로는 font awesome에서 아이콘을 가져와서 꾸며줄수있는 것이다.
font awesome에서 원하는 아이콘을 선택해서 가지고 와서 사용하고
부트스크랩처럼 head태그안에 링크를 넣어줘야 제대로 작동한다.
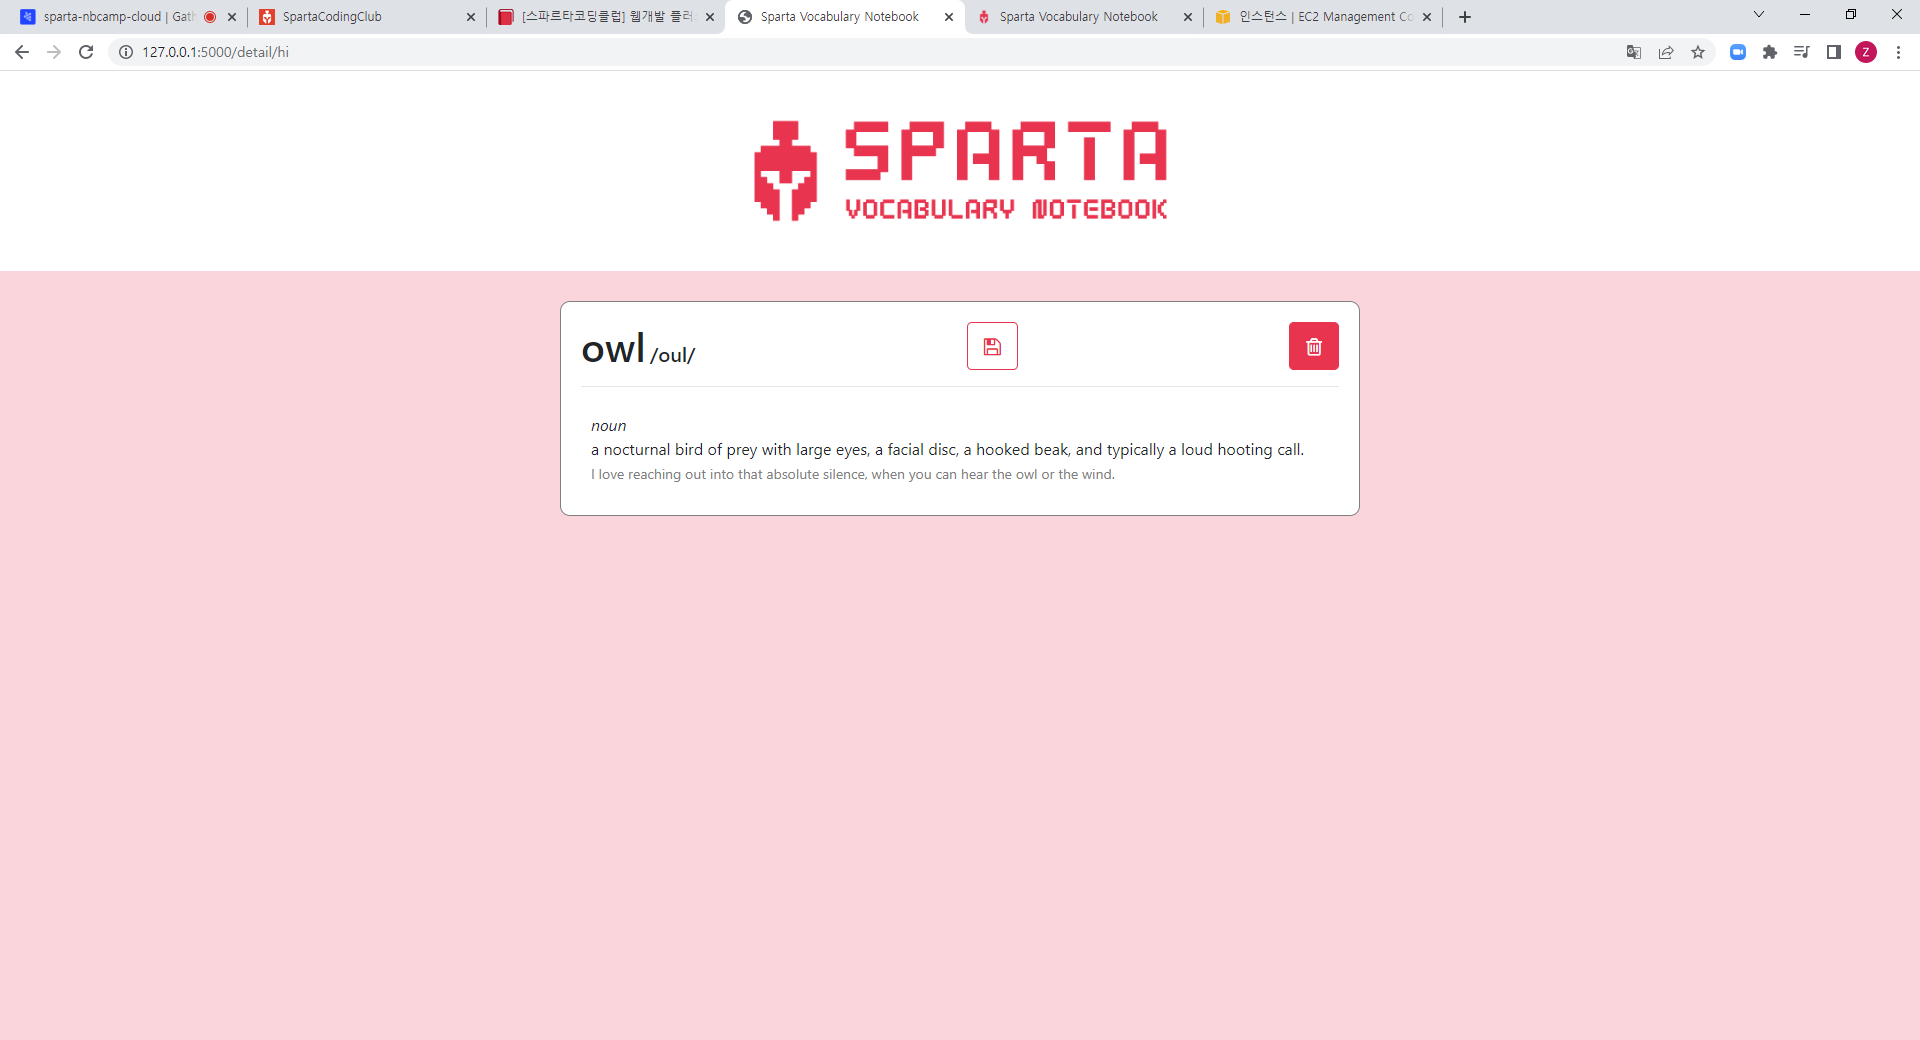
				<button id="btn-save" class="btn btn-outline-sparta btn-lg">
                    <i class="fa fa-floppy-o" aria-hidden="true"></i>
                </button>
                <button id="btn-delete" class="btn btn-sparta btn-lg">
                    <i class="fa fa-trash-o" aria-hidden="true"></i>
                </button>
save 과 delete로 써져있는 버튼이 로고를 모양으로 바뀌었다.
07. 상세 페이지 - Ajax로 단어 뜻 가져오기
상세페이지를 단어의 발음과 뜻을 를 Owlbot openapi에서 끼워넣기
    <script>
        let word = '{{ word }}' //word는 뭘까? app.py에서 keyword로 넘겨준 것이다.
        $(document).ready(function () {
            get_definitions()
        })

        function get_definitions() {
            $.ajax({
                type: "GET",
                url: `https://owlbot.info/api/v4/dictionary/${word}`,
                beforeSend: function (xhr) {
                    xhr.setRequestHeader("Authorization", "Token ");
                },
                data: {},
                error: function (xhr, status, error) {
                    alert("에러 발생!");
                },
                success: function (response) {
                    console.log(response)
                    $("#word").text(response["word"])

                    if (response["pronunciation"] == null) {
                        $("#pronunciation").text("")
                    } else {
                        $("#pronunciation").text(`/${response["pronunciation"]}/`)
                    }

                    $("#definitions").empty()

                    let definitions = response["definitions"]
                    for (let i = 0; i < definitions.length; i++) {
                        let definition = definitions[i]
                        let html_temp = ``
                        if (definition["example"] != null) {
                            html_temp = `<div style="padding:10px">
                                        <i>${definition["type"]}</i>
                                        <br>${definition["definition"]}<br>
                                        <span class="example">${definition["example"]}</span>
                                    </div>`
                        } else {
                            html_temp = `<div style="padding:10px">
                                        <i>${definition["type"]}</i>
                                        <br>${definition["definition"]}<br>
                                    </div>`
                        }

                        $("#definitions").append(html_temp)
                    }
                }
            })
        }
    </script>
여러가지 조건들을 추가하면서 작성했는데 하나하나 다시 살펴볼 필요가 있다.
08. 상세 페이지 - jinja2로 뜻 가져오기
@app.route('/detail/<keyword>')
def detail(keyword):
    # API에서 단어 뜻 찾아서 결과 보내기
    r = requests.get(f"https://owlbot.info/api/v4/dictionary/{keyword}", headers={"Authorization": "Token 토큰토큰"})
    result = r.json() #json형태로 나타낸 것이 result 변수에 들어가고!
    print(result)
    return render_template("detail.html", word=keyword, result=result) #이값들을 detail.html에 보내주도록 합니다다
jinja2에서 설정한 result가 ajax에서는 response라고 보면 된다.
<h1 id="word" style="display: inline;">{{ result["word"] }}</h1>
<h1 id="word" style="display: inline;">{{ result.word }}</h1 >
jinja2에서는 어떤 dictionary 안에있는 word라고 하는 키값을 가지고 오고싶을때
둘은 같은 표현이다. 네모괄호과 따옴표가 없이도 . word라고 작성해도 괜찮다.
<body>
<div class="wrap">
    <div class="banner" onclick="window.location.href = '/'">
    </div>
    <div class="container">
        <div class="d-flex justify-content-between align-items-end">
            <div>
                <h1 id="word" style="display: inline;">{{ result.word }}</h1 >
                <h5 id="pronunciation" style="display: inline;">{{ result.pronunciation }}</h5>
            </div>
            <button id="btn-save" class="btn btn-outline-sparta btn-lg">save</button>
            <button id="btn-delete" class="btn btn-sparta btn-lg">delete</button>
        </div>
        <hr>
        <div id="definitions">
            {% for definition in result.definitions %}
                <div style="padding:10px">
                    <i>{{  definition.type}}</i>
                    <br>{{  definition.definition}}<br>
                    <span class="example">{{ definition.example }}</span>
                </div>
            {% endfor %}
        </div>
    </div>
</div>

</body>
jinja2를 사용해서 구현했다. ajax보다 훨씬 쓰기가 쉬운거같기도 ..?
 <div>
   {%if result.pronunciation %}
   <h5 id="pronunciation" style="display: inline;">{{ result.pronunciation }}</h5>
   {% endif %}
 </div>
발음기호가 있는경우(none이 아닌경우)에 만 표시하도록 조건을 주었다.
{%if definition.example %}
<span class="example">{{ definition.example |safe }}</span>
{% endif %}
전에는 실수형으로 나온 숫자에 |int를 붙여줘서 정수형으로 나오게 했는데
|safe는 앞에 나오는 것이 "html일수도있는데 ~ 이상한걸 시도하는건 아니고 그냥 안전한애야
그대로 표시해줘" 라는 뜻이다!
<span class="example">{{ definition.example.encode('ascii','ignore').decode('utf-8')|safe }}</span>앞에 문자열을 아스키코드로 인코딩해줄건데 아스키코드로 못바꾸는 애들은 무시하고, 다시 문자열로 바꿔줘! 라는 뜻이다 ㅎㅎ 깨진문자가 사라진다.
09. 상세 페이지 - 새 단어/기존 단어 구분하기
url에 localhost:5000/detail/hello?status_give=new 면 저장버튼만
url에 localhost:5000/detail/hello?status_give=old는 삭제버튼만 나타나게해주자
단어가 단어장에 없는 단어면 저장버튼이 있었고, 있는 단어면 상세내역을 보여주었다.
@app.route('/detail/<keyword>')
def detail(keyword):
status_receive = request.args.get("status_give", "new")
return render_template("detail.html", word=keyword, result=result, status=status_receive)
{% if status =="new" %}
<button id="btn-save" class="btn btn-outline-sparta btn-lg">
<i class="fa fa-floppy-o" aria-hidden="true"></i></button>
{% else %}
<button id="btn-delete" class="btn btn-sparta btn-lg">
<i class="fa fa-trash-o" aria-hidden="true"></i></button>
{% endif %}요롷게 조건문 넣어줘서 맹글어 준다!
머리가 안돌아가기 시작했다 어떡하냐 아직 많이 남았는데!!!!!
10. 상세 페이지 - 저장 & 삭제 기능
각각의 단어에 대해서 뜻을 하나씩만 보여주고있는데, 그렇기 때문에 db에 단어하나당 뜻하나를 받아서 한줄씩 입력해주도록 해야한다!