도입
yarn add react-calender로 라이브러리를 먼저 설치해준다.
import React, { useState } from 'react';
import Calendar from 'react-calendar';
import 'react-calendar/dist/Calendar.css'; // css import

function MyApp() {
  const [value, onChange] = useState(new Date());

  return (
    <div>
      <Calendar onChange={onChange} value={value} />
    </div>
  );
}
다음과 같이모듈을 import 하고, css를 적용한다.
useState를 이용해 클릭한 날짜를 가져올 수 있다.
console.log('value', value);이렇게 콘솔에 찍어보면,
 다음과 같이 내가 선택한 날짜의 value를 가져오는 것을 확인할 수 있다.
custom 디자인 사용법
커스텀 할 수 있는 디자인 몇 가지만 소개해보겠다.
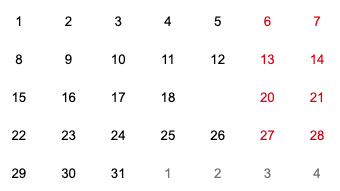
navigation label
.react-calendar__navigation__label > span {
  font-size: ;
  font-weight: ;
  color: ;
}

--- 아래로 수정

.react-calendar__navigation__label > span {
  font-size: 1.5rem;
  font-weight: 600;
  color: red;
}- before

- after

요일 section
.react-calendar__month-view__weekdays {
    abbr {
      color: ;
      font-size: ;
      font-weight: ;
    }
  }

--- 아래로 수정

.react-calendar__month-view__weekdays {
  abbr {
    /*월,화,수... 글자 부분*/
    color: Red;
    font-size: 1.4rem;
    font-weight: 500;
  }
}- before

- after

day 타일 한개 한개 모양 커스텀하기
.react-calendar__tile {
color:;
background: ;
text-align: ;
}
--- 아래로 수정
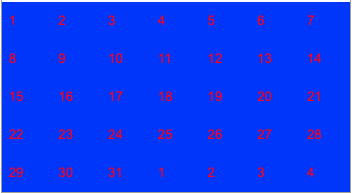
.react-calendar__tile {
color: red;
background: blue;
text-align: start;
}-
before
-
after
day 타일 hover, focus 시 모양 커스텀
.react-calendar__tile:enabled:hover,
.react-calendar__tile:enabled:focus {
  color: ;
  background-color: ;
  border-radius: ;
}

--- 아래로 수정

.react-calendar__tile:enabled:hover,
.react-calendar__tile:enabled:focus {
  color: blue;
  background-color: red;
  border-radius: 50%;
}- before
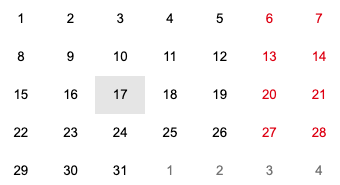
- after
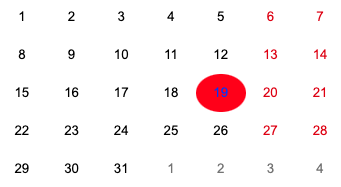
날짜 선택 됐을 때 day 타일 커스텀하기
.react-calendar__tile--active {
color: ;
background-color: ;
border-radius: ;
}
--- 아래로 수정
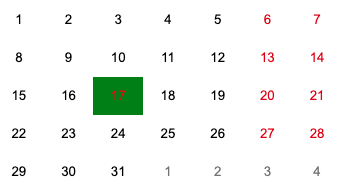
.react-calendar__tile--active {
color: red;
background-color: green;
border-radius: ;
}-
before
-
after
🚨 주의사항
아무리 css 설정을 해줘도 바뀌지 않아서 css 파일, html 구조를 거의 다 뜯어보느랴 시간을 꽤 썼었는데 원하는 부분에 결국 스타일을 줘도 안바뀌던 문제는 순서 때문이었다. 그러니 css 순서를 잘 신경쓰면서 커스텀하자.
달력에 날짜를 선택하다 보면 겹치는 스타일 요소들이 생긴다. (ex. now tile+startDay 와 같은 경우)
이 중 밑에 작성한 부분의 스타일이 채택 되는데 이 부분을 생각하지 않았던 것이다. 오늘도 머리를 싸매고 있다가 문득 깨달아서 위치를 바꿔주었더니 내가 의도한대로 스타일이 설정되었다.

대한민국 최고 개발자가 될거야!