따라하며 배우는 노드, 리액트 시리즈 - 쇼핑몰 사이트 만들기
섹션 0. 강의 소개 및 초기 설정
1. Boiler Plate을 가져오고 Mongo DB 연결하기
GIT에서 boilerplate-mern-stack 다운
terminal download →
terminal : root에서 npm install / client에서 npm install
server.config → dev.js 파일 생성 (내용은 prod와 동일)
mogoDB cluster 생성 후 URI copy → user name / password 만들어서 넣기
섹션1. 업로드 페이지 만들기
1. 업로드 페이지 만들기
-
비어있는 페이지 생성
client/src/components/views/UploadProductPage 폴더와 그 밑에 UploadProductPage.js 생성
(js 파일에는 rfce를 통해 간단히 만들기)
-
업로드 페이지 Route 만들기
client/src/components/App.js
방금 생성한 UploadProductPage import 해오기<Route exact path="/product/upload" component={Auth(UploadProductPage, true)}로그인한 유저만 들어갈 수 있도록 true 설정
-
업로드 페이지 탭 만들기
client/src/components/views/NarBar/Sections/RightMenu.js
if문은 login하지 않은 유저가 보이는 menu이기 때문에 UploadProductPage는 else문에 넣기
    else {
        return (
          <Menu mode={props.mode}>
            <Menu.Item key="upload">
              <a href="/product/upload">Upload</a>
            </Menu.Item>
            <Menu.Item key="logout">
              <a onClick={logoutHandler}>Logout</a>
            </Menu.Item>
          </Menu>
        )
      }
2. onChange Event 처리하기
-
drop zone을 제외한 Form 만들기
import React from 'react' import {Typography, Button, Form, Input} from 'antd' const {Title} = Typography; const {TextArea} = Input; function UPloadProductPage() { return ( <div style={{maxWidth : '700px', margin : '2rem auto'}}> <div style={{textAlign : 'center', marginBotton : '2rem'}}> <Title level ={2}>여행 상품 업로드</Title> </div> <Form> {/*DropZone*/} <br/><br/> <label>이름</label> <Input/> <br/><br/> <label>설명</label> <TextArea/> <br/><br/> <label>가격($)</label> <Input/> <br/><br/> <select> <option></option> </select> <br/><br/> <Button>확인</Button> </Form> </div> ) } export default UPloadProductPage -
모든 input을 위한 onChange Input 만들기
import React, {useState} from 'react'
...
const [Title, setTitle] = useState("")
...
const titleChangeHandler = (event) => {
    setTitle(event.currentTarget.value)
  }
...
<Input onChange = {titleChangeHandler} value = {Title}/>
3. Select Option 처리하기
const [Continent, setContinent] = useState(1)
...
const continentChangeHandler = (event) => {
    setContinent(event.currentTarget.value)
  }
...
                <select onChange = {continentChangeHandler} value = {Continent}>

            {Continents.map(item => (
              <option key={item.Key} value = {item.Key}>{item.value} </option>
            ))}
        </select>
4. Drop-Zone 적용하기
-
file image upload 만들기
다른곳에서도 사용 가능하도록 만들기
component/utils/fileUpload.js -
drop-zone 라이브러리 다운로드
cd client
npm install react-dropzone --save -
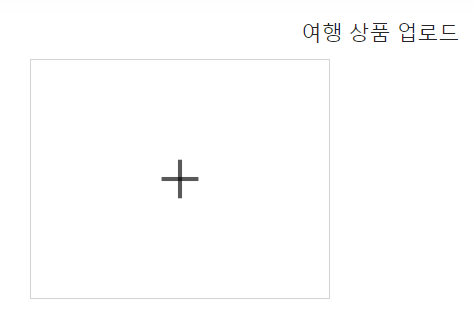
FileUpload.js → 해당 페이지 참고 react-dropzone
import React from 'react'
import Dropzone from 'react-dropzone'
import {Icon} from 'antd'

function FileUpload() {
  return (
    <div style={{display : 'flex', justifyContent : 'space-between'}}>
        <Dropzone onDrop={acceptedFiles => console.log(acceptedFiles)}>
            {({getRootProps, getInputProps}) => (
                <section>
                    <div
                        style={{
                            width : 300, height : 240, border : '1px solid lightgray',
                            display : 'flex', alignItems : 'center', justifyContent : 'center'
                        }}
                        {...getRootProps()}>
                        <input {...getInputProps()} />
                        <Icon type='plus' style={{fontSize : '3rem'}}/>
                    </div>
                </section>
            )}
        </Dropzone>
    </div>
  )
}

export default FileUpload
아래 사진과 같이 화면 생성
5. 이미지 파일을 서버로 보내기
-
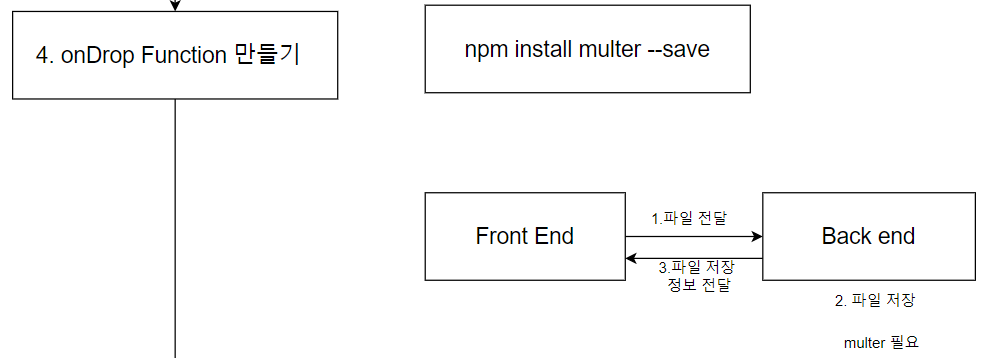
onDrop Function 만들기
-
FileUpload.js (client/src/components/utils/FileUpload.js)
dropHandler 생성
const dropHandler = (file) => { let formData = new FormData(); const config = { header : {'content-type' : 'multipart/form-data'} } formData.append('file', files[0]) axios.post('api/product/image', formData, config) .then(response => { if(response.data.success) { }else { alert('파일을 저장하는데 실패했습니다.') } }) -
server/index.js
app.use('/api/product', require('./routes/product')); -
server/routes/product
const express = require('express');
const router = express.Router();

  //=================================
  //             product
  //=================================

  //index.js에서 이미 api/product를 타고 왔기 때문
app.post('/image', (req,res) => {

  //가져온 이미지를 저장을 해주면 됨

})
  module.exports = router;
4.1 server dependence이므로 root에서 download
npm install multer --save
6. multer 이용하여 이미지 저장
-
server/routes/product 해당 사이트에서 참고
root에 uploads 폴더 생성
-
server/routes/product
const express = require('express'); const router = express.Router(); const multer = require('multer'); //================================= // product //================================= const storage = multer.diskStorage({ destination: function (req, file, cb) { cb(null, 'uploads/') }, filename: function (req, file, cb) { //const uniqueSuffix = Date.now() + '-' + Math.round(Math.random() * 1E9) //cb(null, Date.now() + '_' +file.fieldname) const uniqueSuffix = Date.now() + '-' + Math.round(Math.random() * 1E9) cb(null, `${Date.now()}_${file.originalname}`) } }) const upload = multer({ storage: storage }).single("file") //index.js에서 이미 api/product를 타고 왔기 때문 router.post('/image', (req,res) => { //가져온 이미지를 저장을 해주면 됨 upload(req, res, err => { if(err) { return req.json({success:false, err}) } return res.json({success : true, filePath : res.req.file.path, fileName : res.req.file.filename}) }) }) module.exports = router; -
client/src/components/utils/FileUpload.js
코드 추가return ( <div style={{display : 'flex', justifyContent : 'space-between'}}> <Dropzone onDrop={dropHandler}> {({getRootProps, getInputProps}) => ( <section> <div style={{ width : 300, height : 240, border : '1px solid lightgray', display : 'flex', alignItems : 'center', justifyContent : 'center' }} {...getRootProps()}> <input {...getInputProps()} /> <Icon type='plus' style={{fontSize : '3rem'}}/> </div> </section> )} </Dropzone> <div style={{display : 'flex', width : '350px', height : '240px', overflowX : 'scroll'}}> {Images.map((image, index) => ( <div key = {index}> <img style={{ minWidth : '300px', width : '300px', height : '240px'}} src = {`http://localhost:5000/${image}`} /> </div> ))} </div> </div> )
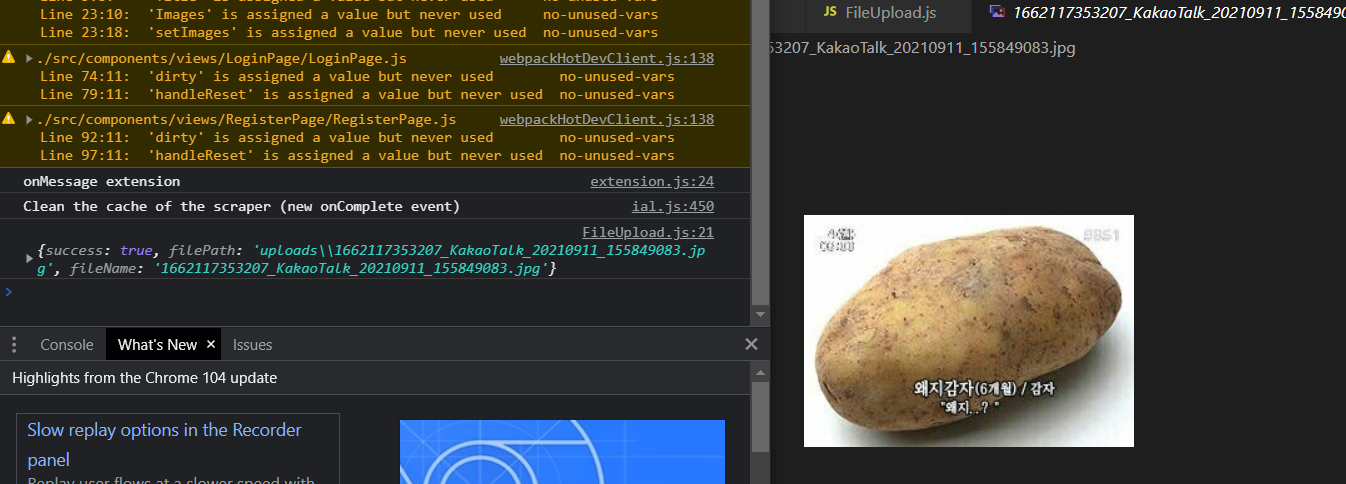
ERROR
POST http://localhost:3000/product/api/product/image 404 (Not Found)
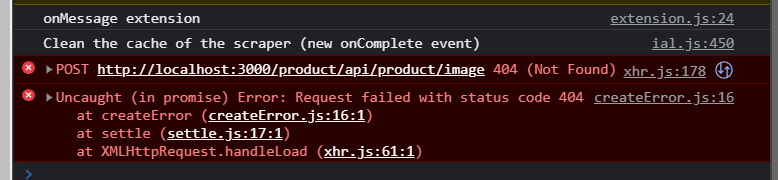
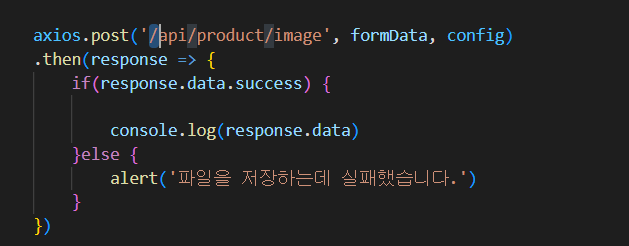
→ FileUpload.js안에 axios.post 경로가 잘못되어 있어서 수정했다.
ERROR 없이 작동한다면 아래 사진과 같이 나온다