https://eugenkiss.github.io/7guis/tasks/#crud
https://v3-docs.vuejs-korea.org/examples/#crud
Examples | CRUD
틀 구성하기
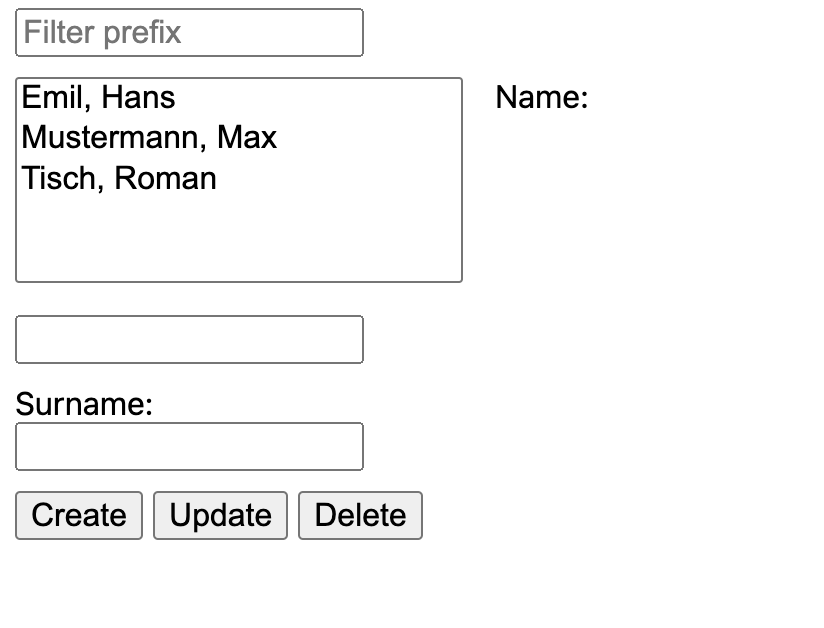
공식문서의 Examples 의 CRUD 파트를 아래의 preview 를 보고 template 과 style 을 먼저 구성한다.
<template>
  <div>
    <input v-model="prefix" placeholder="Filter prefix" />
  </div>
  <select size="5" v-model="selected">
    <option v-for="name in filteredNames" :key="name">{{ name }}</option>
  </select>

  <div>
    <label>Name : <input v-model="first" /> </label>

    <label>Surname : <input v-model="last" /> </label>
  </div>
  <div>
    <button @click="create">Create</button>
    <button @click="update">Update</button>
    <button @click="del">Delete</button>
  </div>
</template>

<style>
input {
  display: block;
  margin-bottom: 1rem;
}
select {
  margin: 0 1rem 1rem 0;
  width: 10rem;
}
button {
  margin-right: 1rem;
}
</style>
작동시키기
input 요소
import { ref, reactive, computed, watch } from "vue";

const names = reactive(["Emil, Hans", "Mustermann, Max", "Tisch, Roman"]);
const prefix = ref("");
const selected = ref("");
const first = ref("");
const last = ref("");
각 사용자의 입력을 받아야하는 input 태그에 각각 prefix, selected, first, last 를 구성해주었다.
filter 기능

제일 상단의 input 태그에서 문자열을 입력하면 select 요소가 filter 되어 나와야 하는 로직이다.
const filteredNames = computed(() =>
  names.filter((n) => n.toLowerCase().startsWith(prefix.value.toLowerCase()))
);<select size="5" v-model="selected">
<option v-for="name in filteredNames" :key="name">{{ name }}</option>
</select>computed 함수를 이용해 해당 names 배열을 filter 메서드 안에서 startsWith 메서드를 이용해 filter input 의 입력받은 v-model 인 prefix 와 비교하여 걸러낸다.
걸러낸 filteredNames 배열을 option 의 v-for 바인딩 요소로 지정한다.
Read
마우스를 이용한 선택된 변수를 selected 로 지정되었기에 name 과 surname 을 읽어와 input 요소에 나타나게 해야한다.
watch(selected, (name) => {
  [last.value, first.value] = name.split(", ");
});
watch 감시자 함수를 이용해 selected 가 변경되면 두번째 콜백 인자를 호출한다. 이 콜백 함수에서는 선택된 name 을 ", " 를 기준으로 분리하여 배열 디스트럭처링을 사용하여 last.value 와 first.value에 값을 할당한다.
Create
<button @click="create">Create</button>function create() {
//first, last 가 채워져있다면
if (first.value.trim() && last.value.trim()) {
const fullName = `${last.value} , ${first.value}`;
if (!names.includes(fullName)) {
names.push(fullName);
first.value = "";
last.value = "";
//first.value = last.value = ''
}
}
}Create 버튼을 누르면 v-on 바인딩을 통해 create 함수를 실행한다.
create 함수는 입력받아야 하는 first.value 와 last.value 요소가 입력되었는지 확인해야한다.
이때 trim 이란? value 값에서 앞 뒤 공백을 제거한 값의 존재여부를 판단하여 true 나 false 를 반환한다.
요소들이 다 잘 입력이 되어 있다면 조합하여 names 배열의 중복 여부를 체크하고 값을 추가해주고 기존의 input 요소들을 초기화 시켜준다. 이때 두 줄의 코딩을 한 줄로 최소화시키는 것은 JavaScript 에서 여러 변수에 동일한 값을 할당할 때 사용되는 간편한 표현법이다.
Update
<button @click="update">Update</button>function update() {
//selected 값이 선택되었고
if (selected.value) {
const i = names.indexOf(selected.value);
names[i] = `${last.value} , ${first.value}`;
}
}update 또한 create 와 동작하는 로직은 비슷하고 더 간단하다.
선택된 값에만 변경이 가능하기 때문에 선택된 값이 있는지 체크한 후, 그 문자열 값이 names 배열의 어느 인덱스를 나타내는지 indexOf 메서드를 이용해 알아낸다. 알아낸 인덱스에 값을 재할당 해줌으로써 update 기능을 수행할 수 있다.
Delete
<button @click="del">Delete</button>function del() {
//selectd 값이 선택되었다면
if (selected.value) {
const fullName = `${last.value} , ${first.value}`;
const i = names.indexOf(fullName);
names.splice(i, 1);
first.value = last.value = "";
}
}update 와 마찬가지로 선택된 값이 존재한다면 그 값의 인덱스를 알아내고 해당 인덱스의 값을 삭제시키면 된다. 이때 사용하는 것이 splice 메서드이다. splice 의 첫번째 인자값인 인덱스에서 두번째 인자값인 1의 의미는 names 배열의 해당 인덱스에서 1개의 요소만 삭제시킨다는 의미이다. 그 후, 다시 값들을 초기화 시켜준다.
마치며
정말 간단한 예제를 이용해서 crud 기능을 알아보았다. 예전에 사용했던 javascript 이지만 vue3 와 합쳐지면서 색다르게 코드를 작성해야하는 부분이 있어서 재밌게 느껴진다.
다음은 서버와 통신하는 예제를 한 번 살펴보아야겠다.