오늘은 swagger lib를 설치해서 api-docs를 만들었다.
$ npm install swagger-jsdoc swagger-ui-express --save-dev먼저 lib를 개발 옵션으로 설치해준다.
swagger로 api 문서를 정의하는 방법이 크게 두 가지 있는 것 같다.
- 기존에 만들어 둔 route 관련 함수에 jsdoc 형식으로 주석을 만들어서 사용.
- 별도의 .yaml 파일에 api 문서를 작성해서 사용.
오늘은 2번 방법으로 별도의 .yaml 파일에다가 api 문서를 작성했다.
// src/swagger/swagger.js

require("dotenv").config();

const swaggerUi = require("swagger-ui-express");
const swaggerJsdoc = require("swagger-jsdoc");

const options = {
  swaggerDefinition: {
    components: {},
    openapi: "3.0.0",
    info: {
      version: "1.0.0",
      title: "APIKeyPER",
      description: "API KEY 저장 관리 서비스",
    },
    servers: [
      {
        url: process.env.SERVER_DOMAIN, // 요청 URL
      },
    ],
  },
    // 1번 방법을 사용할 경우에는 api jsdoc이 포함된 route 파일들이 포함
  apis: ["./src/routes/user", "./src/routes/post"],

  // 2번 방법을 사용할 경우에는 api 문서를 작성한 .yaml 파일들이 포함
  apis: ["./src/swagger/swagger.yaml", "./src/swagger/components.yaml"],
};
const specs = swaggerJsdoc(options);

module.exports = { swaggerUi, specs };
위와 같이 옵션을 설정해준다.
공식 문서를 확인하니 swagger 2.0에서 swagger3.0으로 올라오며 이전에 있던 basePath 같은 prop들이 servers라는 prop으로 기능적으로 대체된 것 같다.
# src/swagger/swagger.yaml

paths:
  /api/auth/sign-up: # route
    post: # method
      tags:
        - Auth # swagger docs category
      summary: Register a new user
      requestBody: # optional, req.body가 필요한 경우에 사용
        required: true
        content:
          application/json:
            schema: # components로 모듈화 가능
              type: object
              properties:
                username:
                  type: string
                  example: apikeyper
                email:
                  type: string
                  example: apikeyper@example.com
                password:
                  type: string
                  example: password123
      responses:
        "201":
          description: User created successfully
          content:
            application/json:
              schema:
                type: object
                properties:
                  success:
                    type: boolean
                    example: true
                  message:
                    type: string
                    example: User created successfully
        "400":
          description: Bad request
위와 같이 API 문서를 작성할 수 있다.
paths: 밑에 route 경로: 를 작성하고 그 밑에 http method:를 작성한다.
http method:를 적은 뒤에는 tags, summary, reauestBody, responses와 같은 값들을 필요에 따라 적어주면 된다.
docs 양이 방대해서 더 필요한 정보는 swagger docs 참고하기!
그리고 POST method처럼 request의 body가 필요한 경우에는 requestBody를 꼭 적어서 body의 내용을 명시해줘야 한다.
# 기본 구조

paths:
  /api/post:
    get:
      tags: ...
      summary: ...
      requestBody: ...
      responses: ...
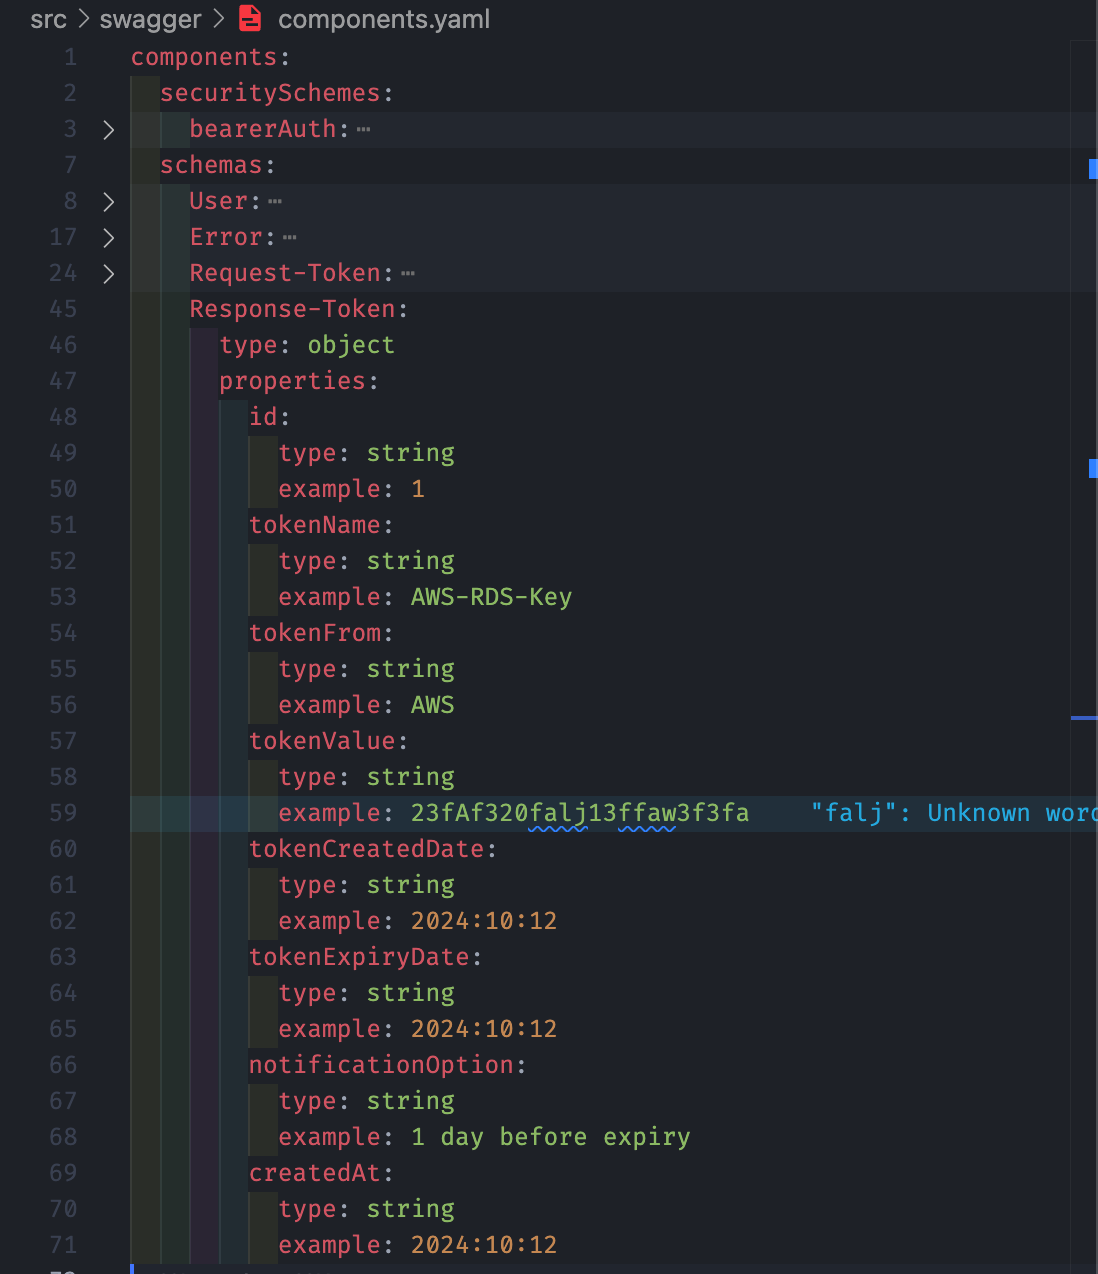
또한 위와 같이 미리 자주 사용되는 것들을 components로 작성해두고
/api/token:
    post:
      tags:
        - Token
      summary: Create a new token data
      requestBody:
        required: true
        content:
          application/json:
            schema:
              $ref: ".#/components/schemas/Request-Token"
위와 같이 $ref: 키워드로 불러와서 사용할 수도 있다.


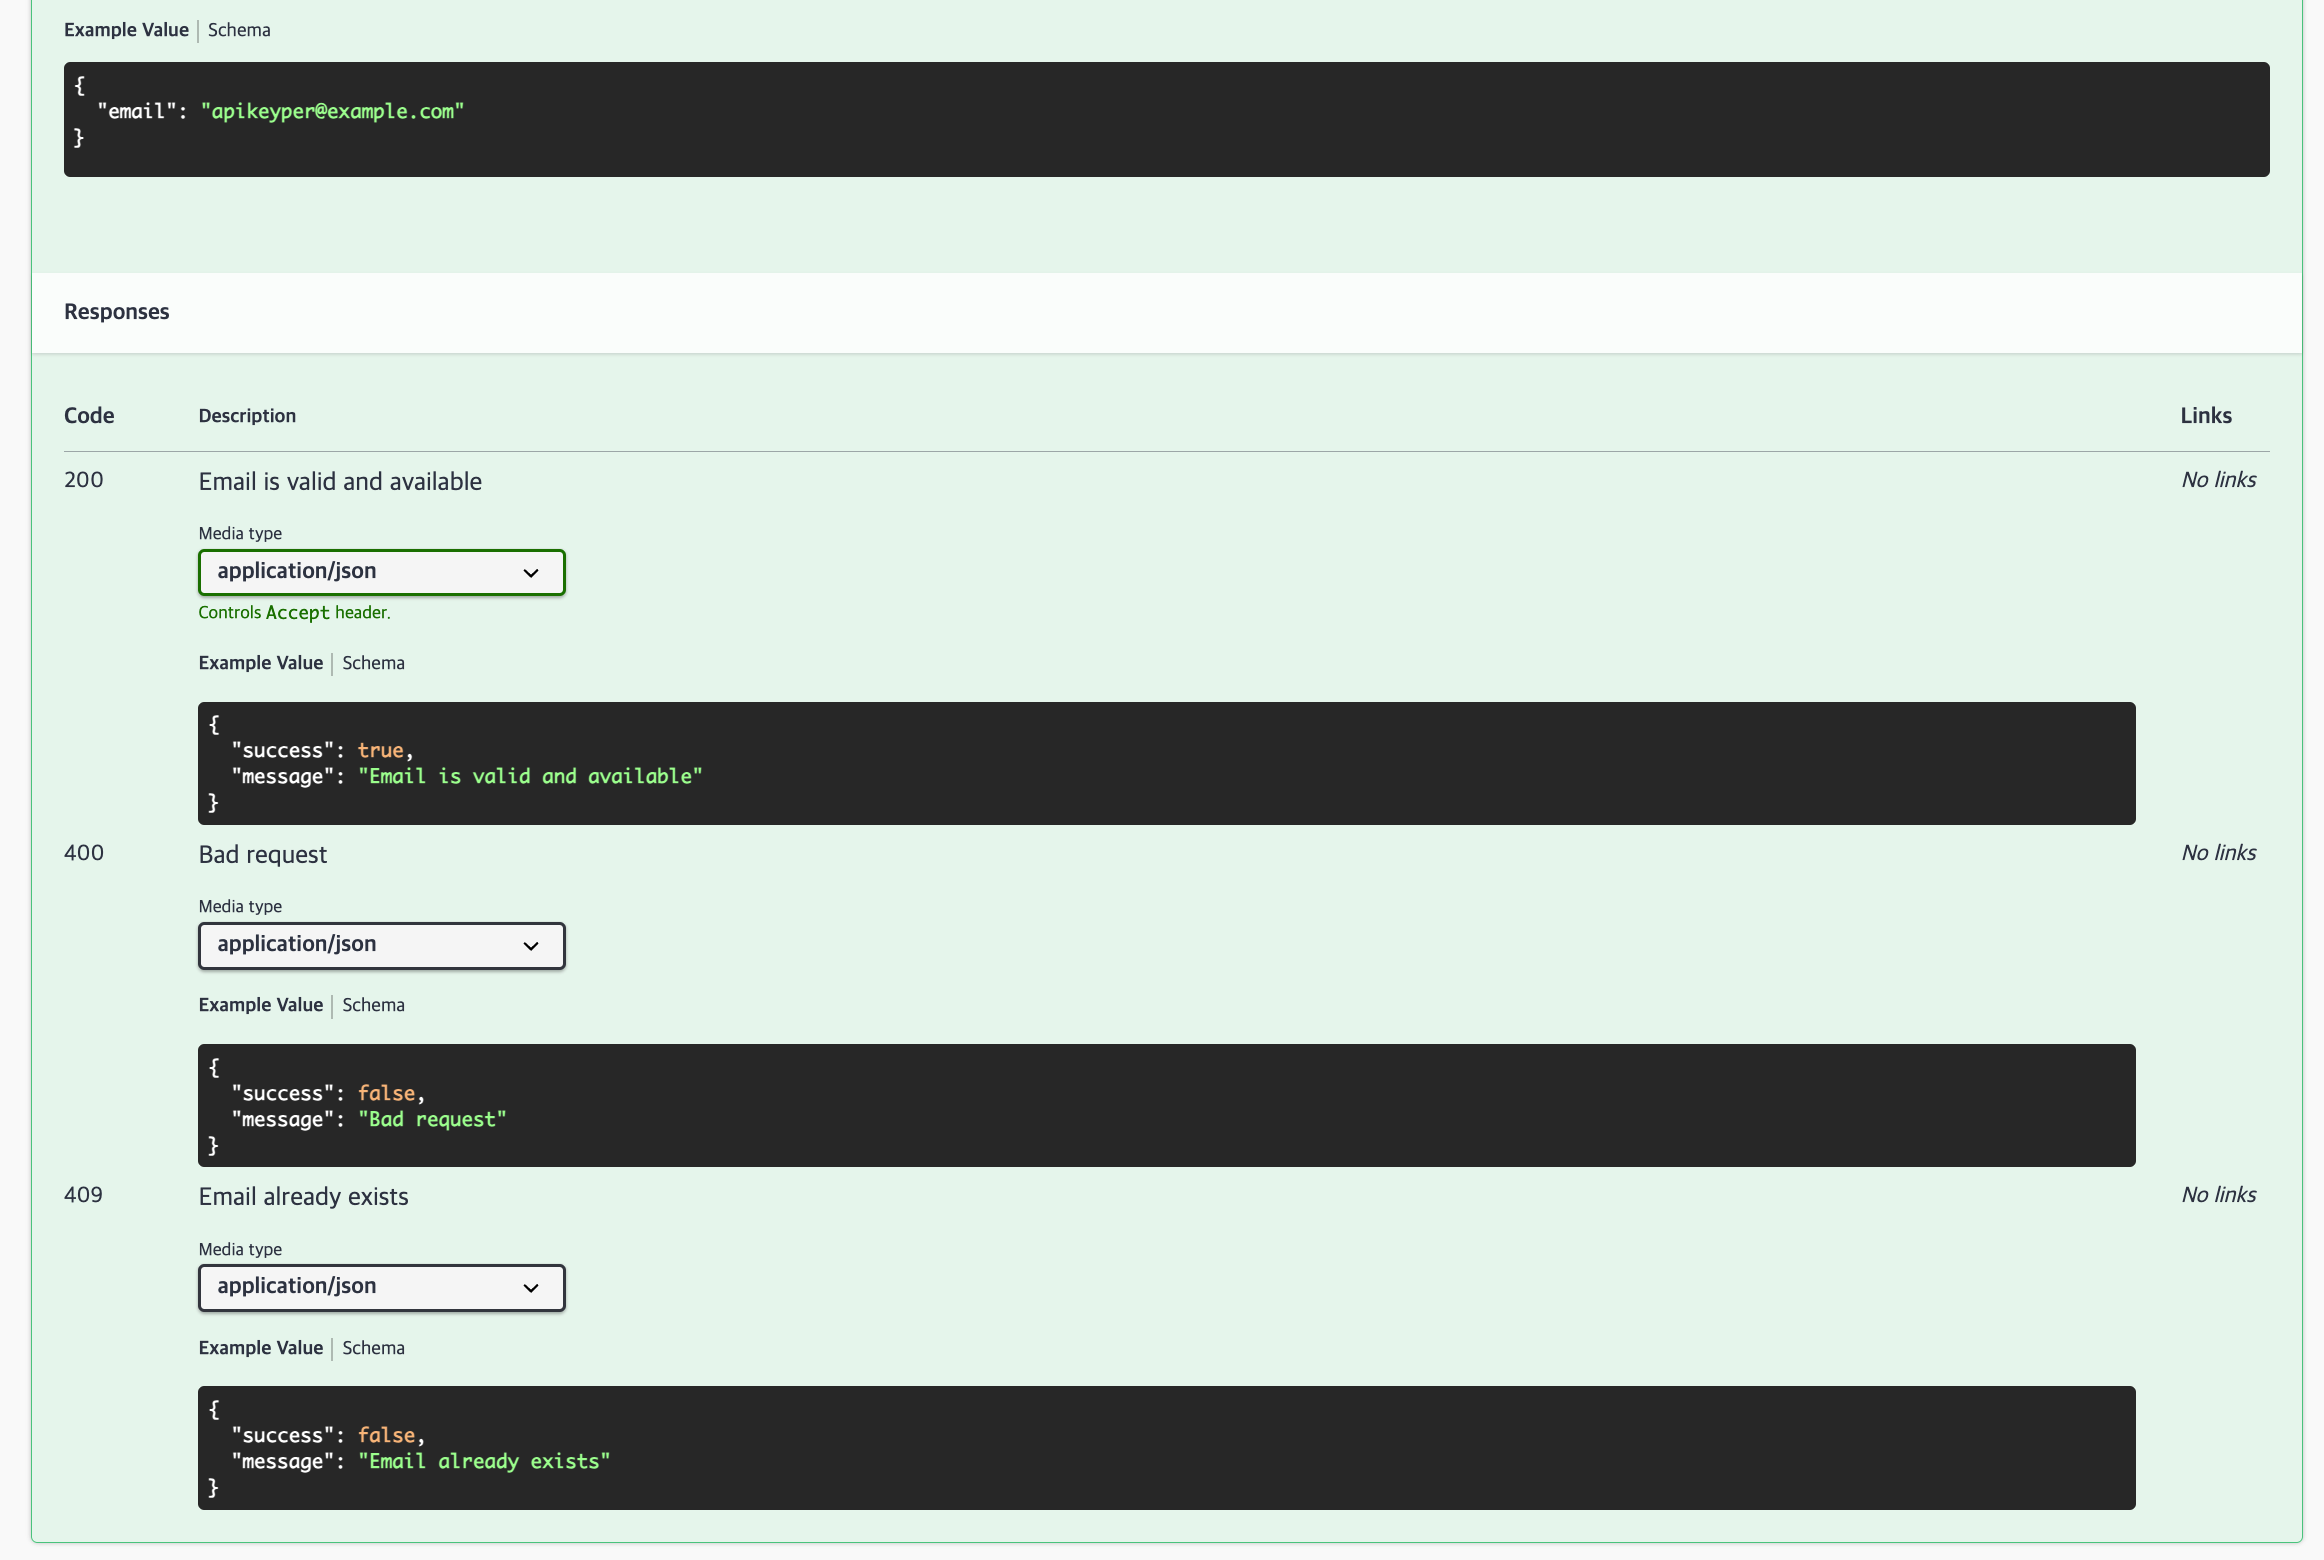
최종적으로는 이러한 형태로 작성된다.
오늘은 swagger UI를 이용한 완벽한 API 테스트까지는 구현하지 않고, req와 res를 정확히 기록하는 용도 정도까지 구현했다. Authrization등 까지 신경쓰며 구현하기에는 시간이 부족했다. 다만 Postman으로 이미 모두 테스트를 진행했기에 일단 백엔드 작업은 여기서 마무리할 것 같다.