1. 서비스 이해 및 인스턴스 생성
1) 서비스 이해
클라우드 컴퓨팅
- idc센터 서버를 모아두는 곳
- 장점
- 가상의 서버를 투입하게 되어 편리성 up
- 유연한 IT 인프라 관리
- 손쉬운 글로벌 서비스
- 예상치 못한 트래픽 폭주 대응
- 빅데이터 및 인공지능(AI) 서비스 확장
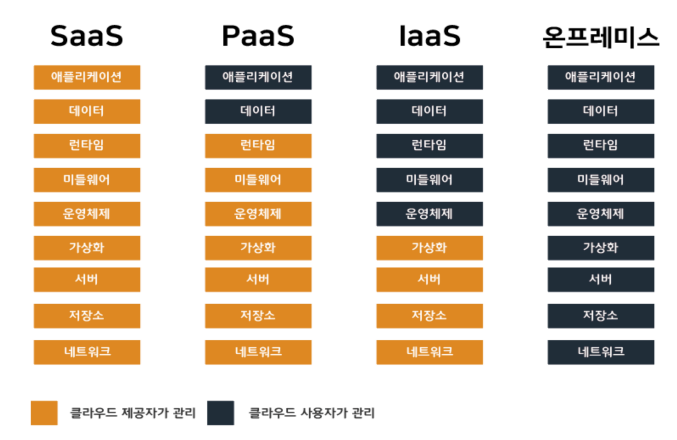
- 서비스 유형: SaaS PaaS IaaS 온프레미스
2) EC2 인스턴스 생성
- EC2 서비스 선택 - console.aws.amazon.com/ec2
- ‘Seoul’ Region 선택
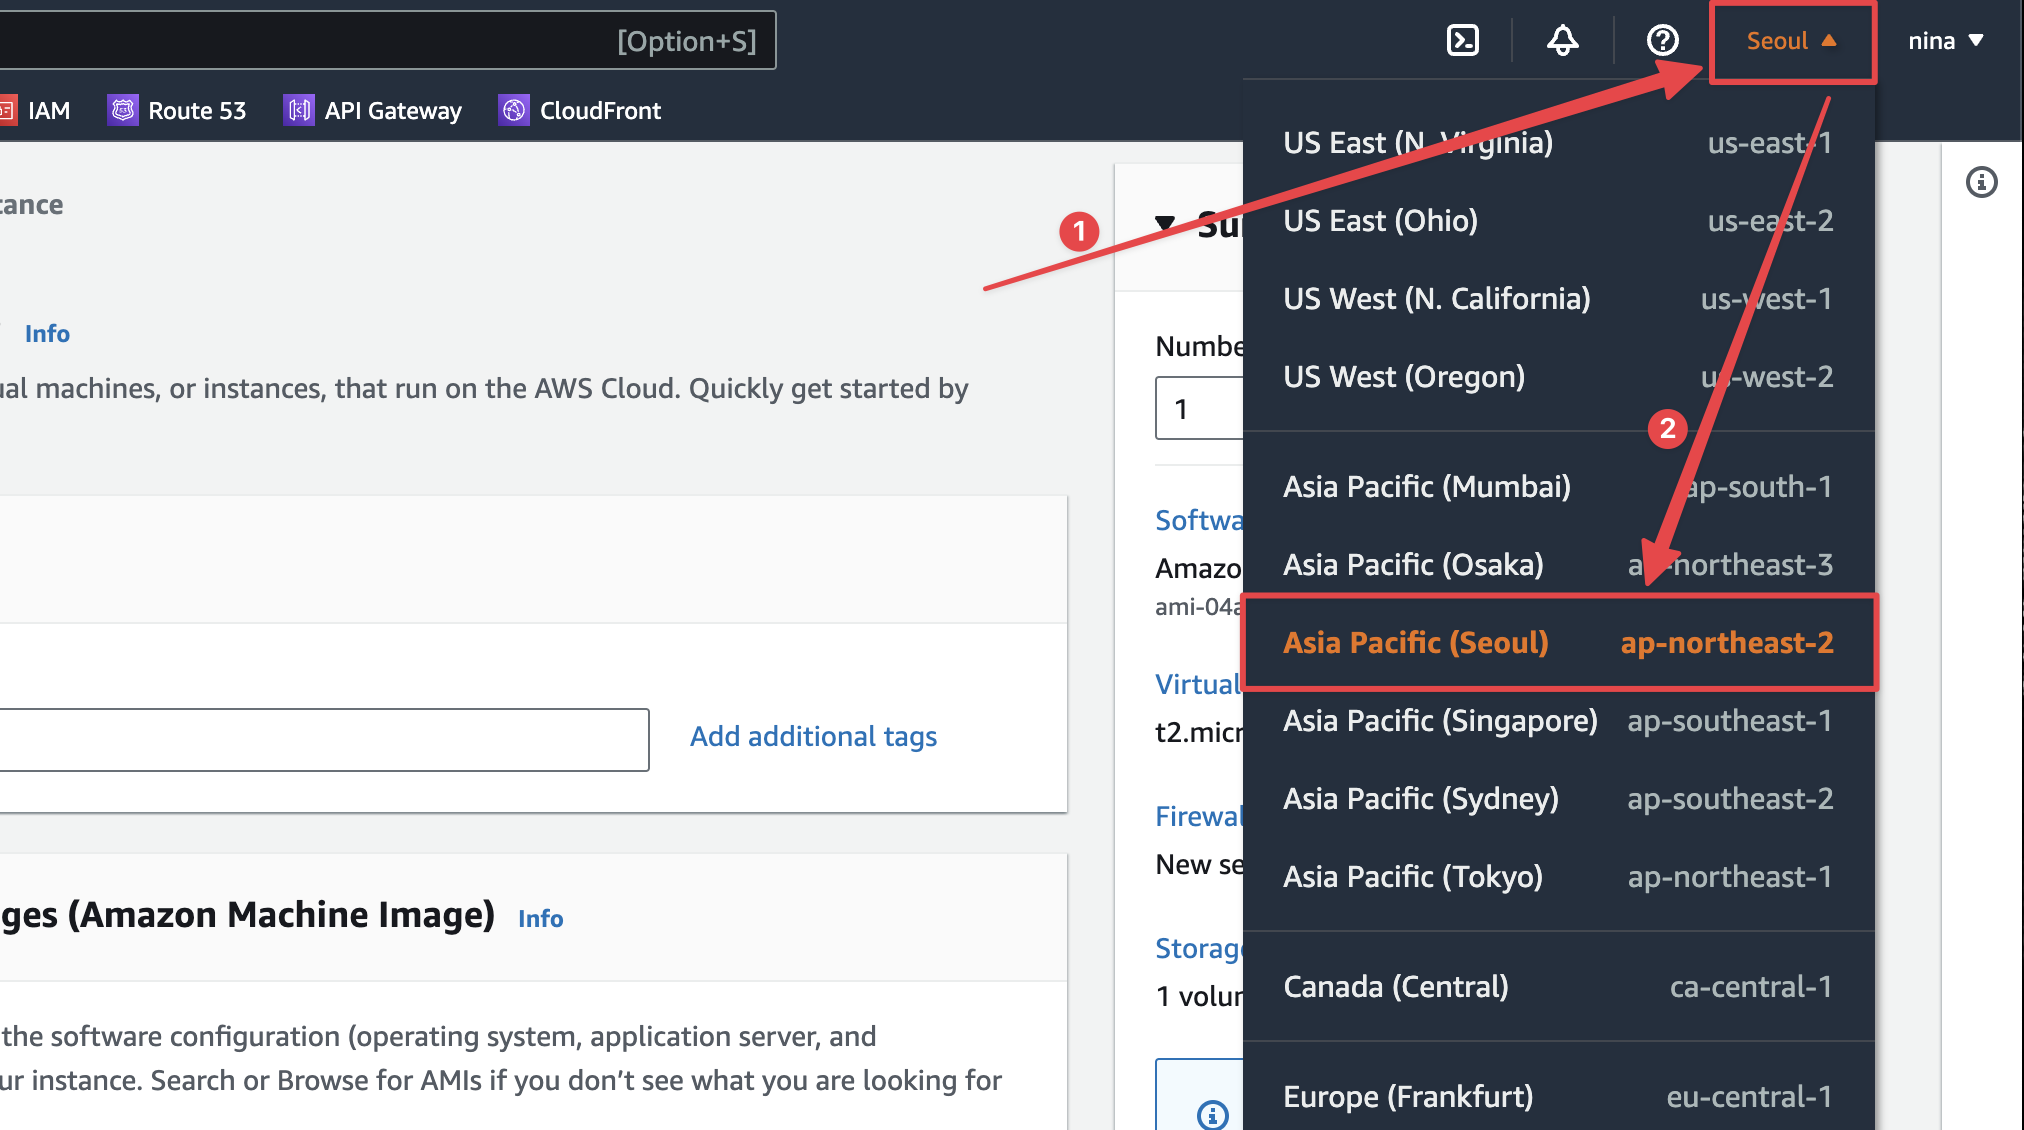
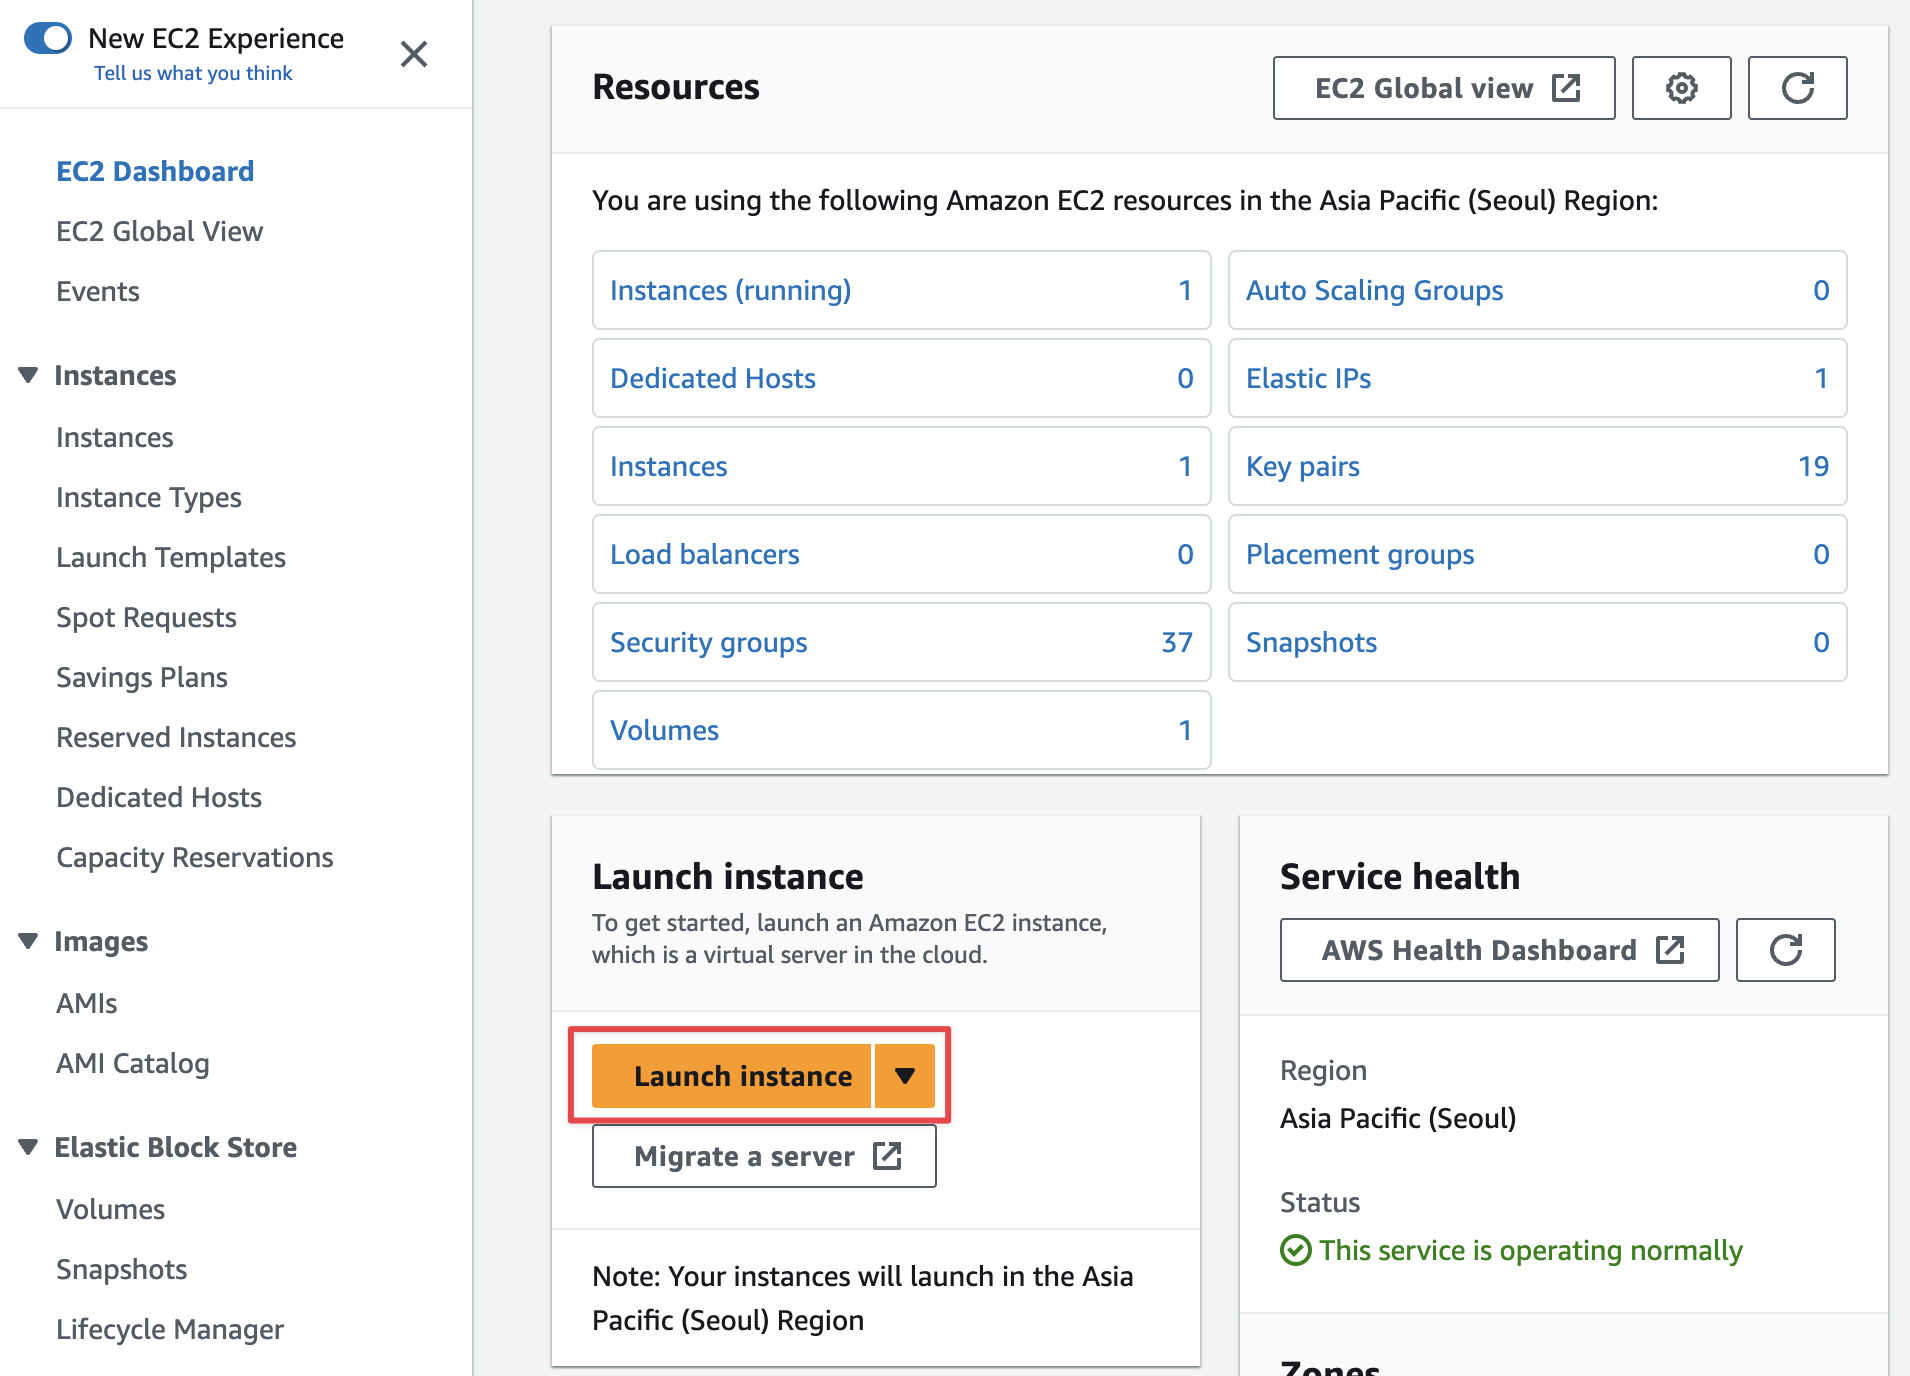
- ‘Launch instance’ 선택
- Name and tags : my-first-java-server
- Application and OS Images : Ubuntu 선택 → Ubuntu Server 22.04 LTS 선택
- Instance type : t2.micro
- Key pair (login) : ‘Create new key pair’ 선택 후 파일 이름 입력해 파일 다운 로드
- ‘Launch instance’ 버튼 클릭
2. 서비스 접속
1) 프로그램 설치
a. SSH Client (window)
b. SSH Client (mac)
2) SSH 접속
- Public IPv4 address 확인
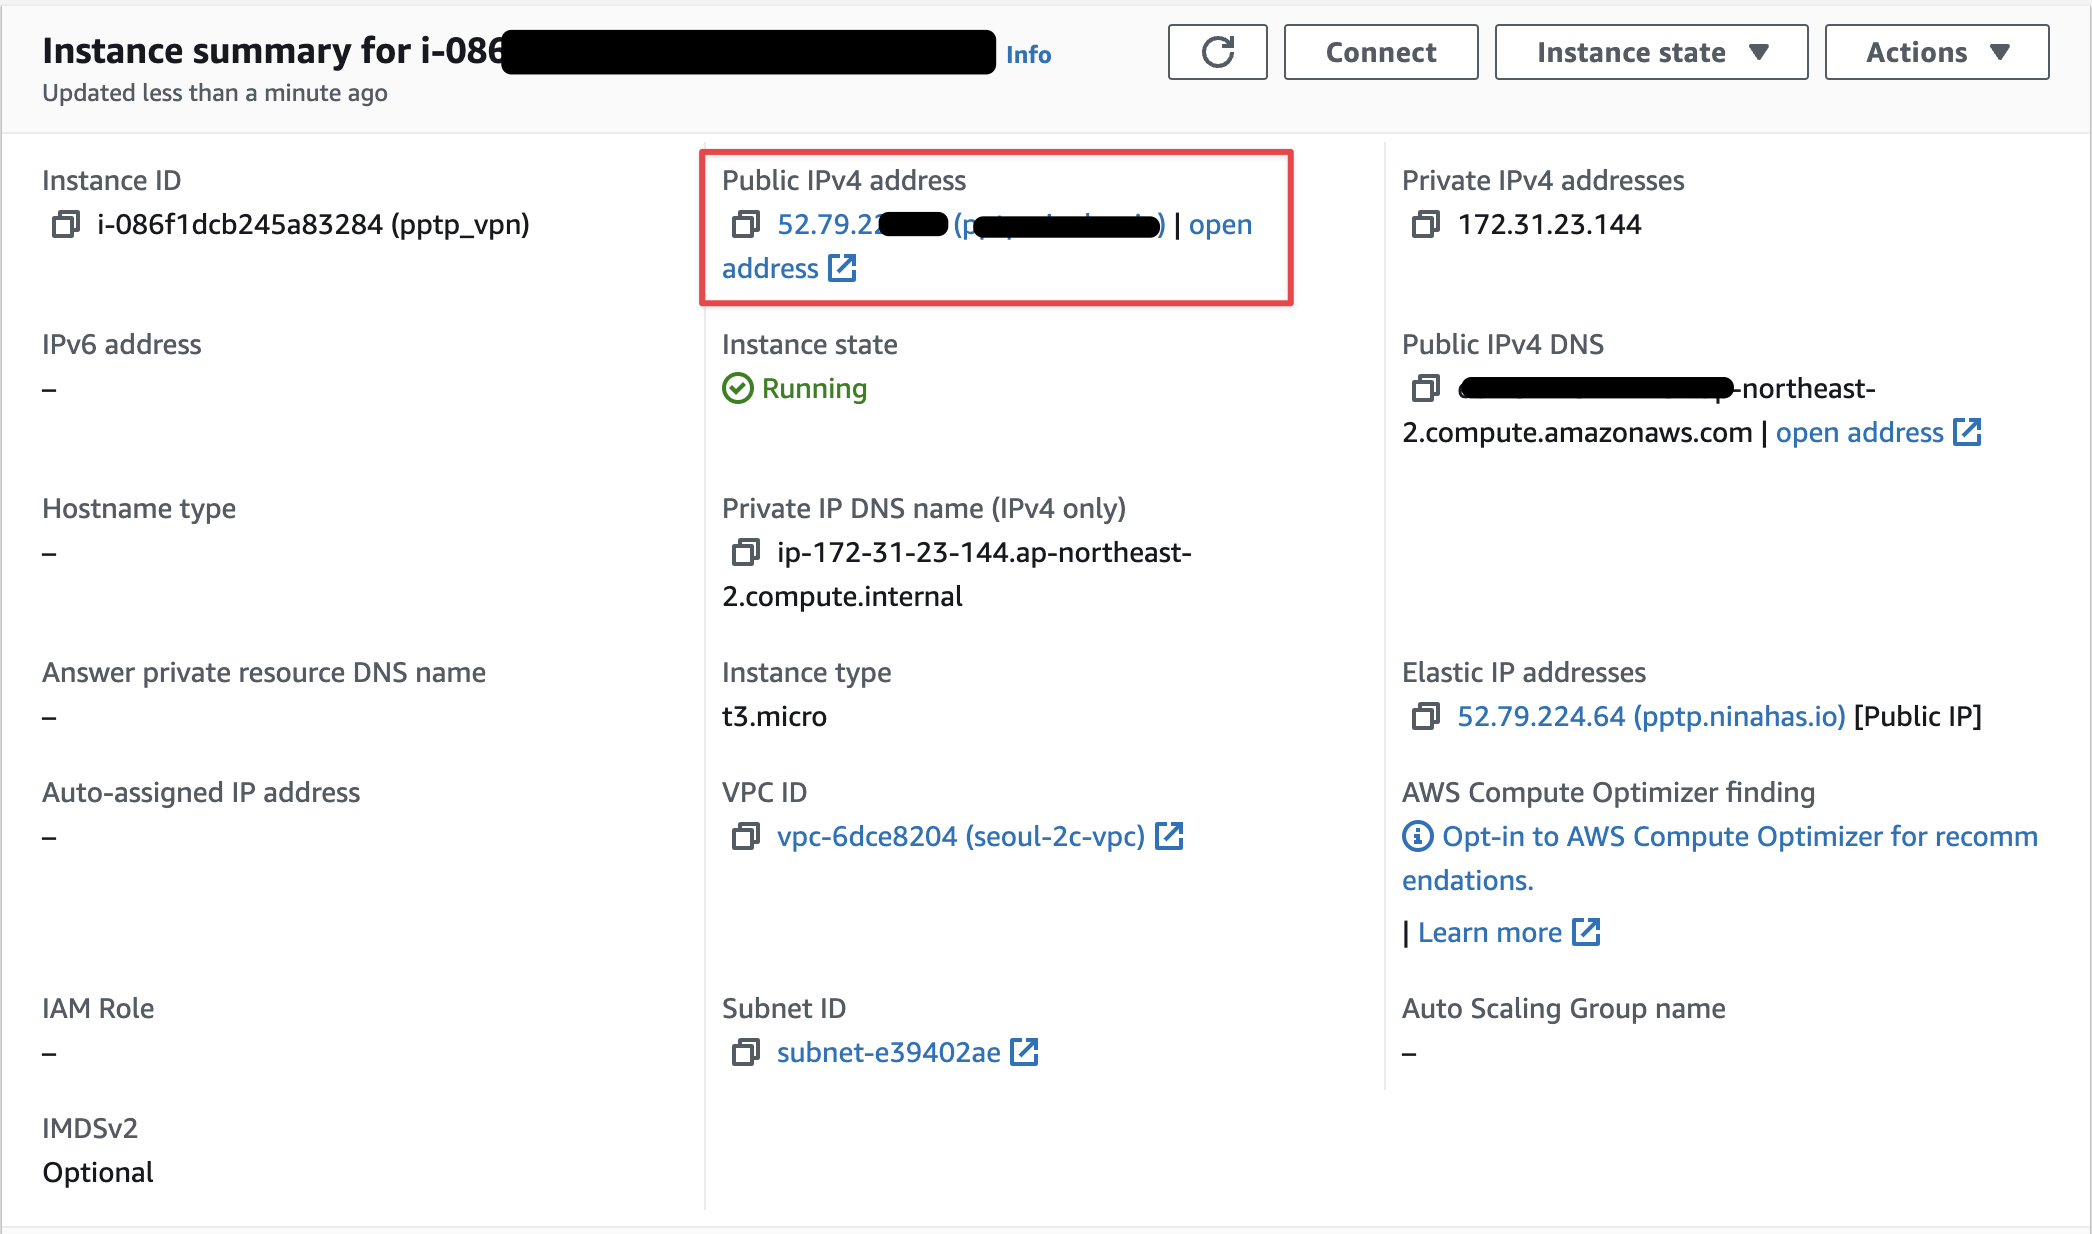
- ssh client 에서 다음의 정보로 접속
ssh -i <다운로드 받은 key file> ubuntu@<public ip>3) 리눅스 명령어
- ls - 현재 위치의 파일 목록 조회
- cd - 디렉터리 이동
- touch - 0바이트 파일 생성, 파일의 날짜와 시간을 수정
- mkdir - 디렉터리 생성
- cp - 파일 복사
- mv - 파일 이동
- rm - 파일 삭제
- cat - 파일의 내용을 화면에 출력, 리다이렉션 기호('>')를 사용하여 새로운 파일 생성
- curl - 웹으로 요청을 보내고 응답을 받아 화면에 출력
3. 서비스 배포
1) 프로그램 설치
a. SFTP Client (window & mac)
b. AWS 인스턴스에 java / tomcat 설치
sudo apt update

# java & tomcat 설치
sudo apt install tomcat9 tomcat9-admin
# curl  웹 요청을 보내는 명령어
curl http://localhost:8080
2) 빌드된 서비스 upload
- gradle 또는 maven 으로 빌드된 java 서비스를 ec2 서버의
/var/lib/tomcat9/webapps 경로로 업로드
예) /var/lib/tomcat9/webapps/ROOT.war
a. 새로운 서비스 빌드

- 압축 해제 후 index.html 파일 추가
- src/main/resources/static/index.html
<!DOCTYPE html>
<html lang="en">
<head>
    <meta charset="UTF-8">
    <title>Title</title>
</head>
<body>
Hello Spring boot on AWS
</body>
</html>- 프로젝트 빌드
# window
gradlew.bat build

# mac
./gradlew build
cd build/libs
java -jar demo-0.0.1-SNAPSHOT.jarb. demo-0.0.1-SNAPSHOT.jar 파일을 서버로 업로드
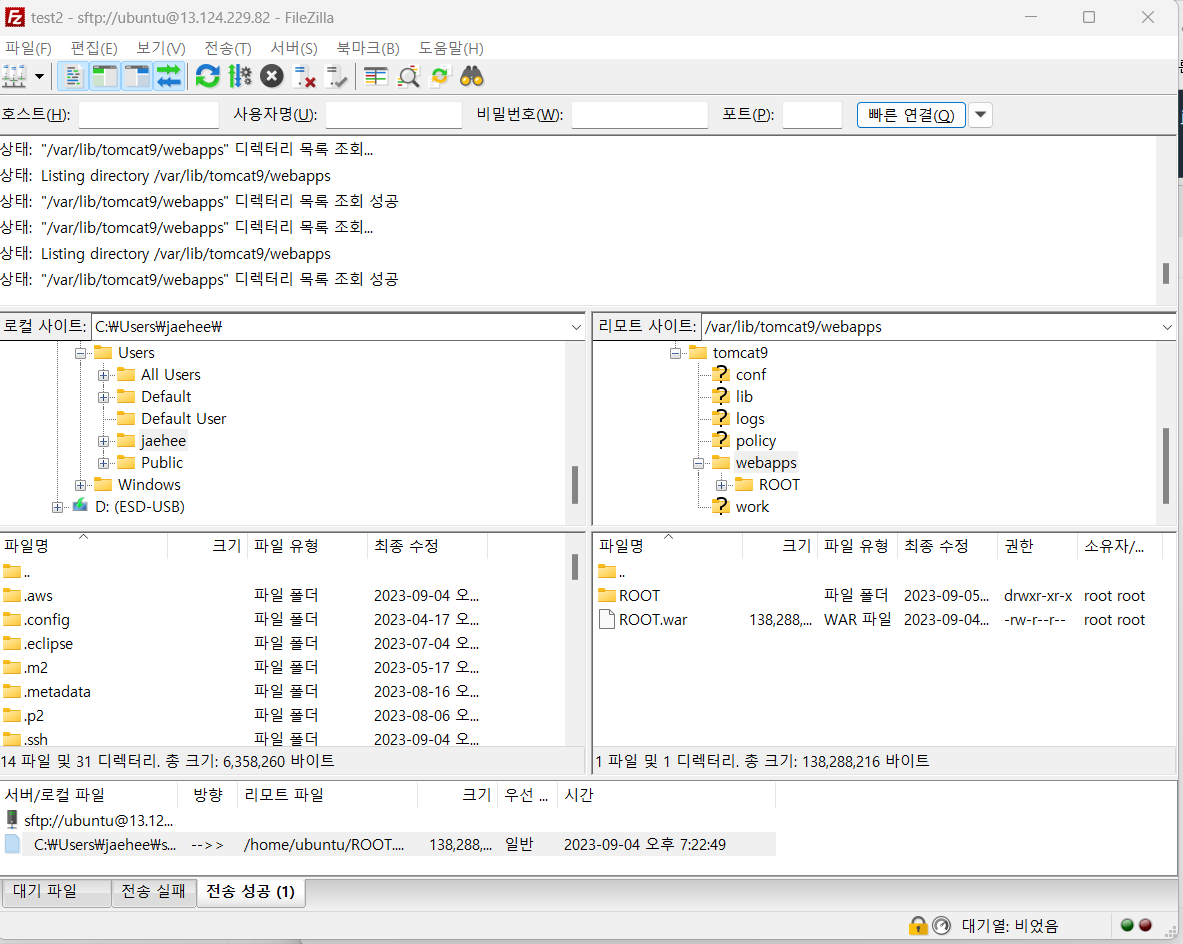
- Protocol : SFTP
- Host : AWS 서버의 Public IP
- Logon Type : Key file
- User : ubuntu
- Key file : 다운로드 받은 pem 파일
파일 업로드 후 ssh 상에서 다음의 명령 실행
java -jar demo-0.0.1-SNAPSHOT.jar3) curl 로 로컬에 배포된 서비스 동작 확인
curl http://localhost:80804) AWS 방화벽 설정 변경
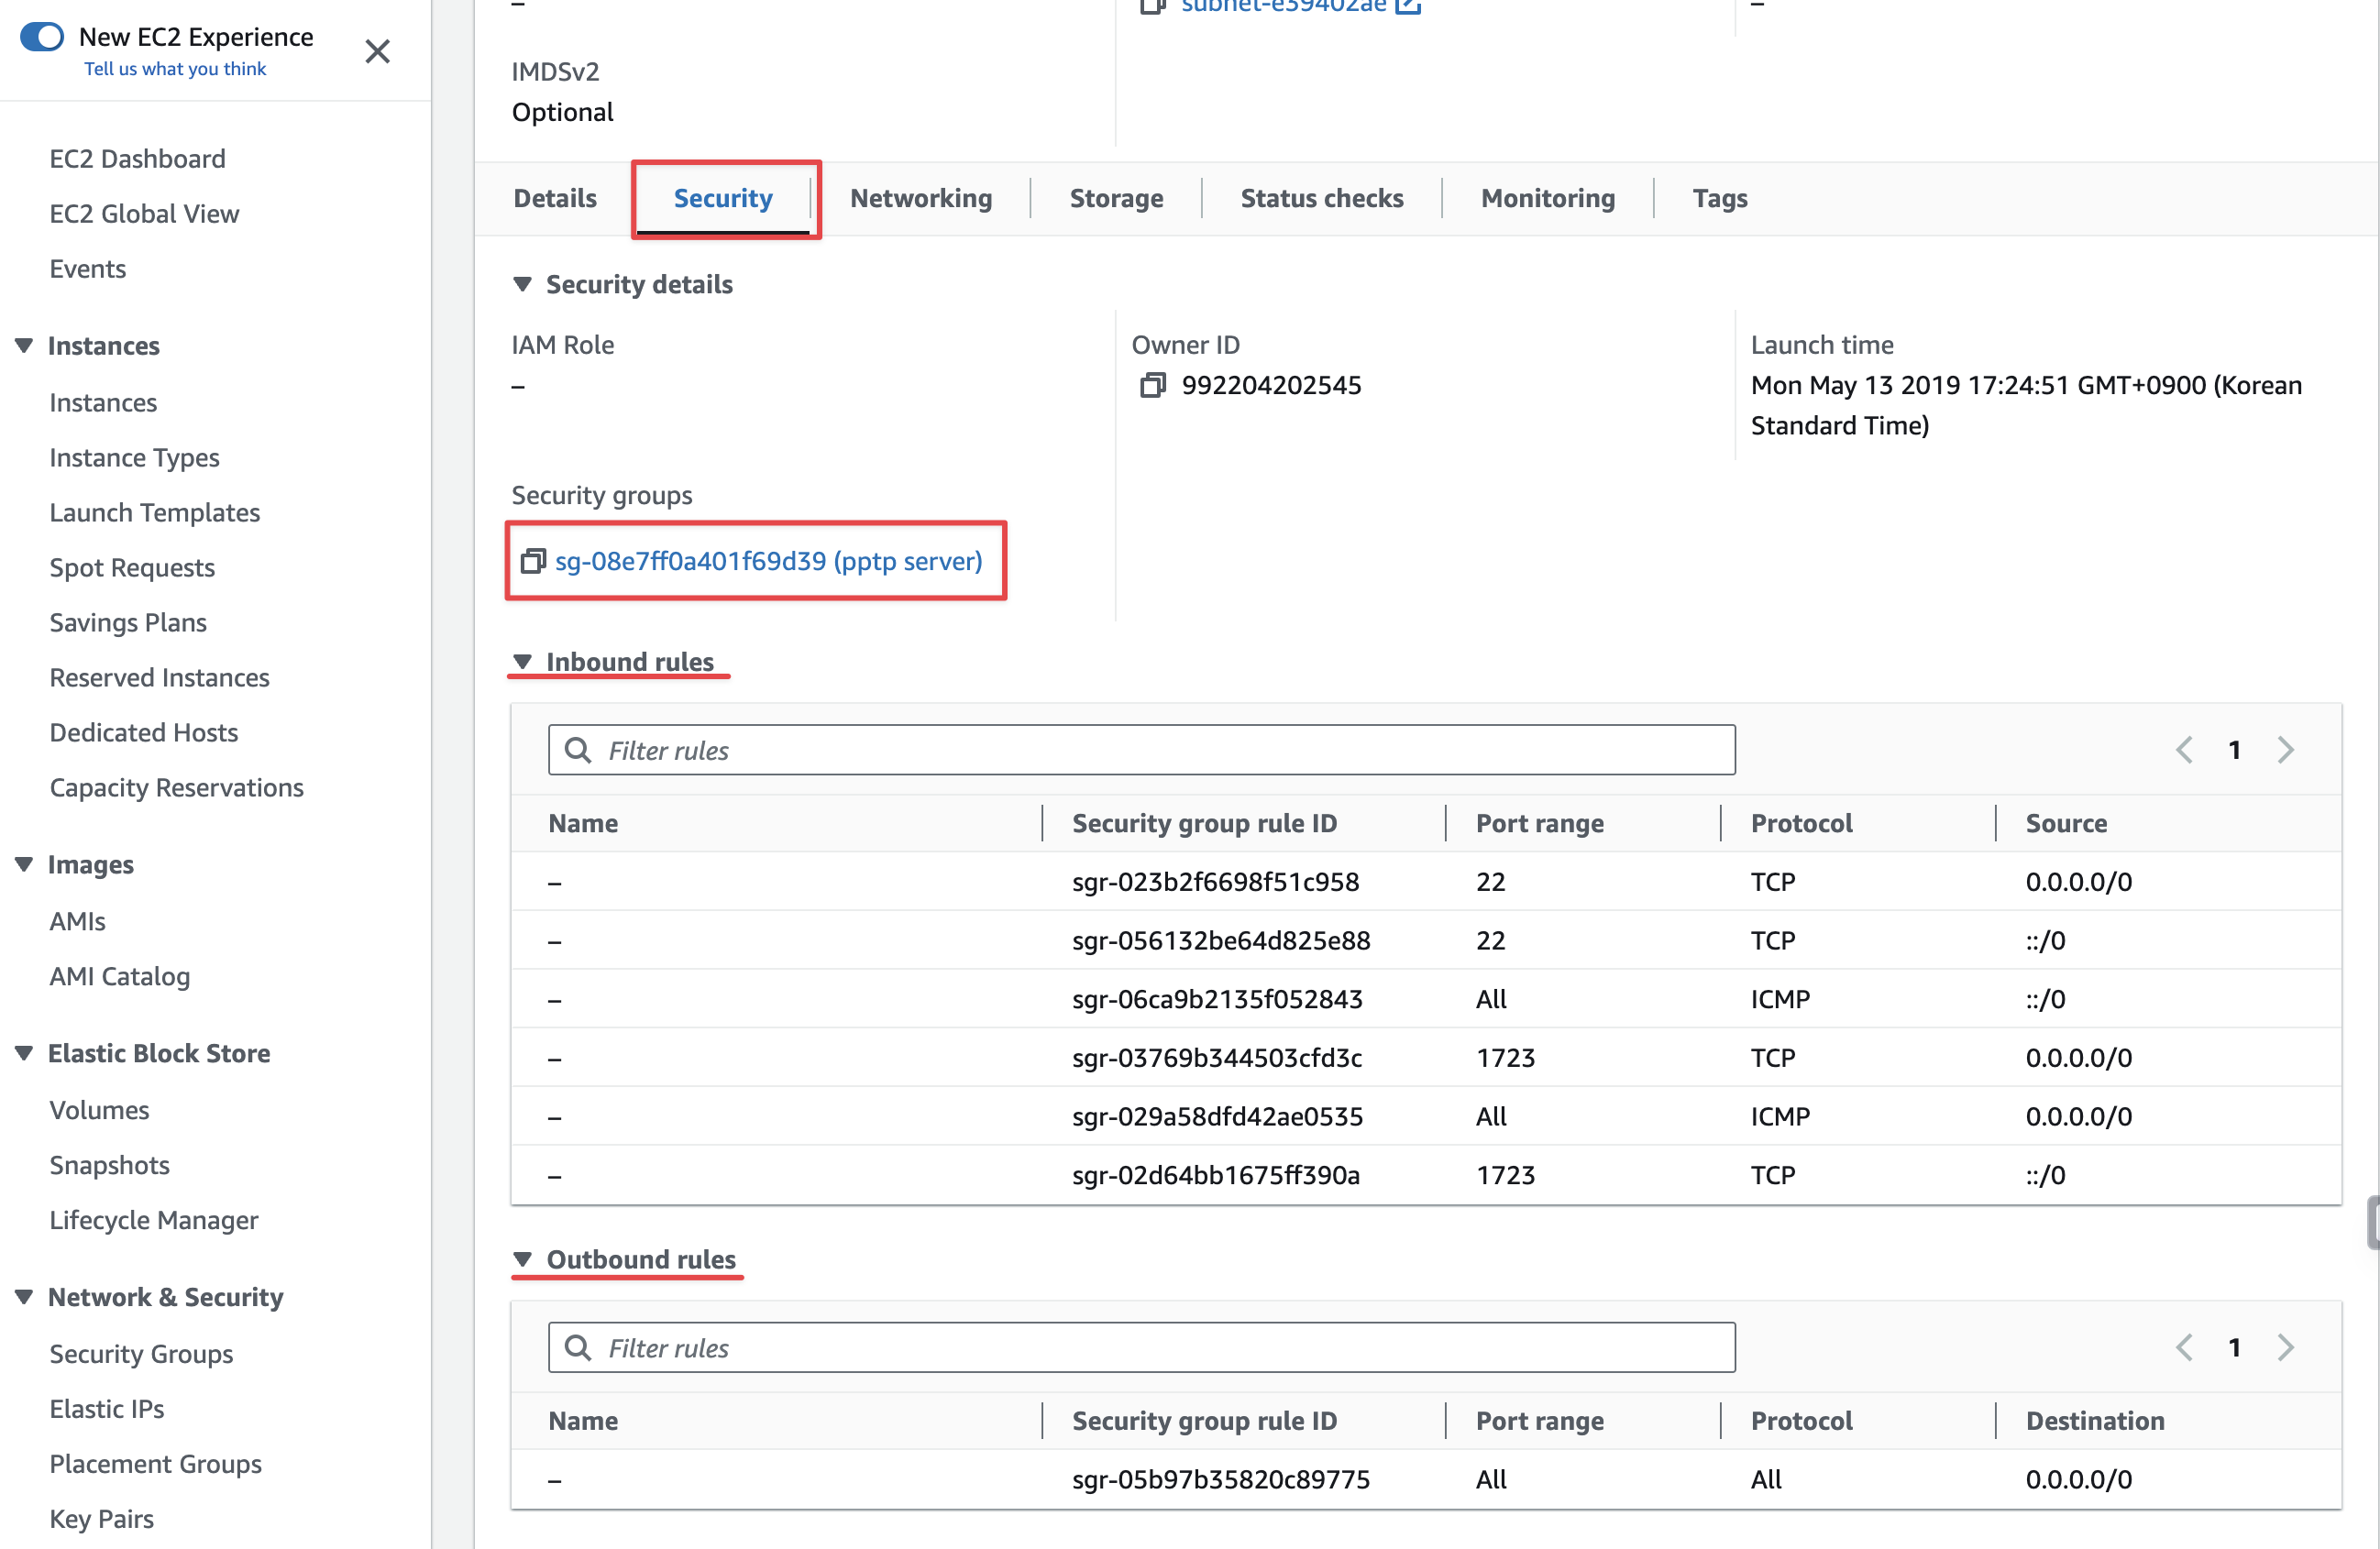
- Edit inbound rules
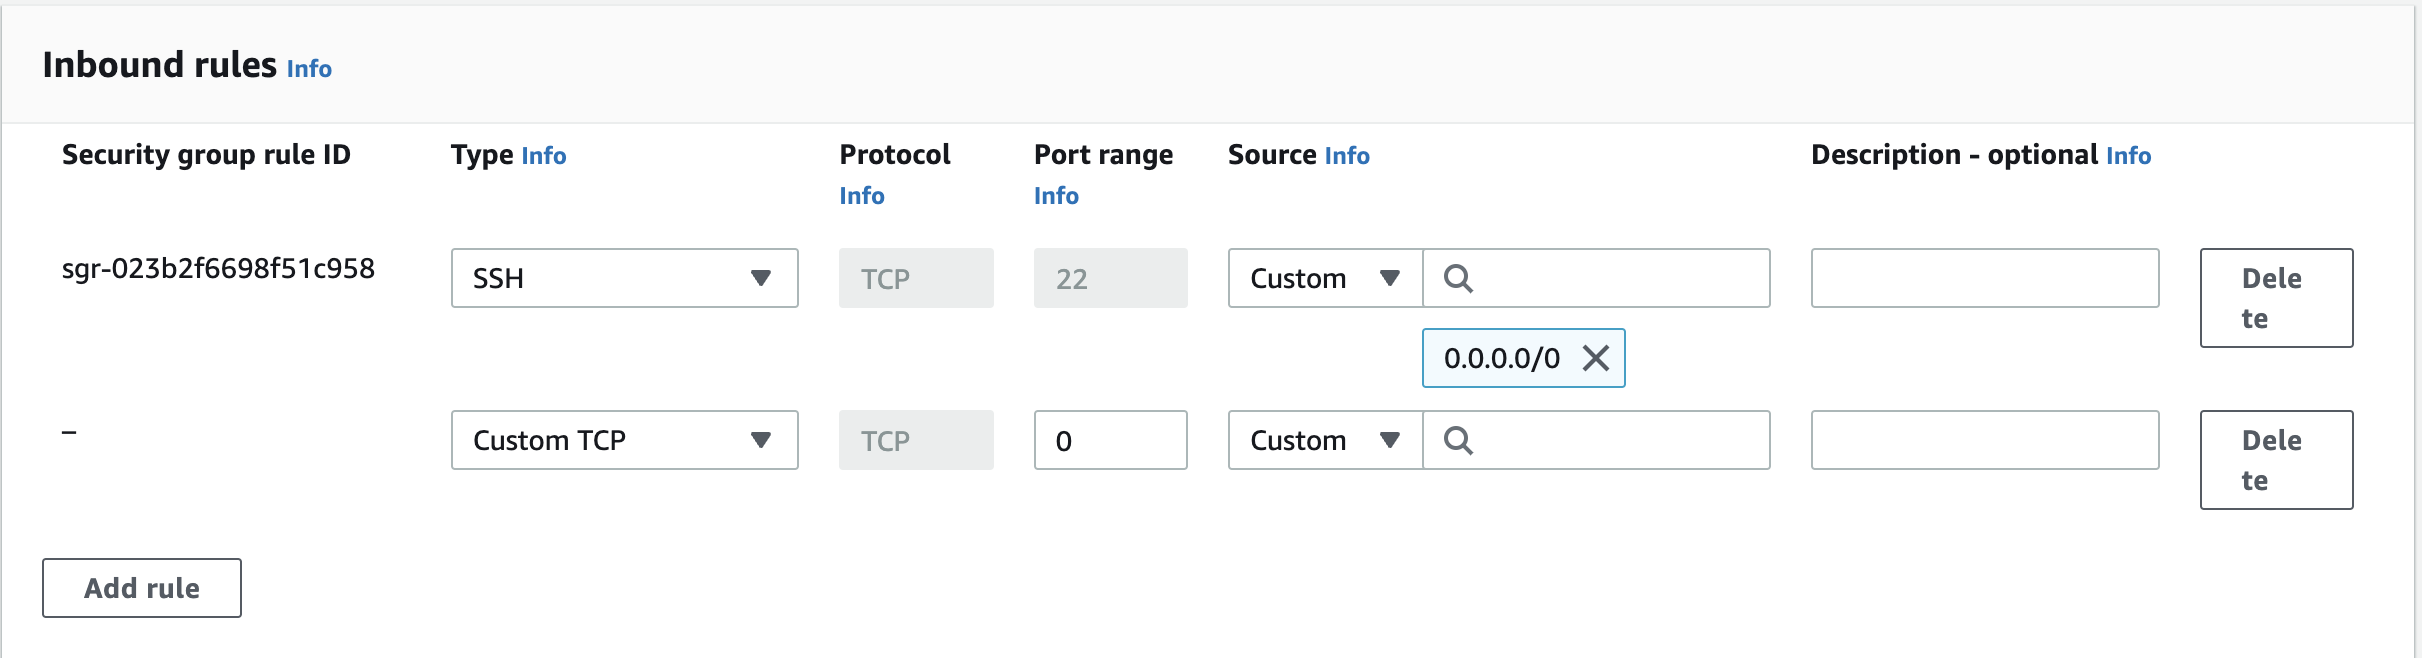
Port : 8080
Source : Any
브라우저 상에서 해당 서비스 접속 확인

소통하며 협업하는 신입 백엔드 개발자입니다.