저번에 만들던거에 이어서 로또 번호가 실제 로또 공처럼 색깔이 다르게 나오게 즉 이쁘게 만들려고 한다!
ShapeDrawable
res/drawable 폴더에 5개의 drawable resource 파일을 추가한다.
circle_yellow.xml
<?xml version="1.0" encoding="utf-8"?>

<shape xmlns:android="http://schemas.android.com/apk/res/android"
    android:shape="oval">

    <solid
        android:color="#D7C400"/>
    <size
        android:width="44dp"
        android:height="44dp"/>

</shape>
shape="oval"- 원을 만드는 코드이다.
solid - 여기서 색깔을 정의할 수 있다.
size - 원의 사이즈
위와같이 5개의 원을 각기 다른 색깔로 만들어준다.
색깔원 만들기
activity_main.xml
각각의 TextView에
            android:textColor="@color/white"
            android:gravity="center"
            android:background="@drawable/circle_blue"
위의 요소들을 원하는 색깔로 추가해준다.
gravity ="center"는 숫자가 background의 정중앙에 위치하게 해주는것이다.
background는 TextView초기화 할때 다시 지정해줄것이기 때문에 xml에서 지정해놓는건 크게 상관없다.
숫자에 맞는 색깔공 띄우기
MainActivity.kt
Drawable은 앱에 저장된것이기 때문에 context를 통해서 가지고 온다.
따라서 ContextCompat을 사용해야된다.
textView.background = ContextCompat.getDrawable(this,R.drawable.circle_blue)이렇게 하면 xml 파일에 android:background를 지정해주는것과 같다.
로또는 십의자리수 단위별로 공의 색깔이 다르다고 한다! (wow)
그래서 textView에 로또 번호가 지정될때 마다 숫자에 따라서 다른 background를 지정해줘야된다.
여기서 TextView에 숫자가 지정될때는 사용자가 numberPicker에서 번호를 추가할때랑 자동 생성할때 총 2번이있다.
numberPicker에서는 numberPicker.value로 자동생성할때는 number값을 이용해서 TextView에 번호를 할당해주는데 이때 background를 지정해주면 된다.
동일한 기능을 하는것이 2번 사용되기때문에 함수화하자!
    private fun setNumberBackground(number:Int, textView:TextView){
        when(number){
            in 1..10->textView.background = ContextCompat.getDrawable(this,R.drawable.circle_yellow)
            in 11..20 -> textView.background = ContextCompat.getDrawable(this,R.drawable.circle_blue)
            in 21..30 -> textView.background = ContextCompat.getDrawable(this,R.drawable.circle_red)
            in 31..40 -> textView.background = ContextCompat.getDrawable(this,R.drawable.circle_gray)
            else -> textView.background = ContextCompat.getDrawable(this,R.drawable.circle_green)
        }
    }
background를 지정해주는 함수로 인자로는 nubmer와 TextView가있다. 인자로 받은 TextView와 그에 상응하는 번호에 따라서 TextView의 background를 지정해주는것이다.
    private fun initRunButton() {
        runButton.setOnClickListener {
            val list = getRandomNumber()

            didRun = true
            list.forEachIndexed{index, number->
                val textView = numberTextViewList[index]
                textView.text = number.toString()
                textView.isVisible = true

                setNumberBackground(number,textView)
            }

        }
    }

    private fun initAddButton() {
        addButton.setOnClickListener {
            if (didRun) {
                Toast.makeText(this, "초기화 후에 시도해주세요.", Toast.LENGTH_SHORT).show()
                return@setOnClickListener
            }
            if (pickNumberSet.size >= 5) {
                Toast.makeText(this, "번호는 5개까지만 선택할수 있습니다.", Toast.LENGTH_SHORT).show()
                return@setOnClickListener

            }
            if (pickNumberSet.contains(numberPicker.value)) {
                Toast.makeText(this, "이미 선택한 번호입니다", Toast.LENGTH_SHORT).show()
                return@setOnClickListener
            } //여기까지 예외처리
            val textView = numberTextViewList[pickNumberSet.size]
            textView.isVisible =true
            textView.text = numberPicker.value.toString()

            setNumberBackground(numberPicker.value,textView)
            pickNumberSet.add(numberPicker.value)

        }

    }
위처럼 initRunButton 이랑 initAddButton에 사용되는데
RunButton 에서는 list에서 받아온 number값을
AddButton 에서는 numberPicker에서 받아온 number값을 인자로 넣어줘서 background를 지정해준다.
결과 화면
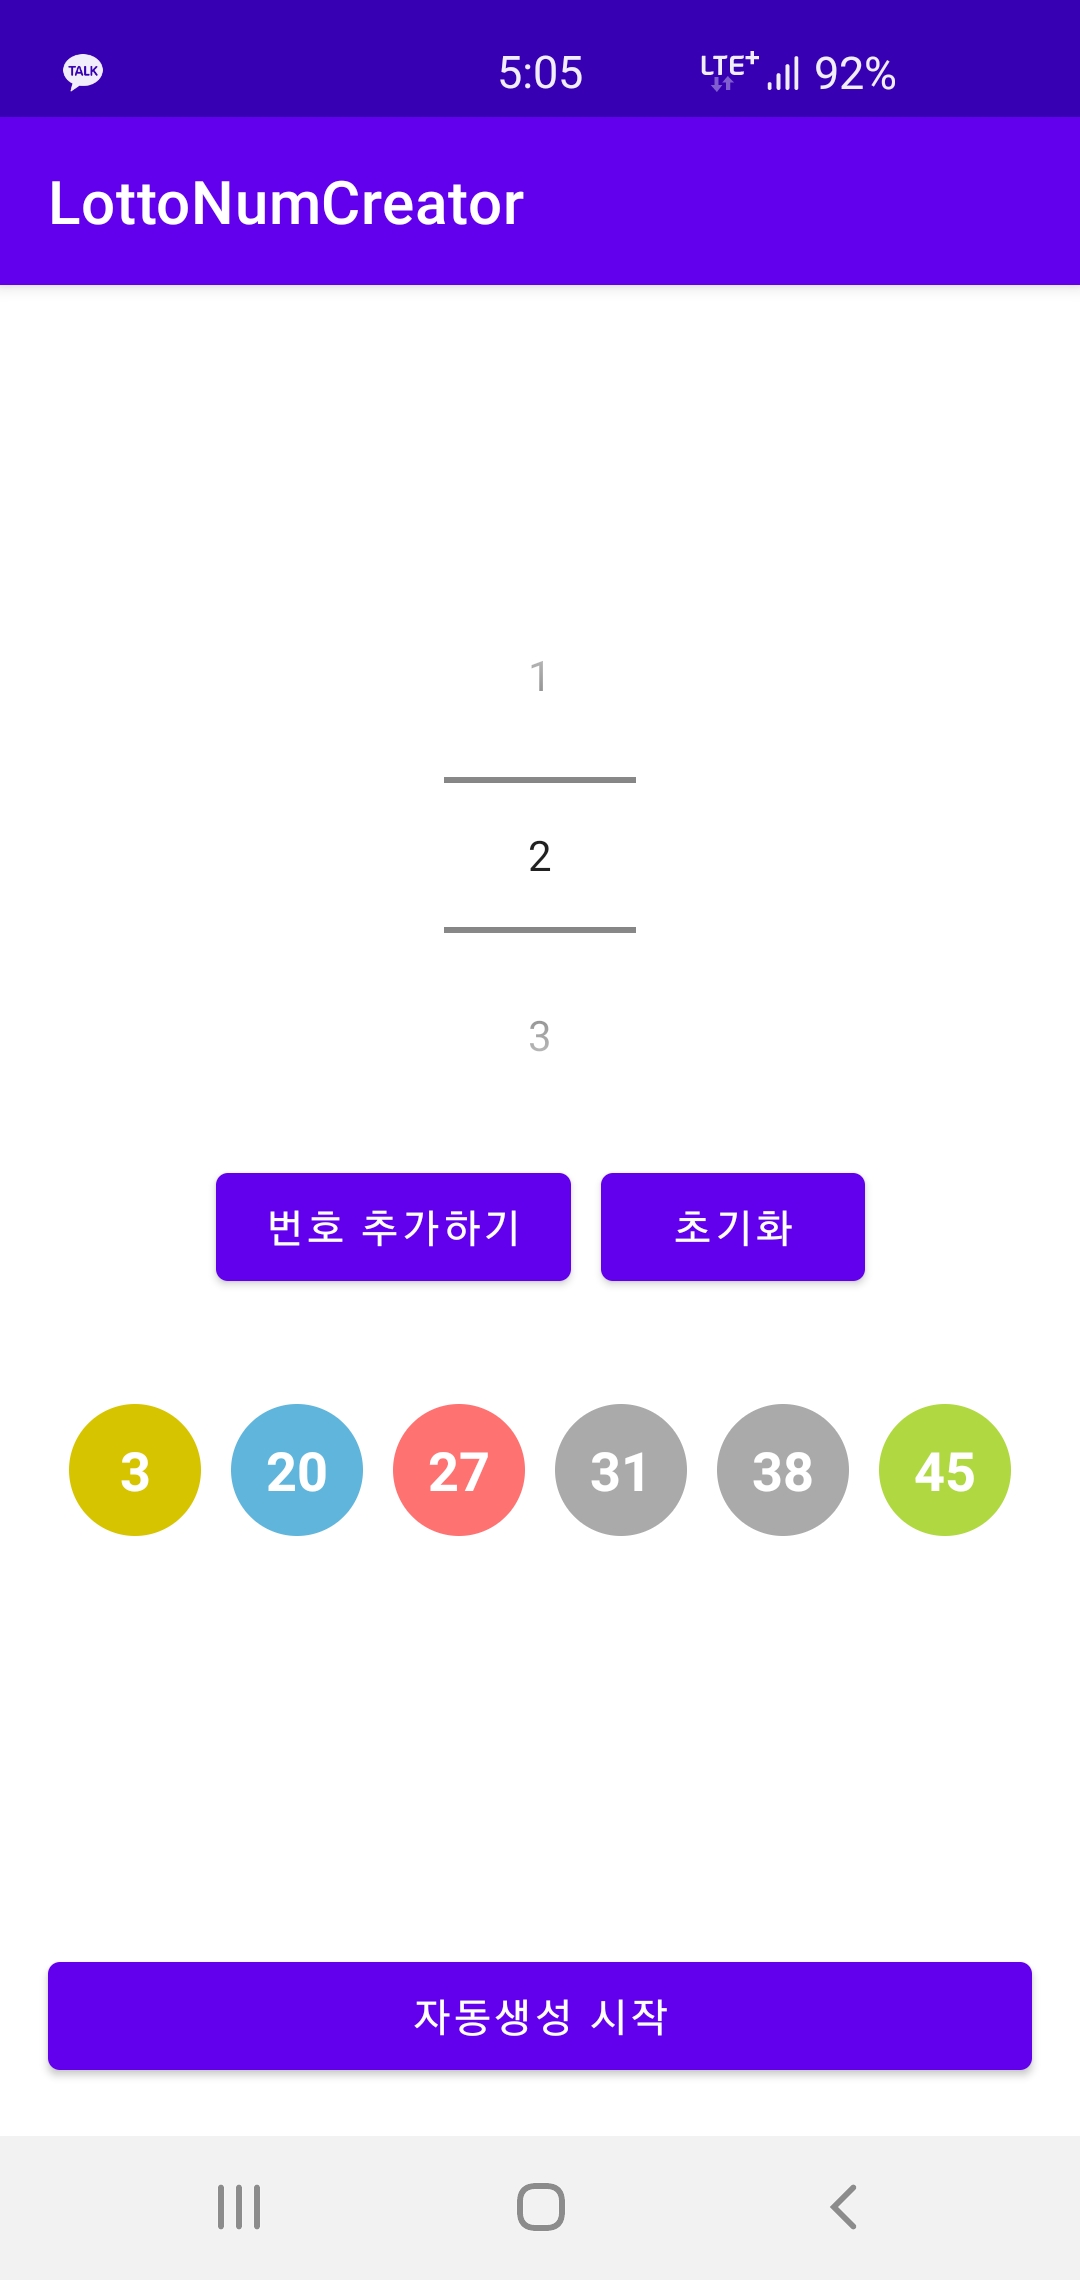
이쁘게 잘나온다.
새로 배운것.
ShapeDrawable
ShapeDrawable을 사용하면 코드로 빠르게 UI를 꾸밀수있다. 간단하게 꾸미는것이면 유용하게 쓰일것 같다.
ContextCompat
Drawable 항목에 접근하게 해주는 함수 내가 알기론 databinding등을 사용하면 쓰지 않아도될거같다. (나중에 다시 알아보자)
로또 앱 끝!
이번 실습으로 했던것
Constraint layout - 제약조건으로 layout배치
NumberPicker - 숫자 선택하는 요소
ShapeDrawable - drawble resource
apply - apply했던 객체를 this로 사용할수있다. 설정 적용하는곳에서 많이씀
when - 조건문 case와 유사
Collection - list, set를 사용