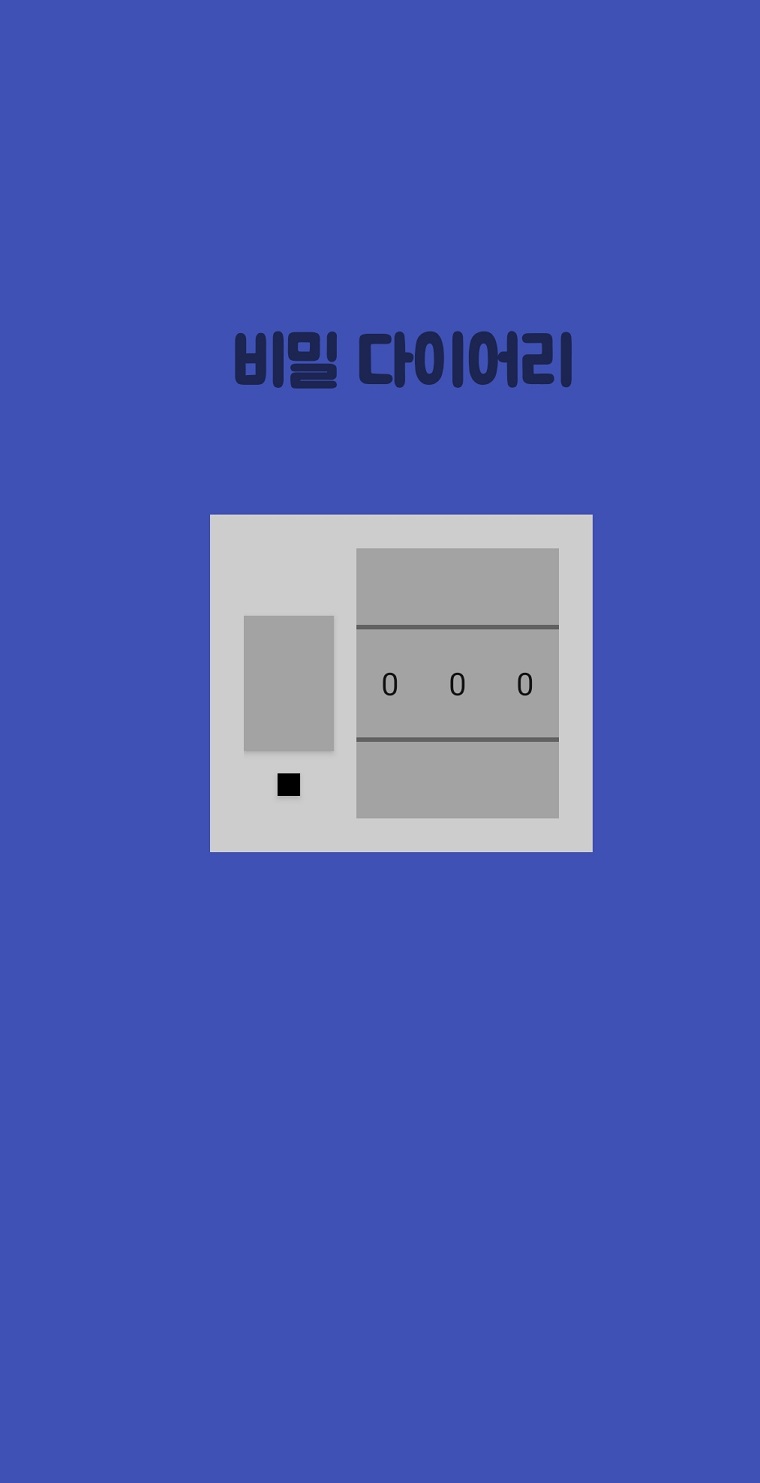
이번 챕터는 비밀 다이어리 어플이다.
SharedPreference
Handler
Theme
AlertDialog
android-ktx
비밀번호로 다이어리를 열수있는 어플
layout 만들기
버튼은 색깔을 바꾸면 바로 적용되지 않는다.
activity_main.xml
<androidx.constraintlayout.widget.ConstraintLayout xmlns:android="http://schemas.android.com/apk/res/android"
    xmlns:app="http://schemas.android.com/apk/res-auto"
    xmlns:tools="http://schemas.android.com/tools"
    android:layout_width="match_parent"
    android:layout_height="match_parent"
    android:background="#3F51B5"
    tools:context=".MainActivity">

    <TextView
        android:layout_width="wrap_content"
        android:layout_height="wrap_content"
        android:layout_marginBottom="50dp"
        android:fontFamily="@font/bm_font"
        android:text="비밀 다이어리"
        android:textSize="30sp"
        android:textStyle="bold"
        app:layout_constraintBottom_toTopOf="@id/passwordLayout"
        app:layout_constraintEnd_toEndOf="parent"
        app:layout_constraintStart_toStartOf="parent" />

    <androidx.constraintlayout.widget.ConstraintLayout
        android:id="@+id/passwordLayout"
        android:layout_width="wrap_content"
        android:layout_height="wrap_content"
        android:background="#CDCDCD"
        android:padding="15dp"
        app:layout_constraintBottom_toBottomOf="parent"
        app:layout_constraintEnd_toEndOf="parent"
        app:layout_constraintStart_toStartOf="parent"
        app:layout_constraintTop_toTopOf="parent"
        app:layout_constraintVertical_bias="0.45">


        <androidx.appcompat.widget.AppCompatButton
            android:id="@+id/btn_open"
            android:layout_width="40dp"
            android:layout_height="60dp"
            android:layout_marginEnd="10dp"
            android:background="#A3A3A3"
            app:layout_constraintBottom_toBottomOf="@id/numberPicker1"
            app:layout_constraintEnd_toStartOf="@id/numberPicker1"
            app:layout_constraintStart_toStartOf="parent"
            app:layout_constraintTop_toTopOf="@id/numberPicker1" />

        <androidx.appcompat.widget.AppCompatButton
            android:id="@+id/btn_change"
            android:layout_width="10dp"
            android:layout_height="10dp"
            android:layout_marginTop="10dp"
            android:background="@color/black"
            app:layout_constraintEnd_toEndOf="@id/btn_open"
            app:layout_constraintStart_toStartOf="@id/btn_open"
            app:layout_constraintTop_toBottomOf="@id/btn_open" />

        <NumberPicker
            android:id="@+id/numberPicker1"
            android:layout_width="30dp"
            android:layout_height="120dp"
            android:background="#A3A3A3"
            app:layout_constraintBottom_toBottomOf="parent"
            app:layout_constraintEnd_toStartOf="@id/numberPicker2"
            app:layout_constraintHorizontal_chainStyle="packed"
            app:layout_constraintStart_toEndOf="@id/btn_open"
            app:layout_constraintTop_toTopOf="parent" />

        <NumberPicker
            android:id="@+id/numberPicker2"
            android:layout_width="30dp"
            android:layout_height="120dp"
            android:background="#A3A3A3"
            app:layout_constraintEnd_toEndOf="@id/numberPicker3"
            app:layout_constraintStart_toEndOf="@id/numberPicker1"
            app:layout_constraintTop_toTopOf="@id/numberPicker1" />

        <NumberPicker
            android:id="@+id/numberPicker3"
            android:layout_width="30dp"
            android:layout_height="120dp"
            android:background="#A3A3A3"
            app:layout_constraintEnd_toEndOf="parent"
            app:layout_constraintStart_toEndOf="@id/numberPicker2"
            app:layout_constraintTop_toTopOf="@id/numberPicker1" />
    </androidx.constraintlayout.widget.ConstraintLayout>
</androidx.constraint
만들어놓은 numberpicker와 버튼들을 감싸는 View를 만들어 준다.
View를 constraintlayout으로 만들어서 안에있는 button과 numberpicker들의 위치를 조정한다.
layout_constraintVertical_bias ="0.45"
constraint layout안에있는 layout의 위치를 수직으로 0.45에 위치하게 한다. (0.5면 정중앙)
기본폰트 의외의 폰트 사용하기
본인이원하는 폰트를 받는다.
나는 배민의 주아체를 써보았다. 링크
res 폴더에 -new android resource folder - 이름을 font로 해서 추가해준다.
그러고 추가하고 싶은 font를 drag&drop으로 추가해주면 된다!
resource drawble은 대문자이름을 사용하지 않기때문에 이름을 소문자로 바꿔줘야한다.
fontFamily - text 폰트 설정
안드로이드 테마
res/values/themes/themes.xml
앱의 테마를 지정해놓는 파일이다.
기본적으로 MaterialComponets로 되어있는데 이는 기본컴포넌트의 색깔을 colorPrimary색깔로 지정한다.
여러개의 테마를 지정한다.
그렇다면 위의 버튼들이 테마의 색깔에 영향을 받지않을려면??
Button을 androidx.appcompat.widget.AppCompatButton 으로 지정하면 버튼에서 설정한 색깔이 잘 지정된다.
테마에는 기본적으로 ActionBar가 나오게 되는데 NoActionBar를 이용해서 없엘수 있다.
style name="Theme.Secretdiary.NoActionBar" parent="Theme.MaterialComponents.DayNight.NoActionBar"
이처럼 위의 원래있던 테마의 하위 테마를 선언해주고 NoActionBar 테마를 생성해준다.
이 테마를 ManiFest파일에 적용해준다 .
<application
        android:allowBackup="true"
        android:icon="@mipmap/ic_launcher"
        android:label="@string/app_name"
        android:roundIcon="@mipmap/ic_launcher_round"
        android:supportsRtl="true"
        android:theme="@style/Theme.Secretdiary.NoActionBar">
        <activity android:name=".MainActivity">

            <intent-filter>
                <action android:name="android.intent.action.MAIN" />

                <category android:name="android.intent.category.LAUNCHER" />
            </intent-filter>
        </activity>
    </application>
이런식으로 적용!

사진처럼 이쁘게 만들어진다!
