useErrorBoundary
이번에는 error boundary를 hook으로 사용할 수 있는 useErrorBoundary의 코드를 읽어 보면서 인상 깊었던 내용을 정리하려 합니다.
전체 코드
import { useContext, useMemo, useState } from "react";
import { ErrorBoundaryContext } from ".";
import { assertErrorBoundaryContext } from "./assertErrorBoundaryContext";
type UseErrorBoundaryState<TError> =
| { error: TError; hasError: true }
| { error: null; hasError: false };
export type UseErrorBoundaryApi<TError> = {
resetBoundary: () => void;
showBoundary: (error: TError) => void;
};
export function useErrorBoundary<TError = any>(): UseErrorBoundaryApi<TError> {
const context = useContext(ErrorBoundaryContext);
assertErrorBoundaryContext(context);
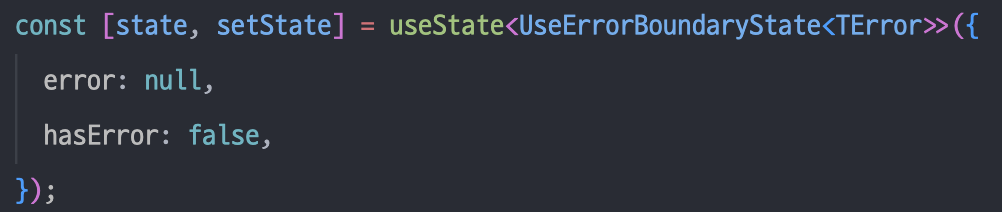
const [state, setState] = useState<UseErrorBoundaryState<TError>>({
error: null,
hasError: false,
});
const memoized = useMemo(
() => ({
resetBoundary: () => {
context.resetErrorBoundary();
setState({ error: null, hasError: false });
},
showBoundary: (error: TError) =>
setState({
error,
hasError: true,
}),
}),
[context.resetErrorBoundary]
);
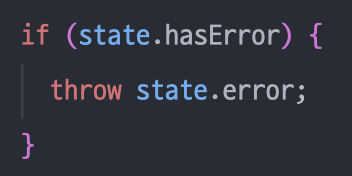
if (state.hasError) {
throw state.error;
}
return memoized;
}시그니처 부분

useErrorBoundary를 호출하면 UseErrorBoundaryApi를 반환하는데요.
UseErrorBoundaryApi는 훅을 호출해 반환받는 resetBoundary와 showBoundary 함수를 프로퍼티 갖는 객체입니다.

훅을 호출할 때 제네릭으로 Error의 타입을 넣어준다면 showBoundary의 error 타입으로 활용되네요.
ErrorBoundaryContext를 참조한다.
ErrorBoundary 컴포넌트는 children을 ErrorBoundaryContext라는 컨텍스트의 Provider로 감싸 리턴합니다.
<ErrorBoundaryContext.Provider value={{didCatch, error, resetErrorBoundary}}>
	{children}
</ErrorBoundaryContext.Provider>useErrorBoundary는 이 컨텍스트를 활용하게 되는데요.
그렇기 때문에 처음 등장하는 코드는 useContext입니다.

타입을 식별하고 좁히기
그 밑에는 assertErrorBoundaryContext라는 함수가 있는데요.
무슨 역할을 하는 함수인지 내부를 보겠습니다.
export function assertErrorBoundaryContext(
  value: any
): asserts value is ErrorBoundaryContextType {
  if (
    value == null ||
    typeof value.didCatch !== "boolean" ||
    typeof value.resetErrorBoundary !== "function"
  ) {
    throw new Error("ErrorBoundaryContext not found");
  }
}
음.. 저는 asserts나 is 같이 처음 보는 키워드가 많아 코드를 해석할 수 없었습니다. 😓💦💦💦
두 키워드에 대한 개념을 간단히 정리한 다음, 이 함수가 어떤 역할을 하는 것인지 해석해 보겠습니다.
(코드를 바로 이해하실 수 있는 분은 스킵하시길 바랍니다. 좀 길어요!)
먼저 asserts 키워드에 대해 알아보겠습니다.
타입스크립트의 공식 문서를 보면, 이러한 예제 코드가 있습니다.
function assert(condition: any, msg?: string): asserts condition {
  if (!condition) {
    throw new AssertionError(msg);
  }
}
It ensures that whatever condition is being checked must be true for the remainder of the containing scope.
위 assert 함수는 검사되는 모든 조건을 스코프의 나머지 영역에서 true여야 함을 보장하는 함수라고 합니다.
*asserts conditionsays that whatever gets passed into theconditionparameter must be true if theassertreturns (because otherwise it would throw an error). That means that for the rest of the scope, that condition must be truthy.*
그리고 asserts condition 부분은 어떤 조건이 condition 파라미터로 들어오든, 이 assert라는 함수가 반환을 하고 나면 항상 true임을 표현한다고 합니다.
condition을 만족하지 못했다면 이 함수가 반환하기 전에 에러를 던지기 때문이에요. (if문)
즉, 한 스코프에서 이 함수를 호출한 다음 부분부터는 condition이라는 조건을 항상 만족한다는 것입니다.
이렇게 알게 된 내용을 assertErrorBoundaryContext 함수의 반환 타입에 적용해 본다면,
이 함수가 호출된 다음부터는 value is ErrorBoundaryContextType이라는 조건이 항상 true가 되겠네요!
이번에는 is 키워드에 대해 알아보겠습니다.
이펙티브 타입스크립트 책에 보면 사용자 정의 타입 가드라는 개념으로 is를 소개하고 있는데요.
다음 코드를 보겠습니다.
function isInputElement(el: HTMLElement): el is HTMLInputElement {
	return 'value' in el;
}
이 함수의 반환 타입인 el is HTMLInputElement는 함수의 반환이 true인 경우, 타입 체커에게 매개변수의 타입을 좁힐 수 있다고 알려주는 역할을 합니다.
위 함수는 다음과 같이 타입이 HTMLInputElement인지 확인하고 싶을 때 사용할 수 있습니다.
function getElementContent(el: HTMLElement) {
	if(isInputElement(el)) { // el의 타입은 HTMLInputElement이므로
		el; // HTMLInputElement
		return el.value; // value에 접근할 수 있음
	}
	el; // el의 타입은 HTMLElement임 (HTMLInputElement가 아님)
	return el.textContent;
}
즉, 함수의 반환 타입이 something is type이라는 형태로 되어 있다면
이는 “함수가 리턴하는 값이 true라면 something의 타입은 type이다” 라는 뜻이 되겠습니다.
공식 문서의 예제를 하나 더 보겠습니다.
function assertIsString(val: any): asserts val is string {
  if (typeof val !== "string") {
    throw new AssertionError("Not a string!");
  }
}
이제 이 함수를 해석할 수 있겠네요.
assertIsString 함수가 에러 없이 실행된다면 함수를 호출한 이후 val은 모두 string 타입으로 취급됩니다.
그럼 다시 assertErrorBoundaryContext 코드를 살펴 보겠습니다.
export function assertErrorBoundaryContext(
  value: any
): asserts value is ErrorBoundaryContextType {
  if (
    value == null ||
    typeof value.didCatch !== "boolean" ||
    typeof value.resetErrorBoundary !== "function"
  ) {
    throw new Error("ErrorBoundaryContext not found");
  }
}
우선 이 함수의 시그니처를 통해 이 함수가 호출되고 나면,
value의 타입은 ErrorBoundaryContextType으로 좁혀지겠구나 라는 것을 알 수 있습니다.
그럼 어떠한 경우에 ErrorBoundaryContextType이 되지 못할까요?
- value==null
- typeof value.didCatch ! == “boolean”
- typeof value.resetErrorBoundary ! == “function”
위와 같은 조건을 만족하지 않는다면 에러 바운더리 컨텍스트가 아니라고 취급합니다.
참고로 ErrorBoundaryContextType은 이렇게 생겼습니다.
export type ErrorBoundaryContextType = {
  didCatch: boolean;
  error: any;
  resetErrorBoundary: (...args: any[]) => void;
};
결론적으로 assertErrorBoundary의 역할은 다음과 같겠습니다.
useErrorBoundary를 사용하는 컴포넌트가ErrorBoundary로 감싸졌는지 체크useContext에 넣은 context가 에러 바운더리 컨텍스트가 맞는지 체크- null 또는 ErrorBoundaryContextType인 컨텍스트의 타입을 ErrorBoundaryContextType로 좁힘(null 검사)
resetBoundary와 showBoundary의 역할
useErrorBoundary는 다음과 같은 상태를 가집니다.
type UseErrorBoundaryState<TError> =
  | { error: TError; hasError: true }
  | { error: null; hasError: false };
이 상태는 에러가 발생했다면 {에러가 발생함, 무슨 에러임} 이라는 상태를 갖고 에러가 없는 상태라면 {에러 없음, null} 이런 상태를 가집니다.
그리고 hasError가 true가 된다면 (에러가 발생한다면) error를 throw합니다.
상태를 “에러가 발생했다”고 어떻게 변경할 수 있을까요?
showBoundary
이 훅을 호출해 사용하는 컴포넌트에서 showBoundary 함수를 호출하면 에러가 발생한 상태라고 변경할 수 있습니다.
// ...
showBoundary: (error: TError) =>
	setState({
		error,
		hasError: true,
}),showBoundary를 호출해서 훅 내부의 상태가 바뀌면,
state.hasError가 true로 바뀌면서 state.error를 throw합니다.
그럼 여기서 던진 에러를 누가 catch하게 될까요?
바로 컴포넌트를 감싸고 있는 ErrorBoundary에서 이 에러를 catch합니다.
즉, 에러가 상위 방향으로 전파되었고 이를 부모가 잡아낸 상황입니다.
componentDidCatch(error: Error, info: ErrorInfo) {
	this.props.onError?.(error, info);
}
위 코드를 실행하여 ErrorBoundary 컴포넌트 내부의 상태가 변경(didCatch: true, error: 에러 객체)되고,
내부 로직에 따라 fallback 컴포넌트가 보여지게 됩니다. (내부 로직은 1편을 참고해 주세요.)
resetBoundary
그럼 최근에 에러가 발생한 부분의 동작을 다시 시도할 수 있게 해 주는 resetBoundary는 어떻게 동작할까요?
resetBoundary: () => {
	context.resetErrorBoundary();
	setState({ error: null, hasError: false });
},resetBoundary가 호출되면 context로부터 받은 함수를 실행하고
훅 내부의 상태를 에러가 발생하기 전으로 돌려 놓습니다.
이때 resetErrorBoundary가 호출되면 부모인 ErrorBoundary 컴포넌트의 상태도 에러가 발생하기 전으로 초기화되면서 fallback이 아닌 성공 시 보여주려는 컴포넌트가 렌더링됩니다. (내부 로직은 1편을 참고해 주세요.)
이 컴포넌트가 렌더링되면서 또 에러가 발생한다면 showBoundary가 호출되고 이 상황이 반복되겠죠!
결론
useErrorBoundary 훅의 코드를 살펴봤습니다.
코드가 길지 않은 편이라 라이브러리 코드를 읽는 게 크게 부담스럽진 않았던 것 같아요.
타입을 체크하고 좁히는 방법에 대해 알 수 있었고 이 훅은 에러를 상위로 전파하여 처리하는 용도임을 알게 되었습니다.
다음에는 마지막 편인 withErrorBoundary HOC 코드를 살펴보겠습니돠.