Course
Build Event-Driven Applications with Eventarc
Lab

목록
- Pub/Sub: Qwik Start - Command Line
- Cloud Run Functions: Qwik Start ⬅️ 오늘의 Lab!
- Eventarc for Cloud Run
- Build Event-Driven Applications with Eventarc: Challenge Lab
🌠 Cloud Run Functions: Qwik Start
개요
Cloud Run Functions은 Google Cloud에서 제공하는 Functions as a Service 제품이다. 새로운 Cloud Run Functions 버전은 Cloud Run, Cloud Build, Artifact Registry, Eventarc로 지원되는 향상된 FaaS 환경을 제공한다.
Eventarc 란?
Eventarc를 사용하면 기본 인프라를 구현, 맞춤설정 또는 유지관리할 필요 없이 이벤트 기반 아키텍처를 빌드할 수 있다.
이번 실습에서는 아래와 같은 내용을 직접 해보자!
- HTTP 호출에 응답하는 함수를 작성
- Cloud Storage 이벤트에 응답하는 함수를 작성
- Cloud 감사 로그에 응답하는 함수를 작성
- Cloud Run 함수의 여러 버전을 배포
- 최소 인스턴스로 콜드 스타트를 제거
- 동시 실행을 설정
실습과정
참고🤖
이번 실습에서는
Gemini for Google Cloud API사용 설정은 하지만, 실습 내에서 해당 API는 코드에 대한 내용 질의 외에는 사용하지 않으므로 그 부분들은 제외하여 작성되었습니다. (실습 통과에는 지장 없음)
1. API 사용 설정
(1) 필요한 모든 서비스의 서비스 사용 설정
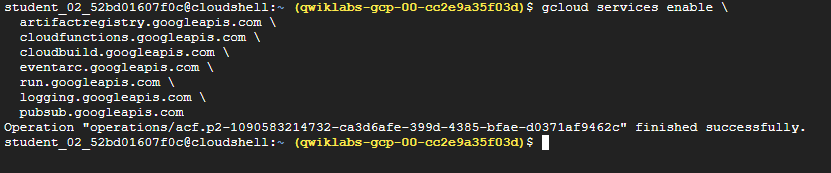
gcloud services enable \
  artifactregistry.googleapis.com \
  cloudfunctions.googleapis.com \
  cloudbuild.googleapis.com \
  eventarc.googleapis.com \
  run.googleapis.com \
  logging.googleapis.com \
  pubsub.googleapis.com
설명✨
🛠️ 빌드 및 저장소 서비스
Artifact Registry: 컨테이너 이미지나 언어 패키지(Maven, npm 등)를 저장하고 관리하는 통합 저장소로, 배포할 이미지를 보관한다.Cloud Build: 서버리스 CI/CD 플랫폼로서 소스 코드를 가져와서 테스트하고, 컨테이너 이미지를 빌드하여 Artifact Registry에 업로드하는 과정을 자동화한다.🚀 실행 및 연동 서비스
Cloud Functions: 이벤트에 응답하여 실행되는 가벼운 단일 목적의 함수(FaaS)를 실행한다.Cloud Run: 컨테이너화된 애플리케이션을 실행하는 풀매니지드 서버리스 플랫폼으로, HTTP 요청이나 이벤트를 처리하며, 트래픽에 따라 자동으로 확장/축소된다.Pub/Sub: 서비스 간 메시지를 비동기적으로 주고받는 메시징 서비스Eventarc: 다양한 소스에서 발생하는 이벤트를Cloud Run이나Functions로 전달하는 이벤트 라우팅 서비스📊 모니터링 및 관리
Cloud Logging: Google Cloud에서 발생하는 모든 로그 데이터를 수집하고 저장하는 서비스
(2) Gemini for Google Cloud API 사용 설정

gcloud services enable cloudaicompanion.googleapis.com2. HTTP 함수 만들기
(1) 폴더와 파일 생성

# 폴더 만들고 해당 폴더로 이동
mkdir ~/hello-http && cd $_

# 파일 2개 생성
touch index.js && touch package.json
(2) 코드 추가
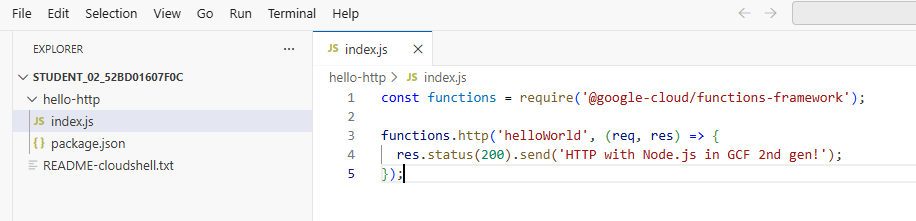
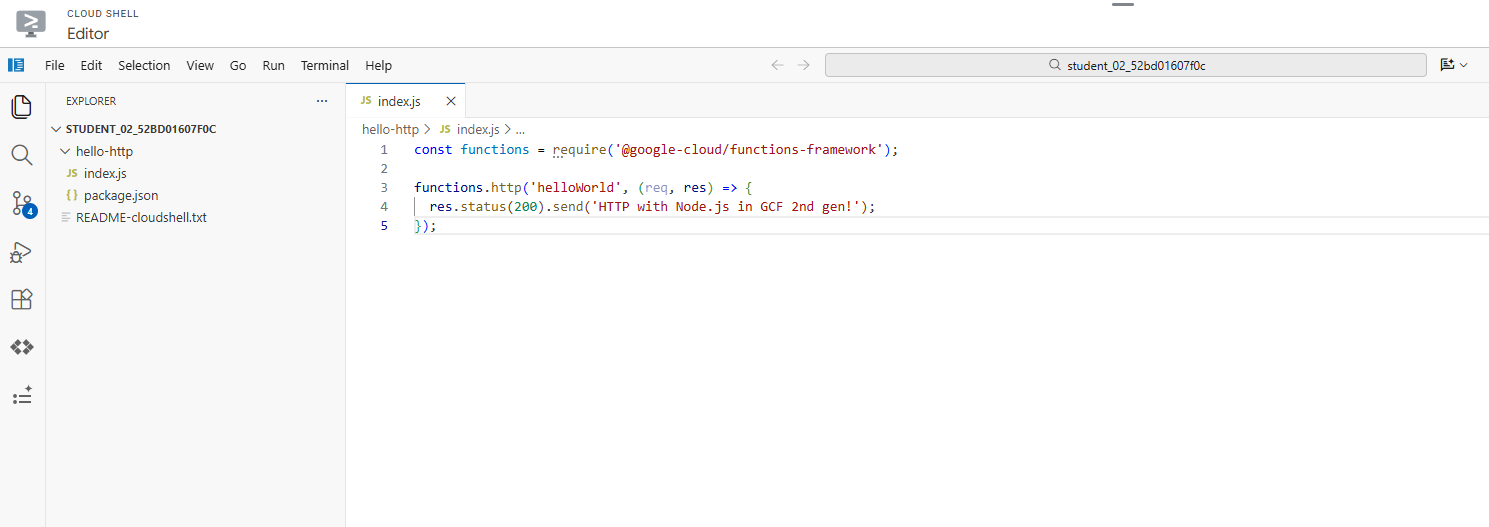
✅ Cloud Shell의 툴바에서 Open Editor 버튼 클릭하여 편집기에서 진행
// hello-http/index.js
const functions = require('@google-cloud/functions-framework');

functions.http('helloWorld', (req, res) => {
  res.status(200).send('HTTP with Node.js in GCF 2nd gen!');
});

// hello-http/package.json
{
  "name": "nodejs-functions-gen2-codelab",
  "version": "0.0.1",
  "main": "index.js",
  "dependencies": {
    "@google-cloud/functions-framework": "^2.0.0"
  }
}
(3) 배포
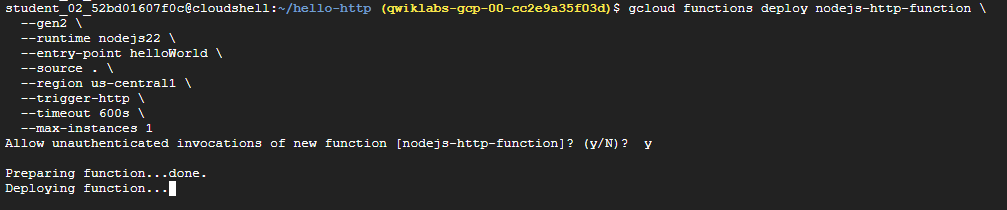
gcloud functions deploy nodejs-http-function \
  --gen2 \
  --runtime nodejs22 \
  --entry-point helloWorld \
  --source . \
  --region Region \
  --trigger-http \
  --timeout 600s \
  --max-instances 1
✅ 인증되지 않은 호출 팝업이 뜰 경우, y 눌러 계속 진행
✅ permissions error가 표시되는 경우 몇 분 정도 기다린 후에 다시 시도!
(4) 배포 확인

✅ Cloud Run > Services 콘솔에 배포한 HTTP 함수가 있는지 확인!
(5) 테스트

gcloud functions call nodejs-http-function \
  --gen2 --region Region
3. Cloud Storage 함수 만들기
(1) IAM 역할 부여

# 환경변수 설정
PROJECT_NUMBER=$(gcloud projects list --filter="project_id:PROJECT_ID" --format='value(project_number)')
SERVICE_ACCOUNT=$(gsutil kms serviceaccount -p $PROJECT_NUMBER)
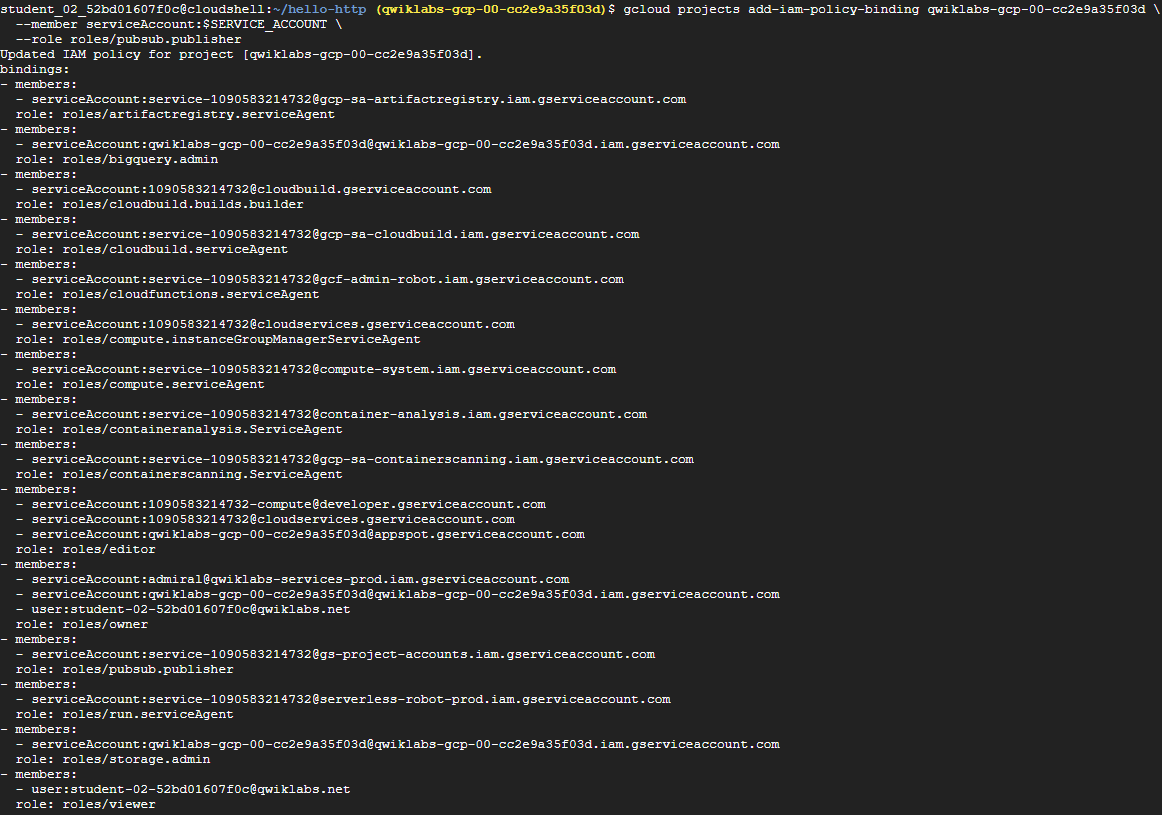
# Cloud Storage 서비스 계정에 pubsub.publisher IAM 역할 부여
gcloud projects add-iam-policy-binding PROJECT_ID \
--member serviceAccount:$SERVICE_ACCOUNT \
--role roles/pubsub.publisher(2) 폴더와 파일 생성

# 폴더 생성 및 경로 이동
mkdir ~/hello-storage && cd $_

# 파일 2개 생성
touch index.js && touch package.json
(3) 코드 추가
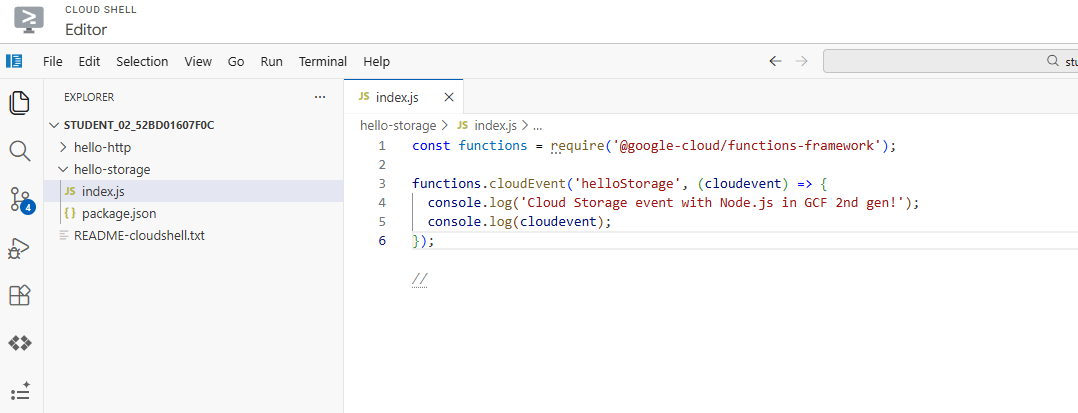
// hello-storage/index.js
const functions = require('@google-cloud/functions-framework');
functions.cloudEvent('helloStorage', (cloudevent) => {
console.log('Cloud Storage event with Node.js in GCF 2nd gen!');
console.log(cloudevent);
});
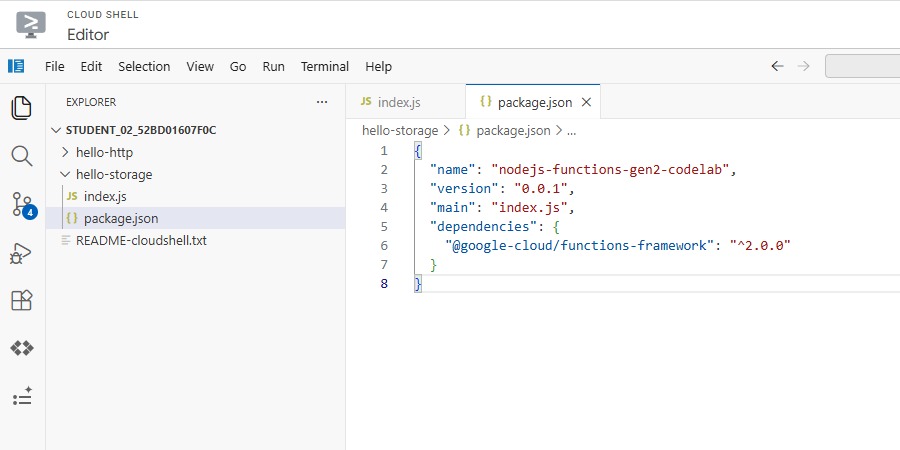
// hello-storage/package.json
{
"name": "nodejs-functions-gen2-codelab",
"version": "0.0.1",
"main": "index.js",
"dependencies": {
"@google-cloud/functions-framework": "^2.0.0"
}
}(4) Cloud Storage 버킷 생성


# 환경변수 설정
BUCKET="gs://gcf-gen2-storage-PROJECT_ID"

# 버킷 생성
gsutil mb -l Region $BUCKET
(5) 함수 배포

gcloud functions deploy nodejs-storage-function \
  --gen2 \
  --runtime nodejs22 \
  --entry-point helloStorage \
  --source . \
  --region Region \
  --trigger-bucket $BUCKET \
  --trigger-location Region \
  --max-instances 1
(6) 배포 확인

(7) 테스트

# 텍스트 파일 생성
echo "Hello World" > random.txt

# 버킷에 파일 업로드
gsutil cp random.txt $BUCKET/random.txt
gcloud functions logs read nodejs-storage-function \
  --region Region --gen2 --limit=100 --format "value(log)"
✅ 만든 클라우드 함수가 잘 돌아갔는지 로그를 100개 가져오기
4. Cloud 감사 로그 함수 만들기
(1) Eventarc 감사 로그를 사용 설정
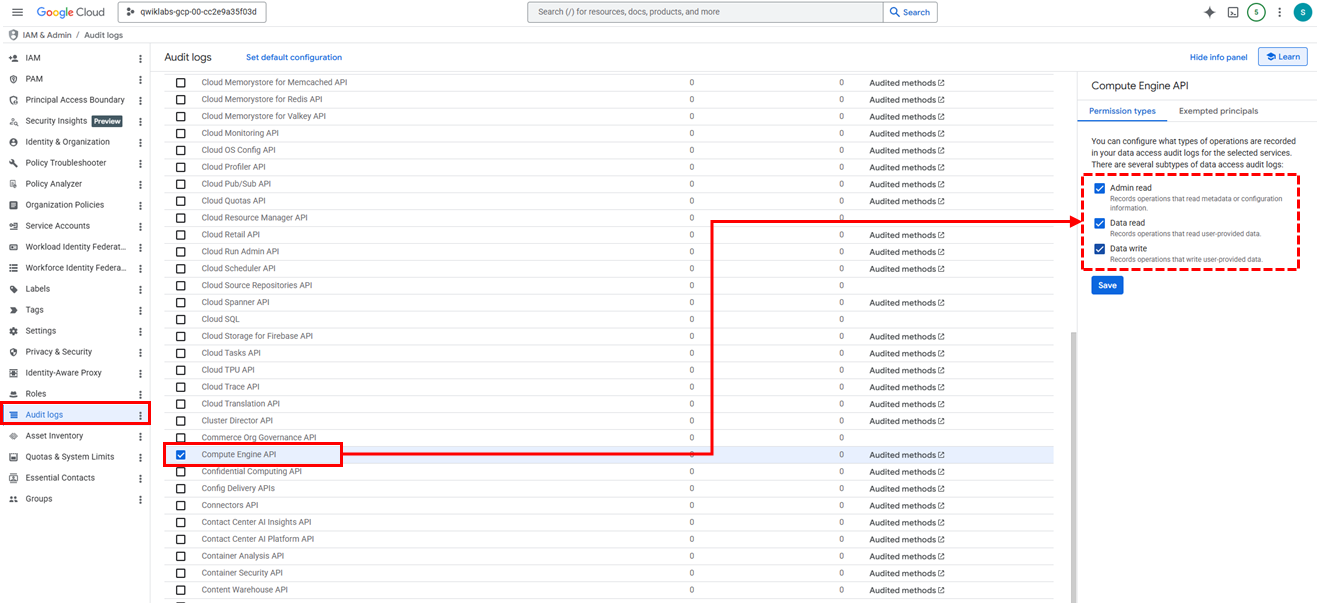
✅ 메뉴: IAM & Admin > Auidt Logs > Compute Engine API
✅ 권한: Admin Read, Data Read, Data Write
(2) IAM 역할 부여

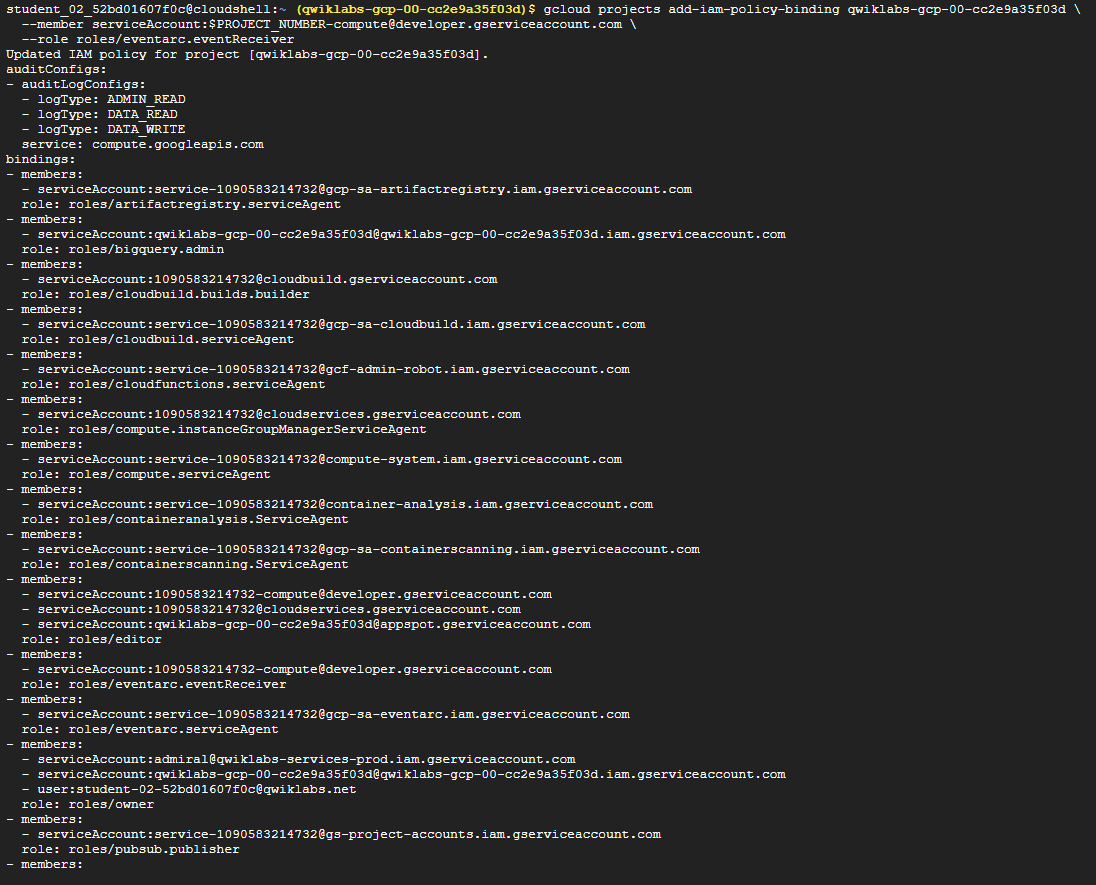
# 환경변수 설정
export PROJECT_NUMBER=$(gcloud projects describe qwiklabs-gcp-00-cc2e9a35f03d --format='value(projectNumber)')

# eventarc.eventReceiver IAM 역할 부여
gcloud projects add-iam-policy-binding PROJECT_ID \
  --member serviceAccount:$PROJECT_NUMBER-compute@developer.gserviceaccount.com \
  --role roles/eventarc.eventReceiver
(3) 코드 가져오기

cd ~
git clone https://github.com/GoogleCloudPlatform/eventarc-samples.git
(4) 배포

# 디렉터리 이동
cd ~/eventarc-samples/gce-vm-labeler/gcf/nodejs

# 배포
gcloud functions deploy gce-vm-labeler \
  --gen2 \
  --runtime nodejs22 \
  --entry-point labelVmCreation \
  --source . \
  --region Region \
  --trigger-event-filters="type=google.cloud.audit.log.v1.written,serviceName=compute.googleapis.com,methodName=beta.compute.instances.insert" \
  --trigger-location Region \
  --max-instances 1
(5) 테스트를 위한 vm 생성
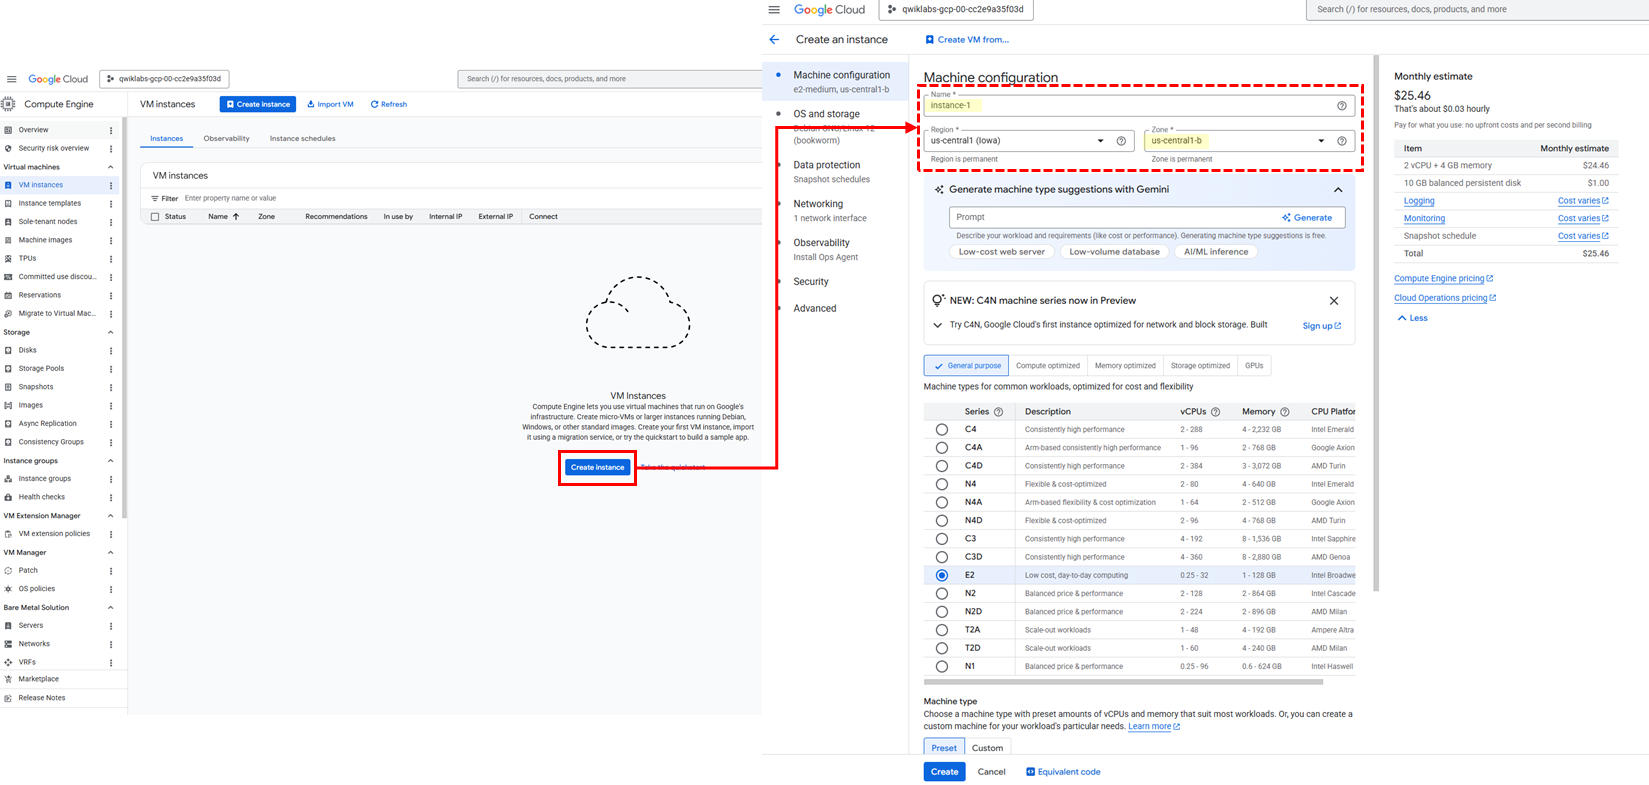
✅ 메뉴: Compute Engine > VM Instances
✅ 인스턴스 이름: instance-1
✅ Region 및 Zone: 실습용 계정에서 설정된 대로 선택
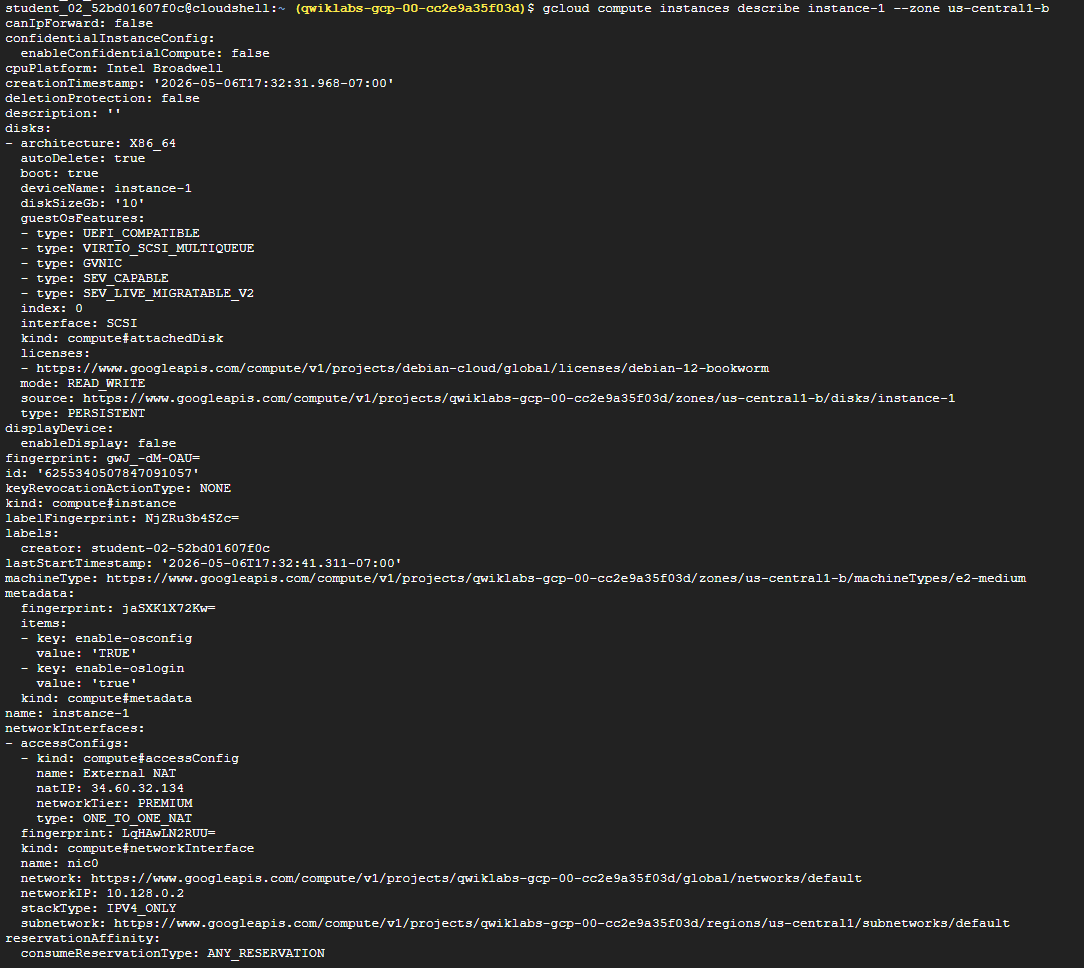
# "Zone"은 실제 zone으로 수정 필요
gcloud compute instances describe instance-1 --zone "Zone"
✅ 해당 Zone에 생성된 VM 인스턴스 확인
(6) 인스턴스 삭제

# "Zone"은 실제 zone으로 수정 필요
gcloud compute instances delete instance-1 --zone "Zone"
5. 여러 버전 배포
(1) 첫 번째 함수 - 생성

# 폴더 생성 및 이동
mkdir ~/hello-world-colored && cd $_

# 파일 생성
touch main.py
touch requirements.txt
(2) 첫 번째 함수 - 코드 추가
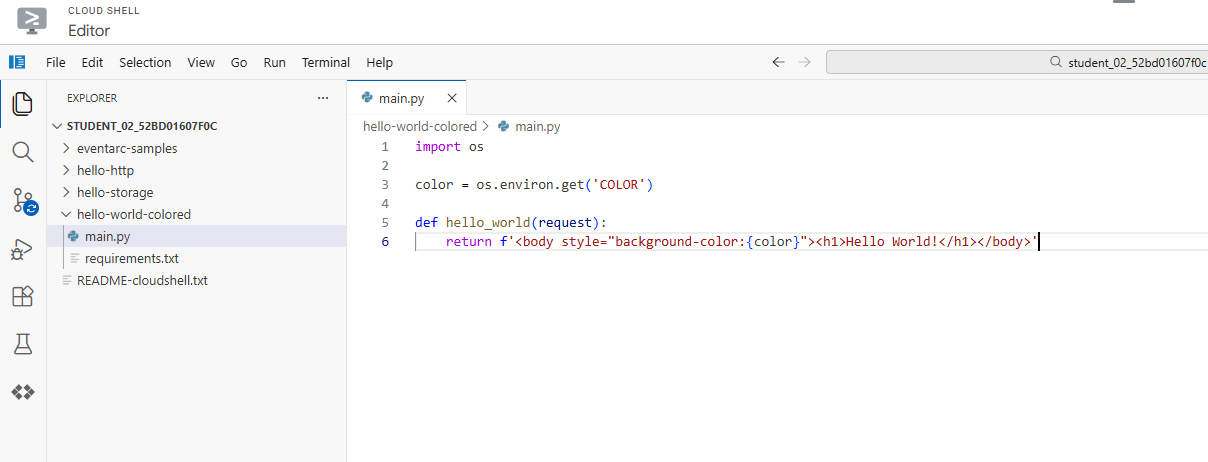
# hello-world-colored/main.py

import os

color = os.environ.get('COLOR')

def hello_world(request):
    return f'<body style="background-color:{color}"><h1>Hello World!</h1></body>'
(3) 첫 번째 함수 - 배포
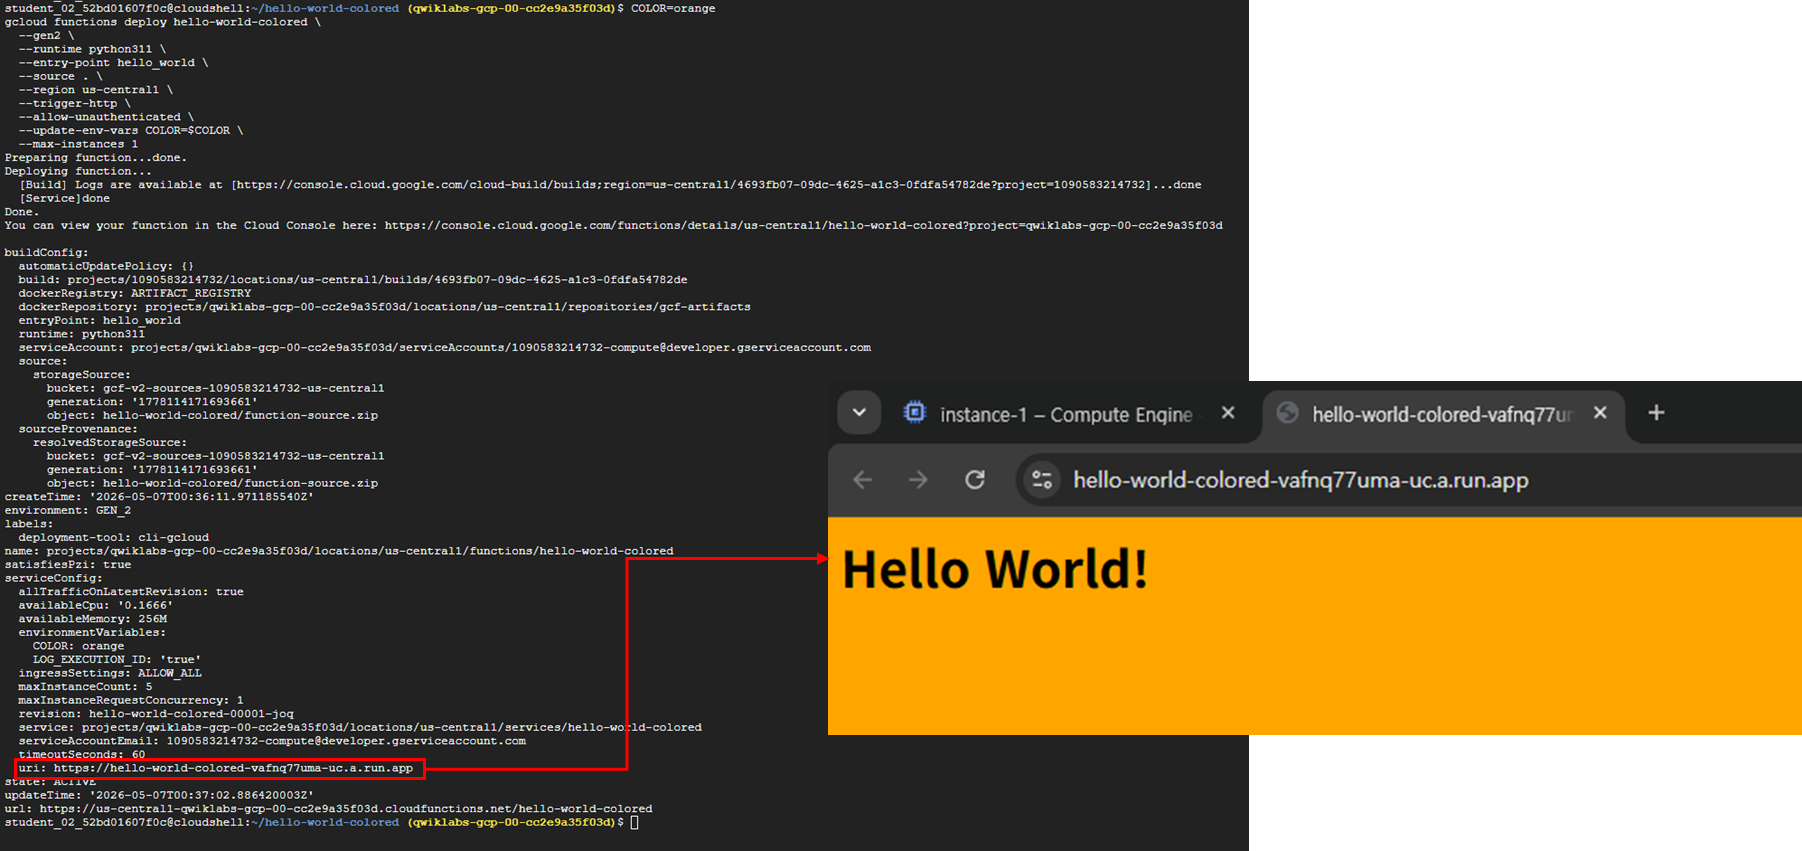
COLOR=orange
gcloud functions deploy hello-world-colored \
  --gen2 \
  --runtime python311 \
  --entry-point hello_world \
  --source . \
  --region Region \
  --trigger-http \
  --allow-unauthenticated \
  --update-env-vars COLOR=$COLOR \
  --max-instances 1
✅ 배포 결과에 출력된 URI 주소를 통해 확인 가능
(4) 두 번째 함수 - 첫 번째 함수 수정
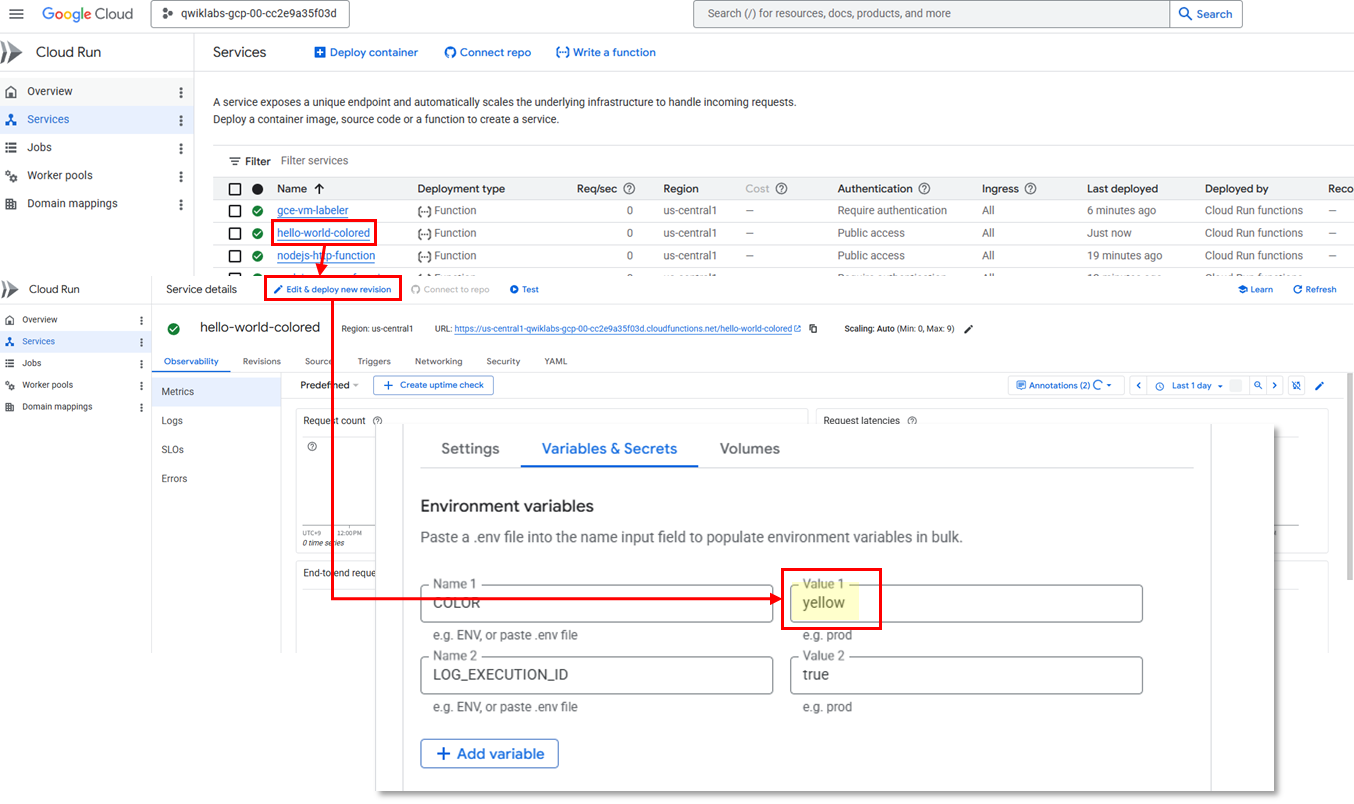
✅ 메뉴: Cloud Run > Services > hello-world-colored 함수 클릭 > Edit & deploy new revision 버튼 클릭
✅ Variables & Secrets 탭에서 Color를 Orange -> Yellow로 변경 후 배포
(5) 두 번째 함수 확인
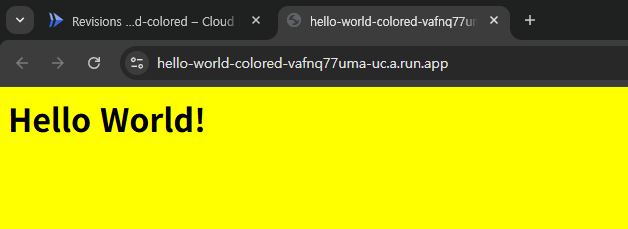
➡️ 첫 번째 함수를 테스트 했던 URI 주소로 들어가 새로고침하면 배경색이 바뀌어져있다.
6. 최소 인스턴스 설정
(1) 폴더와 파일 생성

mkdir ~/min-instances && cd $_
touch main.go
touch go.mod
(2) 코드 추가
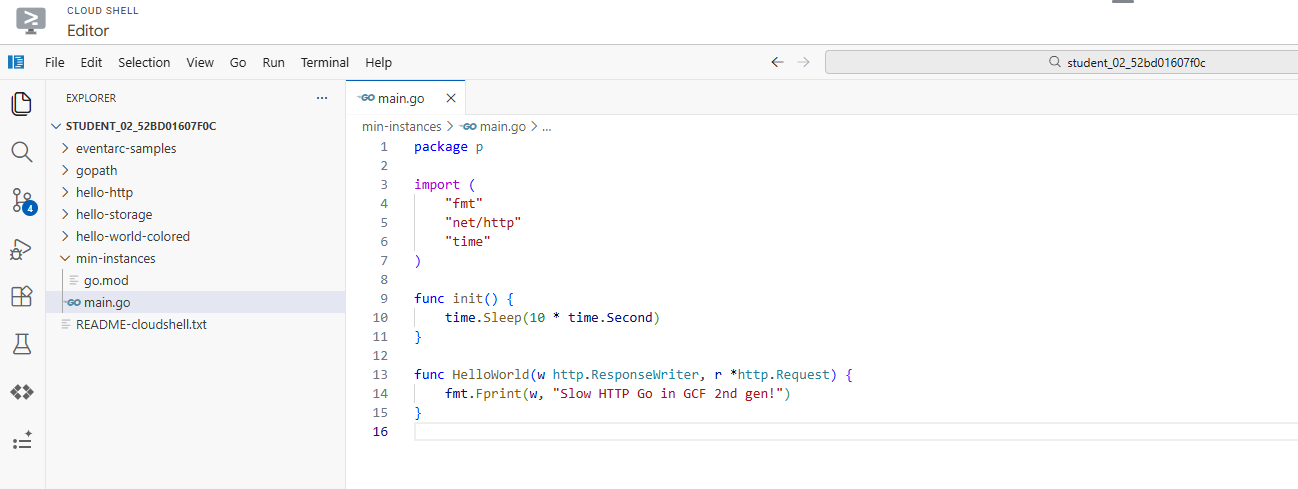
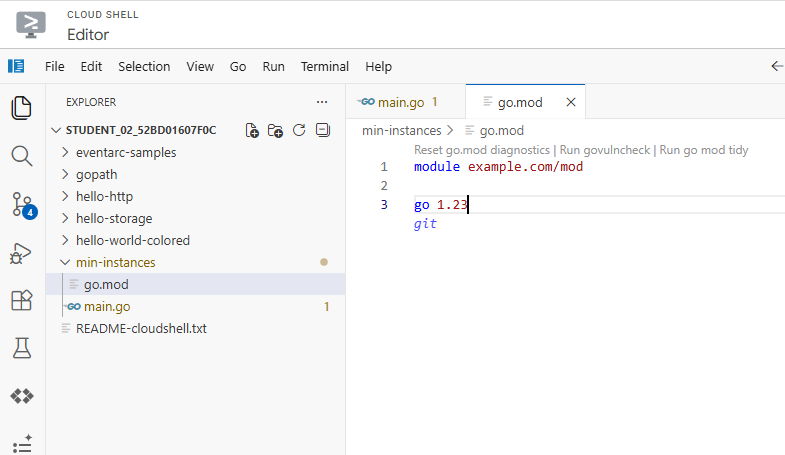
# min-instances/main.go
package p

import (
        "fmt"
        "net/http"
        "time"
)

func init() {
        time.Sleep(10 * time.Second)
}

func HelloWorld(w http.ResponseWriter, r *http.Request) {
        fmt.Fprint(w, "Slow HTTP Go in GCF 2nd gen!")
}

# min-instances/go.mod
module example.com/mod

go 1.23
(3) 배포

gcloud functions deploy slow-function \
  --gen2 \
  --runtime go123 \
  --entry-point HelloWorld \
  --source . \
  --region Region \
  --trigger-http \
  --allow-unauthenticated \
  --max-instances 4
(4) 테스트

gcloud functions call slow-function \
  --gen2 --region Region
✅ 첫 번째 호출에서 10초 지연(콜드 스타트)이 발생한 후 메시지가 표시되며, 후속 호출은 즉시 반환되어야 한다.
(5) 최소 인스턴스 설정
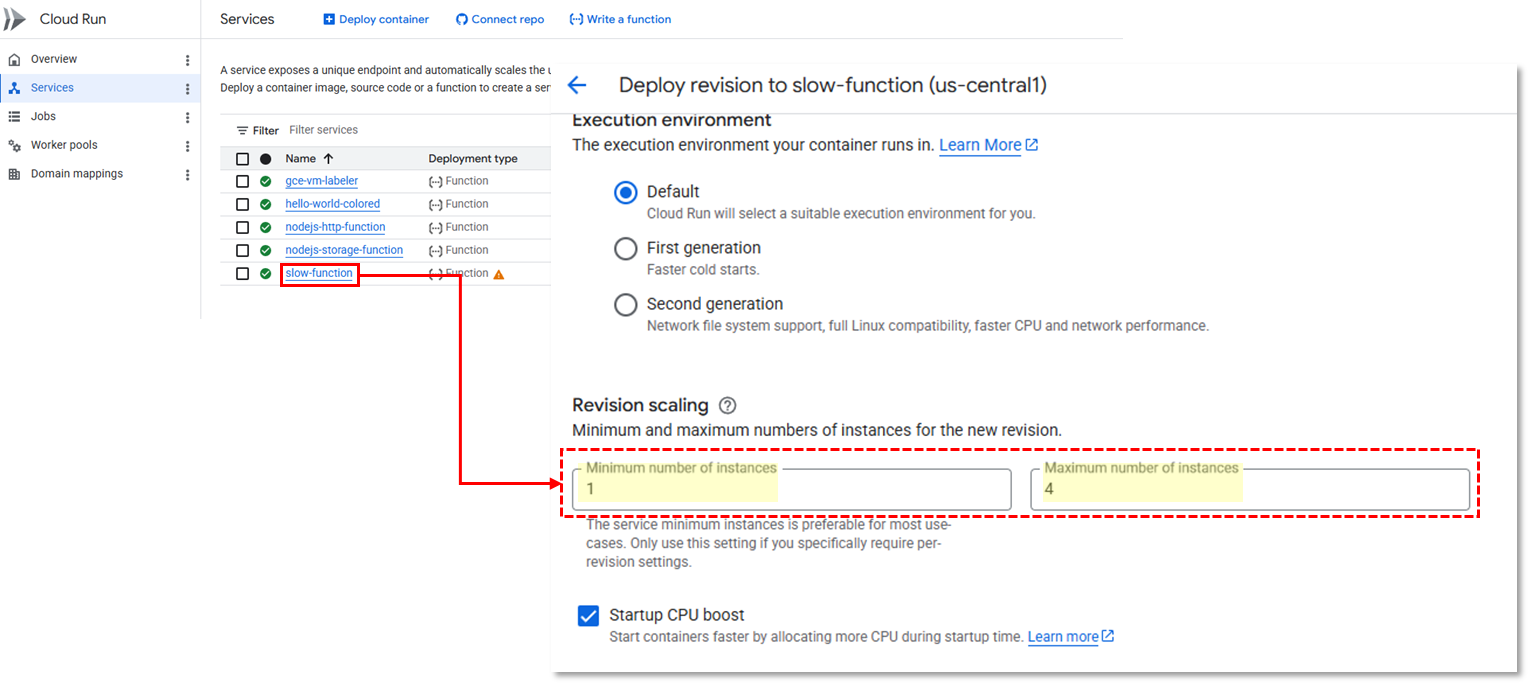
✅ 메뉴: Cloud Run > Services > slow-function > 새 버전 수정 및 배포
✅ 버전 확장 섹션에서 인스턴스 최소 개수는 1개, 최대 개수는 4개로 설정
(6) 테스트

gcloud functions call slow-function \
  --gen2 --region Region
✅ 전과 달리, 첫 번째 요청에서 10초 지연이 발생하지 않는다.
✅ 최소 인스턴스 덕분에 오랜 시간 사용하지 않은 후 첫 번째 호출에서 발생하는 콜드 스타트 문제가 해결되었다.
7. 동시 실행으로 함수 만들기
(1) 동시 실행 없이 테스트 - hey 설치
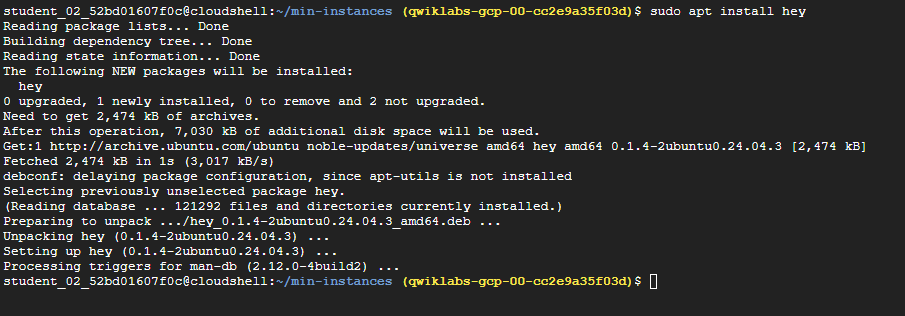
sudo apt install heyhey 란? 🤖
hey는 웹 서버가 얼마나 많은 요청을 견딜 수 있는지 테스트하는 HTTP 부하 테스트(Load Testing) 도구
(2) 동시 실행 없이 테스트 - 환경변수 설정

SLOW_URL=$(gcloud functions describe slow-function --region Region --gen2 --format="value(serviceConfig.uri)")(3) 동시 실행 없이 테스트 - 요청 보내기
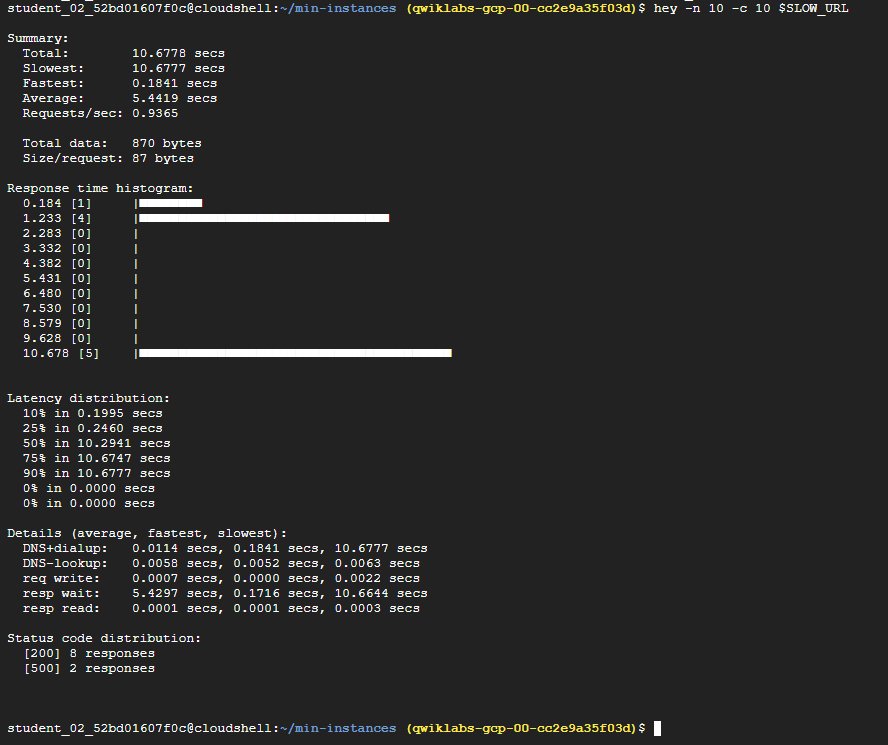
hey -n 10 -c 10 $SLOW_URL✅ hey라는 오픈소스 벤치마킹 도구를 사용하여 느린 함수에 동시 요청 10개 보내기
출력 결과
- 요청을 처리하기 위해 더 많은 함수 인스턴스가 생성되기 때문에, 일부 요청에 소요되는 시간이 길다는 점 확인 가능
- 함수의 활성 인스턴스 수를 확인하면 어느 시점에 인스턴스가 두 개 이상 생성되었고 그 결과 콜드 스타트 문제가 발생하는지를 알 수 있다.
(4) 동시 실행 테스트 - 배포

gcloud functions deploy slow-concurrent-function \
  --gen2 \
  --runtime go123 \
  --entry-point HelloWorld \
  --source . \
  --region Region \
  --trigger-http \
  --allow-unauthenticated \
  --min-instances 1 \
  --max-instances 4
(5) 동시 실행 테스트 - 동시 실행 설정
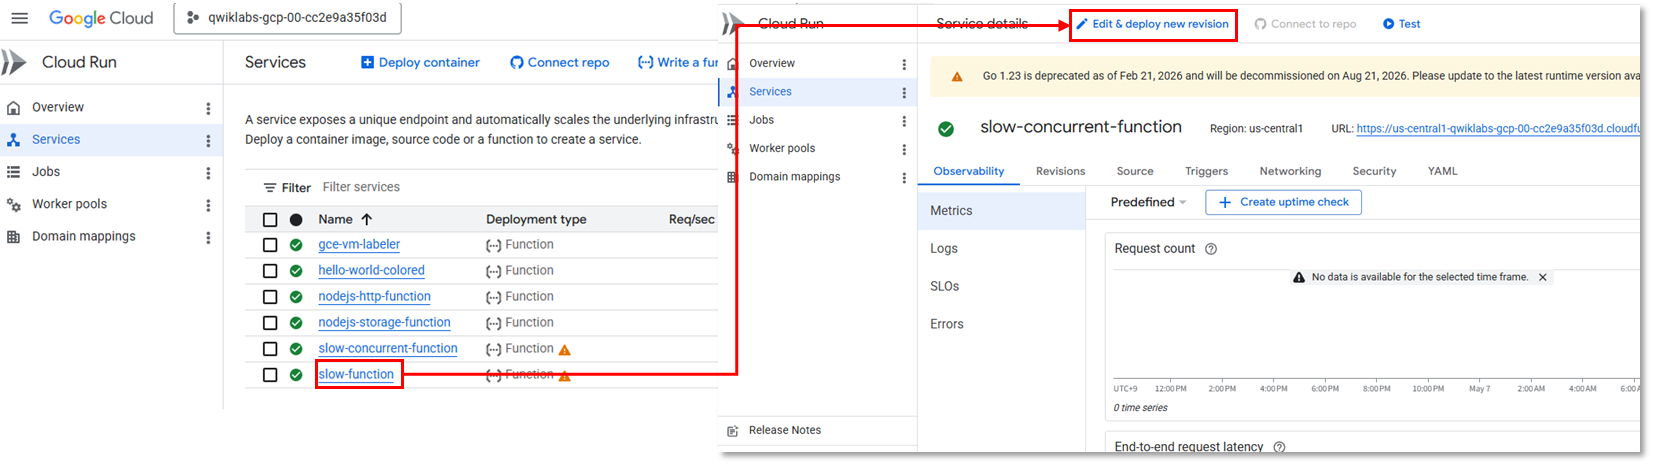
✅ 메뉴: Cloud Run > Services > slow-concurrent-function > 새 버전 수정 및 배포
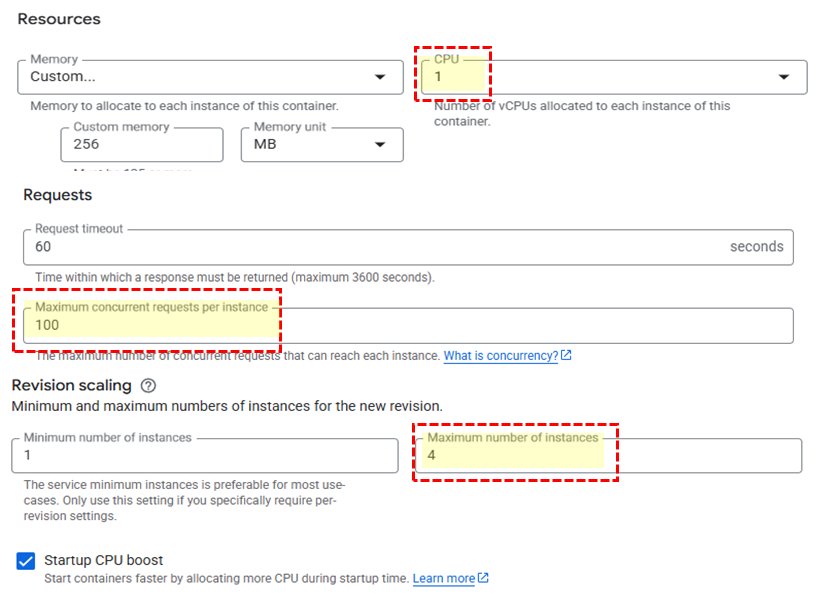
✅ 리소스: CPU를 1로 설정
✅ 요청: 인스턴스 당 최대 동시 요청 수를 100으로 설정
✅ 버전 확장: 인스턴스의 최대 개수 4로 설정
(6) 동시 실행 테스트 - 환경 변수 설정

SLOW_CONCURRENT_URL=$(gcloud functions describe slow-concurrent-function --region Region --gen2 --format="value(serviceConfig.uri)")(7) 동시 실행 테스트 - 요청 보내기
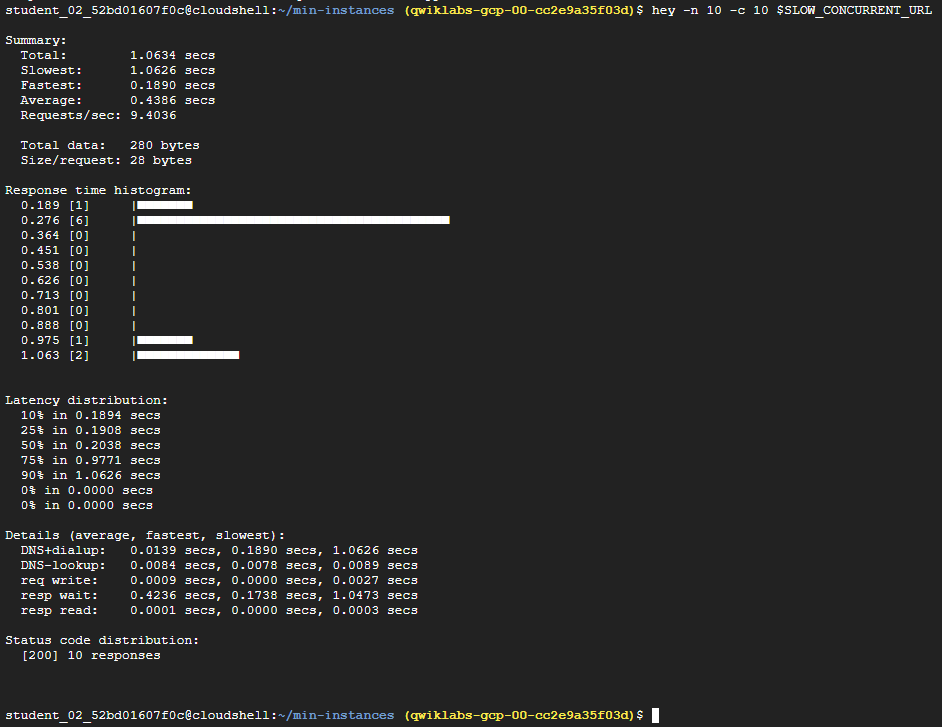
hey -n 10 -c 10 $SLOW_CONCURRENT_URL✅ hey라는 오픈소스 벤치마킹 도구를 사용하여 느린 함수에 동시 요청 10개 보내기
출력 결과
- 동시 실행 수가 증가하여 단일 함수 인스턴스에서 모든 요청을 처리할 수 있게 되었다.
- 콜드 스타트 문제가 해결되었다.
