Course
Build a Website on Google Cloud
Lab
목록
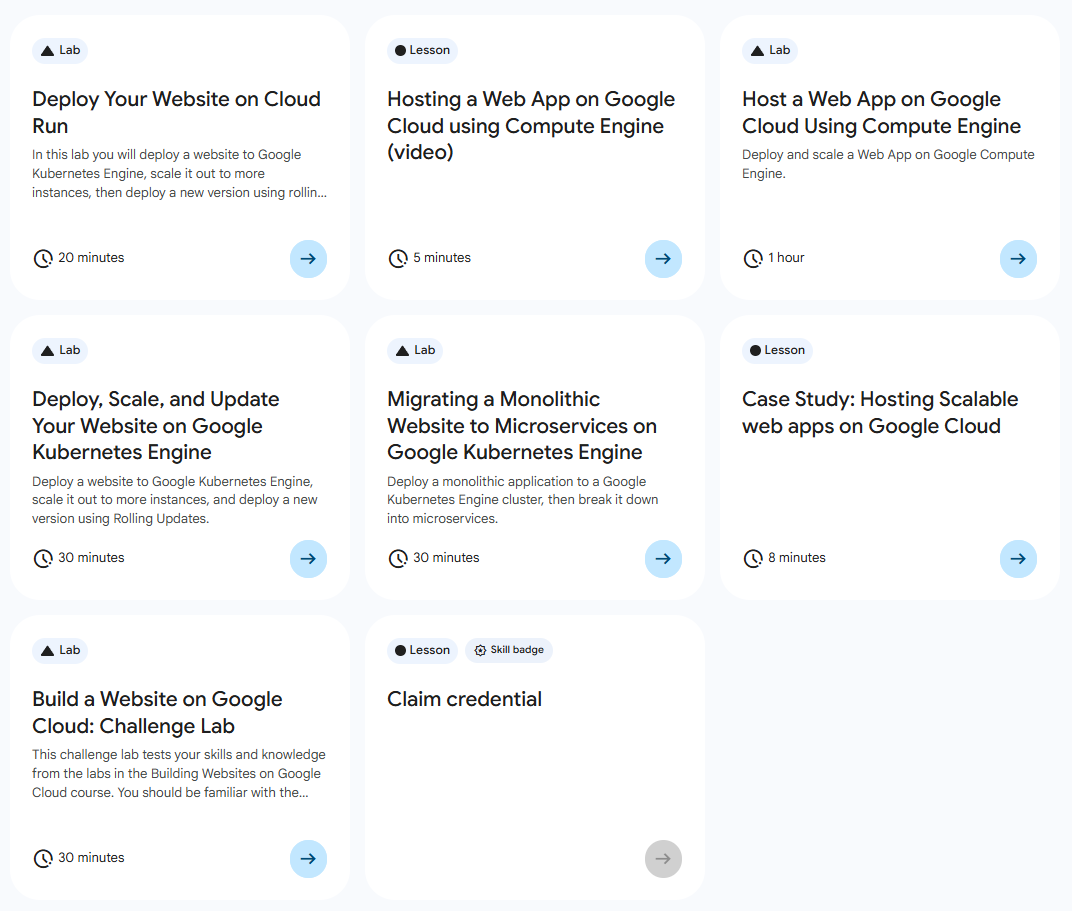
- Deploy Your Website on Cloud Run
- Host a Web App on Google Cloud Using Compute Engine ⬅️ 오늘의 Lab!
- Deploy, Scale, and Update Your Website on Google Kubernetes Engine
- Migrating a Monolithic Website to Microservices on Google Kubernetes Engine
- Case Study: Hosting Scalable web apps on Google Cloud
- Build a Website on Google Cloud: Challenge Lab
🌠 Host a Web App on Google Cloud Using Compute Engine
개요
인스턴스, 인스턴스 템플릿, 관리형 인스턴스 그룹을 만들어보고 관리형 인스턴스 그룹의 상태 점검 생성 및 테스트를 진행한다. 마찬가지로 HTTP(S) 부하 분산기를 만들고, 상태 점검도 만들어본다. 캐싱을 위해 CDN을 사용해보자!
실습과정
1. 세팅

➡️ 리전 및 영역 설정
gcloud config set compute/zone "ZONE"
export ZONE=$(gcloud config get compute/zone)

gcloud config set compute/region "REGION"
export REGION=$(gcloud config get compute/region)
2. Compute Engine API 사용 설정

gcloud services enable compute.googleapis.com3. Cloud Storage 버킷 생성

# Project ID는 자기 계정 작성
gsutil mb gs://fancy-store-Project ID
4. 소스 저장소 Clone
(1) 소스 코드 Clone 후 디렉터리 이동

git clone https://github.com/googlecodelabs/monolith-to-microservices.git
cd ~/monolith-to-microservices
(2) 초기 빌드 실행
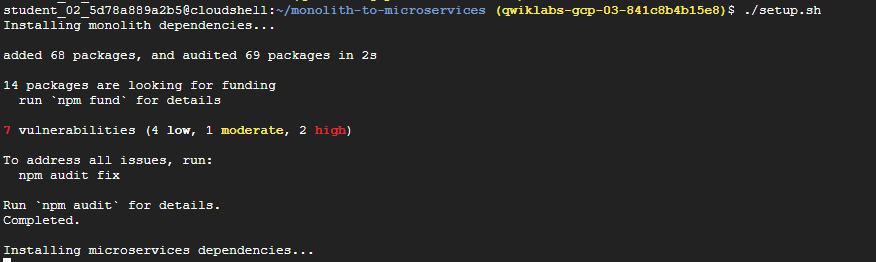
./setup.sh(3) 호환 가능한 Node.js 버전 실행

nvm install --lts(4) 웹 서버 실행
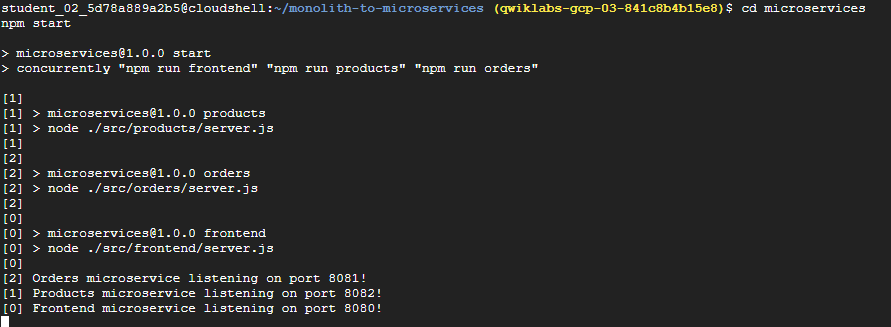
cd microservices
npm start
(5) 브라우저 접속
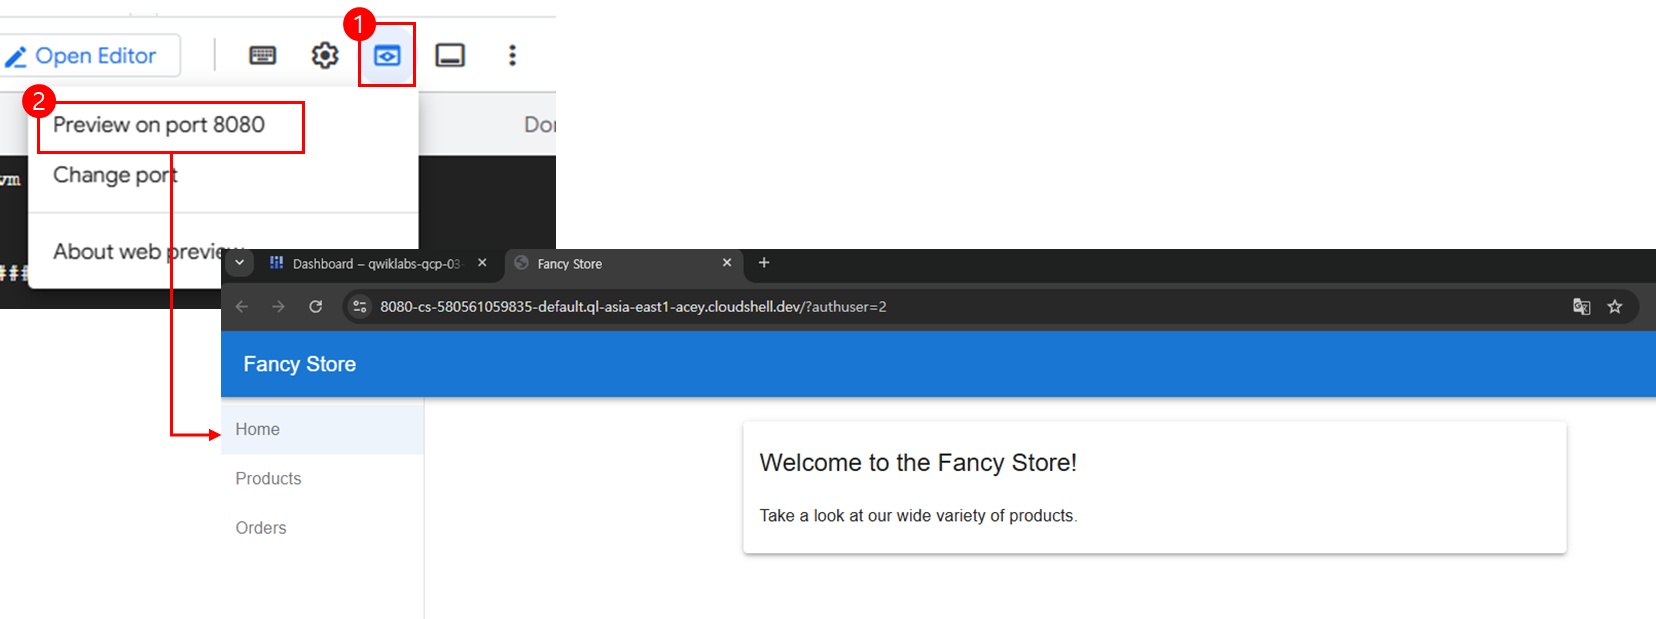
➡️ Open Editor > Preview on port 8080 > Fancy Store Frontend 확인
5. Gemini Code Assist 사용 설정

gcloud services enable cloudaicompanion.googleapis.com➡️ Gemini Code Assist를 사용하기 위해 enable 설정
6. Compute Engine 인스턴스 생성
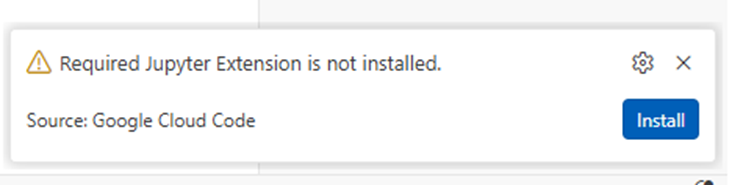
참고
우측 하단의 Google Cloud Code 관련 팝업창에서install진행
(1) 프로젝트 선택
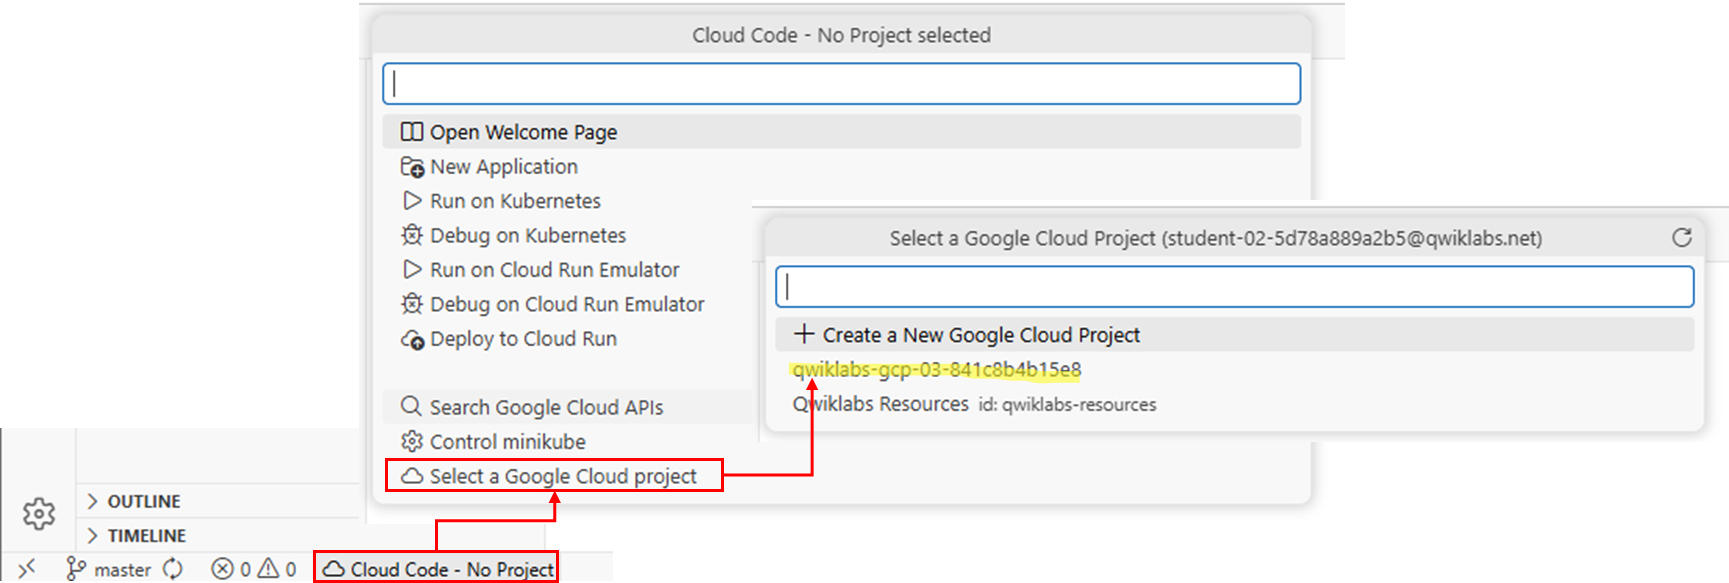
➡️ 좌측 하단의 Clode Code - No Project 선택 > 상단의 창에서 Select a Google Cloud project 선택 > 실습용 계정 선택
(2) 시작 스크립트 생성

touch ~/monolith-to-microservices/startup-script.sh➡️ 인스턴스가 시작될 때마다 수행할 작업을 인스턴스에 지시하는 데 사용되는 스크립트 생성한다.
➡️ 이렇게 하면 인스턴스가 자동으로 구성된다.
(3) startup-script.sh 내용 작성
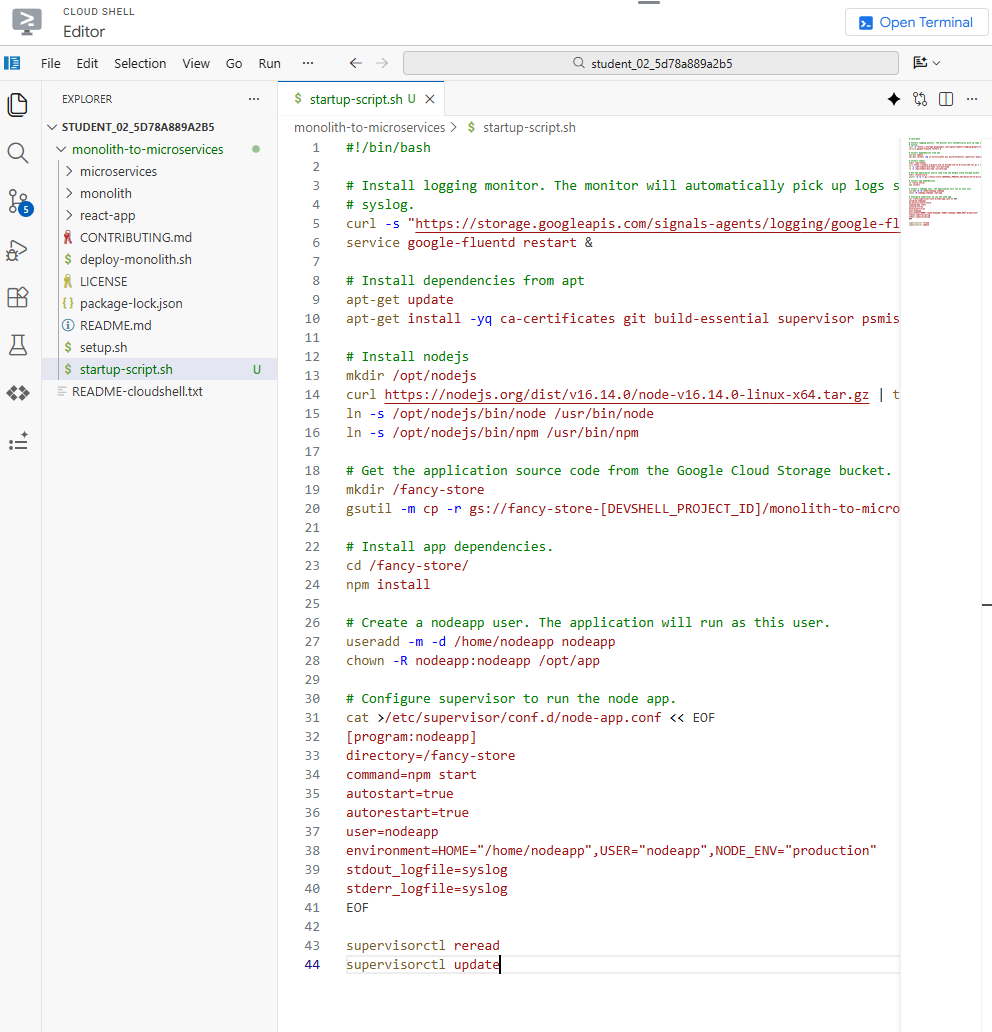
#!/bin/bash

# Install logging monitor. The monitor will automatically pick up logs sent to
# syslog.
curl -s "https://storage.googleapis.com/signals-agents/logging/google-fluentd-install.sh" | bash
service google-fluentd restart &

# Install dependencies from apt
apt-get update
apt-get install -yq ca-certificates git build-essential supervisor psmisc

# Install nodejs
mkdir /opt/nodejs
curl https://nodejs.org/dist/v16.14.0/node-v16.14.0-linux-x64.tar.gz | tar xvzf - -C /opt/nodejs --strip-components=1
ln -s /opt/nodejs/bin/node /usr/bin/node
ln -s /opt/nodejs/bin/npm /usr/bin/npm

# Get the application source code from the Google Cloud Storage bucket.
mkdir /fancy-store
gsutil -m cp -r gs://fancy-store-[DEVSHELL_PROJECT_ID]/monolith-to-microservices/microservices/* /fancy-store/

# Install app dependencies.
cd /fancy-store/
npm install

# Create a nodeapp user. The application will run as this user.
useradd -m -d /home/nodeapp nodeapp
chown -R nodeapp:nodeapp /opt/app

# Configure supervisor to run the node app.
cat >/etc/supervisor/conf.d/node-app.conf << EOF
[program:nodeapp]
directory=/fancy-store
command=npm start
autostart=true
autorestart=true
user=nodeapp
environment=HOME="/home/nodeapp",USER="nodeapp",NODE_ENV="production"
stdout_logfile=syslog
stderr_logfile=syslog
EOF

supervisorctl reread
supervisorctl update
➡️ Cloud Shell 툴바 > Open Editor > monolith-to-microservices 폴더 이동 > startup-script.sh 수정
(4) Gemini Code Assist 사용하여 파일 업데이트
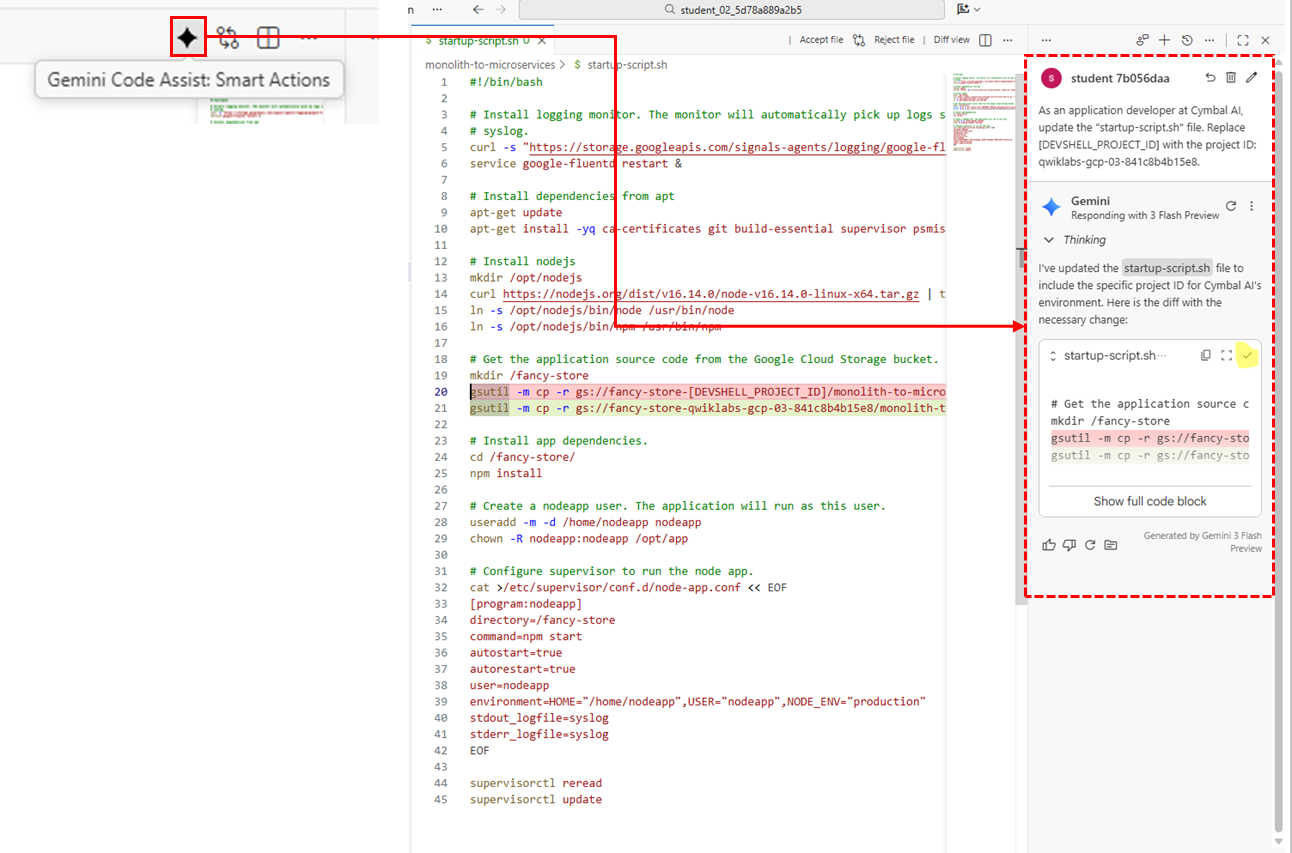
prompt✨
Cymbal AI의 애플리케이션 개발자로, "startup-script.sh" 파일을 업데이트해 줘. 프로젝트 ID의 [DEVSHELL_PROJECT_ID]를 다음으로 교체해 줘.
PROJECT_ID = 자신의 계정
➡️ 답변이 생성되면 내용 확인 후 ✅ 버튼을 눌러 적용한다.
➡️ 변경 내용: gs://fancy-store-Project ID/monolith-to-microservices/microservices/* /fancy-store/
참고
우측 하단의 줄 끝 시퀀스를 'CRLF' -> 'LF'로 변경
(기존부터 LF였다면 변경 필요 없음)

(5) 스크립트 파일을 버킷에 복사

gsutil cp ~/monolith-to-microservices/startup-script.sh gs://fancy-store-Project ID➡️ https://storage.googleapis.com/[BUCKET_NAME]/startup-script.sh 주소에 액세스 가능.
(6) 스크립트 내용 분석 (Optional)
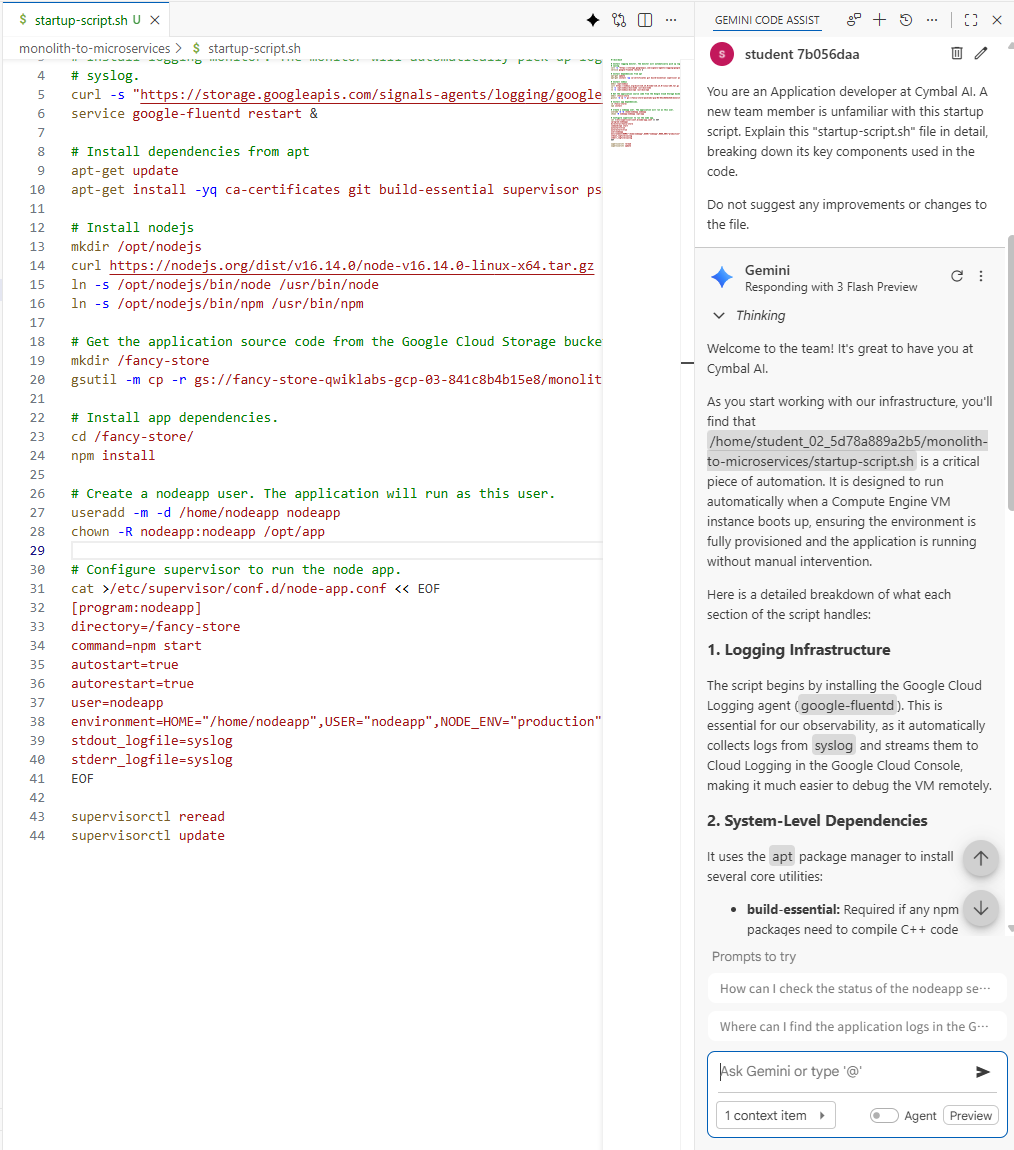
prompt✨
Cymbal AI의 애플리케이션 개발자라고 가정해 줘. 새로운 팀원은 아직 이 시작 스크립트에 익숙하지 않아. 코드에 사용된 주요 구성요소로 "startup-script.sh" 파일을 세분화하여 자세히 설명해 줘.
파일에 대한 개선이나 변경사항을 제안하지 마.
➡️ prompt에 궁금한 내용을 작성하면 Gemini Code Assist가 스크립트 파일의 내용을 분석하여 답변해준다.
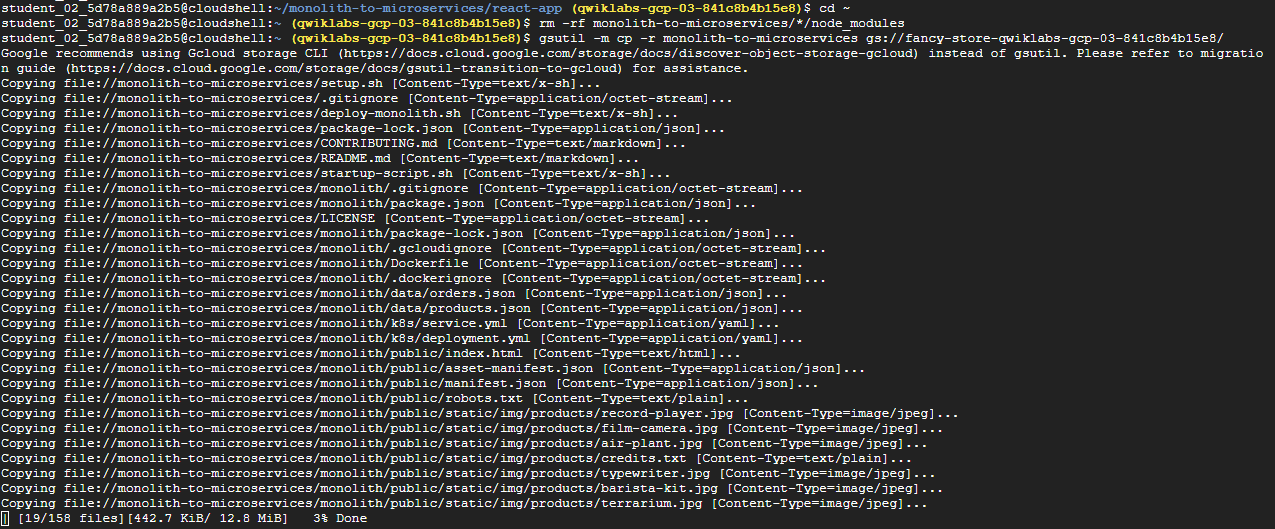
7. 코드를 Cloud Storage 버킷에 복사
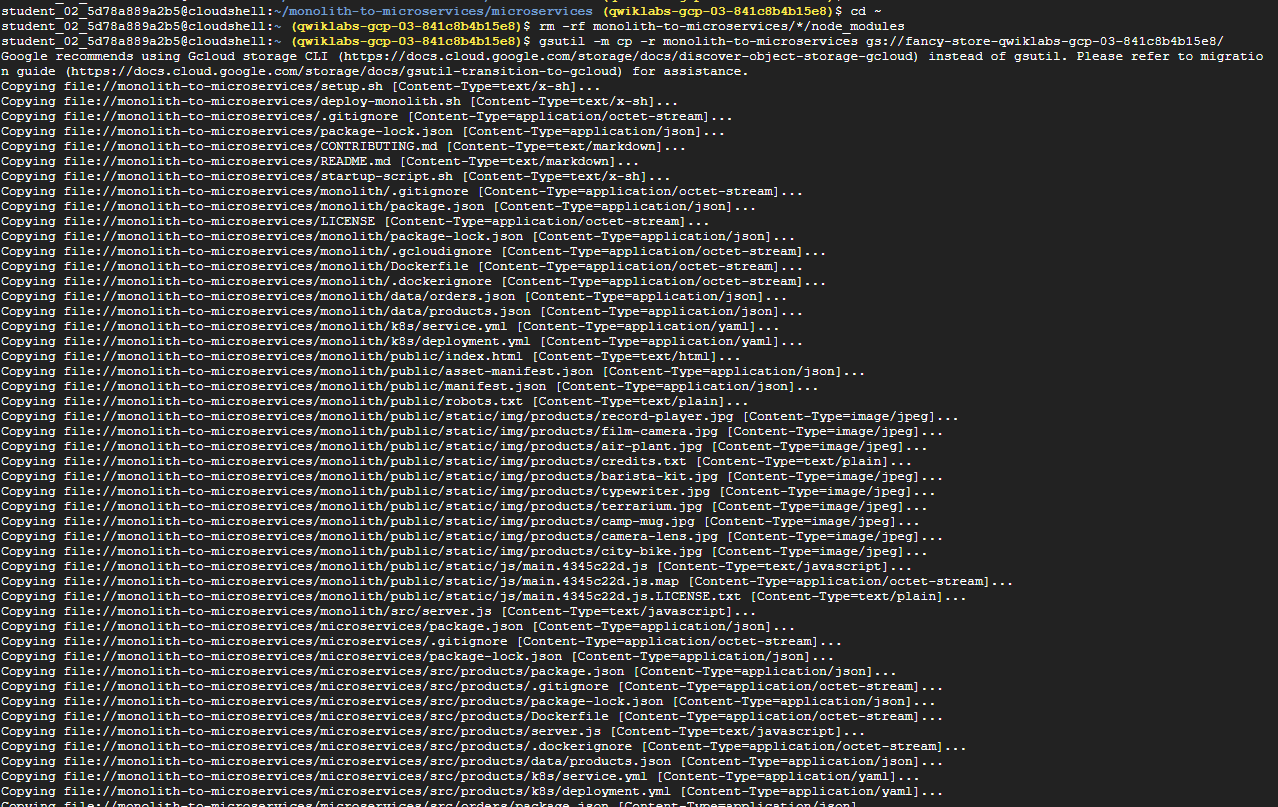
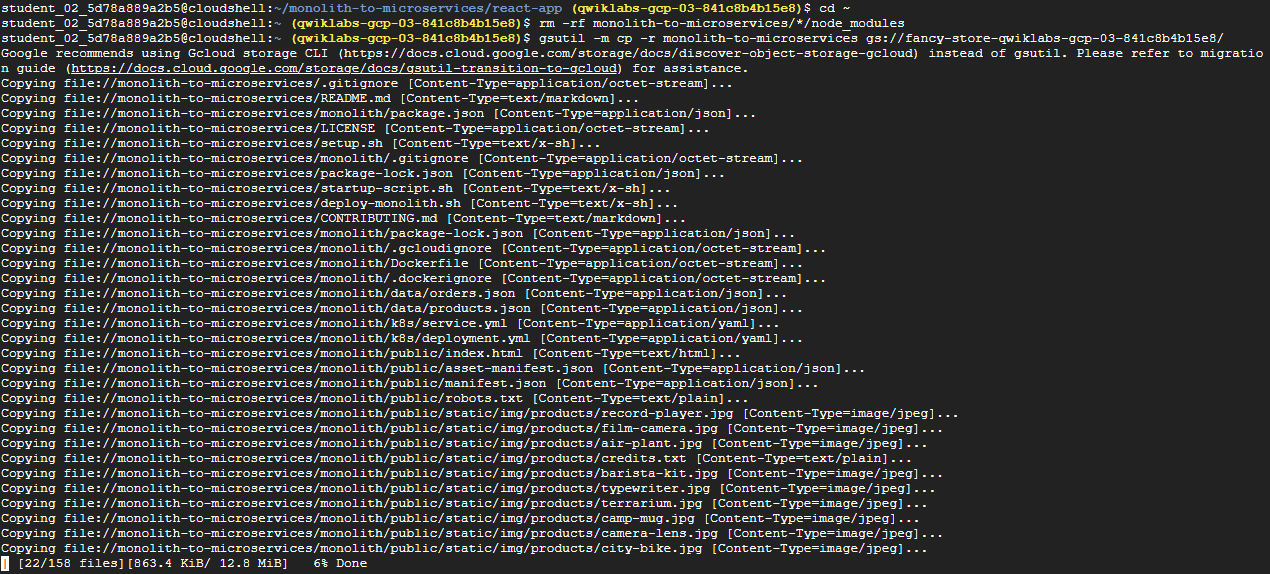
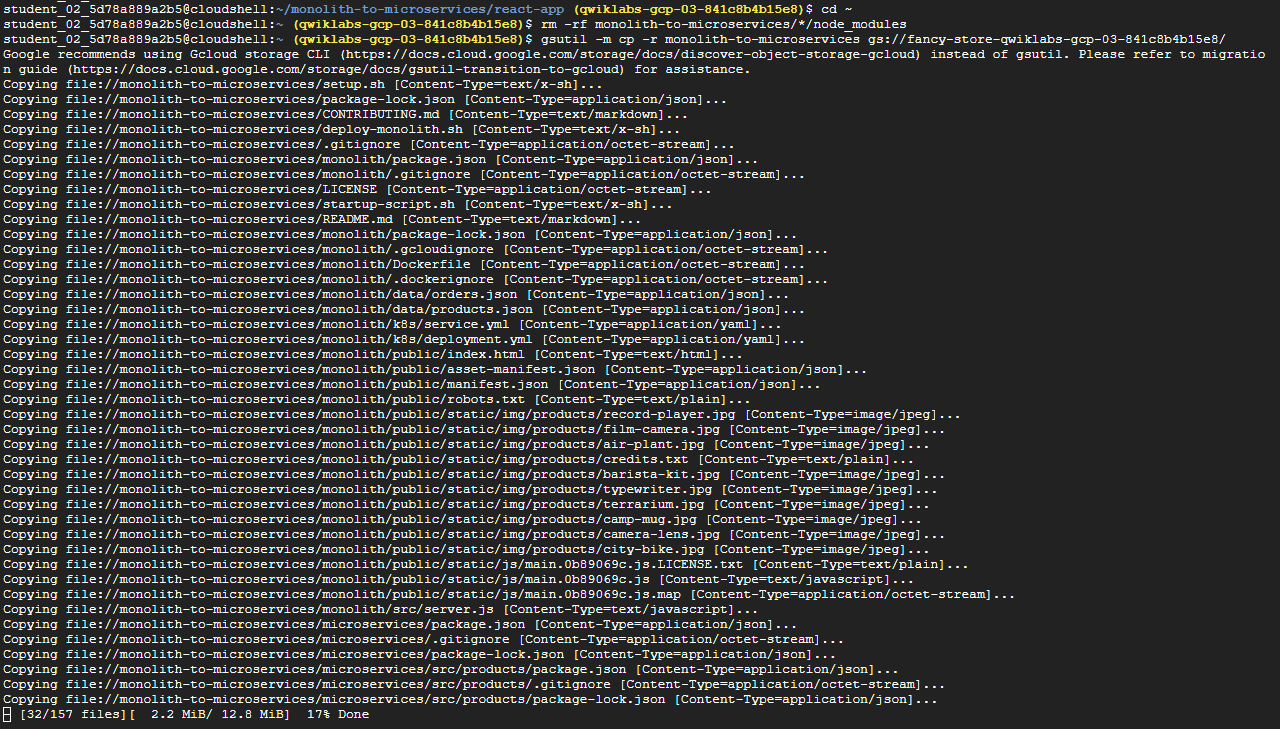
cd ~
rm -rf monolith-to-microservices/*/node_modules
gsutil -m cp -r monolith-to-microservices gs://fancy-store-Project ID/
➡️ 인스턴스가 시작되면 Cloud Storage 버킷에서 코드를 가져오기 때문에 코드의 .env 파일 안에 일부 구성 변수를 저장할 수 있다.
8. 백엔드 인스턴스 배포
(1) e2-standard-2 인스턴스 생성
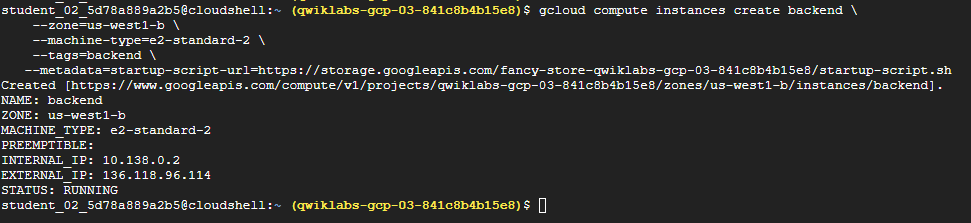
gcloud compute instances create backend \
    --zone=zone \
    --machine-type=e2-standard-2 \
    --tags=backend \
   --metadata=startup-script-url=https://storage.googleapis.com/fancy-store-Project ID/startup-script.sh
➡️ 시작 스크립트를 사용하도록 구성된 e2-standard-2 인스턴스를 생성
➡️ 나중에 특정 방화벽 규칙을 적용할 수 있도록 backend 인스턴스 태그가 지정된다.
(2) 백엔드 연결 구성 확인

gcloud compute instances list➡️ 외부 IP 확인
(3) .env 파일 수정

REACT_APP_ORDERS_URL=http://[BACKEND_ADDRESS]:8081/api/orders
REACT_APP_PRODUCTS_URL=http://[BACKEND_ADDRESS]:8082/api/products
➡️ ~/monolith-to-microservices/react-app 에서 .env 파일 수정
(4) 빌드를 통해 Frontend 업데이트
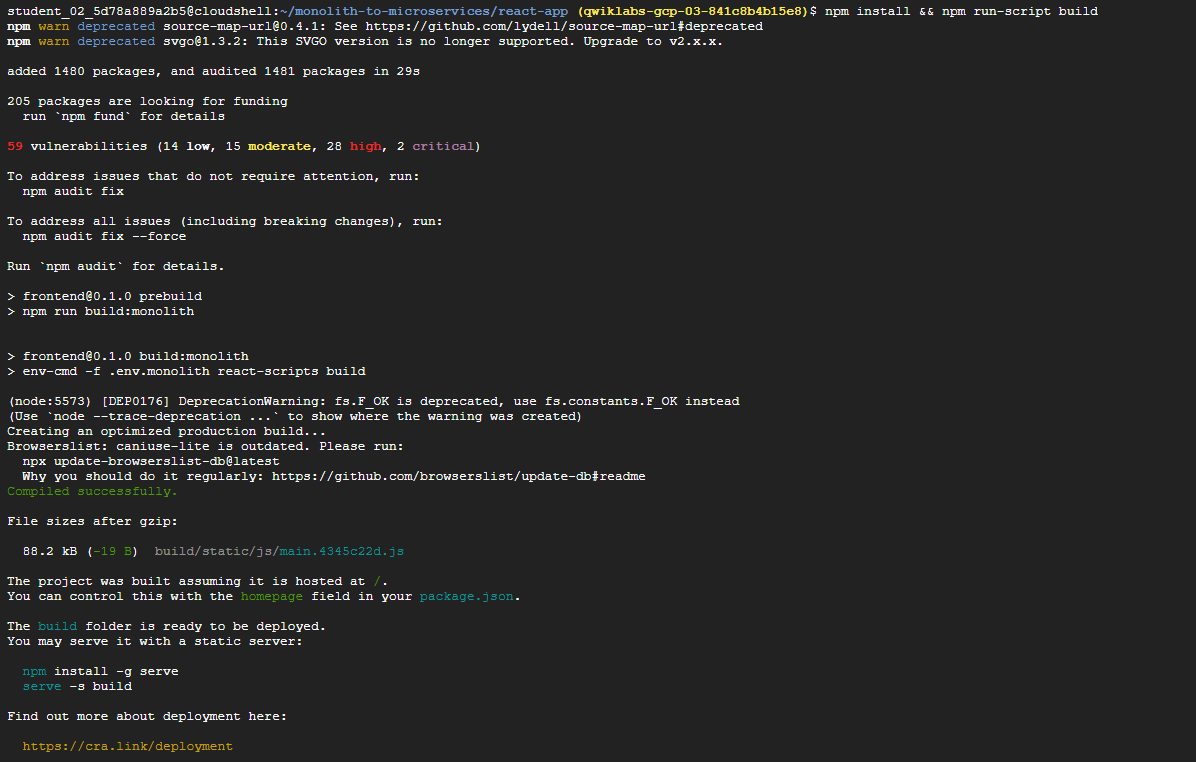
cd ~/monolith-to-microservices/react-app
npm install && npm run-script build
(5) App 코드를 Cloud Storage 버킷에 복사
cd ~
rm -rf monolith-to-microservices/*/node_modules
gsutil -m cp -r monolith-to-microservices gs://fancy-store-Project ID/
9. 프론트 인스턴스 배포
(1) 인스턴스 배포
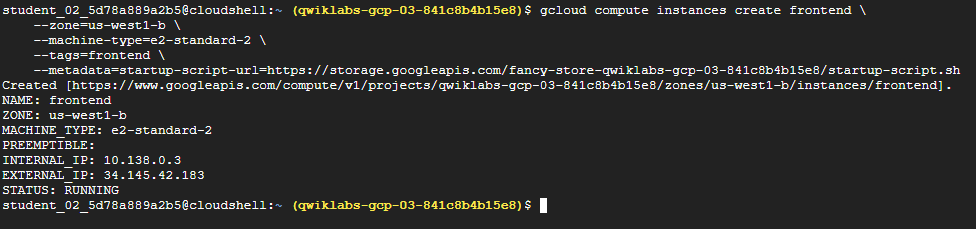
gcloud compute instances create frontend \
    --zone=zone \
    --machine-type=e2-standard-2 \
    --tags=frontend \
    --metadata=startup-script-url=https://storage.googleapis.com/fancy-store-Project ID/startup-script.sh
(2) 네트워크 구성


# Frontend
gcloud compute firewall-rules create fw-fe \
    --allow tcp:8080 \
    --target-tags=frontend

# backend
gcloud compute firewall-rules create fw-be \
    --allow tcp:8081-8082 \
    --target-tags=backend
➡️ Frontend: 8080, Backend: 8081~8082 애겟스 허용 방화벽 규칙 생성
➡️ 방화벽 명령어는 애플리케이션의 인스턴스 생성 중에 지정된 태그 사용
(3) 외부 주소 확인
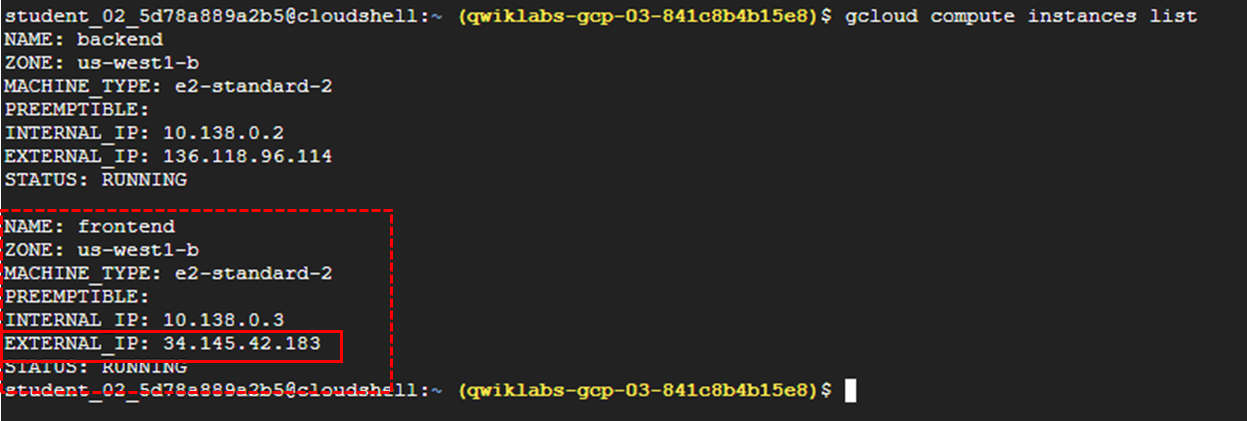
gcloud compute instances list➡️ Frontend의 외부 IP로 이동하기 위한 주소를 찾기 위해, Frontend의 외부 IP 찾기
(4) 브라우저 열기
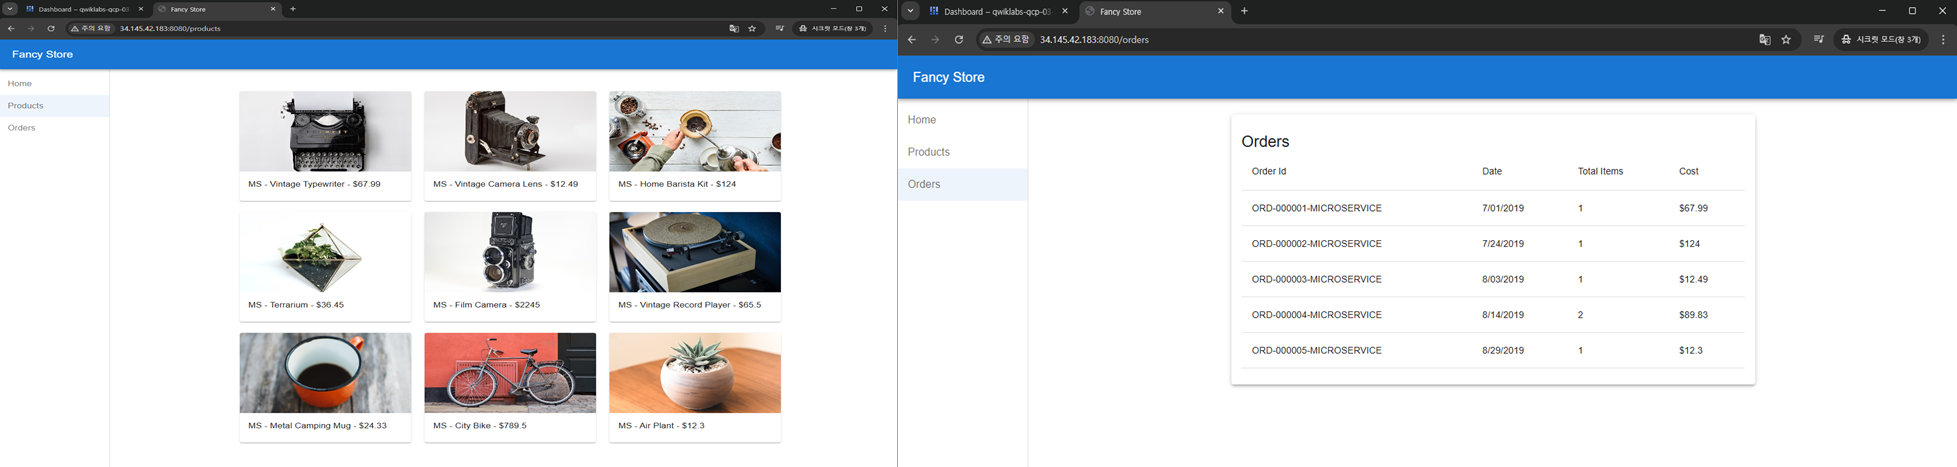
➡️ Products, Orders 메뉴 작동 확인
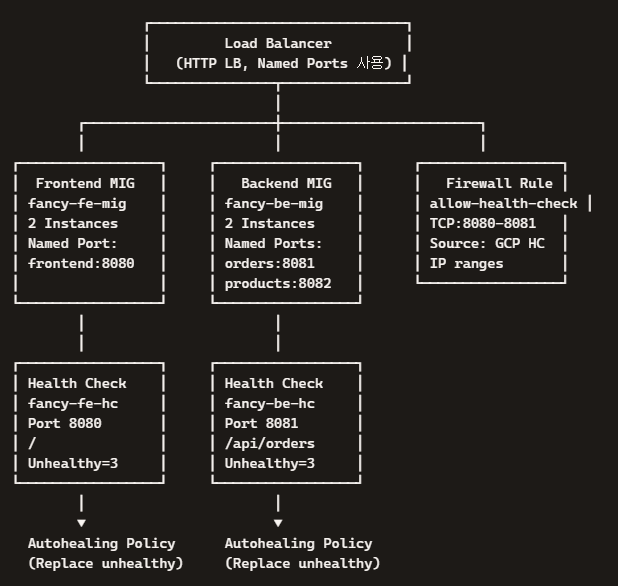
10. 관리형 인스턴스 그룹 만들기
관리형 인스턴스 그룹 아키텍처
(1) 기존 인스턴스 중지

gcloud compute instances stop frontend --zone=zone
gcloud compute instances stop backend --zone=zone
➡️ 인스턴스 템플릿을 만들기 위해서는 이전에 만든 기존 인스턴스를 사용한다.
(2) 인스턴스 템플릿 생성
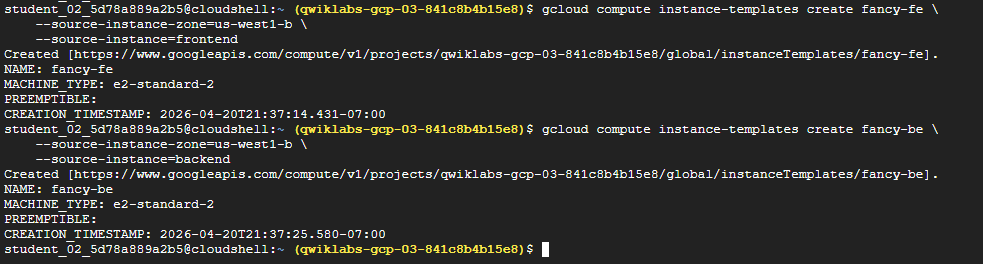
# frontend
gcloud compute instance-templates create fancy-fe \
    --source-instance-zone=zone \
    --source-instance=frontend

# backend
gcloud compute instance-templates create fancy-be \
    --source-instance-zone=zone \
    --source-instance=backend
(3) 인스턴스 템플릿 생성 확인
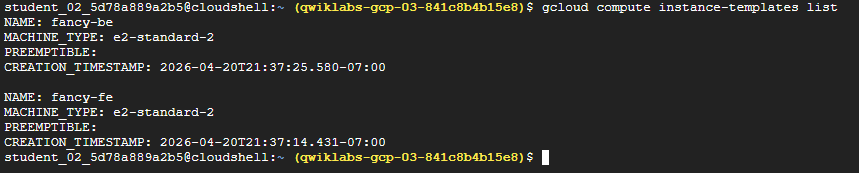
gcloud compute instance-templates list(4) 백엔드 VM 삭제

gcloud compute instances delete backend --zone=zone➡️ 인스턴스 템플릿이 생성된 상태에서 리소스 공간을 절약하기 위해 backend VM 삭제
➡️ frontend VM 삭제해도 무방하나, 실습에서는 나중에 인스턴스 템플릿 업데이트 시 사용하기 위해 삭제를 진행하지 않는다.
(5) 관리형 인스턴스 그룹 생성
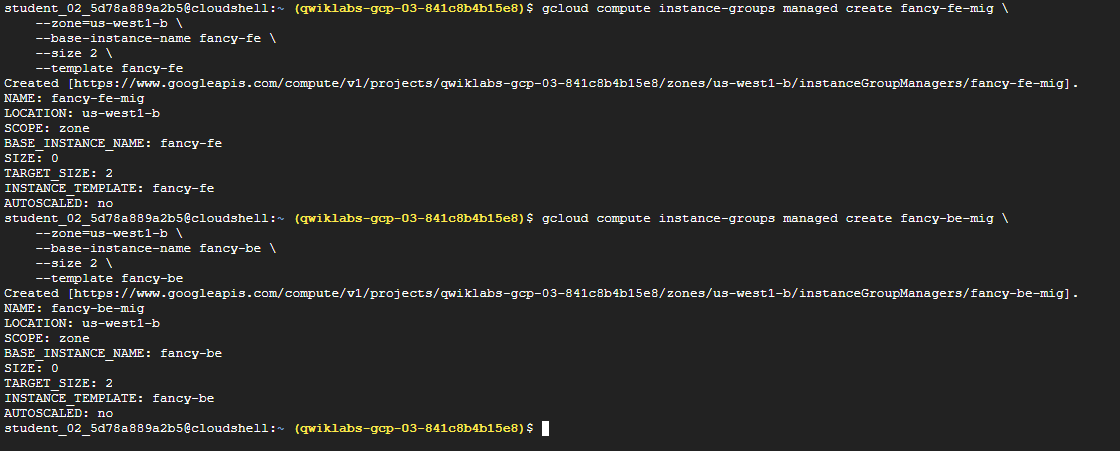
# frontend
gcloud compute instance-groups managed create fancy-fe-mig \
    --zone=zone \
    --base-instance-name fancy-fe \
    --size 2 \
    --template fancy-fe

# backend
gcloud compute instance-groups managed create fancy-be-mig \
    --zone=zone \
    --base-instance-name fancy-be \
    --size 2 \
    --template fancy-be
➡️ 관리형 인스턴스 그룹은 인스턴스 템플릿을 사용하며 각 그룹 내에서 두 개의 인스턴스가 각각 시작되도록 구성된다.
➡️ 인스턴스 이름은 base-instance-name을 기반으로 임의의 문자가 추가되도록 자동 지정된다.
(6) 포트 설정

# frontend
gcloud compute instance-groups set-named-ports fancy-fe-mig \
    --zone=zone \
    --named-ports frontend:8080

# backend
gcloud compute instance-groups set-named-ports fancy-be-mig \
    --zone=zone \
    --named-ports orders:8081,products:8082
➡️ 비표준 포트이기 때문에 식별하기 위해 이름이 지정된 포트를 명시해야 한다.
➡️ {서비스 이름:실행 포트}는 키-값 쌍 메타데이터로, 나중에 구성할 HTTP 부하 분산 서비스에서 사용된다.
(7) 관리형 인스턴스 그룹의 자동 복구 정책 구성
1) 3번 연속 unhealthy 반환 시 인스턴스를 복구하는 상태점검 생성
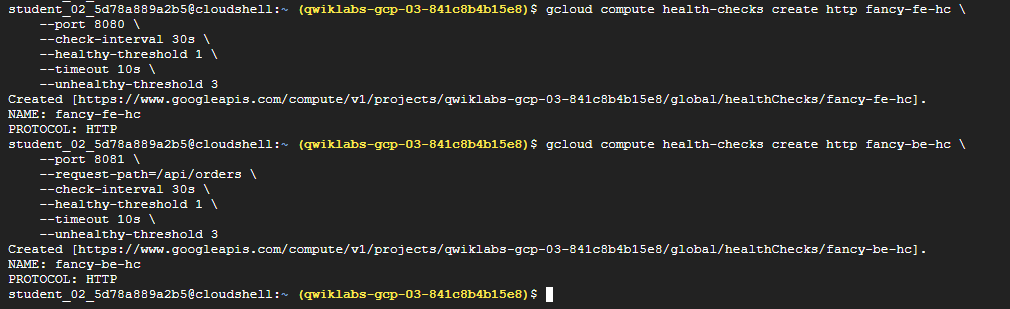
# frontend
gcloud compute health-checks create http fancy-fe-hc \
    --port 8080 \
    --check-interval 30s \
    --healthy-threshold 1 \
    --timeout 10s \
    --unhealthy-threshold 3

# backend
gcloud compute health-checks create http fancy-be-hc \
    --port 8081 \
    --request-path=/api/orders \
    --check-interval 30s \
    --healthy-threshold 1 \
    --timeout 10s \
    --unhealthy-threshold 3
2) 상태 점검 프로브(probes)가 포트 8080~8081의 마이크로서비스에 연결되도록 허용하는 방화벽 규칙 생성

gcloud compute firewall-rules create allow-health-check \
    --allow tcp:8080-8081 \
    --source-ranges 130.211.0.0/22,35.191.0.0/16 \
    --network default
3) 상태 점검을 서비스에 적용

gcloud compute instance-groups managed update fancy-fe-mig \
    --zone=zone \
    --health-check fancy-fe-hc \
    --initial-delay 300

gcloud compute instance-groups managed update fancy-be-mig \
    --zone=zone \
    --health-check fancy-be-hc \
    --initial-delay 300
11. 부하 분산기 만들기
부하 분산 아키텍처
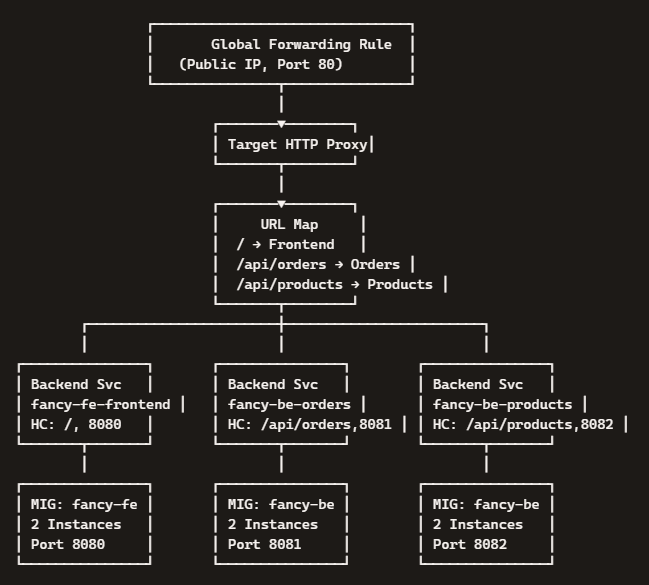
(1) 트래픽 처리 상태 점검 생성
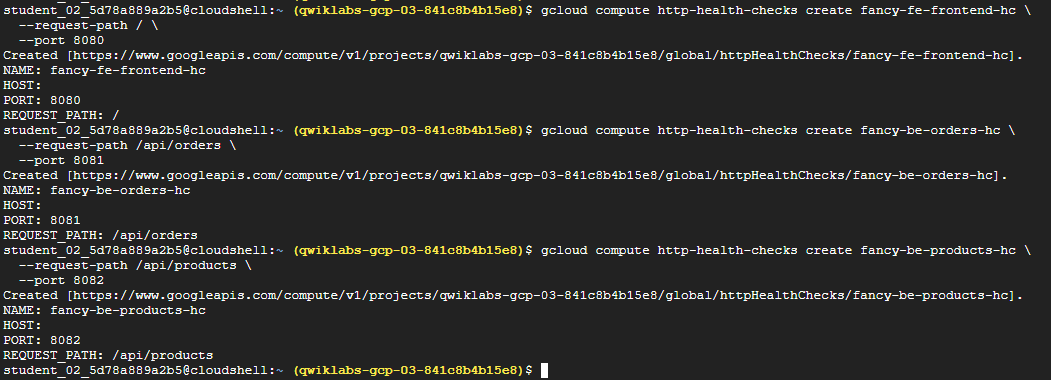
# frontend
gcloud compute http-health-checks create fancy-fe-frontend-hc \
  --request-path / \
  --port 8080

# backend -> /api/orders
gcloud compute http-health-checks create fancy-be-orders-hc \
  --request-path /api/orders \
  --port 8081

# backend -> /api/products
gcloud compute http-health-checks create fancy-be-products-hc \
  --request-path /api/products \
  --port 8082
참고✨
이러한 상태 점검은 부하 분산기용이므로 부하 분산기의 직접 트래픽만 처리하며, 관리형 인스턴스 그룹에서 인스턴스를 재생성하도록 만들지 않는다.
(2) 분산된 트래픽의 대상인 백엔드 서비스 생성
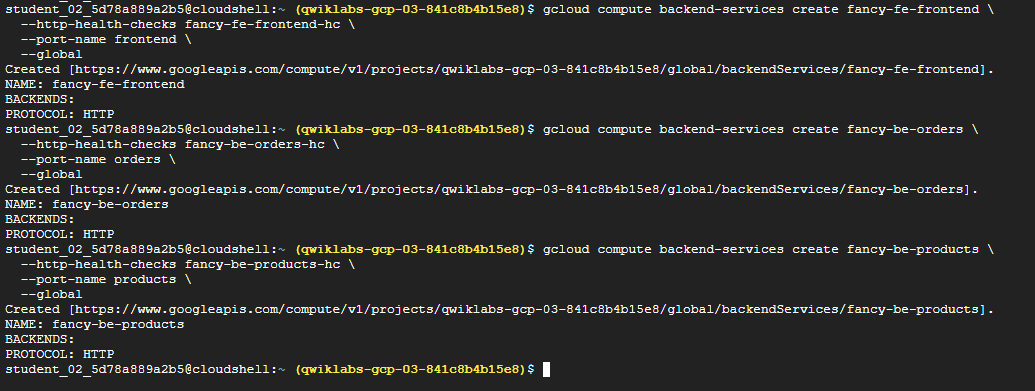
# fancy-fe-frontend
gcloud compute backend-services create fancy-fe-frontend \
  --http-health-checks fancy-fe-frontend-hc \
  --port-name frontend \
  --global

# fancy-be-orders
gcloud compute backend-services create fancy-be-orders \
  --http-health-checks fancy-be-orders-hc \
  --port-name orders \
  --global

# fancy-be-products
gcloud compute backend-services create fancy-be-products \
  --http-health-checks fancy-be-products-hc \
  --port-name products \
  --global
➡️ 백엔드 서비스는 앞에서 만든 상태 점검과 이름이 지정된 포트를 사용한다.
(3) 부하 분산기의 백엔드 서비스를 추가
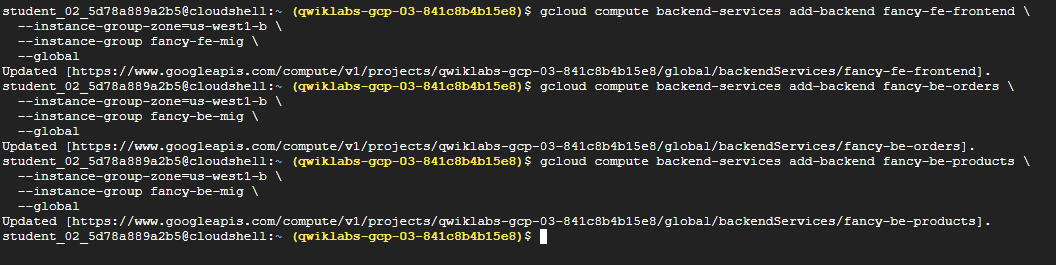
# fancy-fe-frontend
gcloud compute backend-services add-backend fancy-fe-frontend \
  --instance-group-zone=zone \
  --instance-group fancy-fe-mig \
  --global

# fancy-be-orders
gcloud compute backend-services add-backend fancy-be-orders \
  --instance-group-zone=zone \
  --instance-group fancy-be-mig \
  --global

# fancy-be-products
gcloud compute backend-services add-backend fancy-be-products \
  --instance-group-zone=zone \
  --instance-group fancy-be-mig \
  --global
(4) URL 맵 생성

gcloud compute url-maps create fancy-map \
  --default-service fancy-fe-frontend
(5) 라우팅 경로 설정

# /api/orders, /api/products 경로에 대한 설정
gcloud compute url-maps add-path-matcher fancy-map \
   --default-service fancy-fe-frontend \
   --path-matcher-name orders \
   --path-rules "/api/orders=fancy-be-orders,/api/products=fancy-be-products"
(6) URL 맵에 연결되는 프록시 생성

gcloud compute target-http-proxies create fancy-proxy \
  --url-map fancy-map
(7) 프록시 설정

gcloud compute forwarding-rules create fancy-http-rule \
  --global \
  --target-http-proxy fancy-proxy \
  --ports 80
➡️ 공개 IP 주소와 포트를 프록시에 연결하는 전달 규칙 생성
12. 구성 업데이트
(1) .env 파일 수정


# .env 파일이 있는 경로로 이동
cd ~/monolith-to-microservices/react-app/

# 부하 분산기의 IP 주소 확인
gcloud compute forwarding-rules list --global

# 파일 내용 수정
REACT_APP_ORDERS_URL=http://[LB_IP]/api/orders
REACT_APP_PRODUCTS_URL=http://[LB_IP]/api/products
(2) Build하여 Frontend 코드 업데이트

cd ~/monolith-to-microservices/react-app
npm install && npm run-script build
(3) App 코드를 버킷에 복사
cd ~
rm -rf monolith-to-microservices/*/node_modules
gsutil -m cp -r monolith-to-microservices gs://fancy-store-Project ID/
(4) Frontend 인스턴스 업데이트
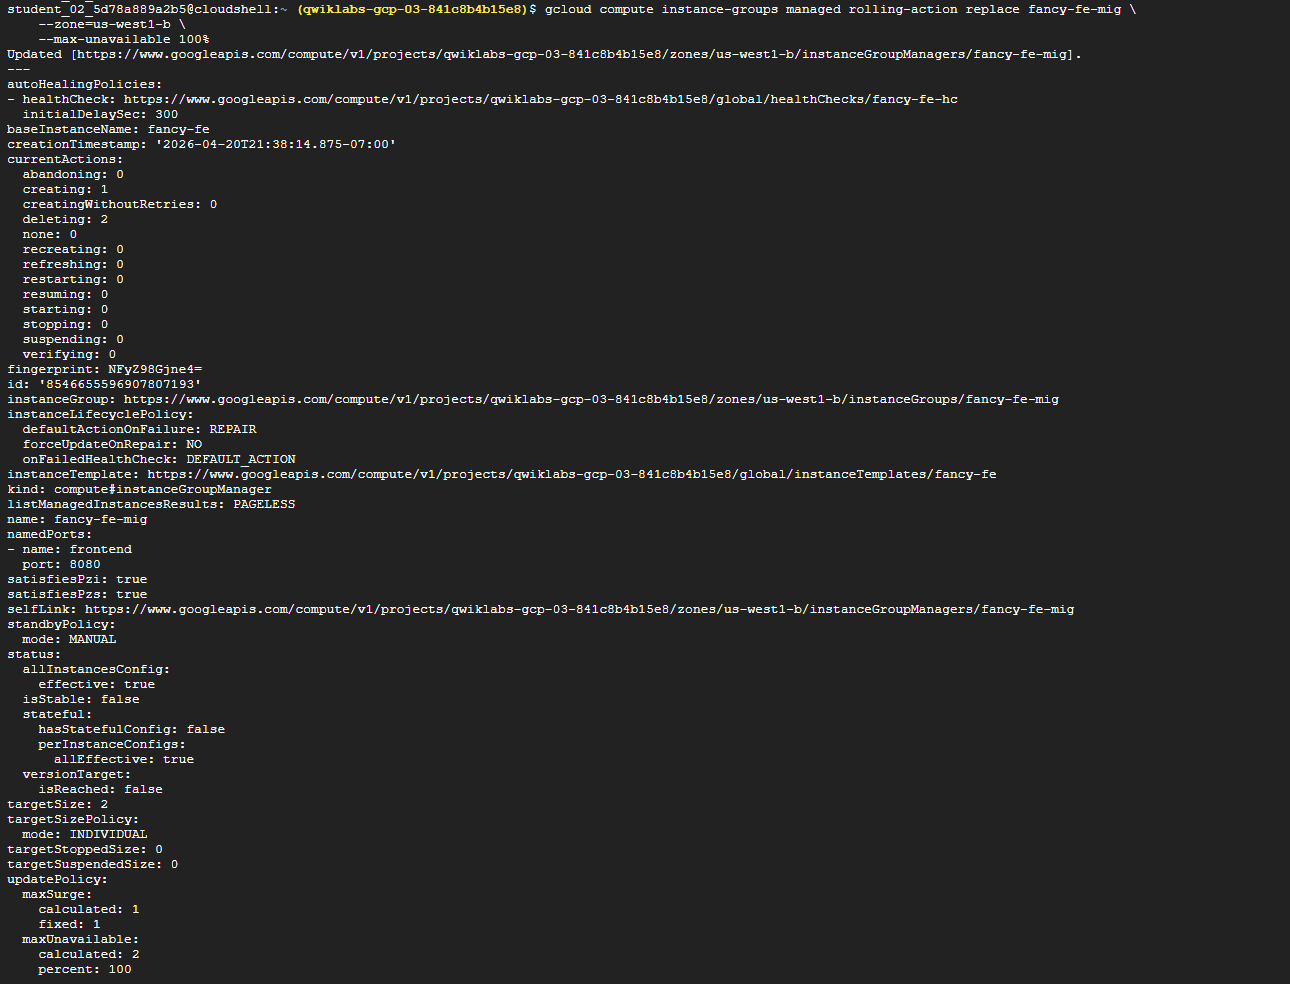
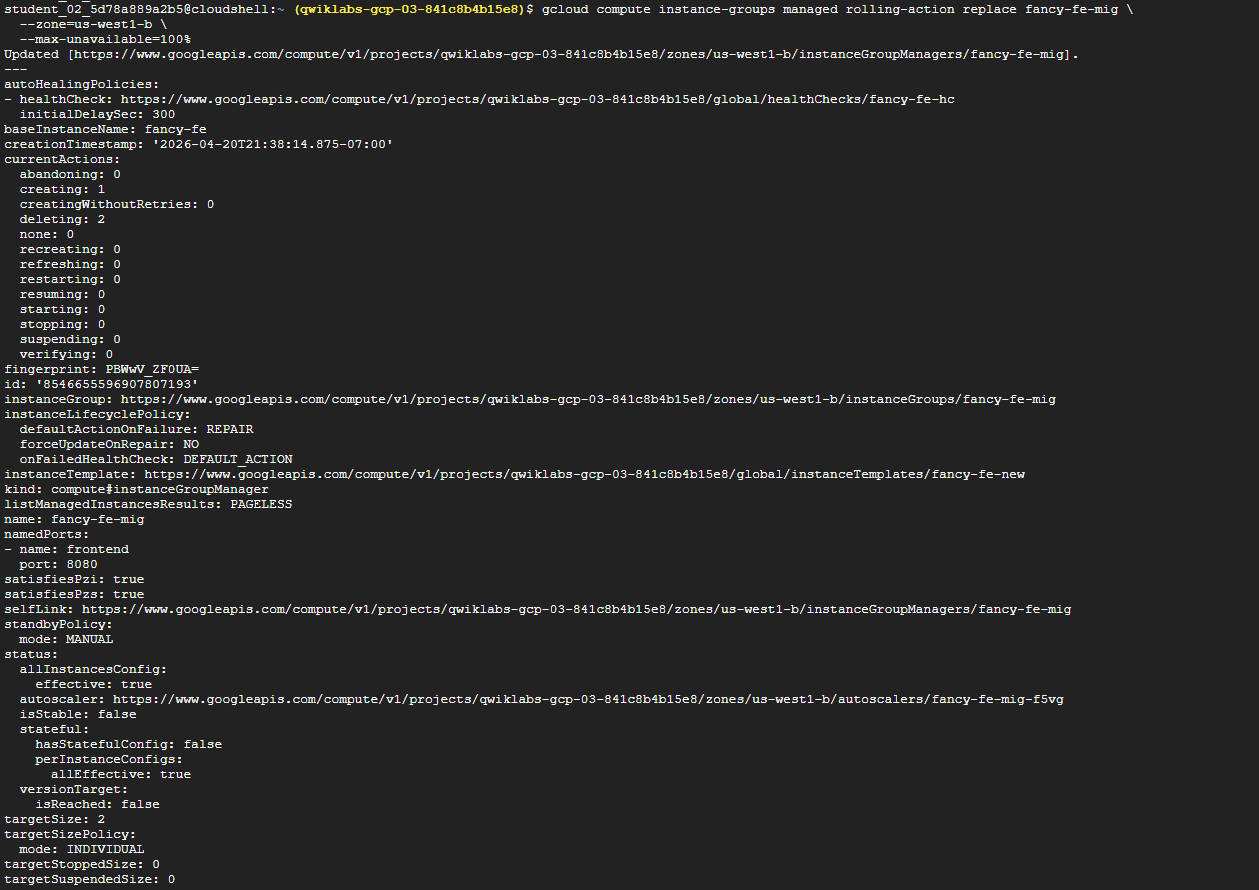
gcloud compute instance-groups managed rolling-action replace fancy-fe-mig \
    --zone=zone \
    --max-unavailable 100%
➡️ 새로운 코드와 구성이 생겼으니 이제 관리형 인스턴스 그룹 내의 프런트엔드 인스턴스로 새 코드를 가져오자.
➡️ 인스턴스는 시작할 때 코드를 가져오므로 다음 명령어를 실행하여 순차적 다시 시작을 실행할 수 있다.
13. 웹사이트 테스트

watch -n 2 gcloud compute backend-services get-health fancy-fe-frontend --globalOutput:
backend: https://www.googleapis.com/compute/v1/projects/my-gce-codelab/zones/us-central1-a/instanceGroups/fancy-fe-mig
status:
healthStatus:

- healthState: HEALTHY
  instance: https://www.googleapis.com/compute/v1/projects/my-gce-codelab/zones/us-central1-a/instances/fancy-fe-x151
  ipAddress: 10.128.0.7
  port: 8080
- healthState: HEALTHY
  instance: https://www.googleapis.com/compute/v1/projects/my-gce-codelab/zones/us-central1-a/instances/fancy-fe-cgrt
  ipAddress: 10.128.0.11
  port: 8080
  kind: compute#backendServiceGroupHealth
➡️ 두 개의 인스턴스가 모두 HEALTHY면 정상!
14. Compute Engine 확장
(1) 사용률을 기준으로 자동 크기 조정(autoscaling)
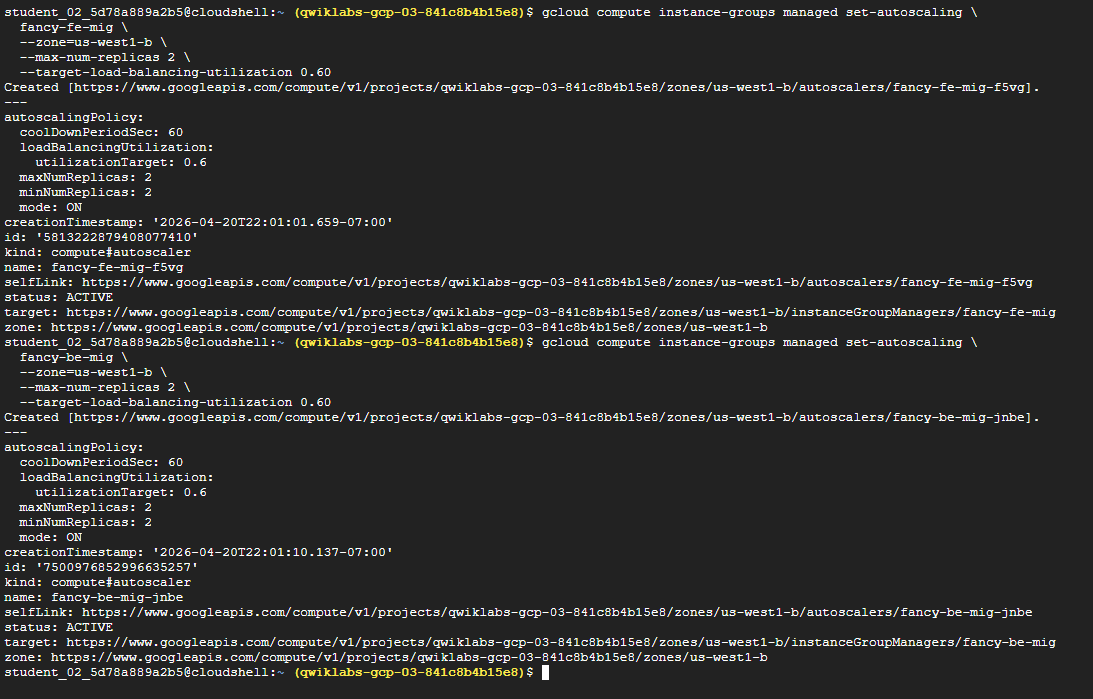
# frontend
gcloud compute instance-groups managed set-autoscaling \
fancy-fe-mig \
--zone=zone \
--max-num-replicas 2 \
--target-load-balancing-utilization 0.60
# backend
gcloud compute instance-groups managed set-autoscaling \
fancy-be-mig \
--zone=zone \
--max-num-replicas 2 \
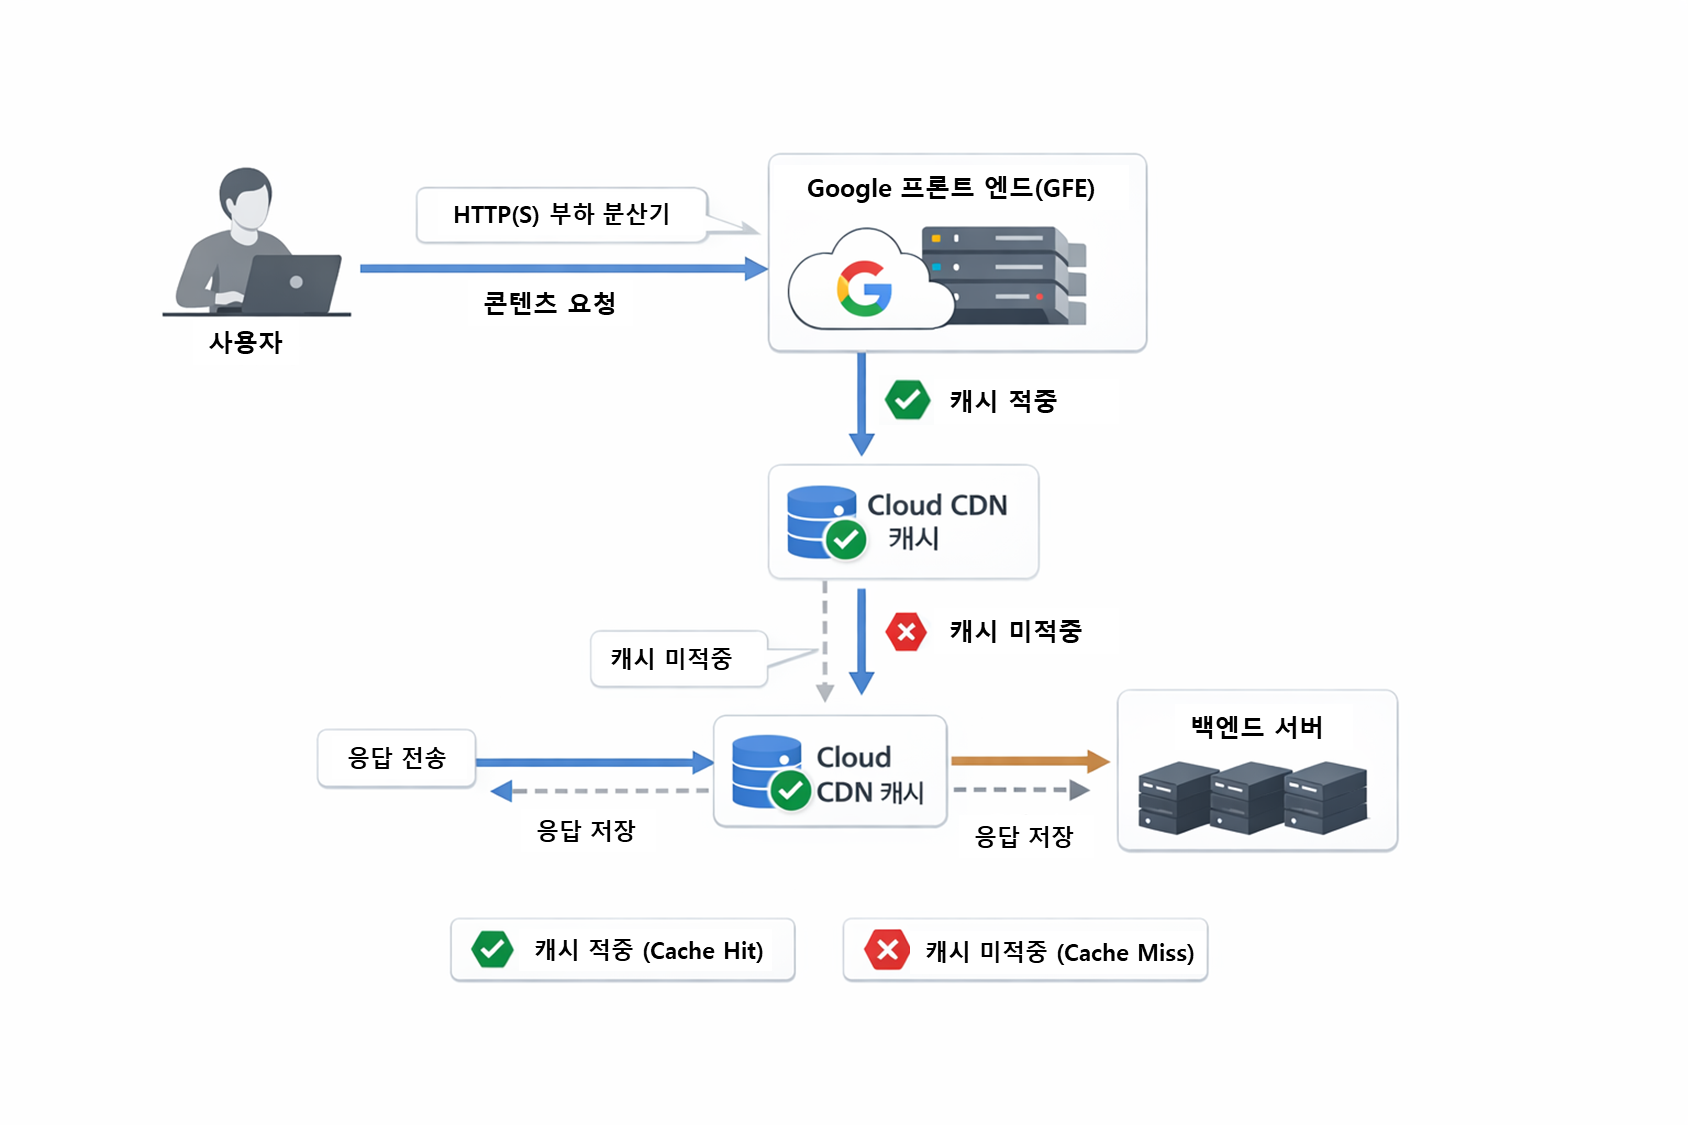
--target-load-balancing-utilization 0.60(2) 콘텐츠 전송 네트워크(SDN) 사용 설정

gcloud compute backend-services update fancy-fe-frontend \
    --enable-cdn --global
➡️ 콘텐츠 전송 네트워크 서비스를 사용 설정하여 프런트엔드에 캐싱을 제공하여 확장에 도움을 준다.
참고✨
15. 웹사이트 업데이트
(1) Frontend 인스턴스 머신 유형 수정

gcloud compute instances set-machine-type frontend \
  --zone=zone \
  --machine-type e2-small
(2) 새 인스턴스 템플릿 생성

gcloud compute instance-templates create fancy-fe-new \
    --region=$REGION \
    --source-instance=frontend \
    --source-instance-zone=zone
(3) 13-2의 인스턴스 템플릿을 관리형 인스턴스 그룹에 배포
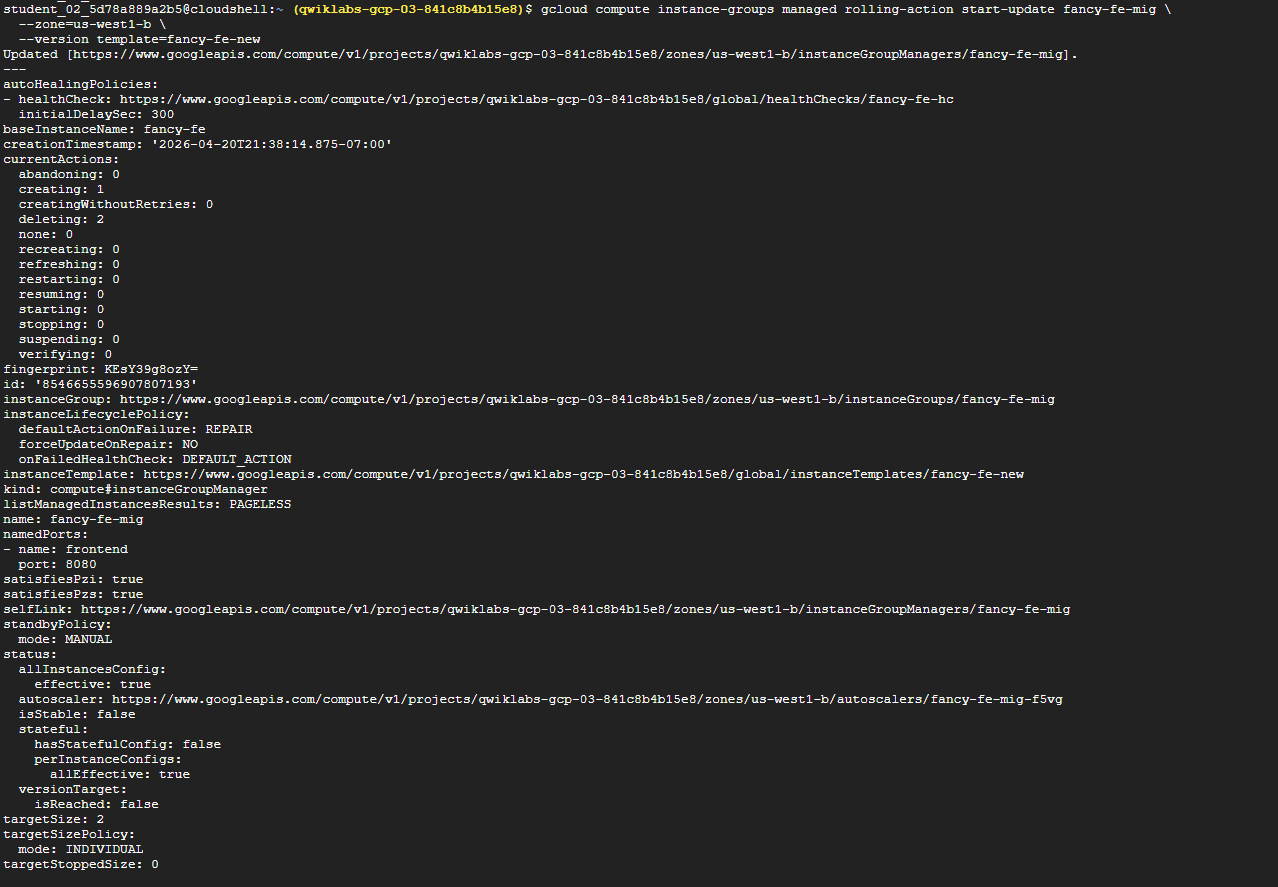
gcloud compute instance-groups managed rolling-action start-update fancy-fe-mig \
  --zone=zone \
  --version template=fancy-fe-new
(4) 업데이트 상태 모니터링

watch -n 2 gcloud compute instance-groups managed list-instances fancy-fe-mig \
  --zone=zone
참고✨
다음 조건에 해당하는 인스턴스가 하나라도 있어야 한다.
다음 조건에 해당하는 머신들 중 하나의 이름을 복사한다.
- STATUS: RUNNING
- ACTION: None으로 설정됨
- INSTANCE_TEMPLATE: 새로운 템플릿 이름(fancy-fe-new)
(5) 새로운 머신 유형(e2-small) 사용 여부 확인

# 위에서 복사한 VM의 이름으로 변경
gcloud compute instances describe [VM_NAME] --zone=zone | grep machineType
16. 웹사이트 변경
상황설명📝
- 시나리오: 마케팅팀에서 사이트의 홈페이지를 변경해 달라고 요청했습니다. 마케팅팀은 홈페이지에서 어떤 회사이며 무엇을 판매하는지에 대해 더 많은 정보를 제공해야 한다고 생각합니다.
- 작업: 이 섹션에서는 마케팅팀이 만족할 수 있도록 홈페이지에 텍스트를 추가합니다. 개발자 한 명이 이미 index.js.new라는 파일 이름에 변경사항을 작성했습니다. 이 파일을 index.js에 복사하기만 하면 변경사항이 적용됩니다.
(1) 업데이트된 파일을 index.js에 복사

cd ~/monolith-to-microservices/react-app/src/pages/Home
mv index.js.new index.js
(2) 변경사항 확인
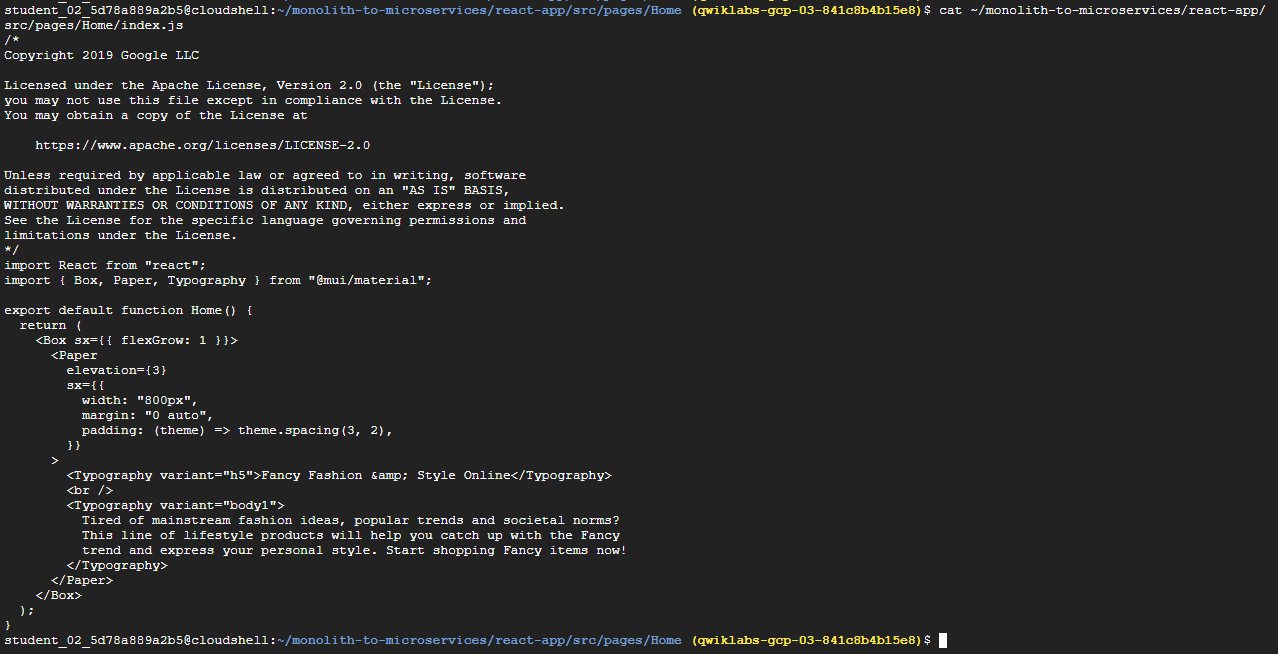
cat ~/monolith-to-microservices/react-app/src/pages/Home/index.js(3) React 앱 빌드 후 monolith 공개 디렉터리에 복사

cd ~/monolith-to-microservices/react-app
npm install && npm run-script build
(4) 코드를 버킷에 보내기
cd ~
rm -rf monolith-to-microservices/*/node_modules
gsutil -m cp -r monolith-to-microservices gs://fancy-store-Project ID/
(5) 순차적 교체가 포함된 변경사항 내보내기
gcloud compute instance-groups managed rolling-action replace fancy-fe-mig \
  --zone=zone \
  --max-unavailable=100%
➡️ 모든 인스턴스를 강제로 교체하여 업데이트를 가져온다.
참고✨
이 순차적 교체의 예시에서
--max-unavailable파라미터를 사용하여 모든 머신을 즉시 교체할 수 있다고 명시하세요. 이 파라미터가 없으면 명령어는 인스턴스를 활성 상태로 유지하면서 다른 머신을 교체합니다. 테스트 목적상 속도를 위해 모두 즉시 교체하도록 지정합니다. 프로덕션에서는 버퍼를 남겨두면 업데이트하는 동안에도 계속 웹사이트를 제공할 수 있습니다.
(6) 관리형 인스턴스 그룹 상태 확인
watch -n 2 gcloud compute backend-services get-health fancy-fe-frontend --globalOutput:
backend: https://www.googleapis.com/compute/v1/projects/my-gce-codelab/zones/us-central1-a/instanceGroups/fancy-fe-mig
status:
healthStatus:

- healthState: HEALTHY
  instance: https://www.googleapis.com/compute/v1/projects/my-gce-codelab/zones/us-central1-a/instances/fancy-fe-x151
  ipAddress: 10.128.0.7
  port: 8080
- healthState: HEALTHY
  instance: https://www.googleapis.com/compute/v1/projects/my-gce-codelab/zones/us-central1-a/instances/fancy-fe-cgrt
  ipAddress: 10.128.0.11
  port: 8080
  kind: compute#backendServiceGroupHealth
➡️ 모든 서비스가 뜰 때까지 기다렸다가 명령어를 실행한다.
➡️ 두 서비스가 모두 HEALTHY여야 정상
(7) http://[LB_Ip] 확인

gcloud compute forwarding-rules list --global➡️ http://[LB_IP]를 통해 웹사이트로 이동할 수 있다.
➡️ [LB_IP]는 부하 분산기에 지정된 IP_ADDRESS이며 해당 명령어를 통해 알 수 있다.
17. 장애 시뮬레이션
(1) 인스턴스 이름 찾기

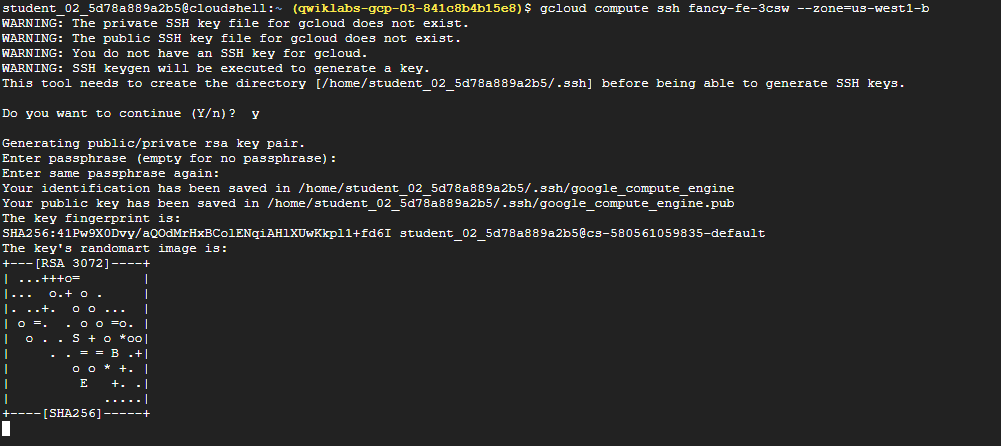
gcloud compute instance-groups list-instances fancy-fe-mig --zone=zone(2) SSH를 인스턴스에 고정

gcloud compute ssh [INSTANCE_NAME] --zone=zone참고✨
이러한 에러가 뜨는 경우에는 다음과 같이 진행한다.
1. 프로젝트 수준에서 OS Login 끄기gcloud compute project-info add-metadata --metadata enable-oslogin=FALSE
- 인스턴스에 직접 SSH 키 강제 주입
gcloud compute instances add-metadata fancy-fe-3csw --zone=us-west1-b --metadata ssh-keys="student_02_5d78a889a2b5:$(cat ~/.ssh/google_compute_engine.pub)"
- 다시 접속 시도
gcloud compute ssh fancy-fe-3csw --zone=us-west1-b➡️ GCP의 SSH 인증은 메타데이터 서버가 핵심인데, 실습 환경에서는 권한 동기화 문제로 인하여 구글 계정 권한(IAM)을 통해 접속하는 방식이 아닌
authorized_keys파일 방식으로 직접 메타데이터에 키를 넣어 인증한다.
(3) 애플리케이션 중지 및 인스턴스 종료

# 애플리케이션 중지
sudo supervisorctl stop nodeapp; sudo killall node

# 인스턴스 종료
exit
(4) 복구 작업 모니터링
watch -n 2 gcloud compute operations list \
--filter='operationType~compute.instances.repair.*'
Output:
몇 분 정도 소요 후에 다음과 같은 출력이 표시된다.
NAME: repair-1755080598062-63c3c8b99843b-eed8dabc-f1833ea3
TYPE: compute.instances.repair.recreateInstance
TARGET: us-east4-c/instances/fancy-fe-tn40
HTTP_STATUS: 200
STATUS: DONE
TIMESTAMP: 2025-08-13T03:23:18.062-07:00
➡️ 관리형 인스턴스 그룹이 인스턴스를 다시 만들어 복구했다.
➡️ 네비게이션 메뉴 > Compute Engine > VM 인스턴스 에서 콘솔을 통해 모니터링도 가능하다.
