jsp는 서버에 의존적이다.
ajax는 서버에 독립적이다. "느슨한연결"
restful API
특정 주소를 보내면 서버는 json데이터(xml)를 보내준다 (서버에서 설계한대로)
규격화 -> 무슨 url로 보내라 그러면 내가 json데이터를 보내줄게와 같은 문서를 만든다.
의존성이 줄어들면 스프링으로 개발했던 것을 나중에 node js/ 장고/ 파이썬으로도 개발이 가능.
주소에 무슨 결과값을 줄지만 정해두면 얼마든지 switching이 가능하다.
프론트를 html/css/javascript 뿐만아니라 c#/Qt/안드로이드/아이폰 등으로 개발 가능. 즉 무엇으로 개발을 하든 주소만 보내서 결과값을 받아 뿌리면 되는 것이다.
front와 back은 어떤 결과값을 주고받는지만 정해놓으면 교체가 될 때도 문제가 없다.
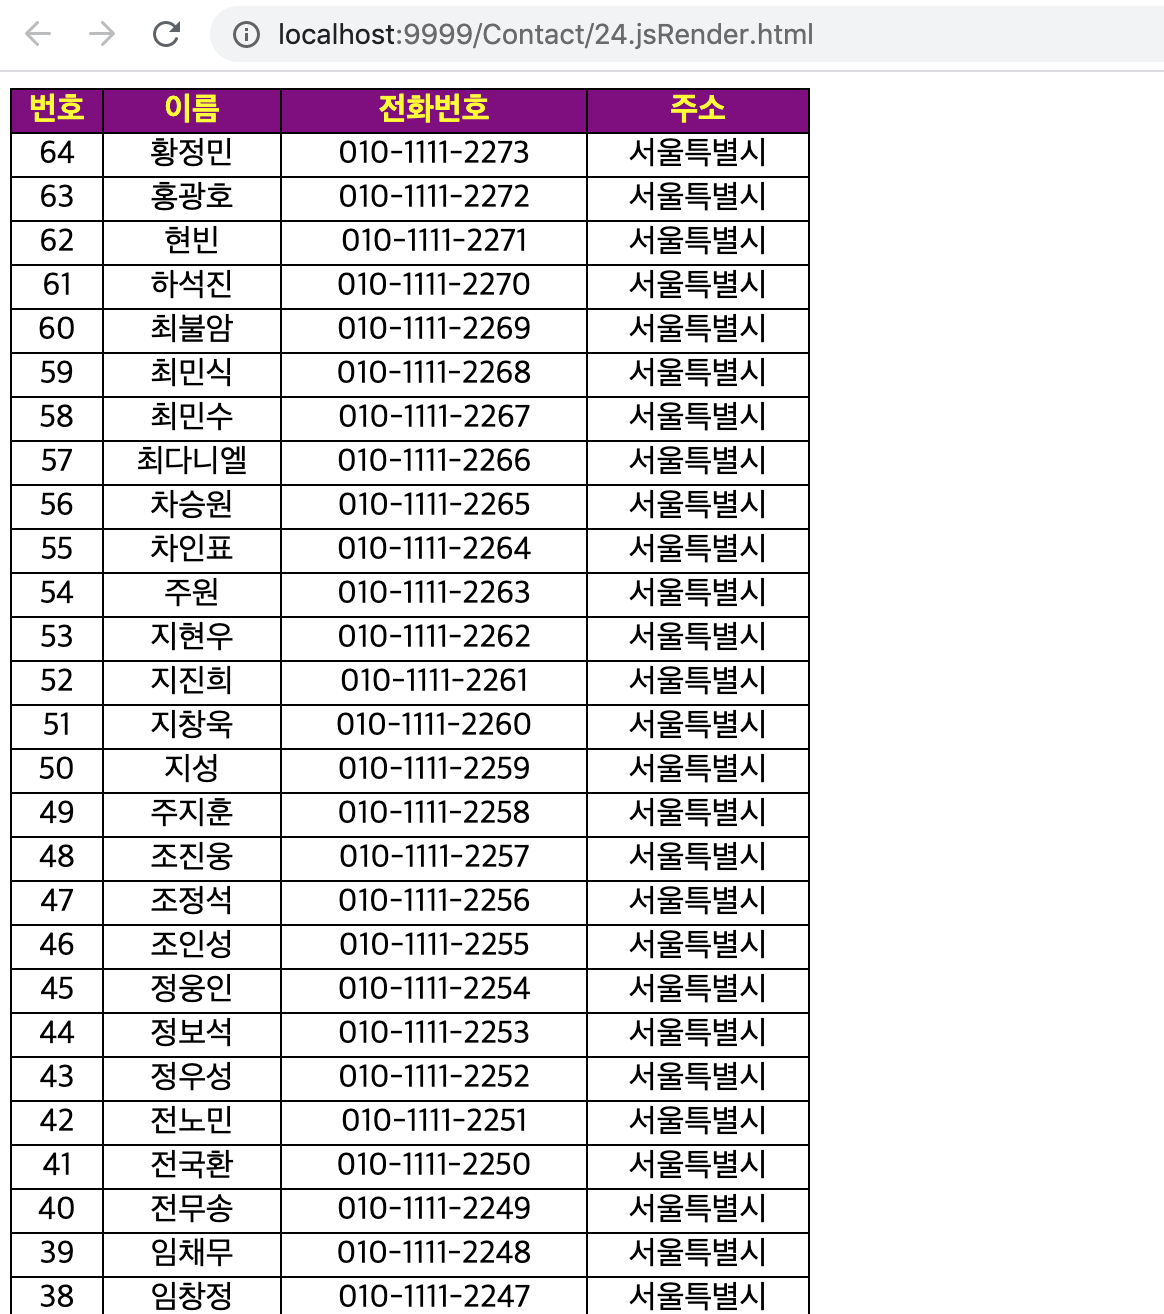
- 테이블
<!DOCTYPE html>
<html>
<head>
<meta charset="UTF-8">
<title>Insert title here</title>
<style>
	table{
		width:400px;
		border:1px solid black;
		border-collapse:collapse;
	}
	td, th{
		border:1px solid black;
		text-align:center;
	}
	table > thead > tr{
		color:yellow;
		background-color:purple;
	}
</style>
<script src="https://code.jquery.com/jquery-3.1.0.js"></script>
<script src="https://www.jsviews.com/download/jsrender.js"></script>

<!-- 1) 데이터 영역
		- 서버로부터 json 데이터 가져오기
		- 데이터와 viewTemplate을 결합하여 UI영역에 표현하기
 -->
<script>
	$(document).ready(function(){
		$.get("/Contact/list.do", function(data){
			//data가 string이었기때문에 js object로 바꾼다.
			var obj = JSON.parse(data);
			// script에서 쓰라고 만들어놓은 template
			var tmpl = $.templates("#contact_template");	// viewTemplate
			// 테이블에 렌더링 (js render)
			// data 안에는 no name tel address라는 프로퍼티가 있으니까 그것들을 뿌려준다.
			var str = tmpl.render(obj.contacts);	// 데이터+viewTemplate=html UI
			$("#container").html(str);	// UI영역에 html UI 표시
		});
	});
</script>

<!-- 2) viewTemplate(데이터가 들어오면 표현될 UI 템플릿) -->
<script id="contact_template" type="text/x-jsrender">
	<tr>
		<td>{{:no}}</td>
		<td>{{:name}}</td>
		<td>{{:tel}}</td>
		<td>{{:address}}</td>
	</tr>
</script>
</head>
<body>
	<table id="list">
		<thead>
			<tr>
				<th>번호</th>
				<th>이름</th>
				<th>전화번호</th>
				<th>주소</th>
			</tr>
		</thead>

		<!-- UI가 출력될 영역 -->
		<tbody id="container">
		</tbody>
	</table>
</body>
</html>
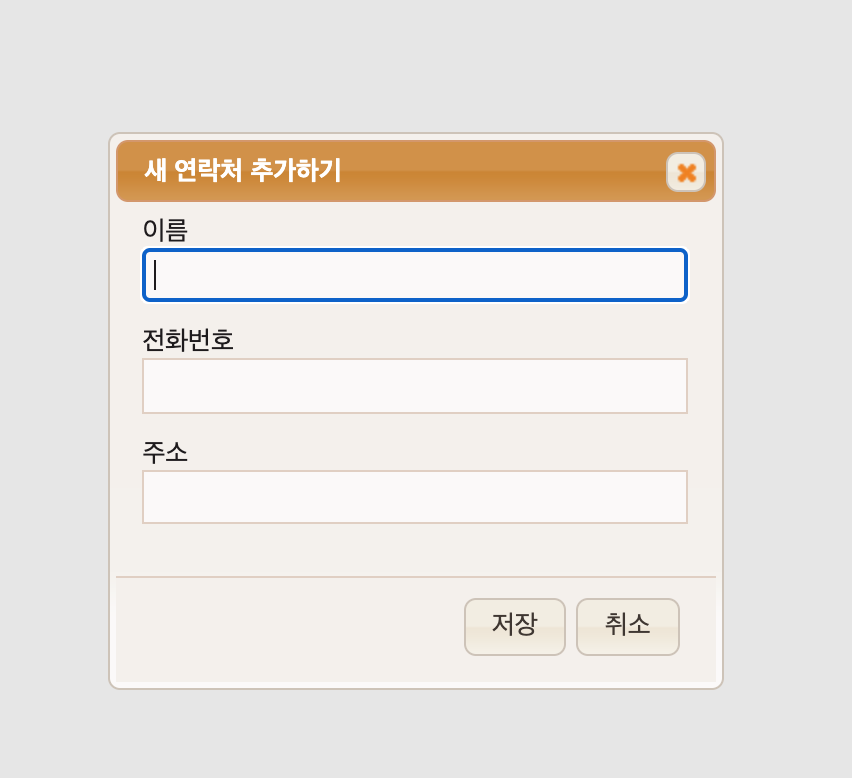
- 모달창
<!DOCTYPE html>
<html>
<head>
<meta charset="UTF-8">
<title>Insert title here</title>
<style>
	body{
		font-size:75%;
	}
	input.text{
		margin-bottom:12px;
		width:95%;
		padding:.4em;
	}
</style>
<link rel="stylesheet" href="https://code.jquery.com/ui/1.12.0/themes/humanity/jquery-ui.css"/>
<script src="https://code.jquery.com/jquery-3.1.0.js"></script>
<script src="https://code.jquery.com/ui/1.12.0/jquery-ui.js"></script>
<script>
	// Dialog 팝업창을 띄운다
	$(document).ready(function(){
		// dialog_new div를 가져와서 전체를 팝업창으로 띄워라
		$("#dialog-new").dialog({
			modal : true,
			autoOpen : true,
			buttons : {
				"저장" : function(){
					$(this).dialog("close");
					alert("저장 완료");
				},
				"취소" : function(){
					$(this).dialog("close");
				}
			}
		});
	});
</script>
</head>
<body>
	<!-- 다이얼로그(모달) 창에 표현할 구성 요소들 -->
	<div id="dialog-new" title="새 연락처 추가하기">
		<form>
			<label for="name">이름</label>
			<input type="text" name="name" id="name"
				class="text ui-widget-content ui-cornet-all">
			<label for="tel">전화번호</label>
			<input type="text" name="tel" id="tel"
				class="text ui-widget-content ui-cornet-all">
			<label for="address">주소</label>
			<input type="text" name="address" id="address"
				class="text ui-widget-content ui-cornet-all">
		</form>
	</div>
</body>
</html>