- html, scss아예 모름. 따라서 정확하지 않을 수 있음.
Velog에서 github.io로 옮기는 이유
- Velog는 Post 작성시 width가 너무 작다.
- Velog역시 markdown이긴 한데 뭔가 완벽하지는 않은거 같음.
예를들어 space두번 없이도 Enter만으로 줄바꿈 가능 등등.... - 1번의 연장인데 github.io는 완전한 custom이 가능.
즉. github.io라는 repository를 만들어서 coding하면 본인의 website을 서버비용없이 만들 수 있음. - github.io의 post는 md 형식인데 어째든 md파일을 local에 저장할 수 있고 활용성이 큼.
깃허브 블로그 만들때 참고했던 자료
- https://www.youtube.com/watch?v=ACzFIAOsfpM
https://ahnslab.com/21-how-to-start-github-blog/
가장 처음 봤던 유튜브 영상과 자료.
local에 jekyll등등 설치 안하고 할 수 있는 방법.
난 아직도 jekyll설치 안되어 있음. 왜 굳이 설치 해야하는 지를 모르겠음.
유튜브에 있지만 https://github.com/topics/jekyll-theme <- theme
결론은 위 github들어가서 fork해오면 된다는 것임.
잘 따라 왔으면 theme로 블로그가 만들어 졌고_config.yml정도를 수정 되어 있을것이라 예상됨. 그리도_post만들어서 하나정도는 posting되었을 것임.
-
https://eona1301.github.io/a_to_z/GithubBlog/
다음으로 봤던 블로그인데 기본적인 설정 하는 방법 등 엄청 잘 정리되어 있음
여기서는 카테고리 만드는 법 배웠음.
추가로 참고한 사이트는
https://hahafamilia.github.io/howto/jekyll-github-mistakes-blog/
https://devinlife.com/categories/#howto-github-pages
https://velog.io/@woo0_hooo/Github-github-profile-%EA%B0%84%EC%A7%80%EB%82%98%EA%B2%8C-%EA%BE%B8%EB%AF%B8%EA%B8%B0
여기서 toc이런거 배우면 좋음. -
https://ansohxxn.github.io/categories/#blog
여기서 제일 많이 배웠음.
가장 자세하게 잘 정리 되어있음.
여기서는 카테고리를 왼쪽으로도 띄우는 방법을 배움. -
여기부터는 Custom이라고 보면 됨.
우선 md는 Latex수식이 잘 되는데 이걸 push하면 블로그에서는 깨짐 따라서 추가로 뭘 해줘야 함.
https://blog.naver.com/PostView.nhn?blogId=prt1004dms&logNo=221525385428&parentCategoryNo=&categoryNo=&viewDate=&isShowPopularPosts=false&from=postView
이대로 하면 잘됨. -
왜인지는 모르겠으나 갑자기 post가 안되는 경우가 발생함.
https://devyuseon.github.io/github%20blog/githubblog-post-not-shown/
감사합니다. -
앞에서 분명 Velog에서 옮기는 첫번째 이유가 wide가 없다는 것임.
여기서 본문의 width를 넓게할 수 있는 방법은 크게 두가지가 알려져 있음.
이걸 할때는 제일 처음에 다뤘던 config와 posting할때 layout을 따로 지정해 주지 않으면 layout: single이 되는 이정도의 이해가 있으면 좋음.
첫번째는 posting할 때 class: wide를 해주면 됨.
https://jinhoooooou.github.io/making-blog/making-blog-5/
두번째는 config를 수정하는 건데
https://danggai.github.io/github.io/Github.io-%EC%A2%8C%EC%9A%B0-%EC%97%AC%EB%B0%B1-%EC%A4%84%EC%9D%B4%EA%B8%B0/
이거 따라하면 됨.
근데 아직 만족하지 못함.
이렇게 해도 좌우에 empty space가 너무 많음. 따라서 다 뒤져봄.
해결책 찾음 https://github.com/mmistakes/minimal-mistakes/issues/1265
결론은 scss의 padding을 직접 수정 하라는 것임.
나같은 경우에는hyeok-jong.github.io/_sass/minimal-mistakes/_archive.scss에서
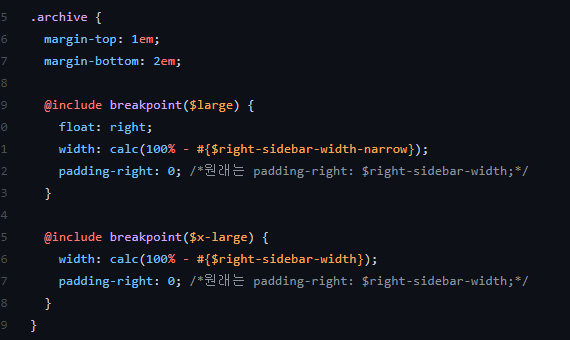
이렇게 바꾸고hyeok-jong.github.io/_sass/minimal-mistakes/_page.scss에서도 같은 형식으로 바꿔줌. 그러면 아예 오른쪽 공백이 사라짐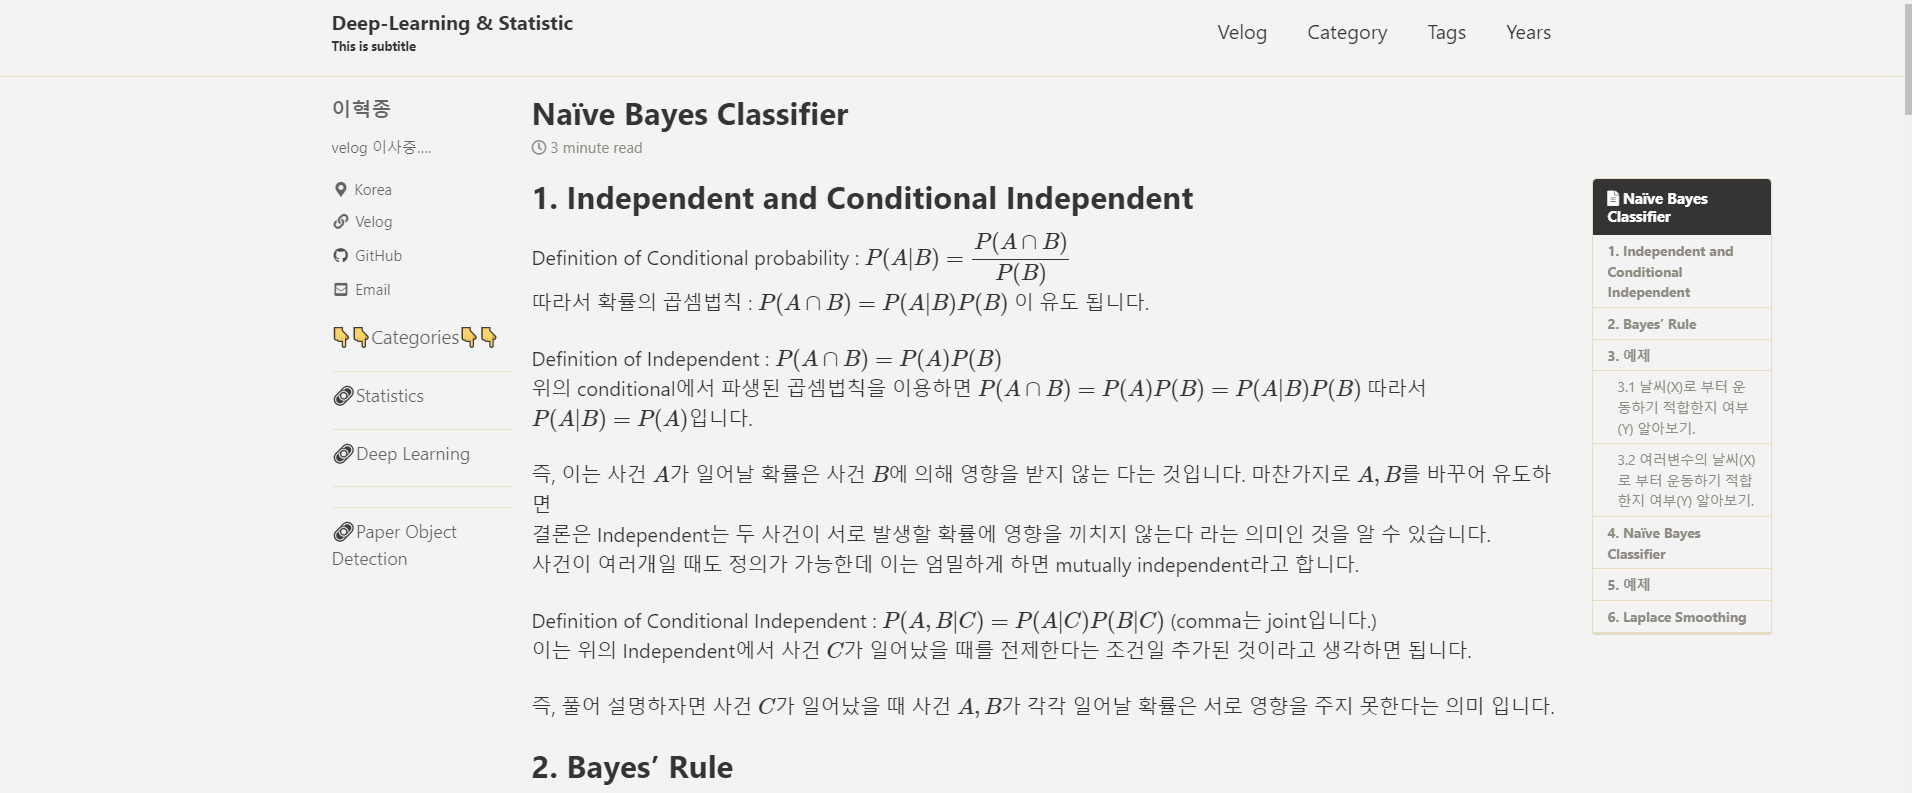
toc을 유지한채로 이정도로 넓게쓰는사람 아직까지 못봄.
왼쪽도 넓히고 싶은데 잘 모르겠음.
html을 아예 처음 해보는 거라 뭐가 어디서 온거지를 모르겠음.
물론 아예 양 끝을 쓰는 방법이 있는데 post작성시layout: posts로 주면 됨.
즉, 새로운 post를 만드는데 형식으로posts로 하겠다는 것임.
https://mmistakes.github.io/minimal-mistakes/docs/layouts/
여기 가 보면 layout에 대한 설명 있는데 posts로 하면 완전 양 끝은 다 사용할 수 있음. 그냥 애초에 coding이 안된거 같음. 예를들어 왼쪽 sidebar나 위에 category이런것도 안나옴.
Here we can find Single is default
추가 custom
색 글씨 https://syh39.github.io/blog/github_blog_setting/
https://hyeonjiwon.github.io/blog/custom/
https://github.com/mmistakes/minimal-mistakes/issues/2191
이건 첫화면 바꾸기
https://github.com/mmistakes/minimal-mistakes/issues/1426
위를 바탕으로 만들었는데 싹 밀고 다시 처음부터 만드는 순서를 기록합니다.
버튼
https://www.w3schools.com/icons/tryit.asp?icon=fas_fa-link&unicon=f0c1
icon
https://fontawesome.com/search?q=people&s=thin
.png)