npm i express로 다운로드해주기
npm init -y
JS
const express = require('express');
const app = express();

app.listen(3000, ()=>{
    console.log('서버 실행됨');
})

app.get('/', (요청, 응답)=> {
    응답.send('어쩌고 저쩌고');
})
서버 구동하기 node server.js
localhost:3000번 들어가면 어쩌고저쩌고가 실행됨
const express = require('express');
const app = express();

app.listen(3000, ()=>{
    console.log('서버 실행됨');
})

app.get('/', (요청, 응답)=> {
    응답.sendFile(__dirname + '/index.html');
})
절대경로로 설정해줌
node server.js
html 페이지가 열리게 됨
nodemon만 해도 서버가 알아서 열림
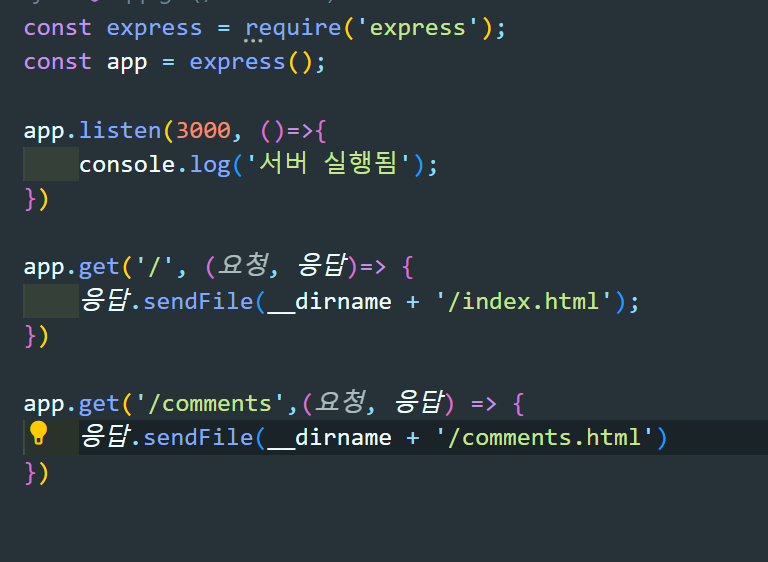
const express = require('express');
const app = express();

app.listen(3000, ()=>{
    console.log('서버 실행됨');
})

app.get('/', (요청, 응답)=> {
    응답.sendFile(__dirname + '/index.html');
}

app.get('/comments',(요청, 응답) => {
    응답.send('어쩌고 댓글 페이지')
})
3000포트 /comments
어쩌고 댓글 페이지가 열림
picoCSS.com에서
<link rel="stylesheet" href="https://cdn.jsdelivr.net/npm/@picocss/pico@2/css/pico.min.css"/>
복사한다음 붙여줌
JS도 수정해줌
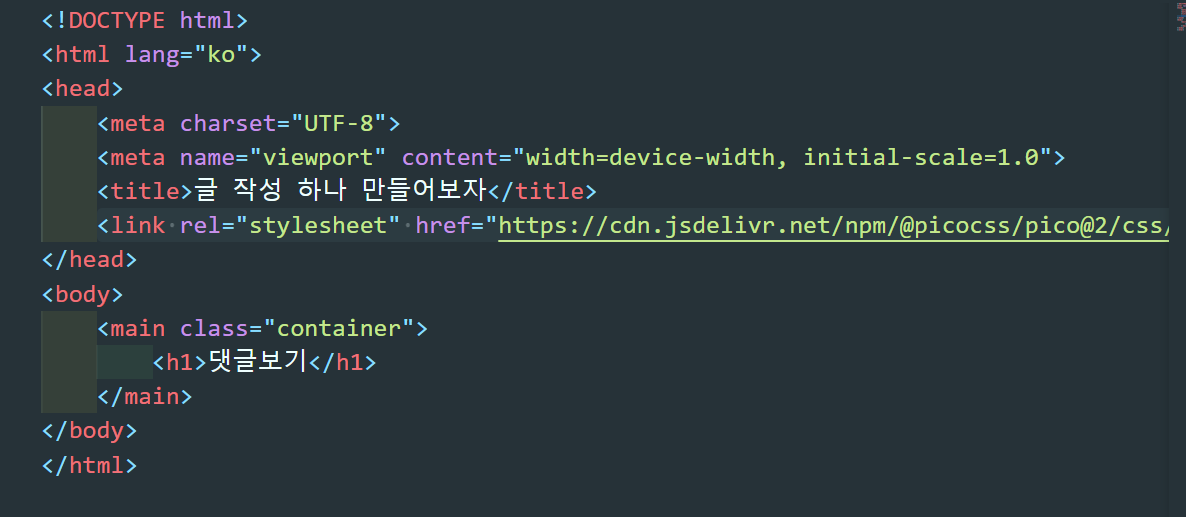
<!DOCTYPE html>
<html lang="ko">

<head>
    <meta charset="UTF-8">
    <meta name="viewport" content="width=device-width, initial-scale=1.0">
    <title>글 작성 하나 만들어보자</title>
    <link rel="stylesheet" href="https://cdn.jsdelivr.net/npm/@picocss/pico@2/css/pico.min.css" />
</head>

<body>
    <main class="container">
        <article>
            <h1>글 작성</h1>
            <div class="grid">
                <input type="text" name="" id="" placeholder="작성자">
                <input type="text" name="" id="" placeholder="글 내용">
            </div>

        </article>
        <article>
            <h1>글 목록</h1>
        </article>
    </main>
</body>

</html>
function post처리(요청,응답){
}
app.post('/comments', post처리)똑같은 의미 이름 쓰기 싫으니까
comments.ejs
<!DOCTYPE html>
<html lang="ko">
<head>
    <meta charset="UTF-8">
    <meta name="viewport" content="width=device-width, initial-scale=1.0">
    <title>글 작성 하나 만들어보자</title>
    <link rel="stylesheet" href="https://cdn.jsdelivr.net/npm/@picocss/pico@2/css/pico.min.css" />
    <style>
        .grid {
            grid-template-columns: 2fr 7fr 1fr;
        }
    </style>
</head>
<body>
    <main class="container">
        <article>
            <h1>글 작성</h1>
            <form class="grid" action="/comments" method="post">
                <input type="text" name="nickname" id="" placeholder="작성자">
                <input type="text" name="comment" id="" placeholder="글 내용">
                <input type="submit" value="등록">
            </form>
        </article>
        <article>
            <h1>글 목록</h1>
            <table>
                <thead>
                    <tr>
                        <th scope="col" style="width: 180px;">작성자</th>
                        <th scope="col">내용</th>
                    </tr>
                </thead>
                <tbody>
                    <% for (let i=comments.length-1; i>=0; i--) { %>
                    <tr>
                        <td><%= comments[i].nickname %></td>
                        <td><%= comments[i].comment %></td>
                    </tr>
                    <% } %>
                </tbody>
            </table>
        </article>
    </main>
</body>
</html>
index.html
<!DOCTYPE html>
<html lang="ko">
<head>
    <meta charset="UTF-8">
    <meta name="viewport" content="width=device-width, initial-scale=1.0">
    <title>서버 메인페이지</title>
</head>
<body>
    <h1>서버 메인페이지</h1>
    <a href="/comments">댓글 페이지 접속하기</a>
</body>
</html>
server.js
const express = require('express');
const app = express();

const commentsData = [];

// 뷰 템플릿 엔진을 ejs로 설정한다
app.set('view engine', 'ejs');

// html form 데이터 처리 시 사용
app.use(express.urlencoded({ extended: true }));

app.listen(3000, ()=>{
    console.log('서버 실행됨');
})

// 메인 페이지
app.get('/', (요청, 응답)=> {
    응답.sendFile(dirname + '/index.html');
})

// 댓글 페이지 로드
app.get('/comments', (요청, 응답)=>{
    //응답.sendFile(dirname + '/comments.html');

    응답.render('comments', { comments: commentsData });
})

// 댓글 등록 데이터 처리
app.post('/comments', (요청, 응답) => {
    commentsData.push(요청.body);
    console.log(commentsData);

    응답.redirect('/comments');
})
XAMPP DB tool
MySQL workbench 설치 [ 툴]
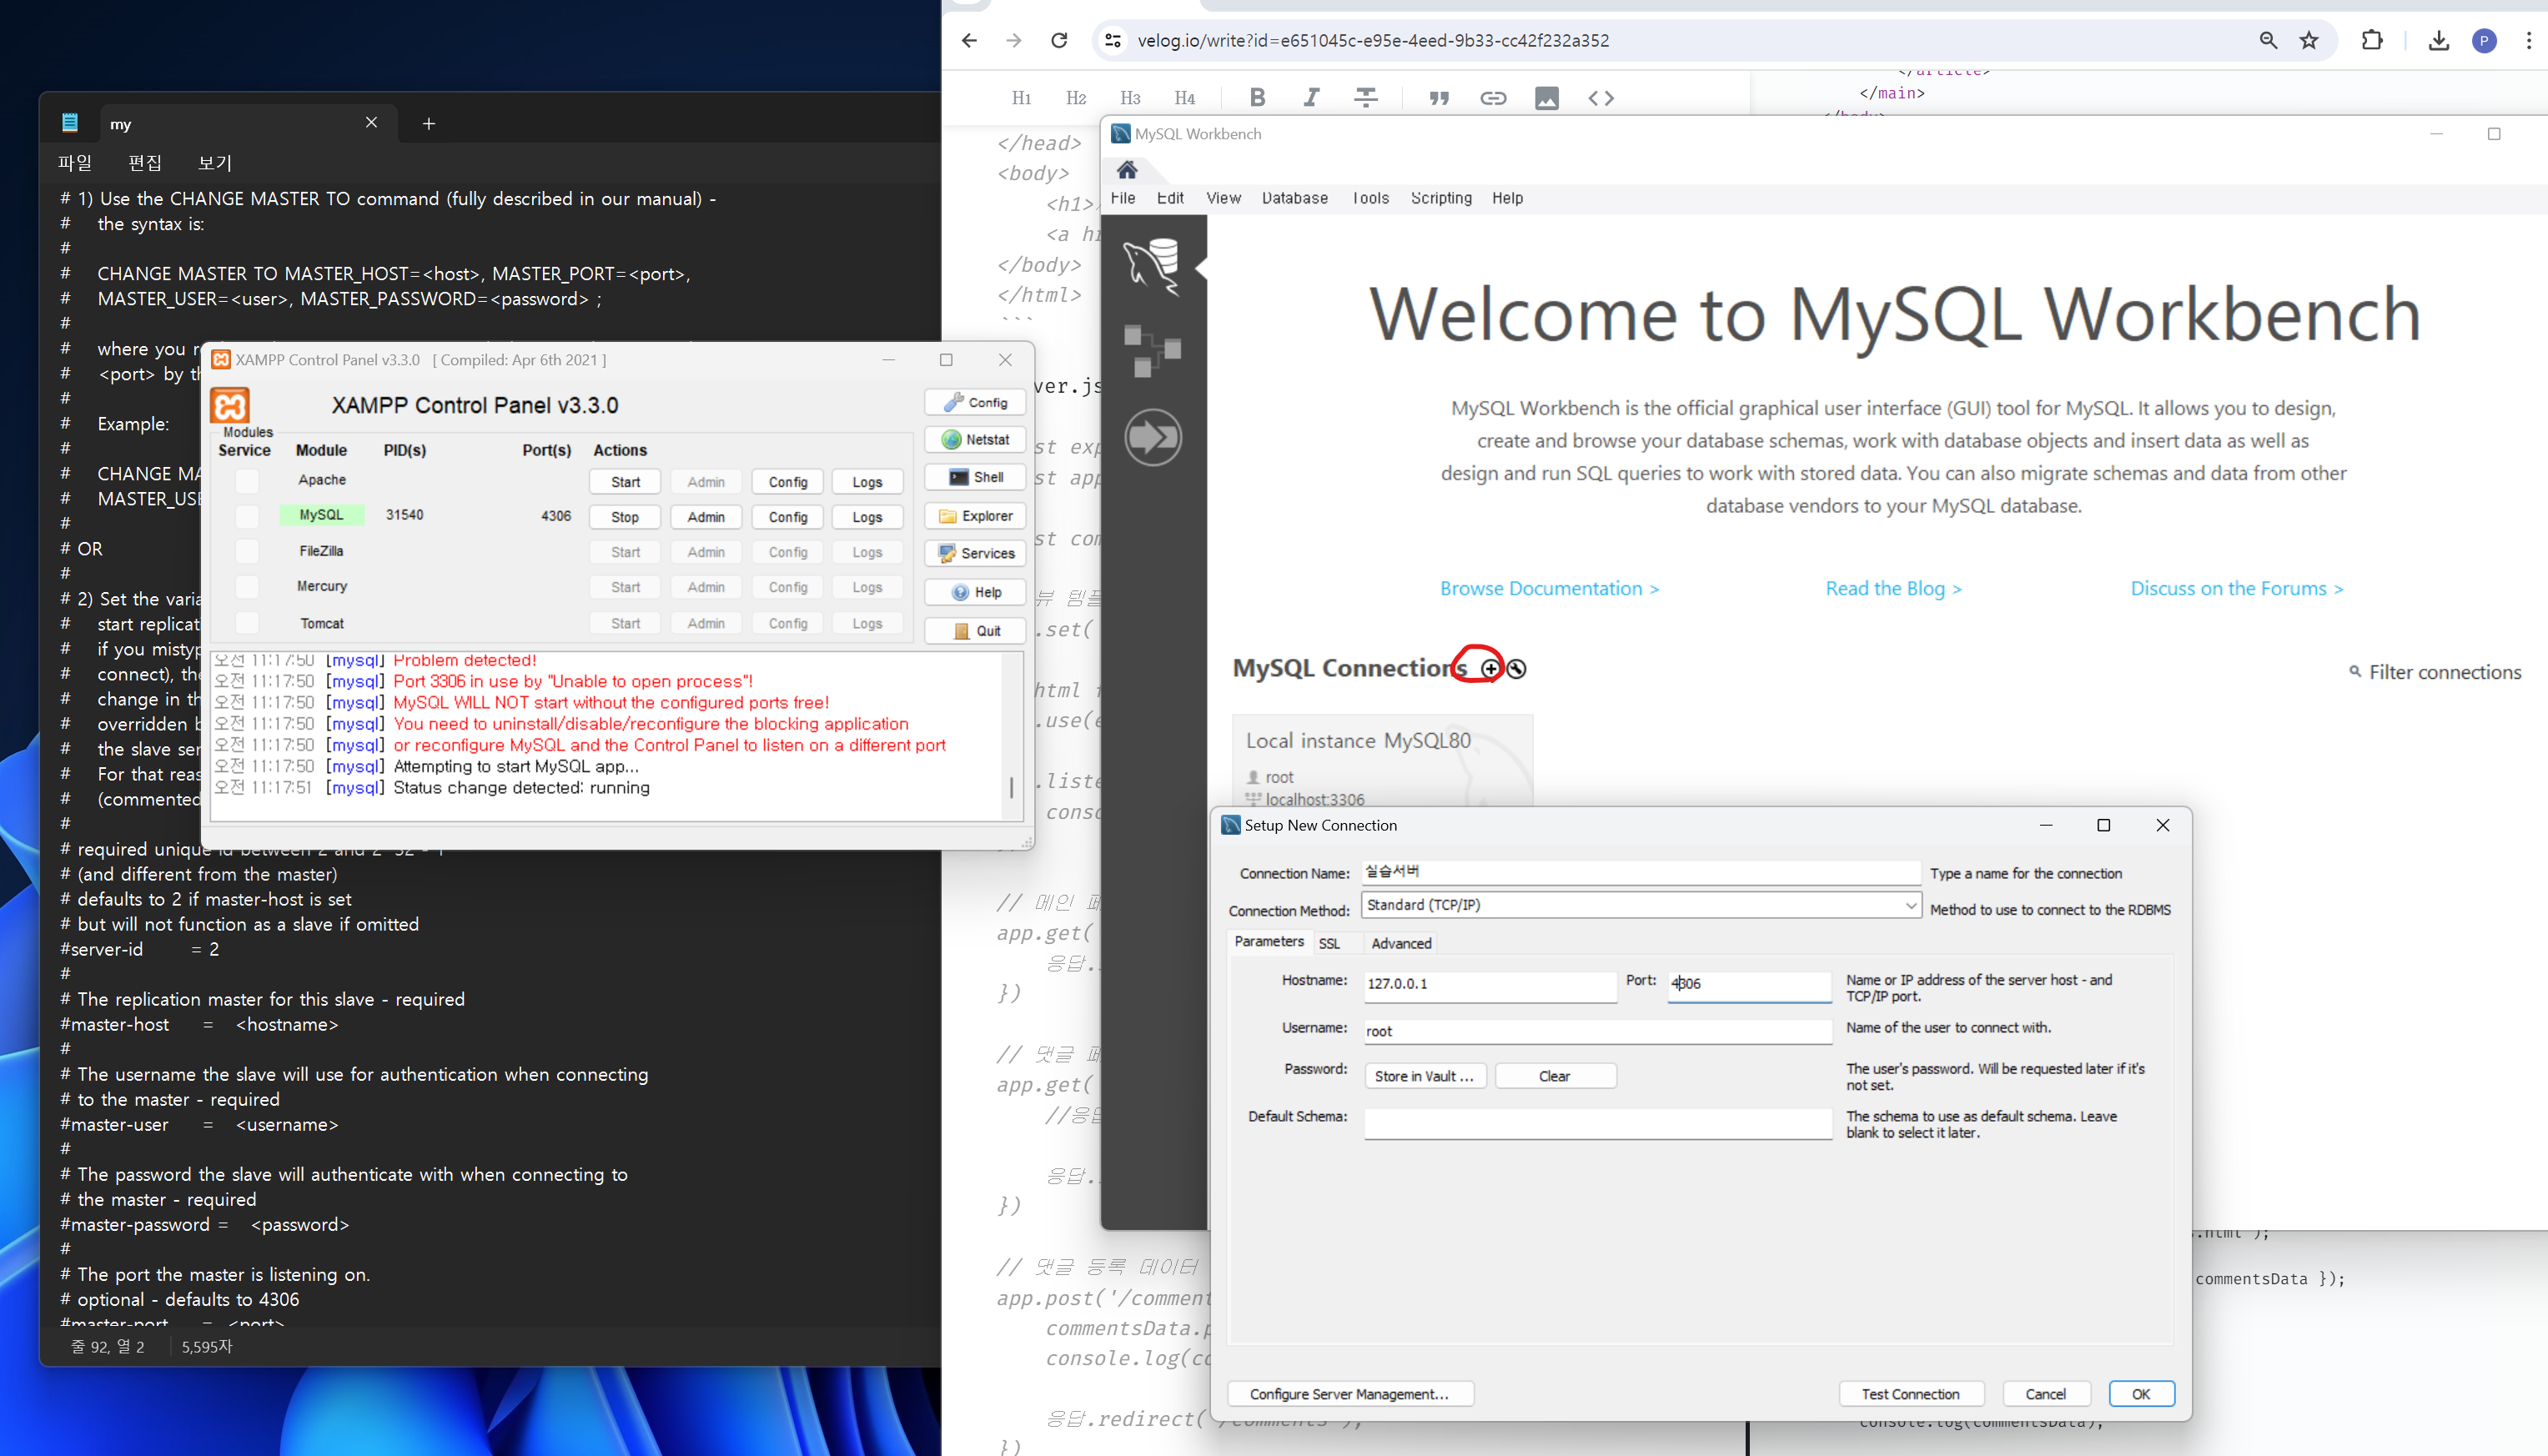
create
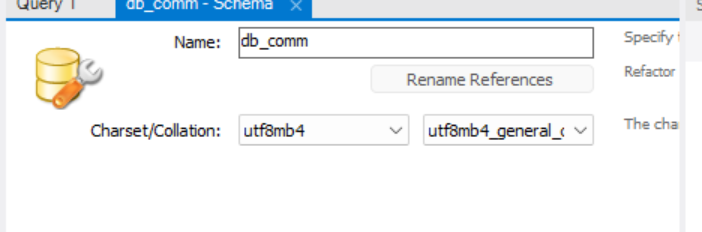
Table 들어가서
use db_comm;
ctr + enter
Table 오른쪽 클릭하고 Create Table 하고 Table name에 comment
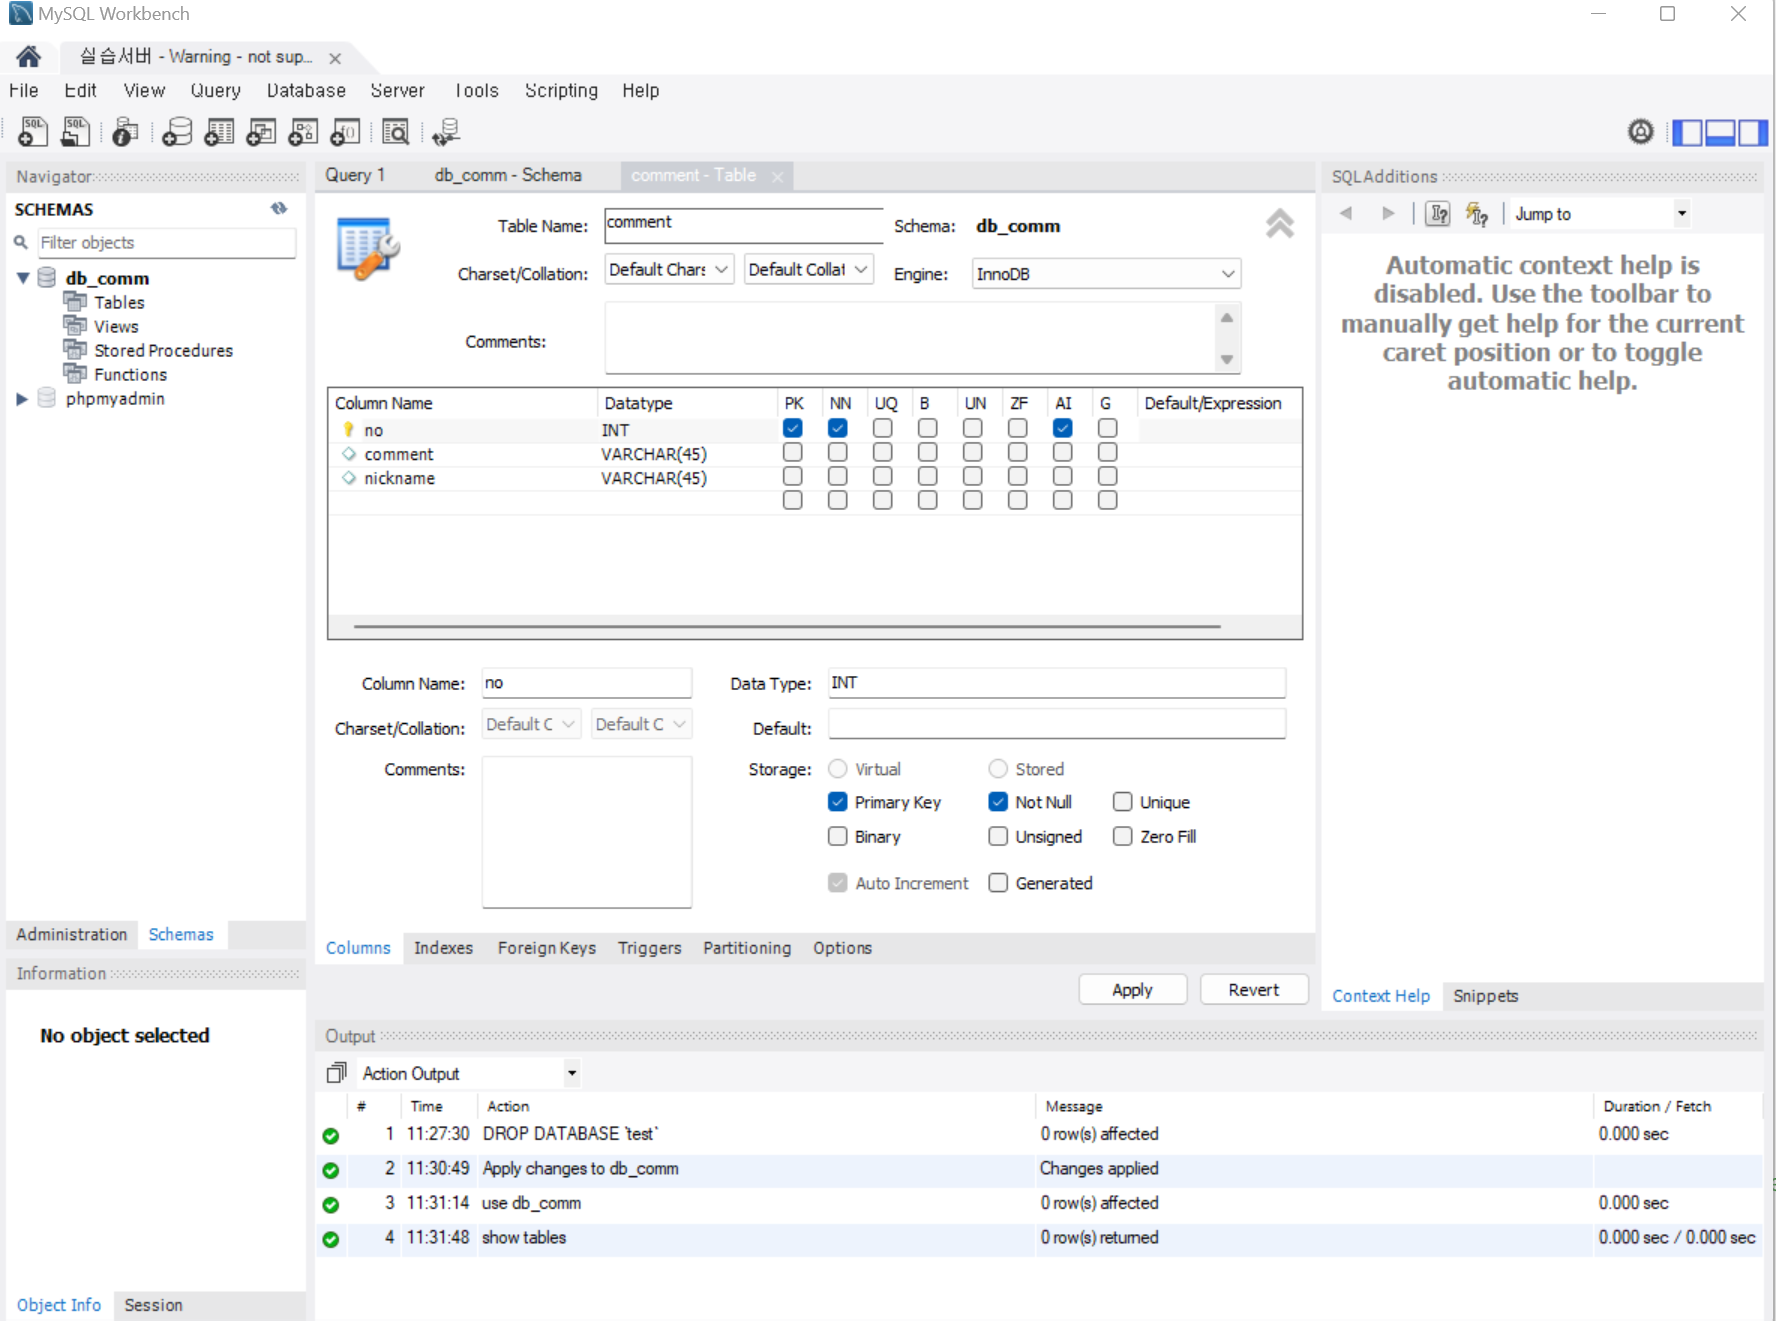
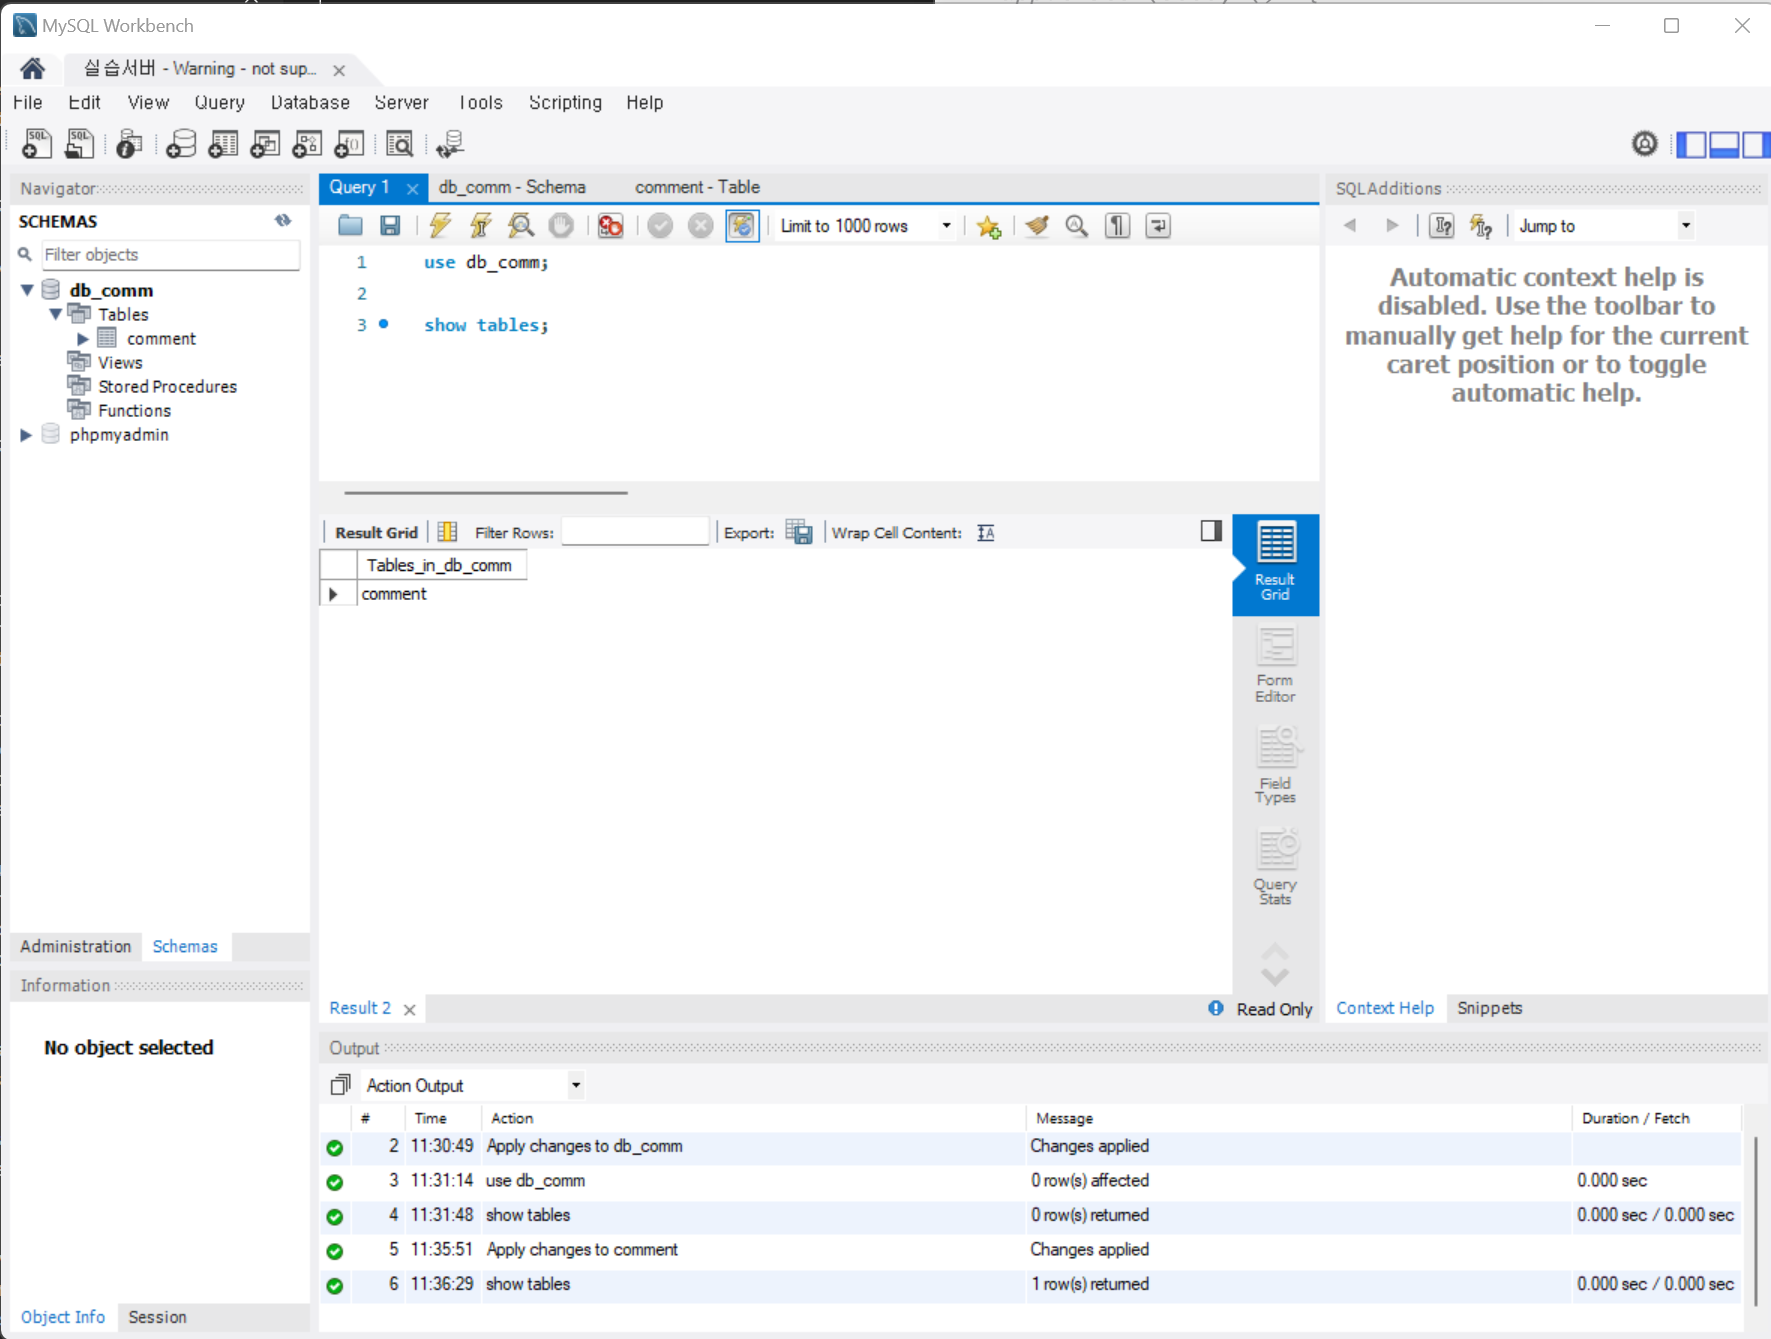
comment 오른쪽 클릭하고 Select row
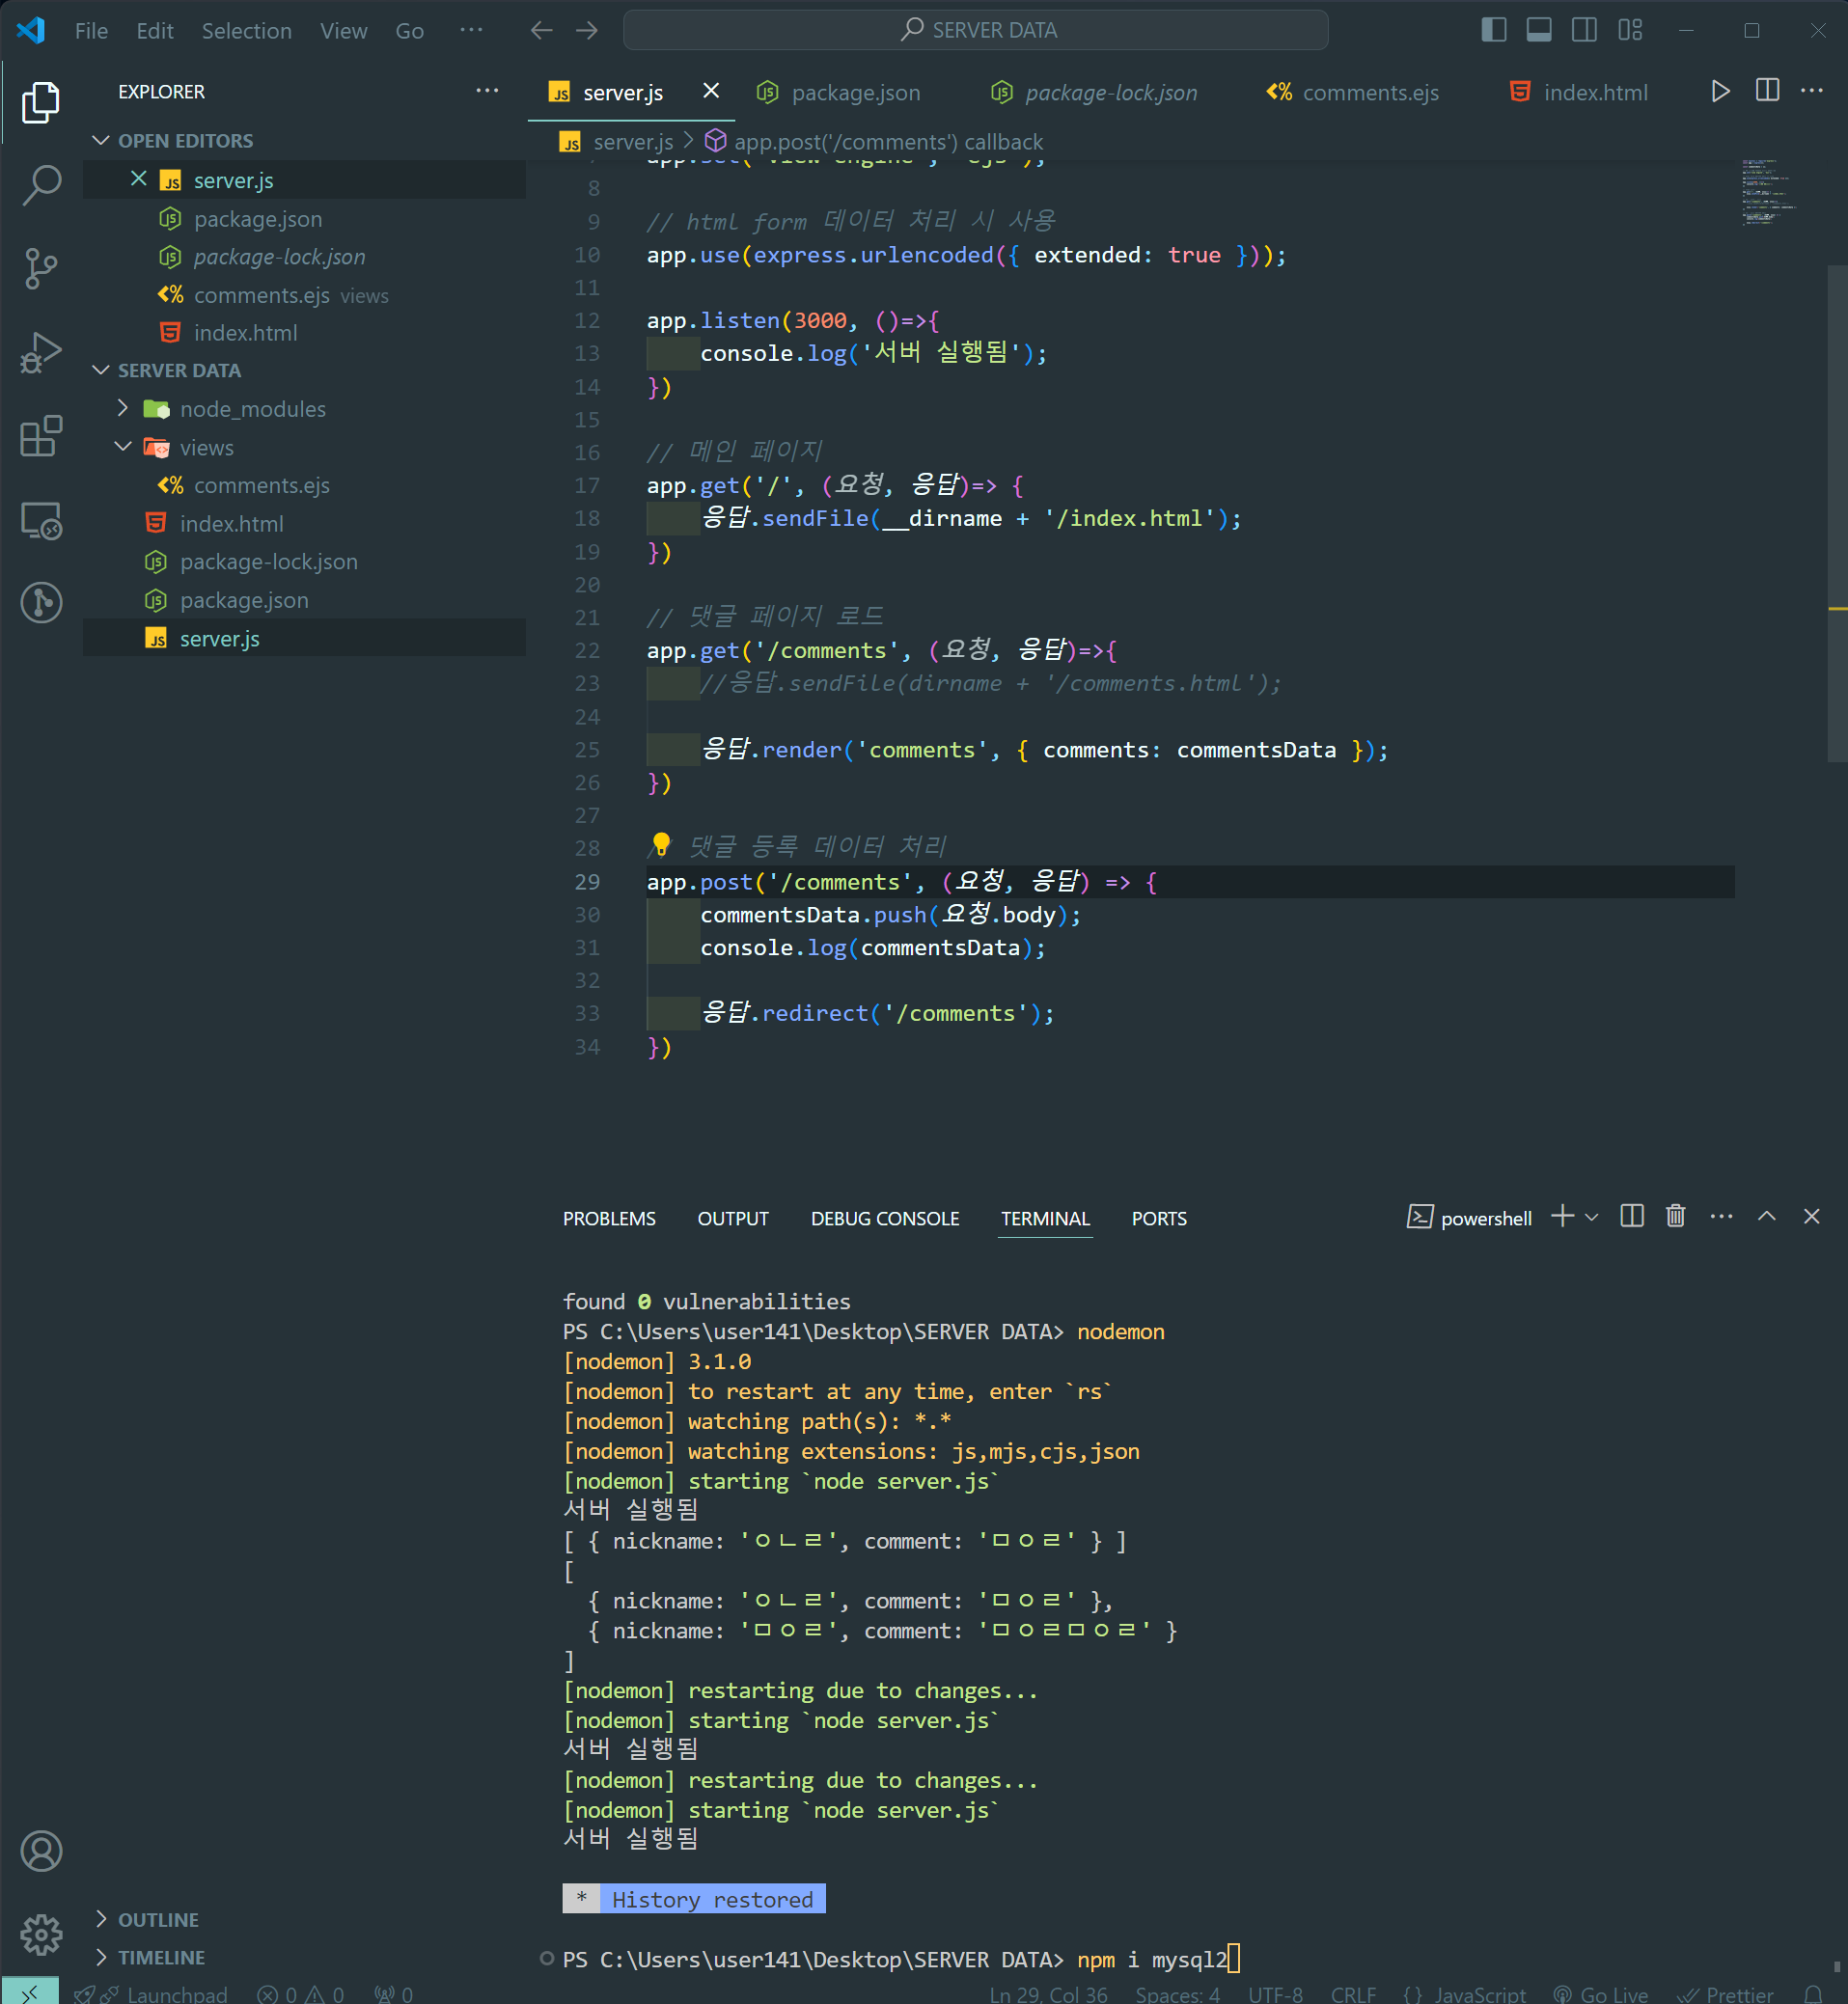
npm i mysql2

안녕하세요. 배운 것을 메모하는 velog입니다.