이번 시간에는 인스타자동화를 해보겠습니다. 목표는 상당히 간단합니다.
selenium 라이브러리를 통해 크롬제어 자동화합니다!
selenium 을 통해서 크롬과 마우스, 키보드를 사용하는 모든 반복적인 작업들을 통제할 수 있습니다.
일단 필요한 재료들부터 확인해보겠습니다.
Python3ChromeChrome Webdriver
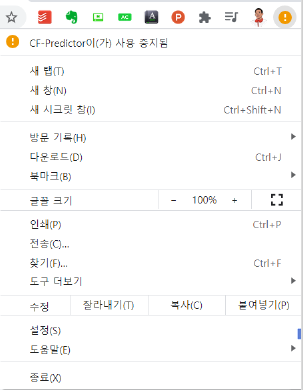
[도움말]에 들어가서 버전을 확인합니다.
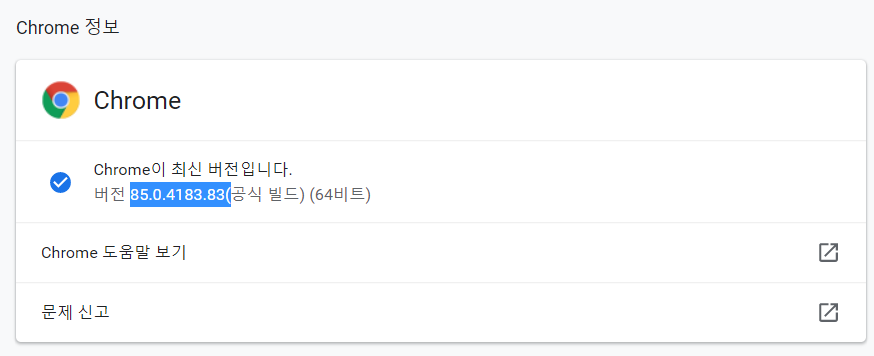
버전이 85.0.4183.83임을 확인했고, 아래 사이트에 들어가서 버전에 맞는 Chrome Webdriver를 다운로드를 합니다.
https://chromedriver.chromium.org/home
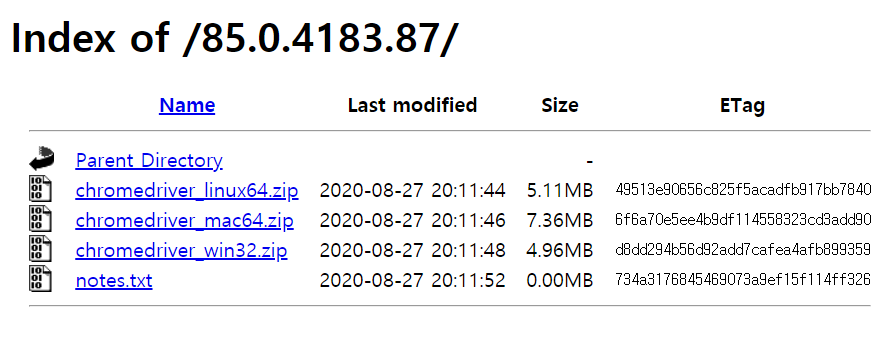
win32버전으로 다운받아줍니다.
from selenium import webdriver
import time

def main() :
    driver = webdriver.Chrome(r'chromedriver.exe')
    time.sleep(10)
main()
import selenium을 할 수도 있으나, webdriver만 사용할 것이기 때문에
from selenium import webdriver 구문을 사용해도 괜찮습니다!
drive를 불러오는 함수. webdriver.Chrome(r, 'chromedriver.exe')
알맞게 설정해줍니다.
from selenium import webdriver
import time

def main() :
    driver = webdriver.Chrome(r'chromedriver.exe')
    driver.get('https://www.instagram.com/accounts/login/?source=auth_switcher')
    time.sleep(5)
    id_form = driver.find_element_by_xpath('//*[@id="loginForm"]/div/div[1]/div/label/input')
    id_form.send_keys('ID')
    pw_form = driver.find_element_by_xpath('//*[@id="loginForm"]/div/div[2]/div/label/input')
    pw_form.send_keys('PW')
    pw_form.submit()
    time.sleep(100)
main()
driver.get() 함수는 해당 인자에 URL을 열겠다라는 의미입니다.
time.sleep()은 브라우저가 열리는 시간보다 조금 더 여유있게 잡아주는 스레드 중지 함수입니다.
다음은 xpath를 통해, 해당 form의 input에 값들을 넣어주는 코드입니다. id_form.send_keys()와 pw_form.send_keys() 함수를 통해 어떤 문자열을 입력하는지 제어할 수 있습니다.
pw_form.submit() 함수를 통해 Enter를 제어할 수 있습니다.
from selenium import webdriver
import time

def main() :
    driver = webdriver.Chrome(r'chromedriver.exe')
    driver.get('https://www.instagram.com/accounts/login/?source=auth_switcher')
    time.sleep(5)
    id_form = driver.find_element_by_xpath('//*[@id="loginForm"]/div/div[1]/div/label/input')
    id_form.send_keys('ID')
    pw_form = driver.find_element_by_xpath('//*[@id="loginForm"]/div/div[2]/div/label/input')
    pw_form.send_keys('PW')
    pw_form.submit()
    time.sleep(5)
    hashtag = "좋아요반사"
    driver.get("https://www.instagram.com/explore/tags/" + hashtag)
    time.sleep(5)
    picture = driver.find_elements_by_class_name('_9AhH0')[9]
    picture.click()
    time.sleep(5)
    like_btn = driver.find_element_by_xpath('/html/body/div[4]/div[2]/div/article/div[3]/section[1]/span[1]/button')
    like_btn.click()
    time.sleep(100)

main()
이건 Raw한 버전이고, 함수모듈화 해보겠습니다.
from selenium import webdriver
import time
def login(driver) :
id_form = driver.find_element_by_xpath('//*[@id="loginForm"]/div/div[1]/div/label/input')
id_form.send_keys('jjongwuner')
pw_form = driver.find_element_by_xpath('//*[@id="loginForm"]/div/div[2]/div/label/input')
pw_form.send_keys('1j2k3l20^^')
pw_form.submit()
time.sleep(5)
def work(driver) :
i = 1
while True :
hashtag = "좋아요반사"
driver.get("https://www.instagram.com/explore/tags/" + hashtag)
time.sleep(5)
picture = driver.find_elements_by_class_name('_9AhH0')[9]
picture.click()
time.sleep(5)
like_btn = driver.find_element_by_xpath('/html/body/div[4]/div[2]/div/article/div[3]/section[1]/span[1]/button')
like_btn.click()
time.sleep(10);
print("%d 번째 실행" % i)
i += 1
def main() :
driver = webdriver.Chrome(r'chromedriver.exe')
driver.get('https://www.instagram.com/accounts/login/?source=auth_switcher')
time.sleep(5)
login(driver)
work(driver)
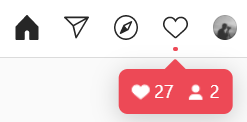
main()모듈화에 성공했습니다!
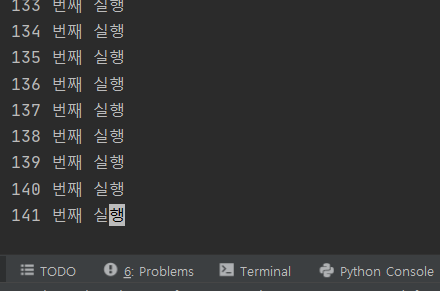
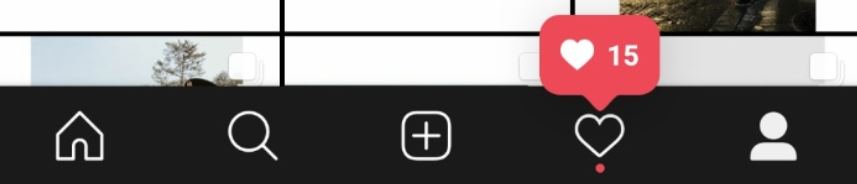
자동화로 인한 반사효과 톡톡히 보고 있습니다.
이렇게 오늘도 인스타그램 부서 직원 1개를 만들었습니다.