
HTML
<!DOCTYPE html>
<html>
<head>
<meta charset="UTF-8">
<title>자바스크립트에서 엘리먼트(태그, 요소)를 잡는 6가지 방법</title>
<link rel="stylesheet" href="css/getElement_querySelectorAll.css" >
<script type="text/javascript" src="js/getElement_querySelectorAll.js"></script>
</head>
<body>
<div>red</div>
<div>green</div>
<div>blue</div>
<br>
<section>
<button type="button" class="btn_navy">버튼1</button>
<button type="button">버튼2</button>
<button type="button" class="btn_navy">버튼3</button>
<button type="button">버튼4</button>
<button type="button" class="btn_navy">버튼5</button>
<button type="button">버튼6</button>
</section>
<br>
<section>
<ul>
<li><label for="hobby1">게임</label><input id="hobby1" type="checkbox" name="hobby" value="game" /><span class="hobby_val"></span></li>
<li><label for="hobby2">영화감상</label><input id="hobby2" type="checkbox" name="hobby" value="movie" /><span class="hobby_val"></span></li>
<li><label for="hobby3">글쓰기</label><input id="hobby3" type="checkbox" name="hobby" value="writing" /><span class="hobby_val"></span></li>
<li><label for="hobby4">음악감상</label><input id="hobby4" type="checkbox" name="hobby" value="music" /><span class="hobby_val"></span></li>
</ul>
<button type="button" id="btn_ok_1">체크박스확인1</button>
<button type="button" id="btn_ok_2">체크박스확인2</button>
<button type="button" onclick="func_clear()">결과지우기</button>
<br>
체크박스에 체크가 되어진 값1 : <span id="result1"></span>
<br>
체크박스에 체크가 되어진 값2 : <span id="result2"></span>
</section>
<br>
<section id="food">
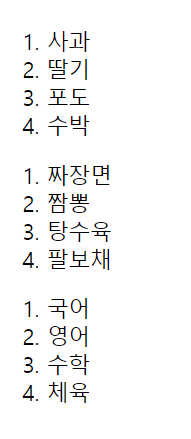
<ol>
<li>사과</li>
<li>딸기</li>
<li>포도</li>
<li>수박</li>
</ol>
<ol>
<li>짜장면</li>
<li>짬뽕</li>
<li>탕수육</li>
<li>팔보채</li>
</ol>
<ol>
<li>국어</li>
<li>영어</li>
<li>수학</li>
<li>체육</li>
</ol>
</section>
<section style="margin-bottom: 150px;">
<img id="food_img"/>
</section>
</body>
</html>JS
window.onload = function(){

// === 1. 자바스크립트에서 태그를 가지고 선택자를 잡는 방법 === //
    /*
        document.getElementsByTagName("태그명"); 이다.

        document.getElementsByTagName("태그명"); 을 실행하면 NodeList 타입(배열과 거의 비슷함)으로 반환해준다. 즉, 쉽게 말하자면 객체(object)가 여러개인 형태로 반환해준다.
    */

    const divList = document.getElementsByTagName("div");

    console.log("divList",divList);

    // alert("divList 의 길이 : " + divList.length);
    // divList 의 길이 :  3

    for(let i=0; i<divList.length; i++){

        // alert(divList[i].innerText); // red  green   blue

        divList[i].style.display = "inline-block";
        divList[i].style.border = "solid 1px gray";
        divList[i].style.width = "200px";
        divList[i].style.height = "150px";
        divList[i].style.margin = "20px";
        divList[i].style.backgroundColor = divList[i].innerText;

        // CSS 에서 background-color 와 같이 스네이크기법으로 했던 것은
        // 자바스크립트에서는 backgroundColor 와 같이 카멜기법으로 바꾸어야만 한다.

        divList[i].style.color = "white";

    }   // end of for-----------------------------

    const btnList = document.getElementsByTagName("button");

    for(let i=0; i<btnList.length; i++){
        btnList[i].style.widtht = "100px";
        btnList[i].style.height = "50px";
        btnList[i].style.margin = "20px";

        /*
        // 버튼 4의 배경색을 노랑색으로 한다.
            if(i == 3){
                btnList[i].style.backgroundColor = "yellow";
            }
        */
    }   // end of for---------------------

    // 버튼 4의 배경색을 노랑색으로 한다.
    document.getElementsByTagName("button")[3].style.backgroundColor = "yellow";

    // === 2. 자바스크립트에서 클래스명을 가지고 선택자를 잡는 방법 === //
    /*
        document.getElementsByClassName("클래스명");

        document.getElementsByClassName("클래스명"); 을 실행하면 NodeList 타입(배열과 거의 비슷함)으로 반환해준다. 즉, 쉽게 말하자면 객체(object)가 여러개인 형태로 반환해준다.
    */

    const btn_navy_list = document.getElementsByClassName("btn_navy");

    for(let i=0; i<btn_navy_list.length; i++){

        btn_navy_list[i].style.backgroundColor = "navy";
        btn_navy_list[i].style.color = "white";

    }   // end of for--------------------------

    document.getElementsByTagName("ul")[0].style.listStyleType = "none";

    const label_list = document.getElementsByTagName("label");

    for(let i=0; i<label_list.length; i++){

        label_list[i].style.color = "red";
        label_list[i].style.fontSize = "16pt";
        label_list[i].style.fontWeight = "bold";

    }   // end of for----------------

    // === 3. 자바스크립트에서 name 속성을 가지고 선택자를 잡는 방법 === //
    /*
        document.getElementsByName("name값");

        document.getElementsByName("name값"); 을 실행하면 NodeList 타입(배열과 거의 비슷함)으로 반환해준다. 즉, 쉽게 말하자면 객체(object)가 여러개인 형태로 반환해준다.
    */

    const checkbox_hobby_list = document.getElementsByName("hobby");

    for(let i=0; i<checkbox_hobby_list.length; i++){

        console.log(checkbox_hobby_list[i].value);
        /*
            game
            movie
            writing
            music
        */

    }   // end of for-------------------------

    const span_hobby_list = document.getElementsByClassName("hobby_val");

    for(let i=0; i<span_hobby_list.length; i++){

        span_hobby_list[i].innerHTML = checkbox_hobby_list[i].value;

    }   // end of for---------------


    // === 4. 자바스크립트에서 id 값을 가지고 선택자를 잡는 방법 === //
    /*
        document.getElementById("id값");

        document.getElementById("id값"); 을 실행하면 리턴타입은 1개의 객체(object)이다.
    */

    const btn_ok_1 = document.getElementById("btn_ok_1");

    // === 엘리먼트(객체)에 마우스가 올라가면 발생하는 이벤트 핸들러 생성하기 === //
    btn_ok_1.onmouseover = function(){

        // btn_ok_1 를 "이벤트소스" 라고 부른다.
        // onmouseover 를 "이벤트" 라고 부른다. 지금은 마우스가 올라가면 발생하는 이벤트이다.
        // function() { } 부분을 핸들러(처리)라고 부른다.

        // alert("확인용 : 체크박스확인1에 마우스가 올라갔군요~~");

        // this 는 "이벤트소스" 인 자기자신의 객체(btn_oki_1)를 가리키는 것이다.
        this.style.backgroundColor = "red";

    }

    // === 엘리먼트(객체)에 마우스가 올라갔다가 빠지면 발생하는 이벤트 핸들러 생성하기 === //
    btn_ok_1.onmouseout = function(){

        // btn_ok_1 를 "이벤트소스" 라고 부른다.
        // onmouseout 를 "이벤트" 라고 부른다. 지금은 마우스가 올라갔다가 빠지면 발생하는 이벤트이다.
        // function() { } 부분을 핸들러(처리)라고 부른다.

        // alert("확인용 : 체크박스확인1에 마우스가 올라갔다가 빠졌군요~~");

        // this 는 "이벤트소스" 인 자기자신의 객체(btn_oki_1)를 가리키는 것이다.
        this.style.backgroundColor = "";    // CSS 에서 주었던 원래의 배경색(Green 을 쓸 필요 없다.)

    }

    // === 5. 자바스크립트에서 CSS 선택자를 가지고 선택자를 잡는 방법 === //
    // document.querySelectorAll("CSS선택자");
    // document.querySelectorAll("CSS선택자"); 을 실행하면 NodeList 타입(배열과 거의 비슷함)으로 반환해준다. 즉, 쉽게 말하자면 객체(object)가 여러개인 형태로 반환해준다.

    // === 6. 자바스크립트에서 CSS 선택자를 가지고 선택자를 잡는 방법 === //
    // document.querySelector("CSS선택자");
    // document.querySelector("CSS선택자"); 을 실행하면 리턴타입은 1개의 객체(object)이다.

    const li_foodList = document.querySelectorAll("body > section#food > ol:nth-child(2) > li");
    const img = document.querySelector("img#food_img");

    const img_food_arr = ["jjm.png","jjbong.png","tangsy.png","palbc.png"];

    for(let i=0; i<li_foodList.length; i++){

        li_foodList[i].onmouseover = function(){

            // alert(li_foodList[i].innerText + " 음식에 마우스를 클릭하셨군요");
            this.style.backgroundColor = "navy";
            this.style.width = "20%";
            this.style.color = "white";

            img.src = "images/" + img_food_arr[i];
            img.width = "150";
            img.height = "110";     // px 을 작성하면 안된다.
            img.style.display = ""; // img.style.display = "none"; 이 있는 경우 해야한다.

        }

        li_foodList[i].onmouseout = function(){

            this.style.backgroundColor = "";
            this.style.color = "";

            // 마우스가 글자에서 벗어났을때 이미지 없애기
            // img.src = "";            -- 틀린경우
            img.style.display = "none";
        }

    }   // end of for----------------------

    // ===== 퀴즈 ===== //
    // 체크박스확인1 버튼을 클릭하면 name 값이 hobby 인 체크박스에 체크가 되어진것만
    // value 을  나열해서 span 태그의 id값이 result1 인 곳에 출력하세요.
    document.querySelectorAll("button")[6].onclick = function() {
        // document.querySelectorAll("button")[6] 을 "이벤트소스" 라고 부른다.
        // onclick 을 "이벤트" 라고 부른다. 지금은 click 이벤트이다.
        // function (){} 을 "핸들러" 라고 부른다.

        // alert("확인용 체크박스확인1 버튼을 클릭하셨군요!! ")

        const checkbox_hobby_list = document.querySelectorAll("input[name='hobby']");

        let result = "";
        let cnt = 0;

        for(let i=0; i<checkbox_hobby_list.length; i++){

            // checkbox_hobby_list[i].value;        // . 표기법
            // checkbox_hobby_list[i]["value"];     // [] 표기법
            /*
                console.log("확인용 value: " ,checkbox_hobby_list[i].value);
                console.log("확인용 체크유무: " ,checkbox_hobby_list[i].checked);
            */
            if(checkbox_hobby_list[i].checked){

                cnt++;
                let s_comma = (cnt==1)?"":",";
                result += s_comma + checkbox_hobby_list[i].value;

            }

        }   // end of for--------------

        document.querySelector("span#result1").innerHTML = result;     // 권장
    };

    // 체크박스확인2 버튼을 클릭하면 name 값이 hobby 인 체크박스에 체크가 되어진것만
    // value 을  나열해서 span 태그의 id값이 result1 인 곳에 출력하세요.
    document.querySelectorAll("button")[7].addEventListener("click", function(){});
    // document.querySelectorAll("button")[6] 을 "이벤트소스" 라고 부른다.
    // click 을 "이벤트" 라고 부른다. 지금은 click 이벤트이다.
    // function (){} 을 "핸들러" 라고 부른다.

    // alert("확인용 체크박스확인2 버튼을 클릭하셨군요!! ")

    document.querySelectorAll("button")[7].onclick = function() {

        const checkbox_hobby_list = document.querySelectorAll("input[name='hobby']");

        let result = "";
        let cnt = 0;

        for(let i=0; i<checkbox_hobby_list.length; i++){

            // checkbox_hobby_list[i].value;        // . 표기법
            // checkbox_hobby_list[i]["value"];     // [] 표기법
            /*
                console.log("확인용 value: " ,checkbox_hobby_list[i].value);
                console.log("확인용 체크유무: " ,checkbox_hobby_list[i].checked);
            */
            if(checkbox_hobby_list[i].checked){

                cnt++;
                let s_comma = (cnt==1)?"":",";
                result += s_comma + checkbox_hobby_list[i].value;

            }

        }   // end of for--------------

        document.querySelector("span#result2").innerHTML = result;     // 권장
    };

}   // end of window.onload = function()--------------

// 결과 지우기
function func_clear() {      // Function Declaration

    document.querySelector("span#result1").innerHTML = "";
    document.querySelector("span#result2").innerHTML = "";

    const checkbox_hobby_list = document.querySelectorAll("input[name='hobby']");

        for(let i=0; i<checkbox_hobby_list.length; i++){

            checkbox_hobby_list[i].checked = false;

        }   // end of for-----------

}   // end of function func_clear()-----------------------
CSS
@charset "UTF-8";

button#btn_ok_1, button#btn_ok_2{
    background-color: green;
}
정리
- 08_getElement_querySelectorAll
-> getElement_querySelectAll.html, getElement_querySelectAll.js, getElement_querySelectAll.css
