1. pyrealsense2.align 문서
pyrealsense2.align클래스는 깊이 이미지와 다른 이미지 간의 정렬을 수행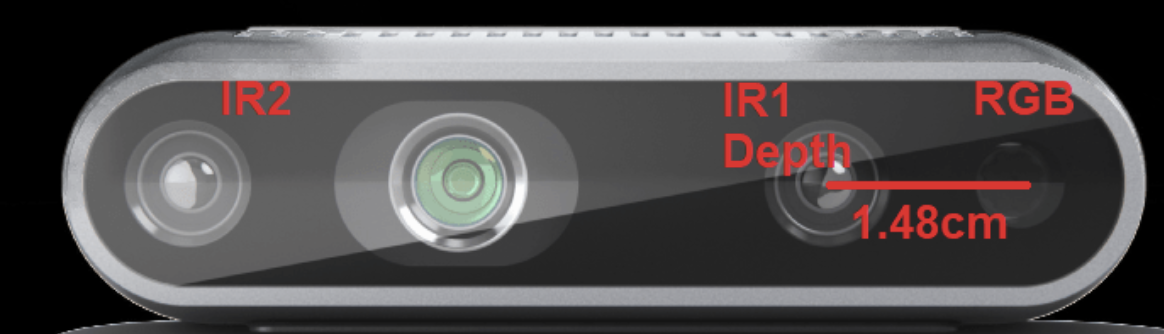
1.1.__init__(self: pyrealsense2.align, align_to: pyrealsense2.stream) → None
- 깊이 이미지를 다른 이미지에 맞추어 정렬하려면
align_to매개변수에 다른 스트림 타입을 설정
- 반대로, 비깊이 이미지를 깊이 이미지에 정렬하려면
align_to매개변수를RS2_STREAM_DEPTH로 설정
- 정렬을 시작할 때 카메라의 보정 정보(렌즈 왜곡을 보정하는 데이터)와 프레임의 종류(깊이 이미지, 컬러 이미지 등)를 미리 설정할 필요가 없고,
- 첫 번째로 들어오는 유효한 이미지 데이터를 바탕으로 자동으로 그 정보를 결정한다는 의미
- 따라서 카메라가 어떤 이미지를 받을지 몰라도, 첫 이미지로부터 자동으로 그 정보를 읽어와 정렬을 수행하는 방식이라고 이해하면 됨
1.2. 메서드
-
__init__(self, align_to)- 깊이 이미지를 다른 이미지에 정렬하려면
align_to매개변수에 다른 스트림 타입을 설정합니다.
- 깊이 이미지를 다른 이미지에 정렬하려면
-
as_decimation_filter(self)- 축소 필터로 변환합니다.
-
as_disparity_transform(self)- 시차 변환으로 변환합니다.
-
as_hdr_merge(self)- HDR 병합으로 변환합니다.
-
as_hole_filling_filter(self)- 구멍 채우기 필터로 변환합니다.
-
as_sequence_id_filter(self)- 시퀀스 ID 필터로 변환합니다.
-
as_spatial_filter(self)- 공간 필터로 변환합니다.
-
as_temporal_filter(self)- 시간 필터로 변환합니다.
-
as_threshold_filter(self)- 임계 필터로 변환합니다.
-
get_info(self, arg0)- 카메라의 특정 정보를 가져옵니다 (내부 구성 요소들의 버전 등).
-
get_option(self, option)- 디바이스에서 옵션 값을 읽어옵니다.
-
get_option_description(self, option)- 옵션에 대한 설명을 가져옵니다.
-
get_option_range(self, option)- 지원되는 옵션의 값 범위를 가져옵니다.
-
get_option_value(self, arg0) -
get_option_value_description(self, option, value)- 특정 옵션 값에 특별한 의미가 있는 경우 해당 값에 대한 설명을 가져옵니다.
-
get_supported_options(self)- 지원되는 옵션 목록을 가져옵니다.
-
invoke(self, f)- 처리 블록에 프레임을 처리하도록 요청합니다.
-
is_decimation_filter(self)- 축소 필터인지 확인합니다.
-
is_disparity_transform(self)- 시차 변환인지 확인합니다.
-
is_hdr_merge(self)- HDR 병합인지 확인합니다.
-
is_hole_filling_filter(self)- 구멍 채우기 필터인지 확인합니다.
-
is_option_read_only(self, option)- 특정 옵션이 읽기 전용인지 확인합니다.
-
is_sequence_id_filter(self)- 시퀀스 ID 필터인지 확인합니다.
-
is_spatial_filter(self)- 공간 필터인지 확인합니다.
-
is_temporal_filter(self)- 시간 필터인지 확인합니다.
-
is_threshold_filter(self)- 임계 필터인지 확인합니다.
-
on_options_changed(self, callback)- 이 컨테이너 내의 옵션이 변경되면 알림을 보내는 콜백을 설정합니다.
-
process(self, frames)- 주어진 프레임을 정렬하는 과정을 실행하여 정렬된 프레임 세트를 얻습니다.
-
set_option(self, option, value)- 디바이스 옵션에 새 값을 기록합니다.
-
set_option_value(self, arg0, arg1) -
start(self, callback)- 프레임이 처리되면 애플리케이션에 알리는 콜백 함수와 함께 처리 블록을 시작합니다.
-
supports(self, arg0)- 특정 카메라 정보 필드를 지원하는지 확인합니다.
2. 코드
- 이 코드는 Intel RealSense 카메라의 깊이 이미지와 컬러 이미지를 정렬하여 출력하는 예제
2.1. 라이브러리 및 설정
- 파이프라인 설정:
rs.pipeline()을 통해 카메라 스트리밍을 관리할 파이프라인을 생성합니다.- 이 파이프라인을 통해 카메라로부터 데이터를 가져옵니다.
- 설정 객체 생성:
rs.config()를 통해 스트림을 설정할 수 있는 설정 객체를 생성- 여기서는 깊이와 컬러 스트림을 설정
2. 장치 확인 및 스트림 설정
- 장치 정보 확인:
pipeline_wrapper와pipeline_profile을 통해 현재 연결된 카메라 장치 정보를 가져옵니다.- 이를 통해 RGB 카메라가 있는지 확인하고, 없다면 프로그램을 종료합니다.
- 스트림 설정:
- 깊이와 컬러 스트림을 640x480 해상도, 30 FPS로 설정합니다.
3. 스트리밍 시작
- 스트리밍 시작:
pipeline.start(config)으로 스트리밍을 시작하고, 카메라에서 데이터를 실시간으로 가져옵니다.
- 깊이 센서 스케일:
depth_sensor.get_depth_scale()로 깊이 데이터를 실제 거리 단위로 변환하는 스케일 값을 가져옵니다.- 예를 들어, 깊이 값이 1일 때 실제 거리는 이 스케일 값을 곱한 값입니다.
4. 정렬 및 배경 제거
- 정렬 객체 생성:
rs.align()을 통해 깊이 이미지를 컬러 이미지에 맞추기 위한 정렬 객체를 생성- 여기서는 깊이 이미지를 컬러 이미지에 맞추기 위해
align_to = rs.stream.color로 설정
- 프레임 처리:
- 무한 루프 내에서
pipeline.wait_for_frames()를 통해 깊이 및 컬러 프레임 세트를 가져오고, align.process(frames)로 깊이 프레임을 컬러 프레임에 맞추어 정렬
- 무한 루프 내에서
- 배경 제거:
np.where()함수를 사용해 클리핑 거리보다 먼 거리에 있는 물체들을 제거하고, 배경을 회색으로 설정- 이때 클리핑 거리는 1미터로 설정
5. 이미지 출력
- 이미지 렌더링: 정렬된 깊이 이미지와 컬러 이미지를 결합하여 보여줍니다.
cv2.applyColorMap()을 사용해 깊이 이미지를 컬러맵(Jet)을 적용하여 시각적으로 보기 쉽게 변환하고,np.hstack()으로 배경 제거된 컬러 이미지와 깊이 이미지를 나란히 출력합니다. - 키 입력 처리: 'q'나 'Esc' 키를 누르면 이미지 창이 닫히고 스트리밍이 종료됩니다.
6. 스트리밍 종료
- 정리:
pipeline.stop()으로 스트리밍을 종료합니다.
요약하자면, 이 코드는 RealSense 카메라의 깊이 이미지와 컬러 이미지를 정렬하고, 1미터 이상 떨어진 물체를 배경으로 처리한 후 그 결과를 화면에 표시하는 기능을 합니다.
## License: Apache 2.0. See LICENSE file in root directory.
## Copyright(c) 2017 Intel Corporation. All Rights Reserved.

#####################################################
##              Align Depth to Color               ##
#####################################################

# First import the library
import pyrealsense2 as rs
# Import Numpy for easy array manipulation
import numpy as np
# Import OpenCV for easy image rendering
import cv2

# Create a pipeline
pipeline = rs.pipeline()

# Create a config and configure the pipeline to stream
#  different resolutions of color and depth streams
config = rs.config()

# Get device product line for setting a supporting resolution
pipeline_wrapper = rs.pipeline_wrapper(pipeline)
pipeline_profile = config.resolve(pipeline_wrapper)
device = pipeline_profile.get_device()
device_product_line = str(device.get_info(rs.camera_info.product_line))

found_rgb = False
for s in device.sensors:
    if s.get_info(rs.camera_info.name) == 'RGB Camera':
        found_rgb = True
        break
if not found_rgb:
    print("The demo requires Depth camera with Color sensor")
    exit(0)

config.enable_stream(rs.stream.depth, 640, 480, rs.format.z16, 30)
config.enable_stream(rs.stream.color, 640, 480, rs.format.bgr8, 30)

# Start streaming
profile = pipeline.start(config)

# Getting the depth sensor's depth scale (see rs-align example for explanation)
depth_sensor = profile.get_device().first_depth_sensor()
depth_scale = depth_sensor.get_depth_scale()
print("Depth Scale is: " , depth_scale)

# We will be removing the background of objects more than
#  clipping_distance_in_meters meters away
clipping_distance_in_meters = 1 #1 meter
clipping_distance = clipping_distance_in_meters / depth_scale

# Create an align object
# rs.align allows us to perform alignment of depth frames to others frames
# The "align_to" is the stream type to which we plan to align depth frames.
align_to = rs.stream.color
align = rs.align(align_to)

# Streaming loop
try:
    while True:
        # Get frameset of color and depth
        frames = pipeline.wait_for_frames()
        # frames.get_depth_frame() is a 640x360 depth image

        # Align the depth frame to color frame
        aligned_frames = align.process(frames)

        # Get aligned frames
        aligned_depth_frame = aligned_frames.get_depth_frame() # aligned_depth_frame is a 640x480 depth image
        color_frame = aligned_frames.get_color_frame()

        # Validate that both frames are valid
        if not aligned_depth_frame or not color_frame:
            continue

        depth_image = np.asanyarray(aligned_depth_frame.get_data())
        color_image = np.asanyarray(color_frame.get_data())

        # Remove background - Set pixels further than clipping_distance to grey
        grey_color = 153
        depth_image_3d = np.dstack((depth_image,depth_image,depth_image)) #depth image is 1 channel, color is 3 channels
        bg_removed = np.where((depth_image_3d > clipping_distance) | (depth_image_3d <= 0), grey_color, color_image)

        # Render images:
        #   depth align to color on left
        #   depth on right
        depth_colormap = cv2.applyColorMap(cv2.convertScaleAbs(depth_image, alpha=0.03), cv2.COLORMAP_JET)
        images = np.hstack((bg_removed, depth_colormap))

        cv2.namedWindow('Align Example', cv2.WINDOW_NORMAL)
        cv2.imshow('Align Example', images)
        key = cv2.waitKey(1)
        # Press esc or 'q' to close the image window
        if key & 0xFF == ord('q') or key == 27:
            cv2.destroyAllWindows()
            break
finally:
    pipeline.stop()