
props와 state
두 객체 모두 렌더링 결과물에 영향을 주는 정보를 갖고 있다는 공통점이 있다. 하지만, props는 컴포넌트에 전달된다는 점과 status는 컴포넌트 안에서 관리한다는 점이 다르다.
props
- 부모 컴포넌트가 자식 컴포넌트에게 주는 값을 말한다.
- 자식 컴포넌트는 props를 받아오기만 하고, 받아온 props를 수정할 수는 없다.
- 받아온 props값은 this.name을 통하여 조회할 수 있다.
-html의 attribute를 용어충돌상의 문제로 props로 정해주었다.
class Subject extends Component {
	render() {
    	return (
        	<header>
            	<h1>{this.props.title}</h1>
                {this.props.sub}
            </header>
            );
          }
        }
class App extends Component {
	render() {
    	return (
        	<div className="App">
            	<Subject title="WEB" sub="world wide web!">						</subject>
                <TOC></TOC>
                <Content></Content>
             </div>
                );
              }
			}

export default App;
state
-컴포넌트의 내부의 상태를 말한다.
- 컴포넌트 내에서 동적으로 변동되는 데이터를 관리하며, 기본값을 미리 설정해야 사용할 수 있다.
- 컴포넌트 내부에서 선언하며 내부에서 값을 변경할 수 있다.
- state를 설정할 때는 constructor함수가 필요하다.
- constructor함수 안에서 super()를 호출한다.
- this.state값에 컴포넌트의 초기 상태값을 설정할 수 있다. (this가 의미하는 것은 컴퍼넌트의 이름이라고 생각하자.밑에 예시에서는 State를 가르킨다.)
import React, { Component } from 'react';

export class State extends Component {
  constructor() {
    super();
    this.state = {
      color: 'red'
    };
  }

  render() {
    return (
      <div>
        <h1 style={{ color: this.state.color }}>Class Component | State</h1>
      </div>
    );
  }
}
setstate
constructor 안에서 state값을 바꾸는 것은 가능하지만, 생성 후 state값을 바꿀 때에는 setState를 사용한다.
assuming this.state = { value: 0 }
this.setState({
value: 1
});
this.setState({ value: this.state.value + 1});
this.setState({ value: this.state.value + 1});
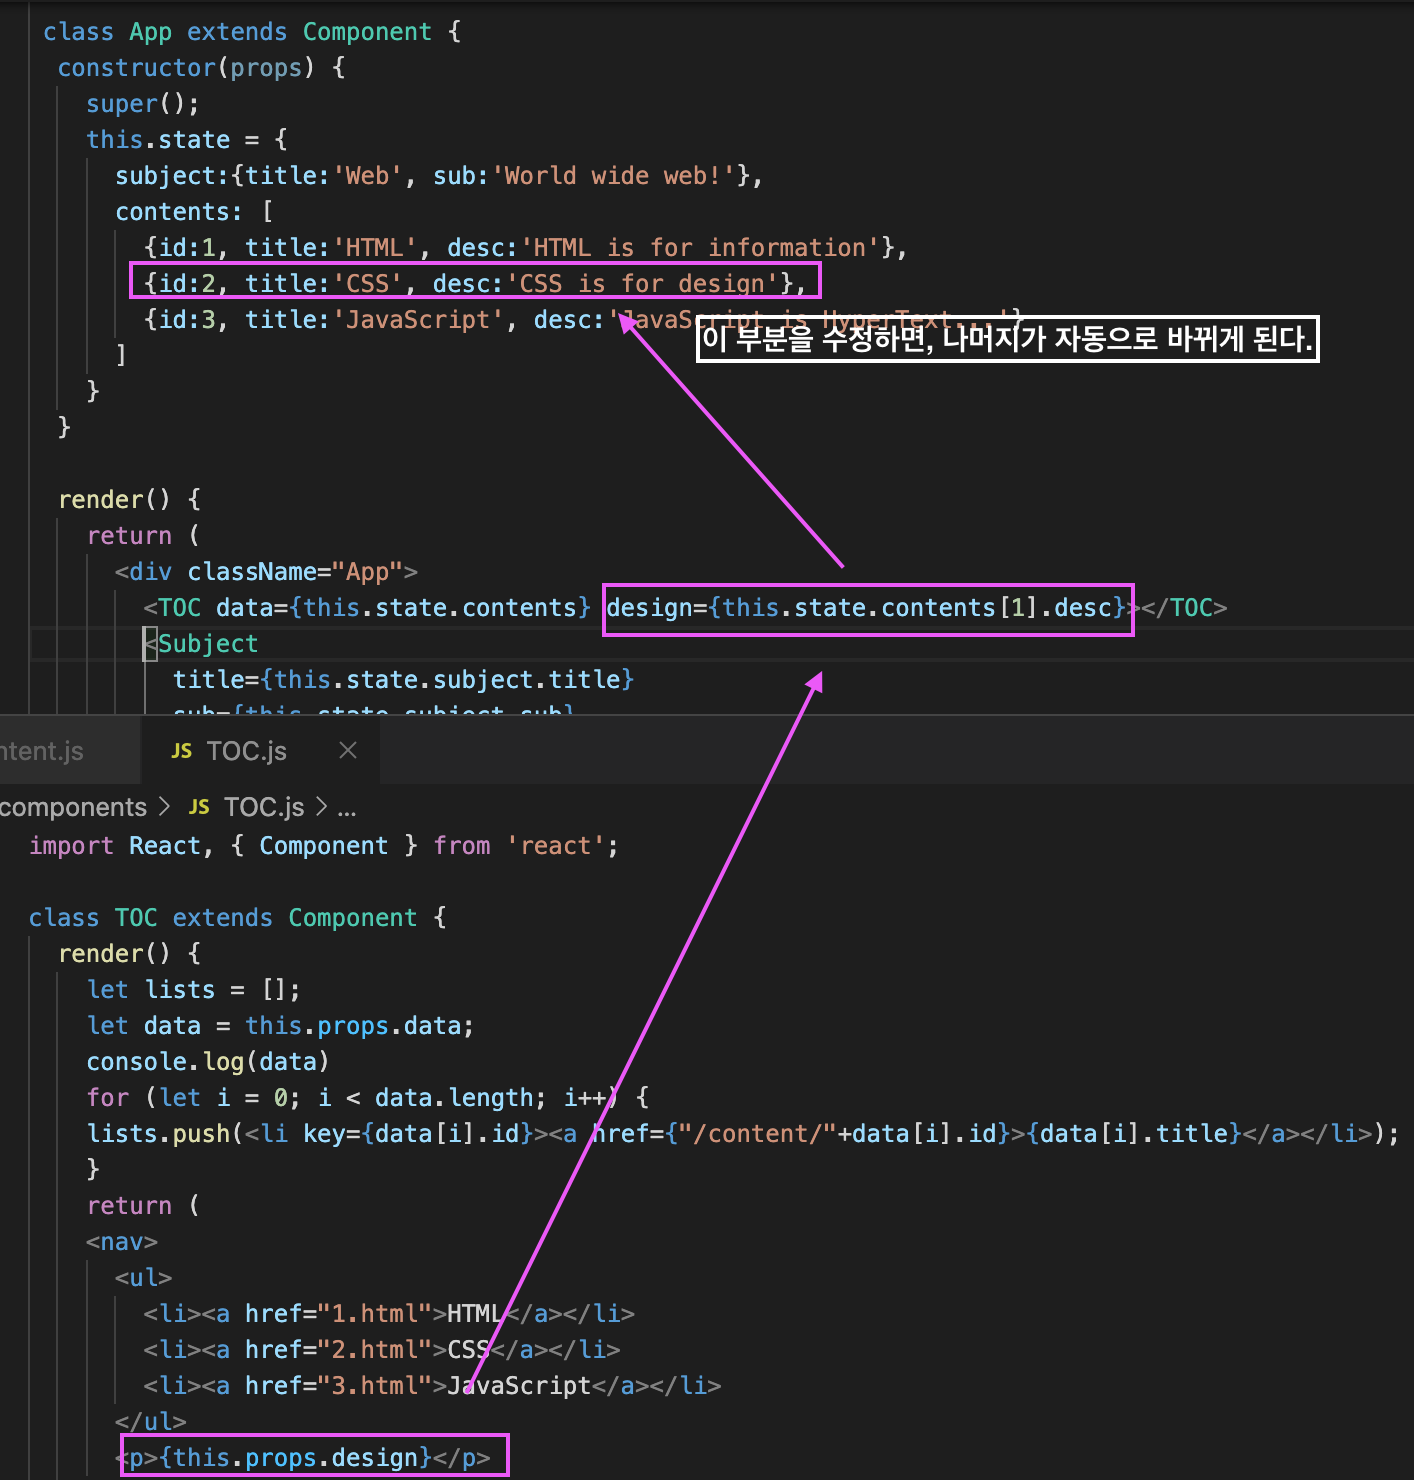
this.setState({ value: this.state.value + 1});*state와 props를 사용하는 이유에 대해서 쉽게 한 번 정리해보자. 10개 이상의 js파일이 존재하고, 그 중 a라는 파일의 P태그 내용을 모든 파일에 재사용하였다. 이때 내용을 수정하고 싶은데 10개의 모든 파일을 일일히 수정하는 것은 엄청 번거로울 것이다.
이때 state와 props를 잘 사용한다면 유지, 보수를 쉽게 할 수 있다.
이벤트 설정하기
- html에서는 onclick 소문자로 작성했지만 리액트에서는 카멜 표기법인 onClick으로 작성해야한다.
- 이벤트에는 함수형태의 객체를 전달해야한다. arrow function을 사용하거나 외부에 미리 함수를 만들어서 전달한다.
class Button extends React.Component {

  constructor() {
    super();

    this.state = {
      clicked: false
    }

    this.handleClick = this.handleClick.bind(this);
  }

  handleClick() {
    this.setState({
      clicked: !this.state.clicked
    });
  }

  render() {
    return (
      <div
        className={`btn ${this.props.type === 'like' ? 'like-btn' : ''}`}
        onClick={this.handleClick}
      >
        {this.state.clicked ? '좋아요' : '싫어요'}
      </div>
    );
  }
}

ReactDOM.render(
  <Button type="like" />,
  document.getElementById('root')
);

Lv.1🌷