[개발일지7일차] 데이터베이스 Python 연동
1. 학습내용
1) flask- Create 기능: form 태그
- form 태그: server로 데이터를 전송할때 사용한다.~~
예시)
 <form action="/create/" method="POST">
      <p><input type="text" name="title" placeholder="title"></p>
      <p><textarea name="body" placeholder="body"></textarea></p>
      <p><input type="submit" value="create"></p>
    </form>
이처럼
은 사용자의 입력을 받는 여러형태의 태그가 존재한다.상기의 예시에서는
input의 경우 text를 받고
textarea name 는 여러줄의 입력을 받으며
input type= "submit"는 사용자의 결심을 받는다. 즉, 전부 입력하였으니 제출을 받는다.라고 해석 할 수 있다.
2) flask- Create 기능: Method Get
먼저, 브라우저 입장에서는
읽기= Get= 어떤 정보를 가져오는 것
쓰는 것= POST (Get x)= 서버에서 어떤 정보를 추가하거나 저장하거나 삭제하거나, 로그인 하는 것.
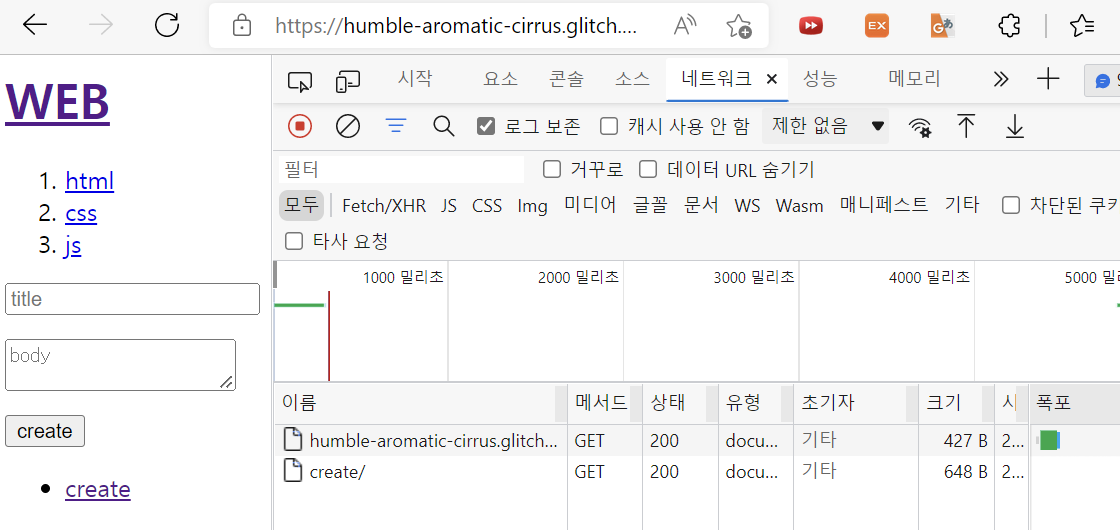
<참고>
만약 Method 창이 뜨지 않으면 오른쪽 클릭한 후, Method에 체크
3) flask- Create 기능: Method Post
개발자 도구에서 create/ 에서 Metod의 창이 Get이 아닌 Post로 할 경우 url에 더이상 title에 body가 생성되지 않음
from flask import Flask

app = Flask(__name__)

topics = [
  {"id":1, "title":"html", "body":"html is ...."},
  {"id":2, "title":"css", "body":"css is ...."},
  {"id":3, "title":"js", "body":"js is ...."}
]

def template(content):
  liTags = ''
  for topic in topics:
    liTags = liTags + f'<li><a href="/read/{topic["id"]}/">{topic["title"]}</a></li>'
  return f'''
  <html>
    <body>
      <h1><a href="/">WEB</a></h1>
      <ol>
        {liTags}
      </ol>
      {content}
      <ul>
        <li><a href="/create/">create</a></li>
      </ul>
    </body>
  </html>
  '''

@app.route("/")
def index():
  return template('<h2>Welcome</h2>Hello, WEB!')

@app.route("/read/<int:id>/")
def read(id):
  title = ''
  body = ''
  for topic in topics :
    if topic['id'] == id:
      title = topic['title']
      body = topic['body']
      break;
  return template(f'<h2>{title}</h2>{body}')

@app.route('/create/')
def create():
  content = '''
    <form action="/create_process/" method="POST">
      <p><input type="text" name="title" placeholder="title"></p>
      <p><textarea name="body" placeholder="body"></textarea></p>
      <p><input type="submit" value="create"></p>
    </form>
  '''
  return template(content)

@app.route('/create_process/', methods=['POST'])
def create_process():

  return 'Success!'


# @app.route('/update/')
# def update():
#   return 'Update'

app.run()
결과1-1) Method에 post 표시
즉, Get방식을 거부하고 post를 수용하게 된다.
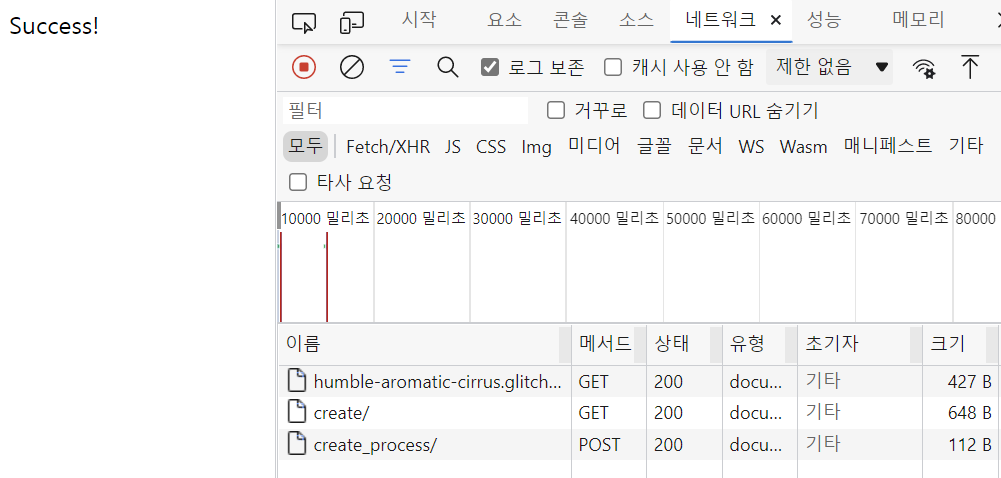
결과1-2) url에 body가 나타나지 않게됨.

4) flask- Delete 기능
delete 즉, 삭제의 기능은 Get 방식이 아닌 form 방식이다.
만약 a 태그 (a href )를 사용 시 홈페이지에 들어가서 다시 삭제를 해야함.
from flask import Flask, request, redirect


app = Flask(__name__)

topics = [
 {"id":1, "title":"html", "body":"html is ...."},
 {"id":2, "title":"css", "body":"css is ...."},
 {"id":3, "title":"js", "body":"js is ...."}
]
nextId = 4

def template(content, id=None):
 liTags = ''
 for topic in topics:
   liTags = liTags + f'<li><a href="/read/{topic["id"]}/">{topic["title"]}</a></li>'
 return f'''
 <html>
   <body>
     <h1><a href="/">WEB</a></h1>
     <ol>
       {liTags}
     </ol>
     {content}
     <ul>
       <li><a href="/create/">create</a></li>
       <li>
         <form action="/delete/{id}/" method="POST">
           <input type="submit" value="delete">
         </form>
       </li>
     </ul>
   </body>
 </html>
 '''

@app.route("/")
def index():
 return template('<h2>Welcome</h2>Hello, WEB!')

@app.route("/read/<int:id>/")
def read(id):
 title = ''
 body = ''
 for topic in topics :
   if topic['id'] == id:
     title = topic['title']
     body = topic['body']
     break;
 return template(f'<h2>{title}</h2>{body}', id)

@app.route('/create/')
def create():
 content = '''
   <form action="/create_process/" method="POST">
     <p><input type="text" name="title" placeholder="title"></p>
     <p><textarea name="body" placeholder="body"></textarea></p>
     <p><input type="submit" value="create"></p>
   </form>
 '''
 return template(content)

@app.route('/create_process/', methods=['POST'])
def create_process():
 global nextId
 title = request.form['title']
 body = request.form['body']
 newTopic = {"id":nextId, "title": title, "body": body}
 topics.append(newTopic)
 nextId = nextId + 1
 return redirect(f'/read/{nextId-1}/')


@app.route('/delete/<int:id>/', methods=['POST'])
def delete(id):
 for topic in topics:
   if topic['id'] == id:
     topics.remove(topic)
     break;
 return redirect('/')

# @app.route('/update/')
# def update():
#   return 'Update'


app.run()
에서 none 시 home으로 갔을때 error 표시가 나타나지 않게 된다.
def template(content, id=None):결과1-1)
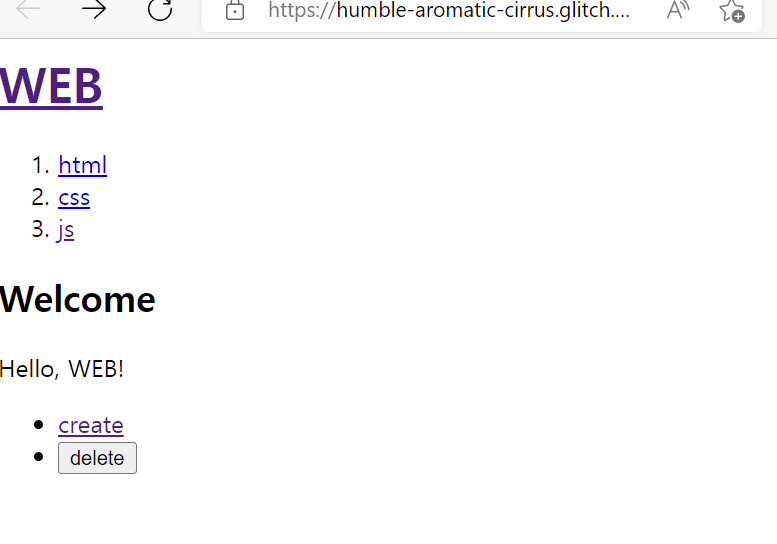
결과1-2) js를 누르고 delete를 눌렀을때
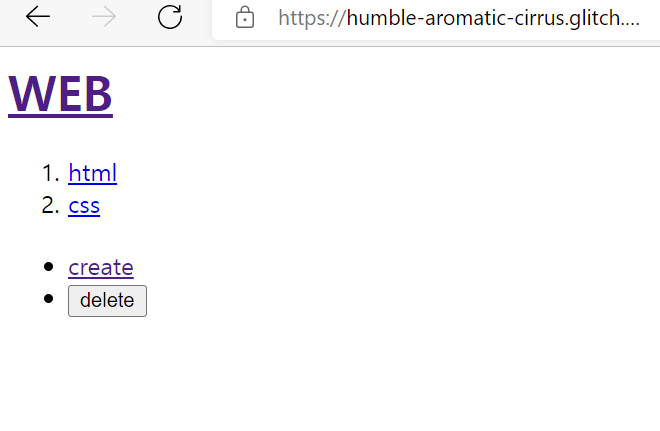
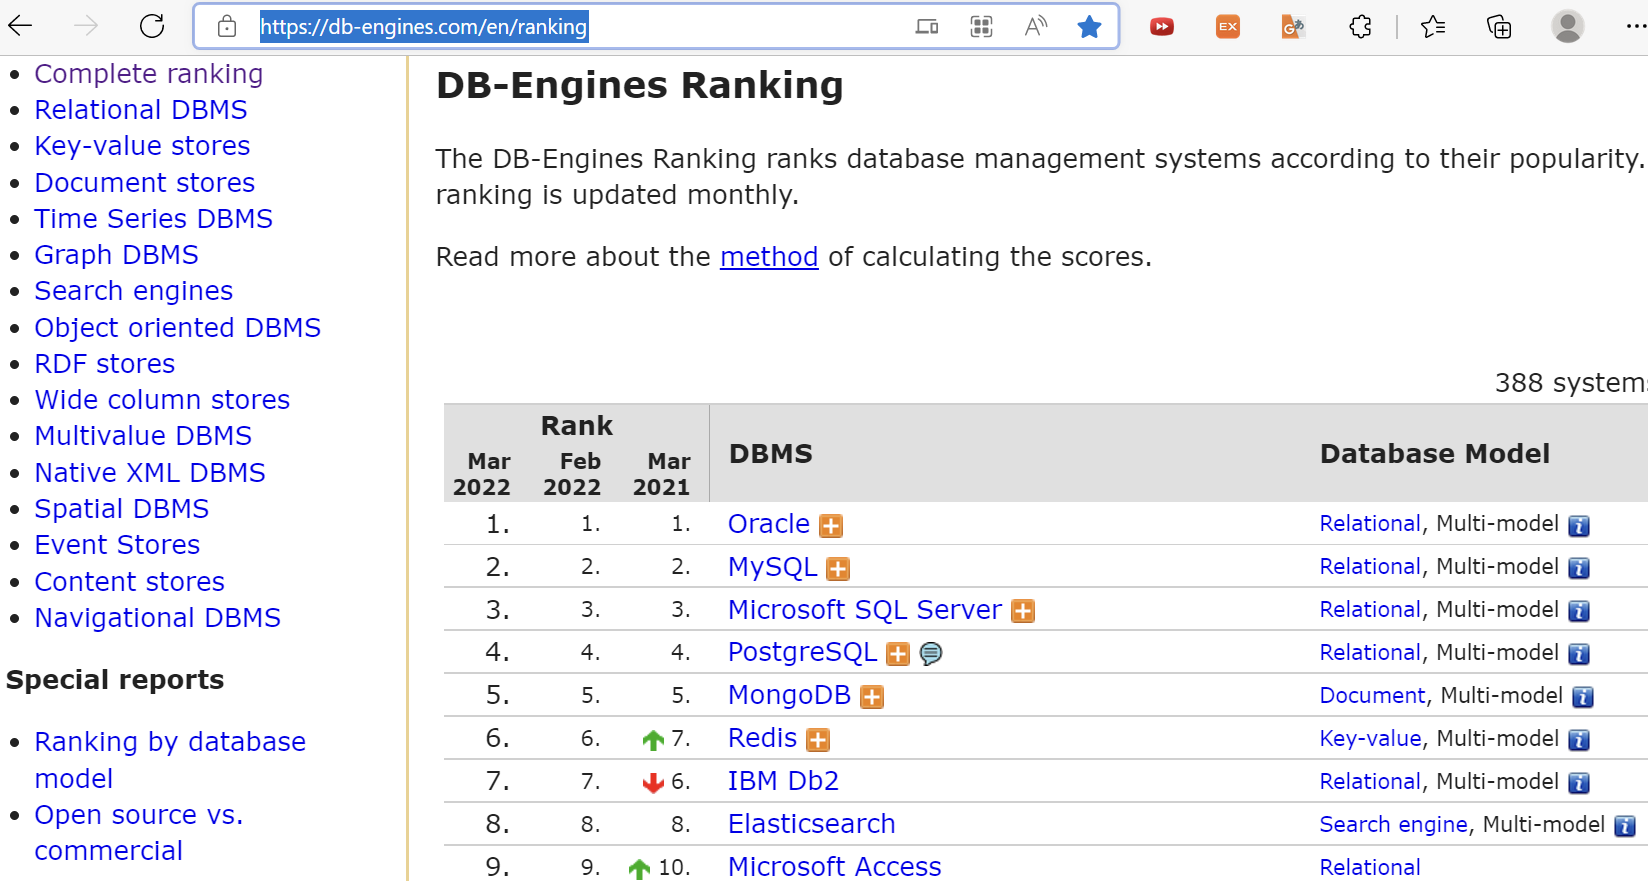
5) 데이터 베이스
기존의 파일시스템에서 중복된 정보를 효율적으로 처리하는 것이 관점 연구분야였고, 이 중복을 피하여 정보를 일원화 하여 처리를 효율적으로 수행하기 위해서 서로 관련성을 가지며 중복이 없는 데이터의 집합을 유지하는 것을 데이터 베이스라고 한다.
5-1) DataBase Ranking
홈페이지: https://db-engines.com/en/ranking
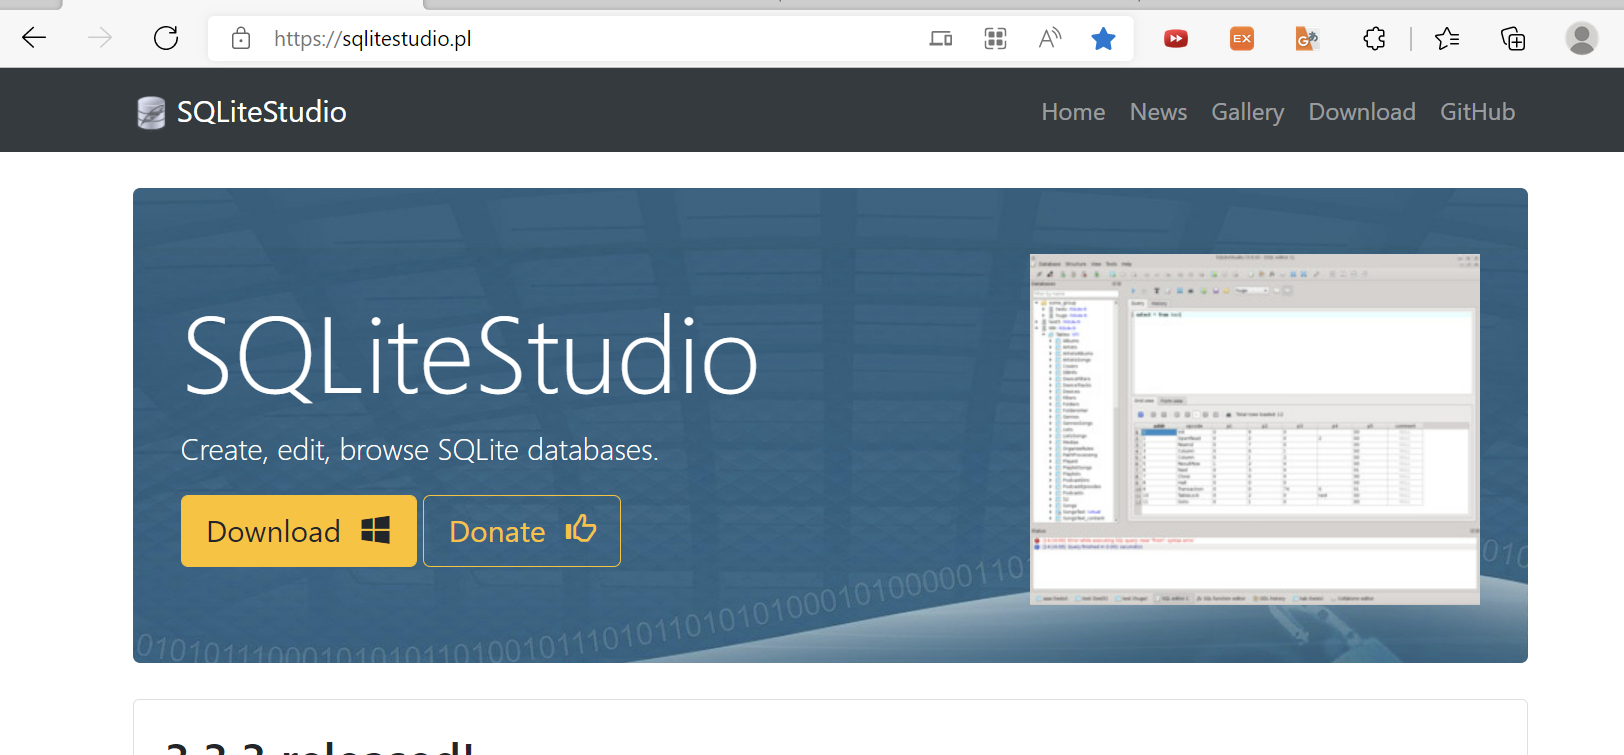
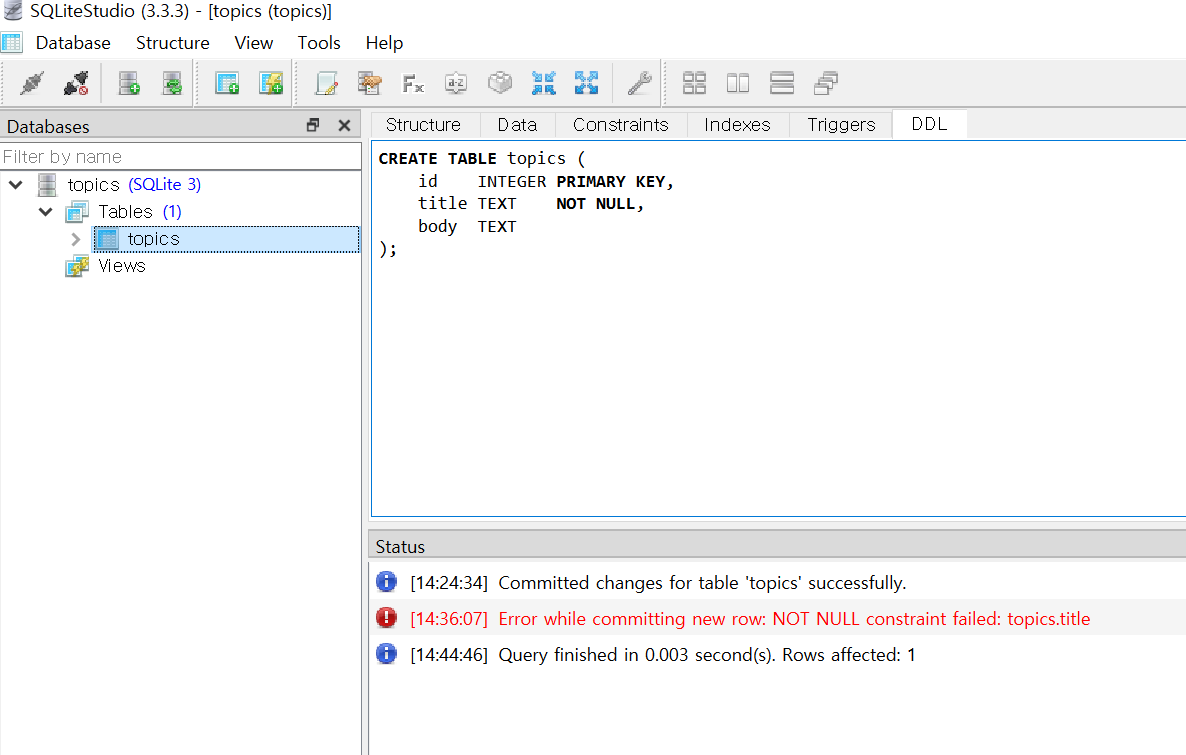
5-2) SQlite
홈페이지: https://sqlitestudio.pl/
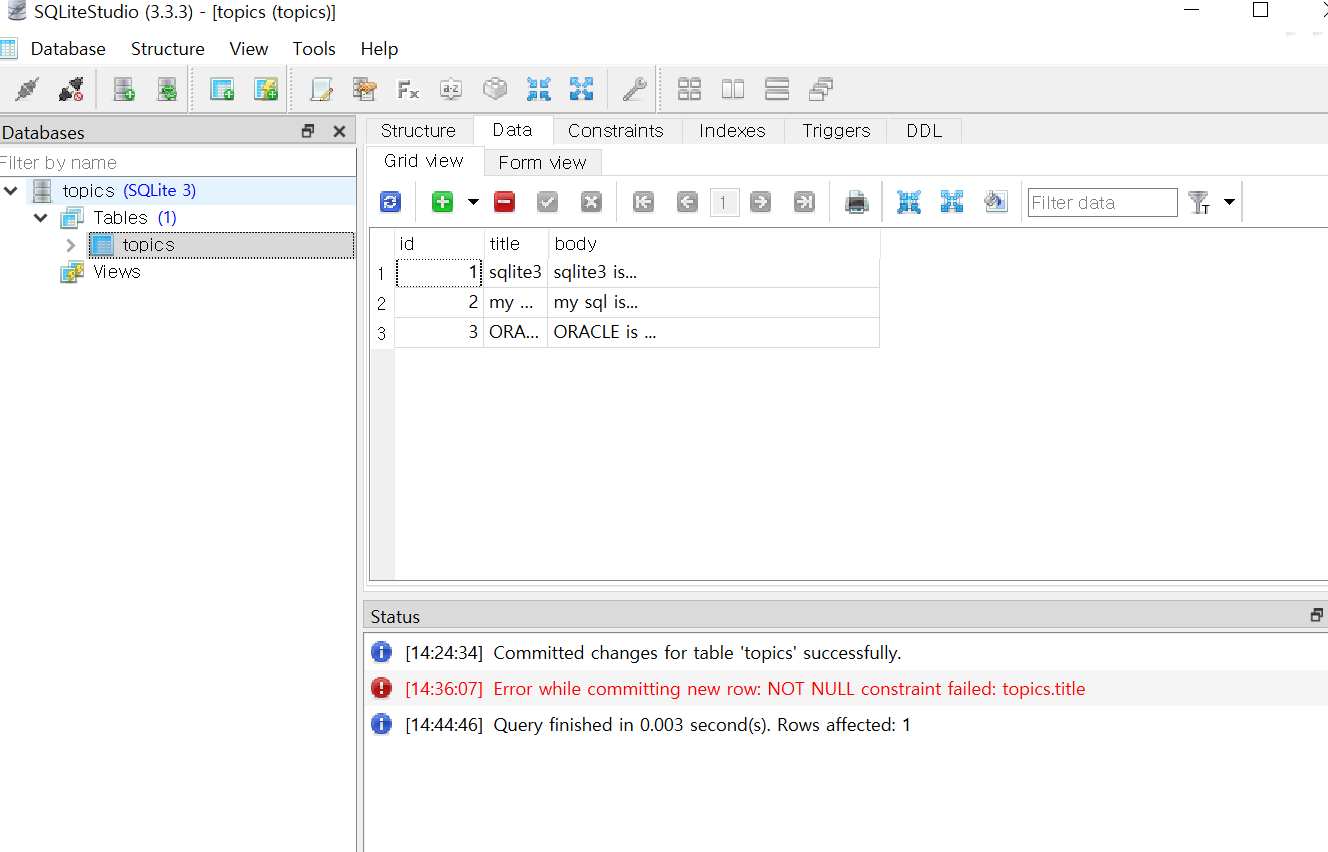
실행화면
2. 학습한 내용 중 어려웠던 점 또는 해결못한 것들
1) flask 상 sqlite를 실행하여 코드를 작성하는 부분
3. 해결방법 작성
3-1) 수업동영상 참고
3-2) 스스로 code를 처음부터 작성하였다.
3-1과 3-2를 통하여 terminal에서 처음 .exit를 하고 .open topics. sqlit3과 .sqlite3 topics. sqlite3을 작성한 후에 terminal 상 올바르게 열이 바뀌었다.
이후
3-3) 열추가 방법
-
열추가 방법 1
초록색 버튼(insert row)를 누르고 열을 입력 한 후 파란색 버튼(refresh) 누름.
DDL에서 코드 추가되는 것을 확인 가능.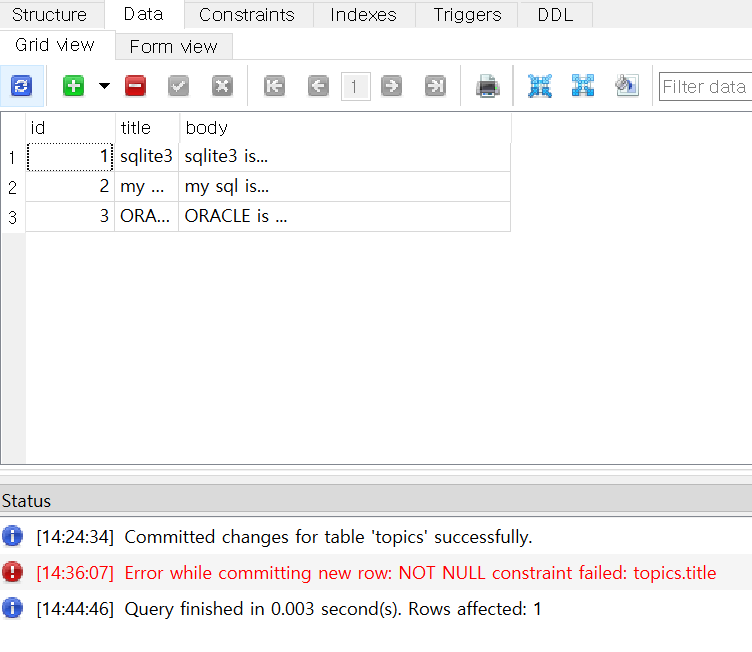
-
열추가 방법 2
메모처럼 생긴 Open SQL& editor 클릭하여 아래의 코드 입력

입력 코드 적용
INSERT INTO topics (title, body) VALUES ('ORACLE', 'ORACLE is ...') 
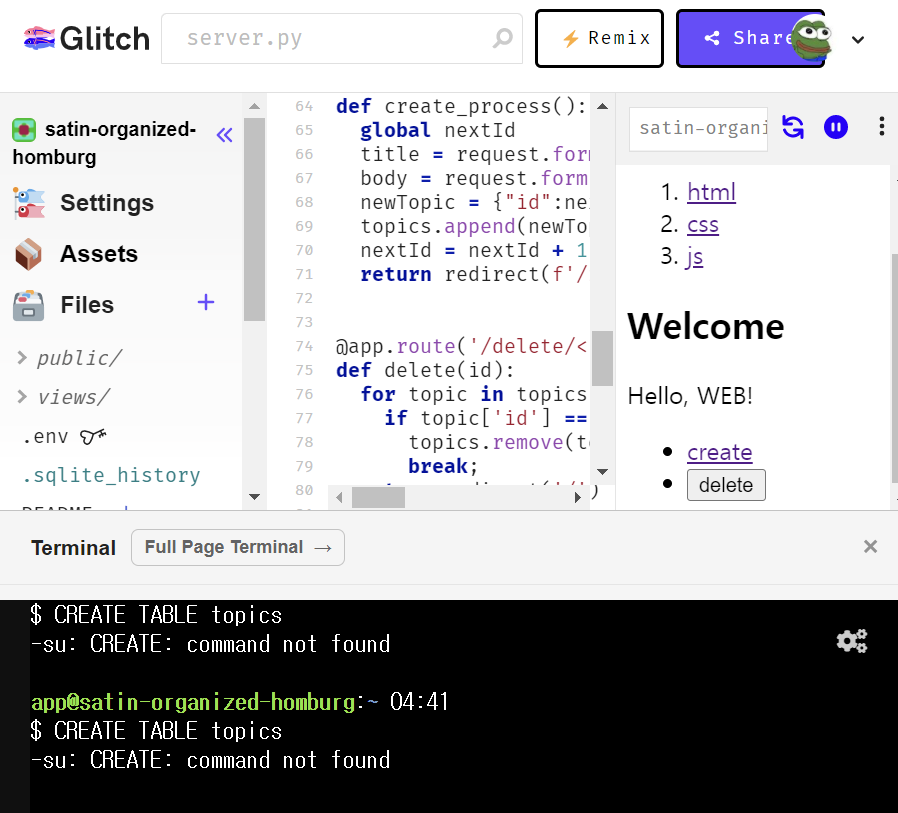
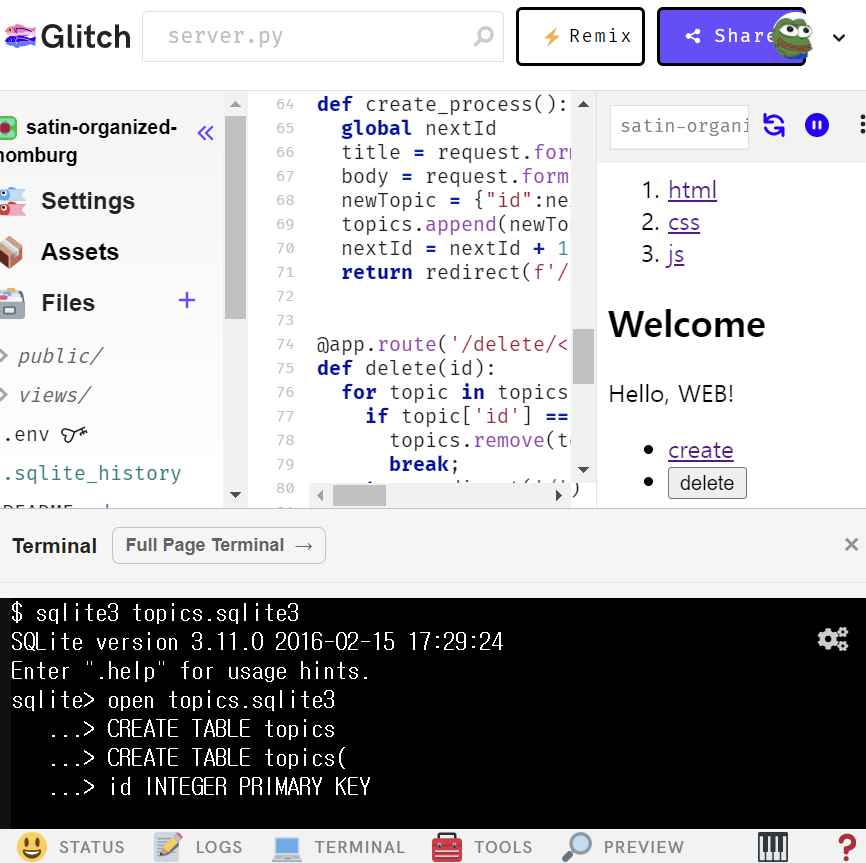
3-4) sqlit3에서 열을 추가한 후 DDL 상의 코드를 glitch 상에서 그대로 복사
CREATE TABLE topics (
    id    INTEGER PRIMARY KEY,
    title TEXT    NOT NULL,
    body  TEXT
);
이후 glitch 상의 terminal에 refresh
<참고>
.open topics. sqlite3 = topics. sqlite3을 열 때
.exit = 나갈 때
.sqlite3 topics. sqlite3 = sqlite3 topics를 sqlite3에서 찾을 때
ls = 그동안의 문서정보를 알 수 있다.
ls -al = ls보다 더 상세한 문서정보를 알 수 있다.
refresh = sqlite 상의 화면을 glitch에서 저장기능
4. 학습소감
데이터베이스 관련해서 sqlit3를 실행하고 작동하였을때 수업시간에 잘 따라가지 못한 부분도 있었고 용어 부분에서도 많이 이해가 되지않는 등 많이 어려웠었는데 개발일지를 작성하면서 수업동영상을 참고하여 다시 sqlit를 실행하다보니 실행부분에서는 따라가나 아직까지도 용어사용 등에서는 이해가 조금 어렵다고 생각이 들었습니다. 인터넷에서 데이터베이스관련 용어 등을 찾아보면서 공부하여 이해가 필요함을 느꼈습니다.