Cloud9 Setup
보다 원활한 협업을 위해 현재 클라우드에 Cloud9을 세팅한다.
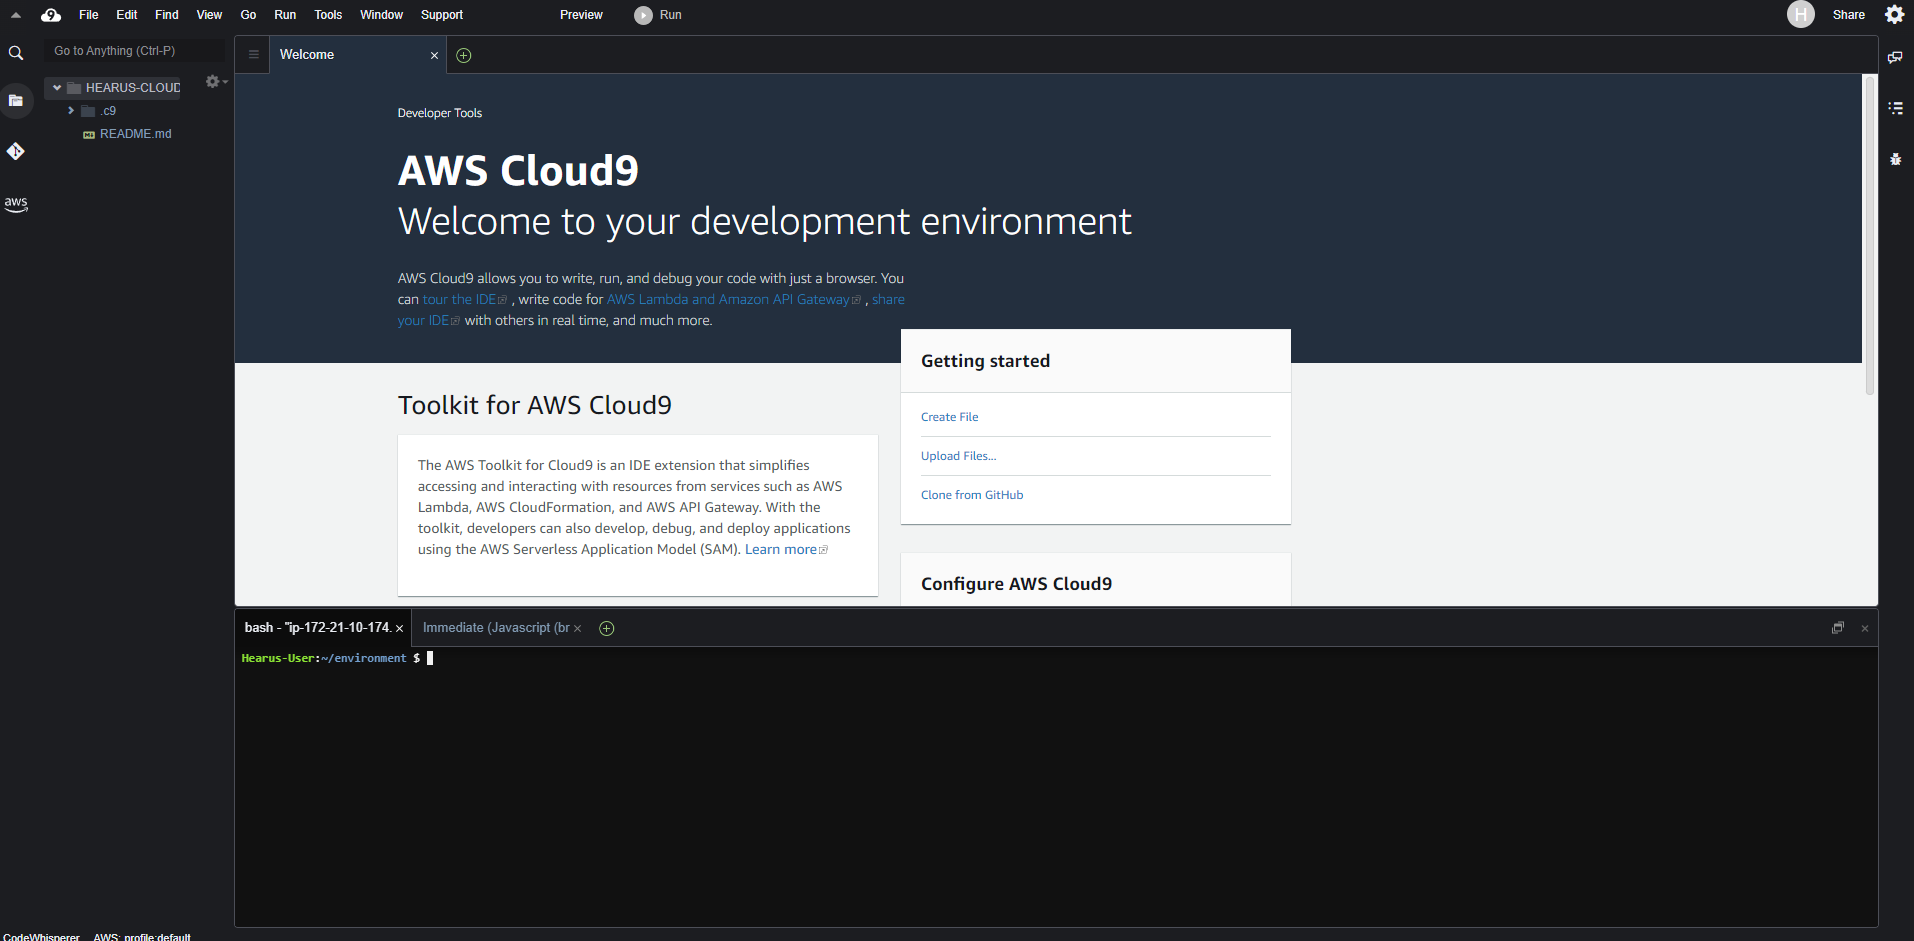
 먼저 위와 같이 AWS Cloud9 환경을 생성하고
 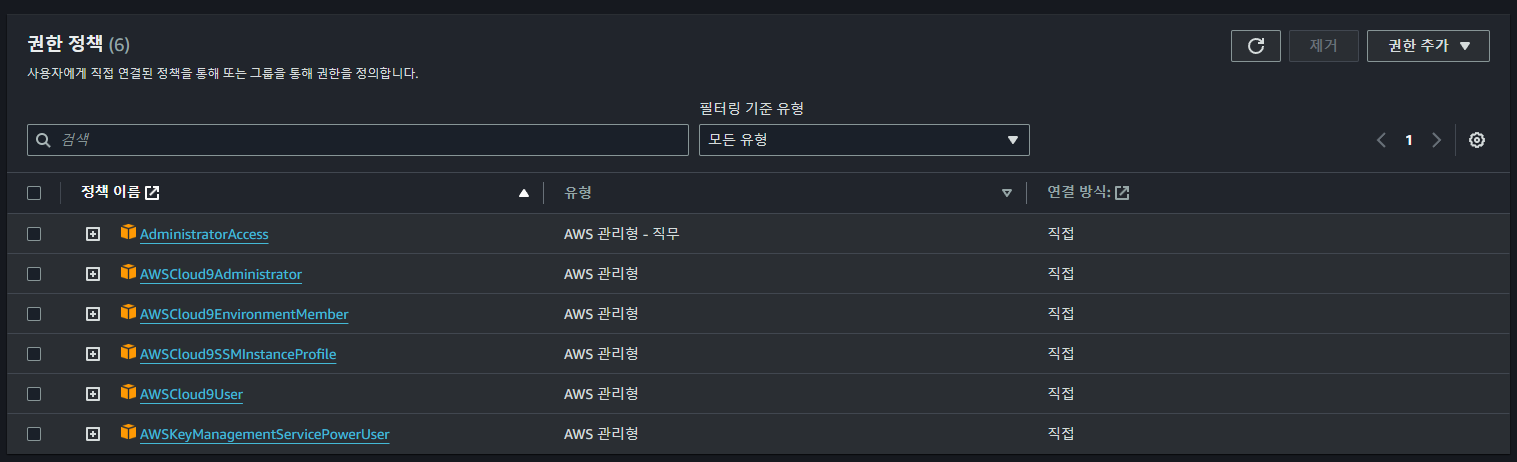 위와 같이 현재 팀원과 공유하여 사용하는 Hearus-User IAM 계정에 권한 정책을 연결한다.
Trouble Shooting
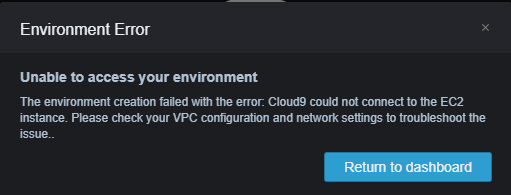 하지만 Cloud9에 접속을 시도하니 위와 같이 오류가 발생하였다.
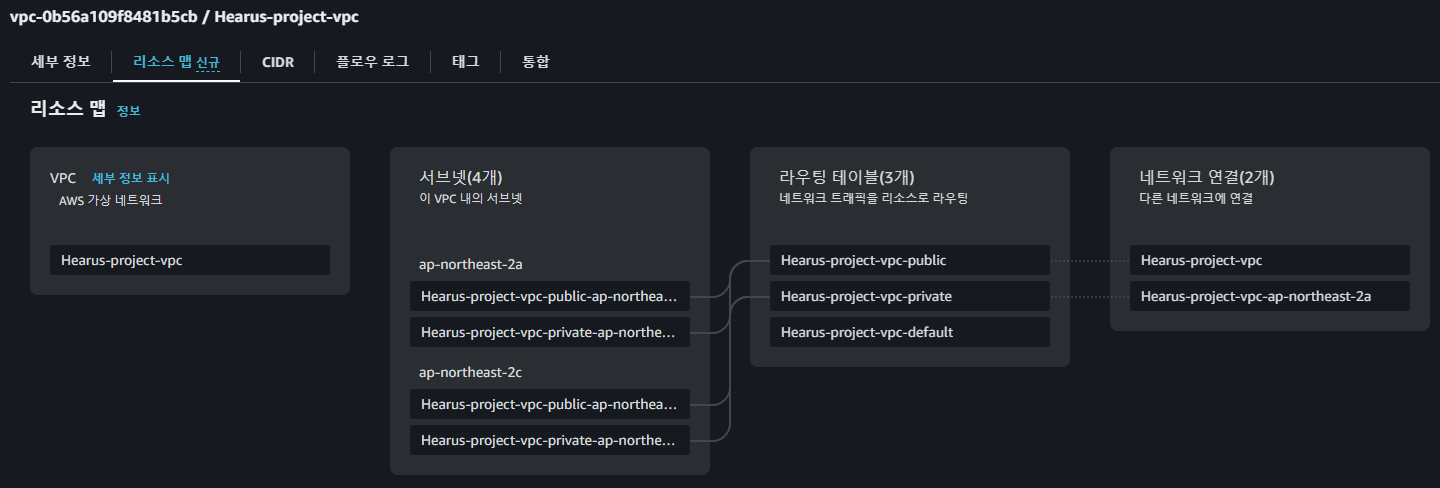 우선적으로 현재 VPC는 현재 프로젝트의 EKS에 맞게 구축되어있기 때문에 이를 확인한다.
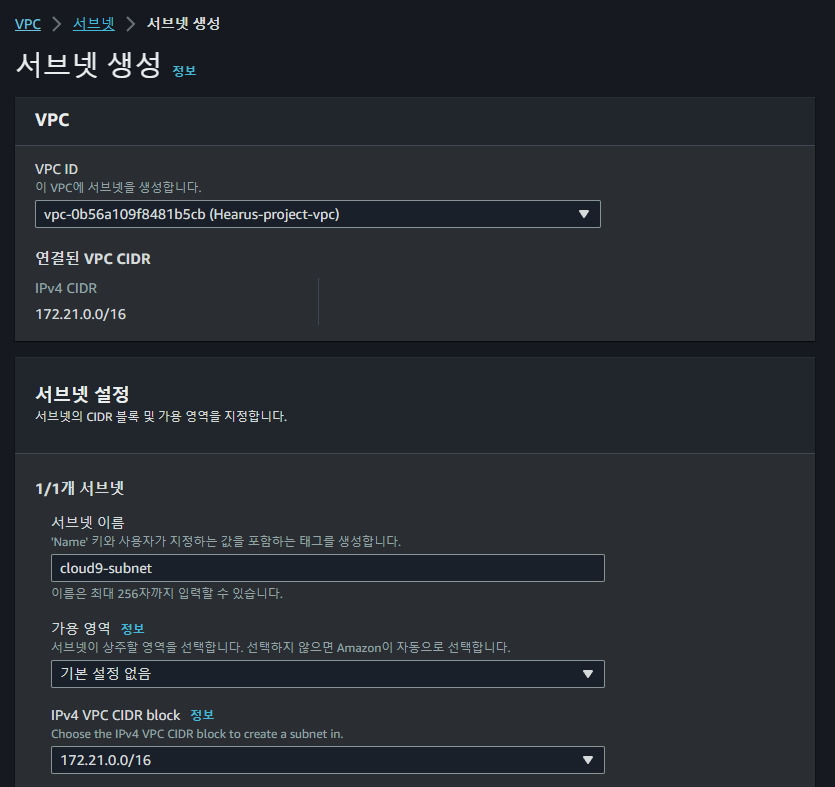 이때 Public 네트워크에 Cloud9이 연결되어있지 않았기 때문에 서브넷을 생성하고
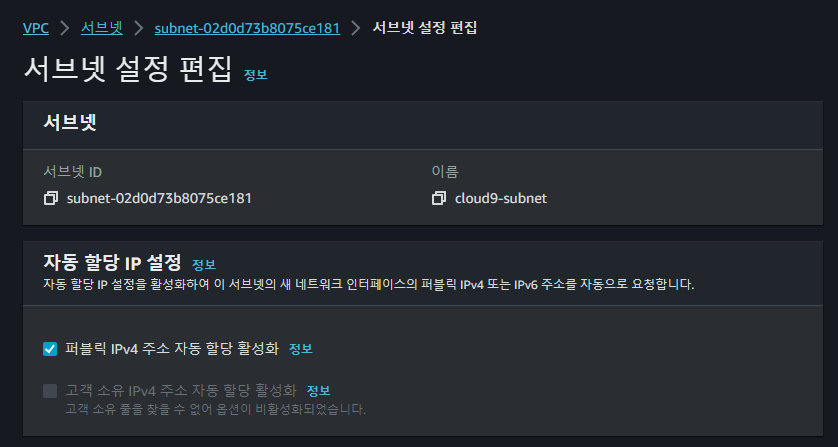 서브넷 설정에서 자동으로 퍼블릭 IPv4 주소를 할당하도록 설정한다.
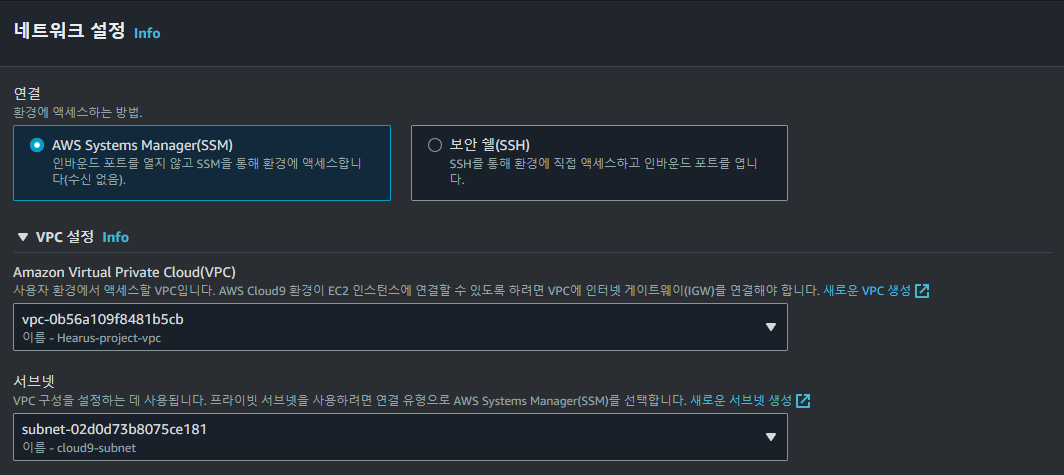 또한 AWS Cloud9 환경을 SSM 방식으로 연결하도록 하고 서브넷과 VPC를 연결한다.
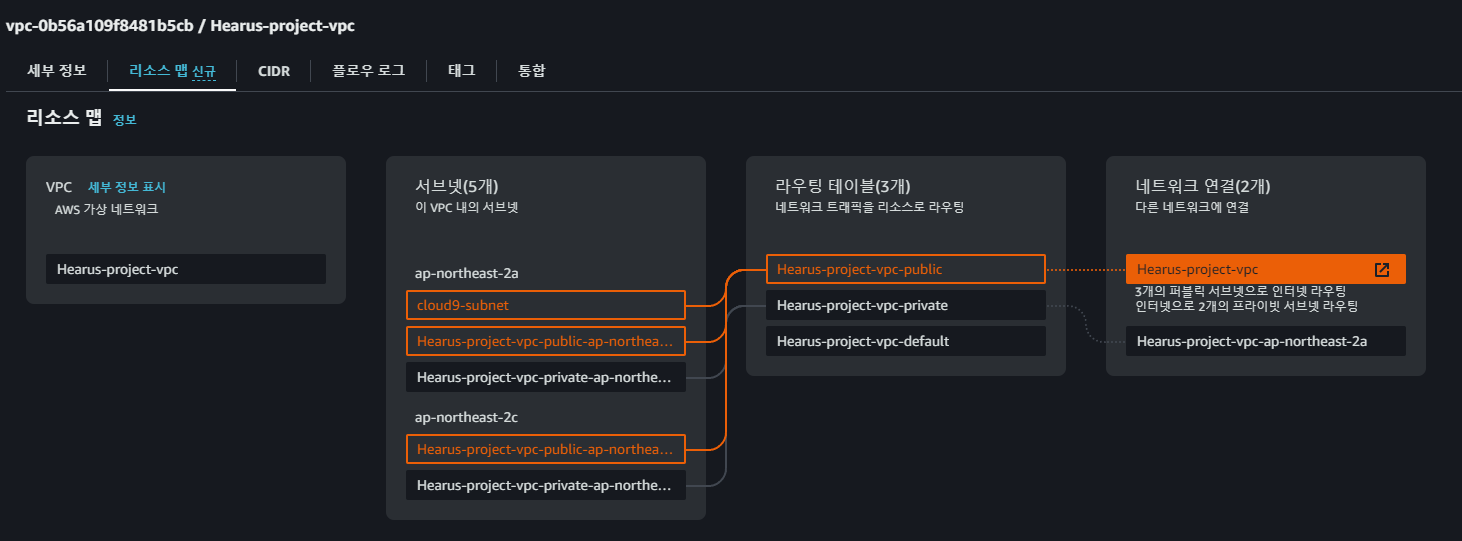 이후 위와 같이
 cloud9-subnet이 정상적으로 연결된 것을 확인한 이후
 AWS Cloud9에 접속할 수 있었다.
EKS Setup
curl "https://awscli.amazonaws.com/awscli-exe-linux-x86_64.zip" -o "awscliv2.zip"
unzip awscliv2.zip
sudo ./aws/install
export PATH=/usr/local/bin:$PATH
source ~/.bash_profile
Cloud9 환경에 EKS 클러스터를 제어할 수 있도록 먼저 awscli를 업데이트 해준다.
sudo curl -o /usr/local/bin/kubectl  \
   https://s3.us-west-2.amazonaws.com/amazon-eks/1.23.13/2022-10-31/bin/linux/amd64/kubectl
sudo chmod +x /usr/local/bin/kubectl
kubectl version --client=true --short=true
이후 kubectl을 설치해준다.
sudo yum install -y jq
sudo yum install -y bash-completion
또한 추가적으로 json, bash 관련 패키지를 설치한다.
K9S_VERSION=v0.26.7
curl -sL https://github.com/derailed/k9s/releases/download/${K9S_VERSION}/k9s_Linux_x86_64.tar.gz | sudo tar xfz - -C /usr/local/bin
이후 EKS를 사용하기 위해 k9s을 설치한다.
aws configure
aws eks --region ap-northeast-2 update-kubeconfig \
    --name Hearus-project-eks-a3cIrjVg
aws configure을 통해 EKS CLuster와 리전을 설정하고
aws sts get-caller-identity --region ap-northeast-2 --query Arn | grep eksworkshop-admin -q && echo "IAM role valid" || echo "IAM role NOT valid"
aws sts get-caller-identity --region ap-northeast-2
위 명령어를 통해 IAM Role을 점검하여 접근 여부를 확인한다.
Trouble Shooting
Hearus-User:~ $ kubectl get nodes
Unable to connect to the server: dial tcp 172.21.xxx.xxx:443: i/o timeout
하지만 이때 kubectl을 통해 클러스터에 접근을 시도하면 위와 같은 에러가 발생했다.
Hearus-User:~ $ kubectl config current-context
arn:aws:eks:ap-northeast-2:939992775538:cluster/Hearus-project-eks-a3cIrjVgcurren-context를 통해 현재 클러스터가 올바르게 명시되어 있는 것을 확인할 수 있었다.
 따라서 EKS 클러스터의 인바운드 규칙에
 cloud9 서브넷 소스를 추가하였다.
Hearus-User:~ $ kubectl get pod
error: You must be logged in to the server (Unauthorized)
이후 connection 문제는 해결되었지만 Unauthorized에러가 발생하였다.
aws eks update-kubeconfig --name Hearus-project-eks-a3cIrjVg --region ap-northeast-2 따라서 한번 더 클러스터 정보를 업데이트 해주고
kubectl edit -n kube-system configmap/aws-authkube-system의 configmap/aws-auth configmap을 업데이트 해주었다.
# Please edit the object below. Lines beginning with a '#' will be ignored,
# and an empty file will abort the edit. If an error occurs while saving this file will be
# reopened with the relevant failures.
#
apiVersion: v1
data:
  mapRoles: |
    - groups:
      - system:bootstrappers
      - system:nodes
      rolearn: arn:aws:iam::939992775538:role/node-group-eks-node-group-20231227105607040600000002
      username: system:node:{{EC2PrivateDNSName}}
  mapUsers: |
    - groups:
      - system:masters
      userarn: arn:aws:iam::939992775538:user/Hearus-User
      username: Hearus-User
kind: ConfigMap
metadata:
  creationTimestamp: "2023-12-27T11:05:12Z"
  name: aws-auth
  namespace: kube-system
  resourceVersion: "955"
  uid: e9326a8e-5e95-41d5-811e-14932efcce05
이때 mapUsers 관련 부분을 추가하여 정상적으로 User가 접근할 수 있도록 하였다
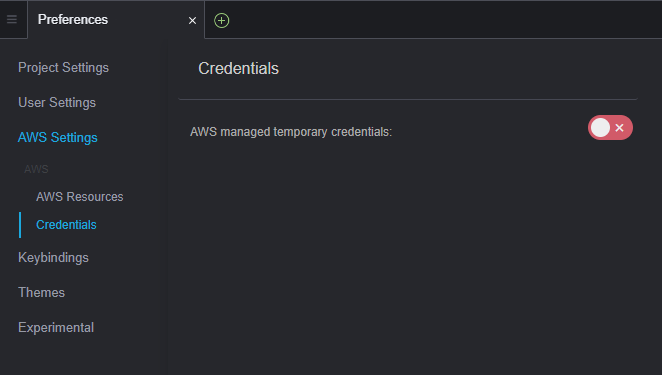
하지만 문제가 해결되지 않아서 Cloud9의 Credential관련 설정을 변경하고.
다시금 aws configure 명령어를 통해 credential 정보를 Hearus-user로 변경하였다.
Hearus-User:~/.aws $ cat credentials
[default]
aws_access_key_id = ...
aws_secret_access_key = ...
aws_session_token =
추가적으로 공란인 aws_session_token을 제거하여 문제를 해결할 수 있었다.

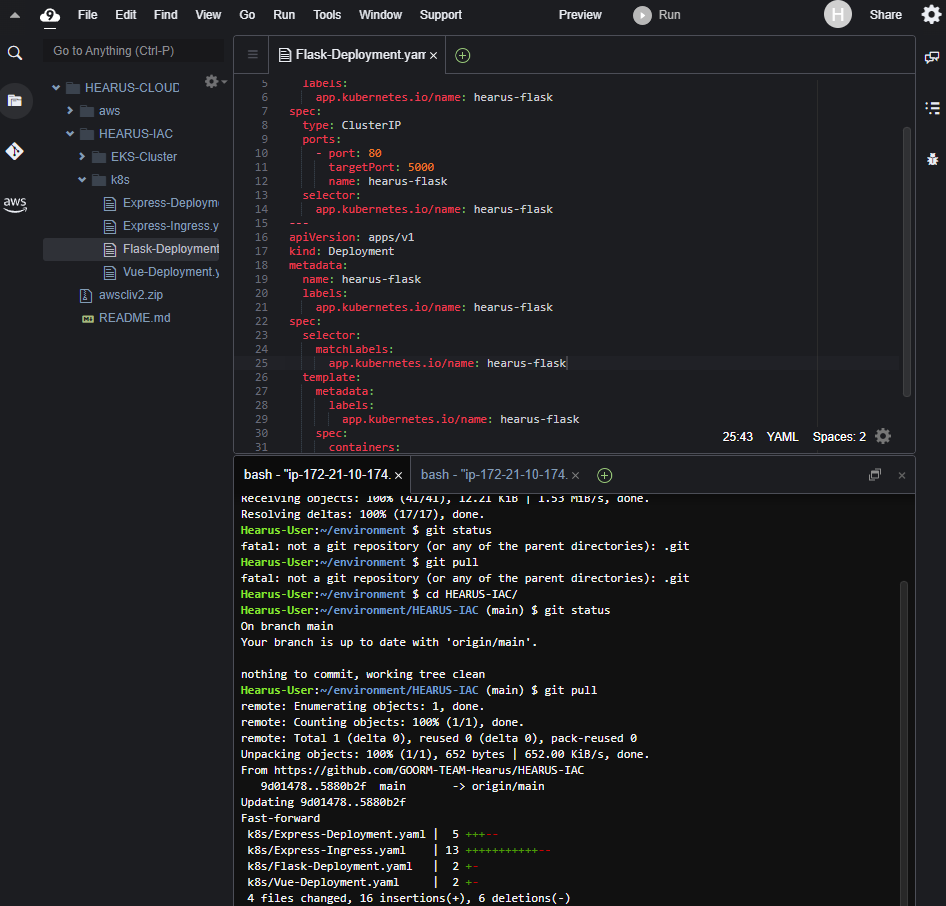 또한 기존의 Git Repository를 Pull하여 설정을 완료하였다.
ECR Image Upload
Dockerhub 뿐만 아니라 Private하게 프로젝트 리포지토리를 관리하기 위해 ECR을 세팅하였다.
aws ecr create-repository \
--repository-name hearus-front-vue \
--image-scanning-configuration scanOnPush=true \
--region ap-northeast-2
먼저 위와 같은 명령어로 ECR에 리포지토리를 생성해주었다.

docker build -t hearus-front-vue .
docker tag hearus-front-vue:latest 939992775538.dkr.ecr.ap-northeast-2.amazonaws.com/hearus-front-vue:lastest
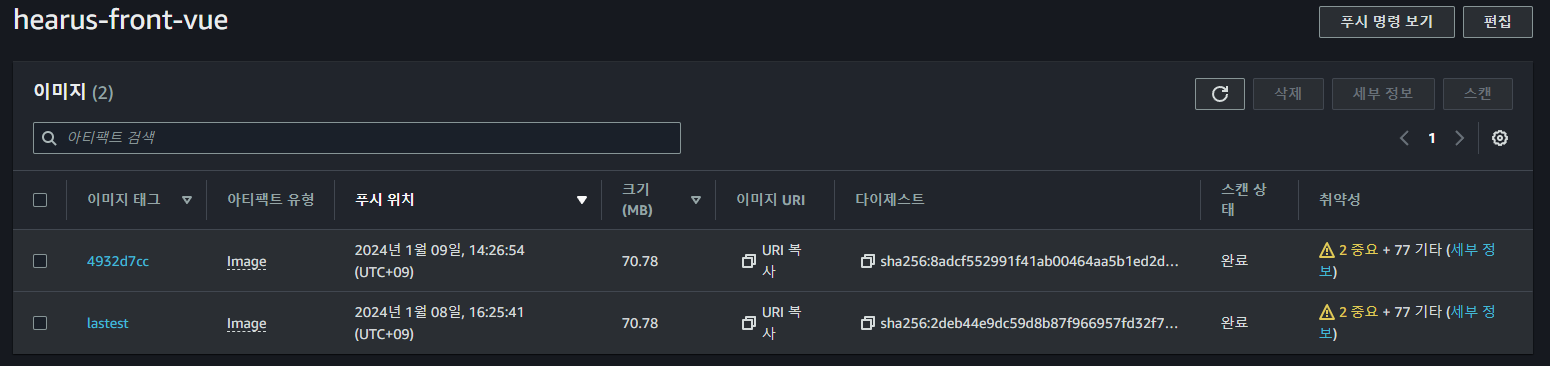
docker push 939992775538.dkr.ecr.ap-northeast-2.amazonaws.com/hearus-front-vue:lastest또한 위와 같이 올바른 UID와 Region 설정을 통해 임의로 Dockerfile을 빌드하고 PUSH를 시도하였다.
$ docker push 939992775538.dkr.ecr.ap-northeast-2.amazonaws.com/hearus-front-vue:lastest
The push refers to repository [939992775538.dkr.ecr.ap-northeast-2.amazonaws.com/hearus-front-vue]
fc4c20054a41: Preparing
e8992303de1e: Preparing
dde000954828: Preparing
1ccf63b99f96: Preparing
b074db3b55e1: Preparing
e50c68532c4a: Waiting
f6ba584ca3ec: Waiting
01aaa195cdad: Waiting
2a13e6a7cca6: Waiting
370869eba6e9: Waiting
7292cf786aa8: Waiting
no basic auth credentials
하지만 이때 no basic auth credentials 오류가 발생하였지만
aws ecr get-login-password \
    --region ap-northeast-2 \
| docker login \
    --username AWS \
    --password-stdin 939992775538.dkr.ecr.ap-northeast-2.amazonaws.com
위와 같이 docker login을 통해 Auth 정보를 입력하고 정상적으로 이미지를 Push할 수 있었다. 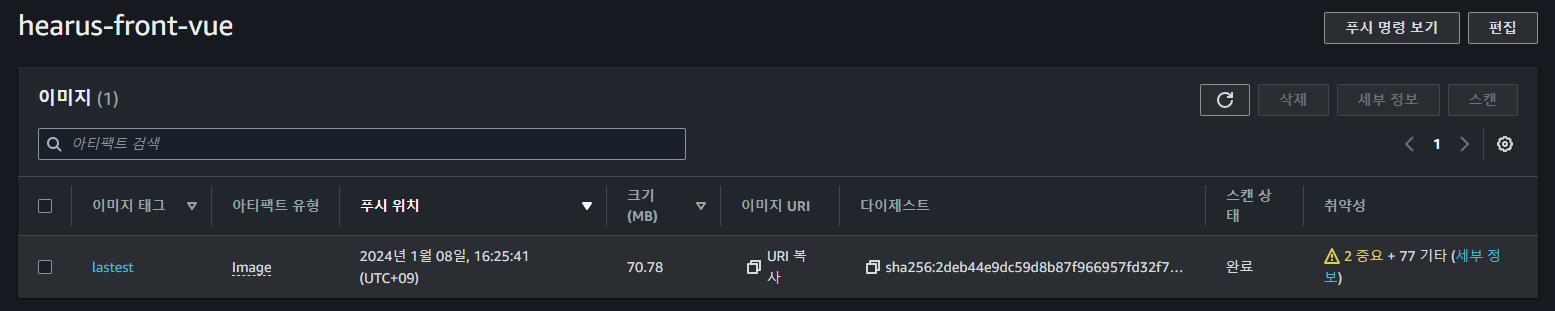
EKS Deployment
apiVersion: v1
kind: Service
metadata:
name: hearus-front-svc
labels:
app.kubernetes.io/name: hearus-front
spec:
type: LoadBalancer
ports:
- port: 80
targetPort: 80
name: hearus-front
selector:
app.kubernetes.io/name: hearus-front
---
apiVersion: apps/v1
kind: Deployment
metadata:
name: hearus-front
labels:
app.kubernetes.io/name: hearus-front
spec:
selector:
matchLabels:
app.kubernetes.io/name: hearus-front
template:
metadata:
labels:
app.kubernetes.io/name: hearus-front
spec:
containers:
- image: 939992775538.dkr.ecr.ap-northeast-2.amazonaws.com/hearus-front-vue:lastest
name: hearus-front
ports:
- containerPort: 80
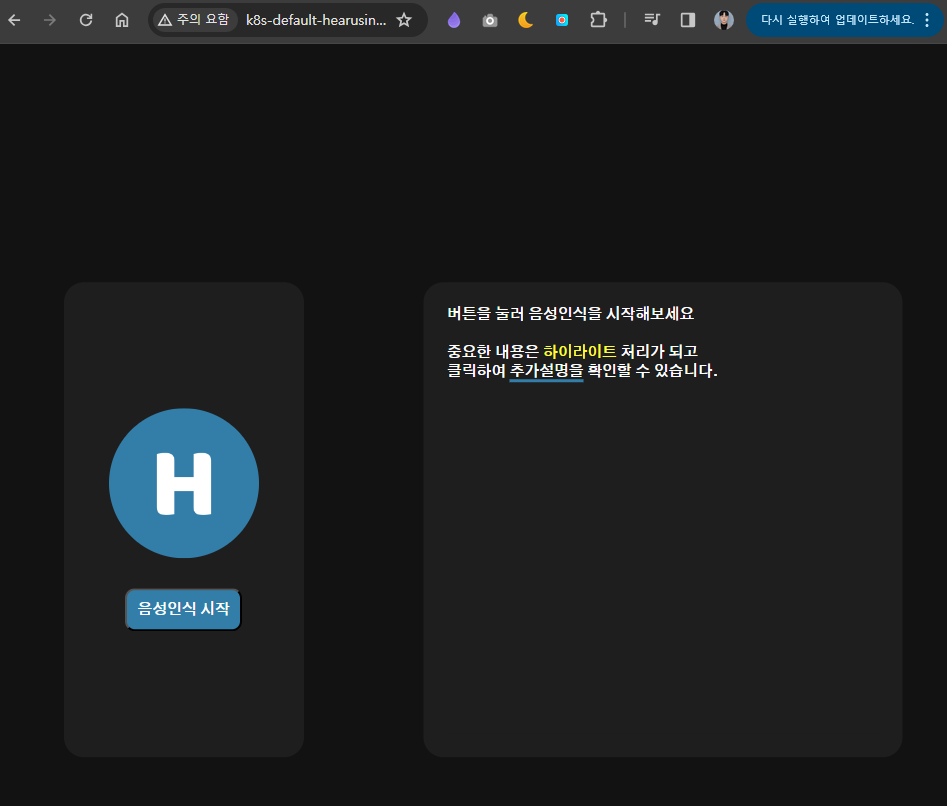
name: hearus-frontECR에 업로드된 이미지의 URI로 기존에 구현된 Deployment spec을 변경하였다.
Hearus-User:~/environment/HEARUS-IAC/k8s (main) $ kubectl replace -f Vue-Deployment.yaml --force
service "hearus-front-svc" deleted
deployment.apps "hearus-front" deleted
service/hearus-front-svc replaced
deployment.apps/hearus-front replaced
이후 kubectl replace를 통해 Deploy와 SVC를 Replace 해주었고
Events:
  Type    Reason     Age   From               Message
  ----    ------     ----  ----               -------
  Normal  Scheduled  85s   default-scheduler  Successfully assigned default/hearus-front-7df5858bfd-59px6 to ip-172-21-2-239.ap-northeast-2.compute.internal
  Normal  Pulling    84s   kubelet            Pulling image "939992775538.dkr.ecr.ap-northeast-2.amazonaws.com/hearus-front-vue:lastest"
  Normal  Pulled     83s   kubelet            Successfully pulled image "939992775538.dkr.ecr.ap-northeast-2.amazonaws.com/hearus-front-vue:lastest" in 691ms (691ms including waiting)
  Normal  Created    83s   kubelet            Created container hearus-front
  Normal  Started    83s   kubelet            Started container hearus-front
Pod를 Inspect하여 올바른 이미지로 생성된 것을 확인할 수 있었다.
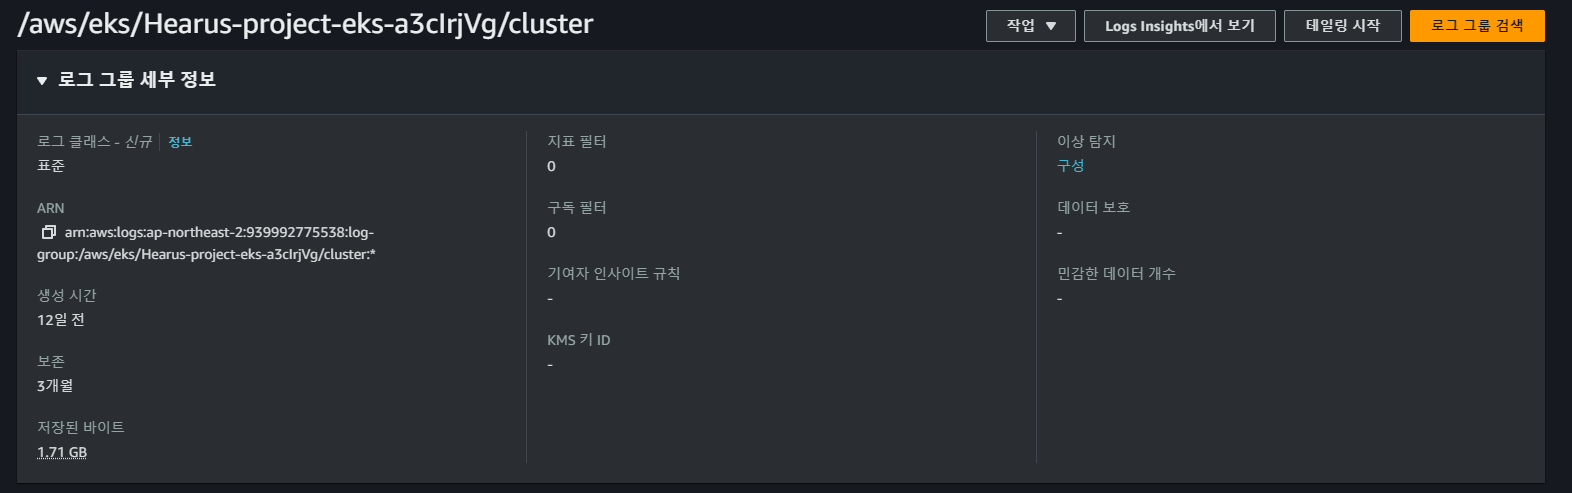
CloudWatch Container Insight
kubectl create ns amazon-cloudwatch추후 프로젝트에서 활용하기 위해 Container Insight를 EKS 클러스터에 적용하였다.
먼저 클러스터 내에 amazon-cloudwatch namespace 생성하였고
ClusterName=Hearus-project-eks-a3cIrjVg
RegionName=ap-northeast-2
FluentBitHttpPort='2020'
FluentBitReadFromHead='Off'
[[ ${FluentBitReadFromHead} = 'On' ]] && FluentBitReadFromTail='Off'|| FluentBitReadFromTail='On'
[[ -z ${FluentBitHttpPort} ]] && FluentBitHttpServer='Off' || FluentBitHttpServer='On'
이후 위와 같이 cwagent-fluent에서 사용될 Config Var을 정의하였다.
wget https://raw.githubusercontent.com/aws-samples/amazon-cloudwatch-container-insights/latest/k8s-deployment-manifest-templates/deployment-mode/daemonset/container-insights-monitoring/quickstart/cwagent-fluent-bit-quickstart.yaml
sed -i 's/{{cluster_name}}/'${ClusterName}'/;s/{{region_name}}/'${RegionName}'/;s/{{http_server_toggle}}/"'${FluentBitHttpServer}'"/;s/{{http_server_port}}/"'${FluentBitHttpPort}'"/;s/{{read_from_head}}/"'${FluentBitReadFromHead}'"/;s/{{read_from_tail}}/"'${FluentBitReadFromTail}'"/' cwagent-fluent-bit-quickstart.yaml
위 명령어를 통해 amazon-cloudwatch-container-insights를 설치해주고
# create configmap for cluster name and aws region for CloudWatch Logs
# need to replace the placeholders Hearus-project-eks-a3cIrjVg and ap-northeast-2
# and need to replace "On" and "2020"
# and need to replace "Off" and "On"
apiVersion: v1
data:
  cluster.name: Hearus-project-eks-a3cIrjVg
  logs.region: ap-northeast-2
  http.server: "On"
  http.port: "2020"
  read.head: "Off"
  read.tail: "On"
kind: ConfigMap
metadata:
  name: fluent-bit-cluster-info
  namespace: amazon-cloudwatch
yaml 파일에서 정상적으로 정보가 입력된 것을 확인한 후
kubectl apply -f cwagent-fluent-bit-quickstart.yamlHearus-User:~/environment/HEARUS-IAC/cloudwatch (main) $ kubectl get pod -n amazon-cloudwatch
NAME READY STATUS RESTARTS AGE
cloudwatch-agent-7gnvf 1/1 Running 0 42s
cloudwatch-agent-kzlbr 1/1 Running 0 42s
fluent-bit-b7trj 1/1 Running 0 42s
fluent-bit-vknd9 1/1 Running 0 42sfluent-bit와 cloudwatch-agent가 구동되는 것을 확인할 수 있었으며
AWS Console에서도 log가 기록되는 것을 확인할 수 있었다.
CI/CD Pipeline - Application
Hearus-User:~/environment/HEARUS-IAC/cicd (main) $ aws iam create-user --user-name github-action
{
    "User": {
        "Path": "/",
        "UserName": "github-action",
        "UserId": "AIDA5VW7PPNZNCFW3FB3O",
        "Arn": "arn:aws:iam::939992775538:user/github-action",
        "CreateDate": "2024-01-09T03:40:15+00:00"
    }
}
CI/CD 파이프라인 구축을 위한 github-action IAM User를 먼저 생성한다.
{
    "Version": "2012-10-17",
    "Statement": [
        {
            "Sid": "AllowPush",
            "Effect": "Allow",
            "Action": [
                "ecr:GetDownloadUrlForLayer",
                "ecr:BatchGetImage",
                "ecr:BatchCheckLayerAvailability",
                "ecr:PutImage",
                "ecr:InitiateLayerUpload",
                "ecr:UploadLayerPart",
                "ecr:CompleteLayerUpload"
            ],
            "Resource": "arn:aws:ecr:ap-northeast-2:939992775538:repository/hearus-front-vue"
        },
        {
            "Sid": "GetAuthorizationToken",
            "Effect": "Allow",
            "Action": [
                "ecr:GetAuthorizationToken"
            ],
            "Resource": "*"
        }
    ]
}
이후 해당 유저에게 attach 될 ECR-Policy를 위와 같이 구성한다.
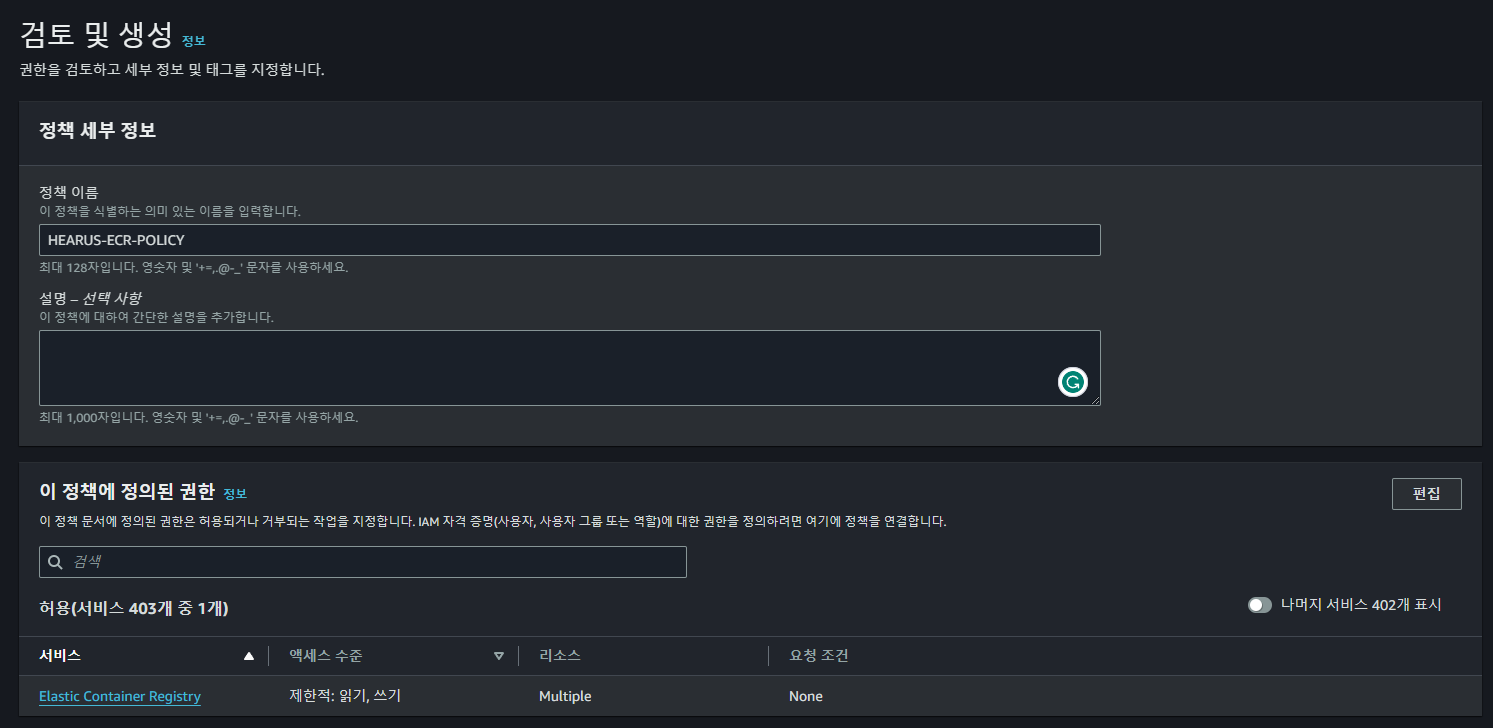
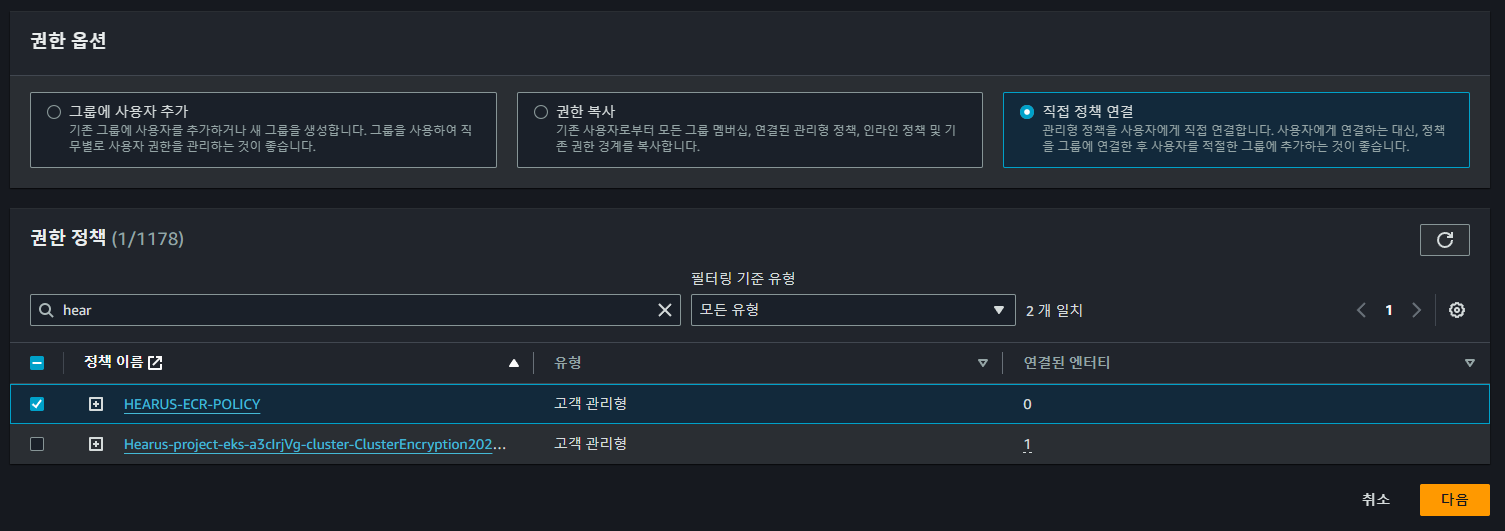 이후 AWS 콘솔에서 위와 같이 정책을 연결하여 사용자 구성을 완료한다.
AWS Credential, Github Token
Hearus-User:~/environment/HEARUS-IAC/cicd (main) $ aws iam create-access-key --user-name github-action
{
    "AccessKey": {
        "UserName": "github-action",
        "AccessKeyId": "...",
        "Status": "Active",
        "SecretAccessKey": "...",
        "CreateDate": "2024-01-09T03:50:34+00:00"
    }
}
정책과 IAM 사용자 생성이 완료되면 해당 IAM User에 대한 access-key를 생성하고
 추후 Repository 관리를 위한 access token을 추가로 생성한 다음
  Organization의
 Action Secret으로 Github Action 사용 준비를 마친다.
Github Action
name: Hearius Frontend CI on DockerHub, ECR
on:
push:
branches:
- main
jobs:
build-and-push-image:
runs-on: ubuntu-latest
steps:
- name: Checkout
uses: actions/checkout@v2
# Docker Configure
- name: Set up Docker Buildx
uses: docker/setup-buildx-action@v1
- name: Login to DockerHub
uses: docker/login-action@v1
with:
username: ${{ secrets.ORG_JUDEMIN_DOCKERHUB_USERNAME }}
password: ${{ secrets.ORG_JUDEMIN_DOCKERHUB_PASSWORD }}
# AWS Configure
- name: Configure AWS credentials
uses: aws-actions/configure-aws-credentials@v1
with:
aws-access-key-id: ${{ secrets.ORG_JUDEMIN_AWS_ACCESS_KEY_ID }}
aws-secret-access-key: ${{ secrets.ORG_JUDEMIN_AWS_SECRET_ACCESS_KEY }}
aws-region: ap-northeast-2
- name: Login to Amazon ECR
id: login-ecr
uses: aws-actions/amazon-ecr-login@v1
# Build and Push Stage
- name: Get image tag(verion)
id: image
run: |
VERSION=$(echo ${{ github.sha }} | cut -c1-8)
echo VERSION=$VERSION
echo "::set-output name=version::$VERSION"
- name: Build, Tag, and push image to Amazon ECR
id: image-info
env:
ECR_REGISTRY: ${{ steps.login-ecr.outputs.registry }}
ECR_REPOSITORY: hearus-front-vue
IMAGE_TAG: ${{ steps.image.outputs.version }}
run: |
echo "::set-output name=ecr_repository::$ECR_REPOSITORY"
echo "::set-output name=image_tag::$IMAGE_TAG"
docker build -t $ECR_REPOSITORY:$IMAGE_TAG .
docker tag $ECR_REPOSITORY:$IMAGE_TAG $ECR_REGISTRY/$ECR_REPOSITORY:$IMAGE_TAG
docker push $ECR_REGISTRY/$ECR_REPOSITORY:$IMAGE_TAG
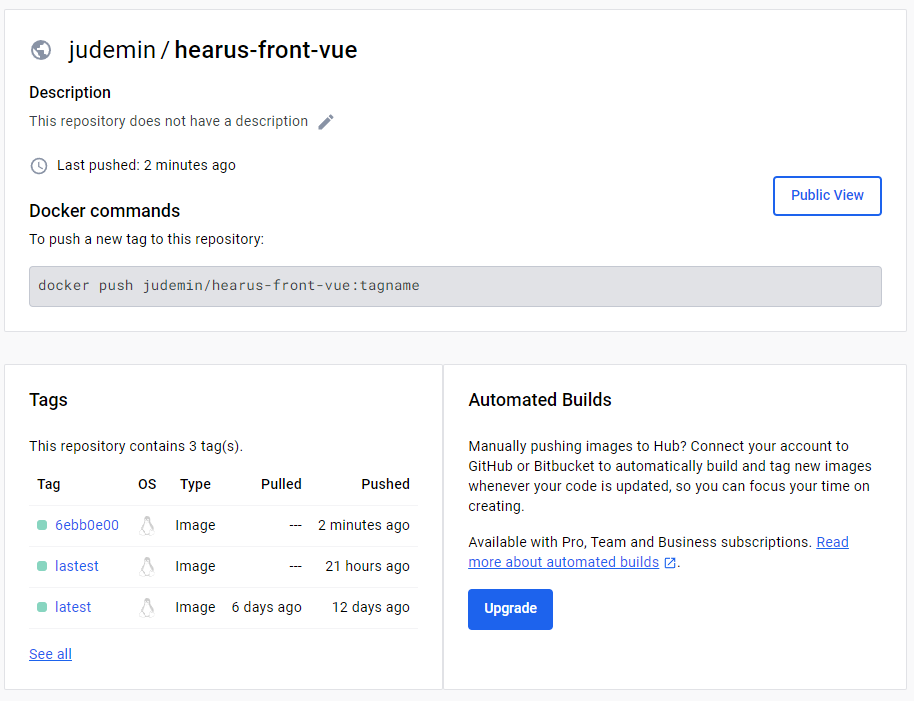
- name: Build and push mage to DockerHub
id: docker_build
uses: docker/build-push-action@v2
with:
push: true
tags: judemin/hearus-front-vue:${{ steps.image.outputs.version }}
# Github Action Cache
cache-from: type=gha
cache-to: type=gha,mode=max
이후 ECR에 이미지를 Push하기 위한 Github Action 코드를 위와 같이 작성한다.
TroubleShooting : An image does not exist locally with the tag
An image does not exist locally with the tag: ***.dkr.ecr.ap-northeast-2.amazonaws.com/hearus-front-vue위와 같이 이미지가 존재하지 않는 에러가 발생하는 것은 TAG가 정상적으로 생성되지 않은 것으로
docker build -t $ECR_REPOSITORY:$IMAGE_TAG .
docker tag $ECR_REPOSITORY:$IMAGE_TAG $ECR_REGISTRY/$ECR_REPOSITORY:$IMAGE_TAG
docker push $ECR_REGISTRY/$ECR_REPOSITORY:$IMAGE_TAG
위와 같이 Github Action 코드에 docker tag로 태그를 지정해주면 해결할 수 있다.
TroubleShooting : Process completed with exit code 1
...
b074db3b55e1: Retrying in 3 seconds
259907a6d3f1: Retrying in 2 seconds
48774bdf8b3f: Retrying in 2 seconds
e11f3db88c89: Retrying in 2 seconds
d2b438caf341: Retrying in 2 seconds
b074db3b55e1: Retrying in 2 seconds
259907a6d3f1: Retrying in 1 second
48774bdf8b3f: Retrying in 1 second
e11f3db88c89: Retrying in 1 second
d2b438caf341: Retrying in 1 second
b074db3b55e1: Retrying in 1 second
EOF
이미지까지 정상적으로 인식된 이후 위와 같이 Retrying을 지속적으로 시도하는 상황이 발생하였다.
...
			"Resource": "arn:aws:ecr:ap-northeast-2:939992775538:repository/hearus-front-vue"
		},
		{
			"Sid": "GetAuthorizationToken",
            ...
이는 AWS의 ECR에 대한 Policy의 문제로 Resource의 arn을 올바르게 지정하여 해결하였다.
CI/CD Pipeline - Kustomize
.
├── base
│   ├── Vue-Deployment.yaml
│   ├── Vue-Service.yaml
│   └── kustomization.yaml
└── overlays
    └── dev
        ├── Vue-Deployment-patch.yaml
        ├── Vue-Service-patch.yaml
        └── kustomization.yaml
kustomize는 상속 형태로 사용자의 의도에 맞게 K8s의 manifest 파일을 수정해준다.
이때 위와 같이 원본 manifest 파일을 저장하는 base 디렉터리, 그리고 patch될 manifest 파일을 저장하는 overlays/dev 디렉터리로 구성된다.
curl -s "https://raw.githubusercontent.com/kubernetes-sigs/kustomize/master/hack/install_kustomize.sh"  | bash
sudo mv kustomize /usr/local/bin/
먼저 위와 같이 kustomize를 다운로드 받아 /usr/local/bin/에 옯겨 사용할 수 있게 한다.
base
Vue-deployment.yaml
---
apiVersion: apps/v1
kind: Deployment
metadata:
  name: hearus-front
  labels:
    app.kubernetes.io/name: hearus-front
spec:
  selector:
    matchLabels:
      app.kubernetes.io/name: hearus-front
  template:
    metadata:
      labels:
        app.kubernetes.io/name: hearus-front
    spec:
      containers:
      - image: 939992775538.dkr.ecr.ap-northeast-2.amazonaws.com/hearus-front-vue:lastest
        name: hearus-front
        ports:
        - containerPort: 80
          name: hearus-front
Vue-service.yaml
---
apiVersion: v1
kind: Service
metadata:
  name: hearus-front-svc
  labels:
    app.kubernetes.io/name: hearus-front
spec:
  type: LoadBalancer
  ports:
    - port: 80
      targetPort: 80
      name: hearus-front
  selector:
    app.kubernetes.io/name: hearus-front
kustomization.yaml
apiVersion: kustomize.config.k8s.io/v1beta1
kind: Kustomization
resources:
  - Vue-Deployment.yaml
- Vue-Service.yamlresources에 상속 이전의 base manifest 파일들을 정의한다.
overlays
Vue-Deployment-patch.yaml
---
apiVersion: apps/v1
kind: Deployment
metadata:
  name: hearus-front
  namespace: default
  labels:
    env: dev
spec:
  selector:
    matchLabels:
      app: hearus-front
  template:
    metadata:
      labels:
        app: hearus-front
Vue-Service-patch.yaml
---
apiVersion: v1
kind: Service
metadata:
  name: hearus-front-svc
  labels:
    app.kubernetes.io/name: hearus-front
spec:
  selector:
    app.kubernetes.io/name: hearus-front
kustomization.yaml
apiVersion: kustomize.config.k8s.io/v1beta1
kind: Kustomization
images:
- name: 939992775538.dkr.ecr.ap-northeast-2.amazonaws.com/hearus-front-vue
  newName: 939992775538.dkr.ecr.ap-northeast-2.amazonaws.com/hearus-front-vue
  newTag: newtag
resources:
- ../../base
patchesStrategicMerge:
- Vue-Deployment-patch.yaml
- Vue-Service-patch.yaml
이후 overlays/dev 하위의 kustomization 파일에 원본 경로인 resources과 변경될 spec인 images를 정의하여주고, newName, newTag를 설정하면 이후 정상적으로 빌드되는 것을 확인할 수 있다.
Test Kustomize
cd /overlays/dev
kustomize build ./
Hearus-User:~/environment/HEARUS-IAC/CICD/overlays/dev (main) $ kustomize build ./
apiVersion: v1
kind: Service
metadata:
labels:
app.kubernetes.io/name: hearus-front
name: hearus-front-svc
spec:
ports:
- name: hearus-front
port: 80
targetPort: 80
selector:
app.kubernetes.io/name: hearus-front
type: LoadBalancer
---
apiVersion: apps/v1
kind: Deployment
metadata:
labels:
app.kubernetes.io/name: hearus-front
env: dev
name: hearus-front
spec:
selector:
matchLabels:
app: hearus-front
app.kubernetes.io/name: hearus-front
template:
metadata:
labels:
app: hearus-front
app.kubernetes.io/name: hearus-front
spec:
containers:
- image: 939992775538.dkr.ecr.ap-northeast-2.amazonaws.com/hearus-front-vue:newtag
name: hearus-front
ports:
- containerPort: 80
name: hearus-front위에 보이는 것처럼 image가 상속되어 hearus-front-vue:newtag로 변경된 것을 확인할 수 있다.
CI/CD Pipeline - ArgoCD
kubectl create namespace argocd
kubectl apply -n argocd -f https://raw.githubusercontent.com/argoproj/argo-cd/stable/manifests/install.yamlVERSION=$(curl --silent "https://api.github.com/repos/argoproj/argo-cd/releases/latest" | grep '"tag_name"' | sed -E 's/.*"([^"]+)".*/\1/')
sudo curl --silent --location -o /usr/local/bin/argocd https://github.com/argoproj/argo-cd/releases/download/$VERSION/argocd-linux-amd64
sudo chmod +x /usr/local/bin/argocdCD 파이프라인을 구축하기 위해 argoCD를 클러스터에 배포한다.
kubectl patch svc argocd-server -n argocd -p '{"spec": {"type": "LoadBalancer"}}'
export ARGOCD_SERVER=`kubectl get svc argocd-server -n argocd -o json | jq --raw-output .status.loadBalancer.ingress[0].hostname`
echo $ARGOCD_SERVER
ArgoCD는 LB로 외부에 드러나지 않기 때문에 이를 임의로 EXPOSE하여 접근할 수 있게 한다.
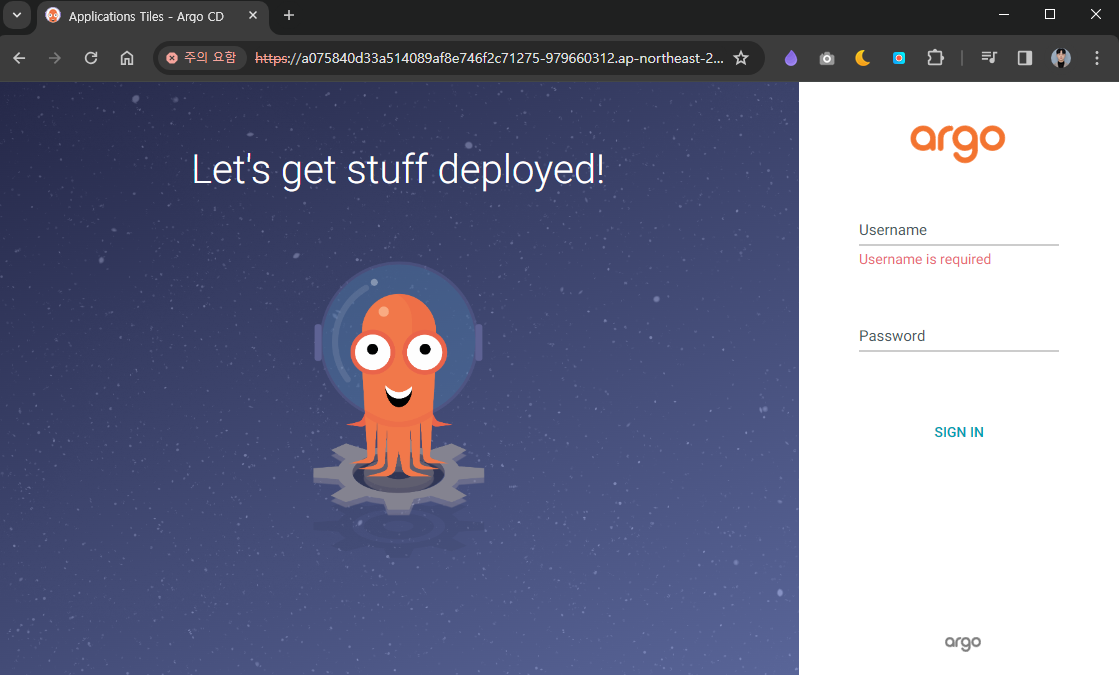
ARGO_PWD=`kubectl -n argocd get secret argocd-initial-admin-secret -o jsonpath="{.data.password}" | base64 -d`
echo $ARGO_PWD
기본 ID admin이며 위 명령어를 통해 자동으로 생성된 비밀번호를 확인할 수 있다.
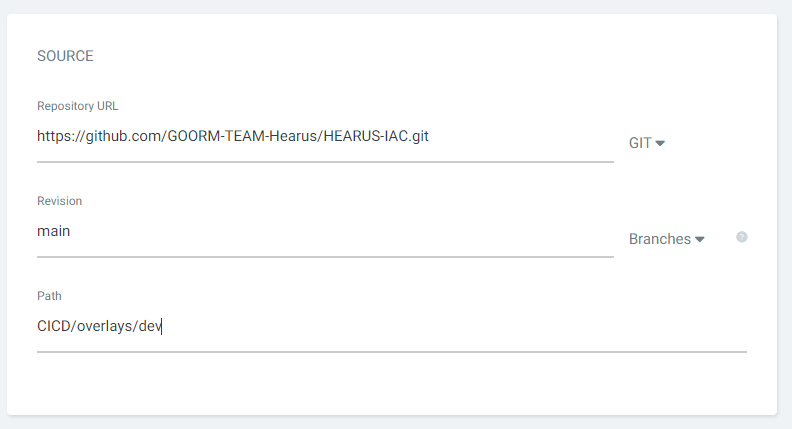 이후 위와 같이 manifest 코드가 있는 리포지토리를 설정하고
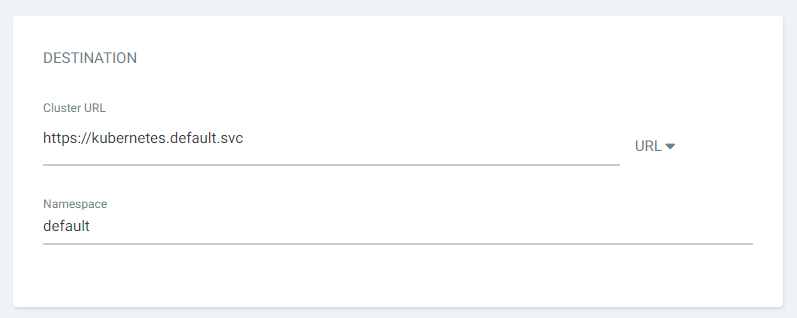
DESTINAMTION까지 설정하면 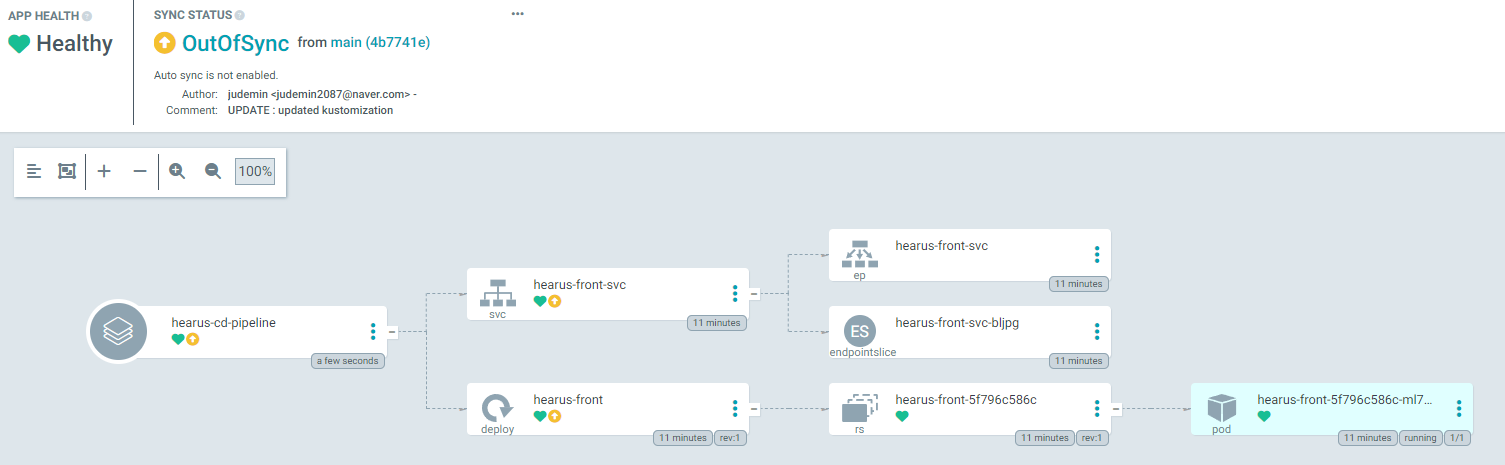 위와 같이 정상적으로 Application이 생성된 것을 볼 수 있다.
 또한 Github Action으로 ArgoCD를 통해 kustomize를 실행하기 위해 리포지토리 접근 권한이 있는
 ACTION_TOKEN을 Organization 내에 생성해준다.
      # ArgoCD with Kustomize
      - name: Setup Kustomize
        uses: imranismail/setup-kustomize@v1

      - name: Checkout kustomize repository
        uses: actions/checkout@v2
        with:
          repository: GOORM-TEAM-Hearus/HEARUS-IAC
          ref: main
          token: ${{ secrets.ACTION_TOKEN }}
          path: HEARUS-IAC

      - name: Update Kubernetes resources
        run: |
          echo ${{ steps.login-ecr.outputs.registry }}
          echo ${{ steps.image-info.outputs.ecr_repository }}
          echo ${{ steps.image-info.outputs.image_tag }}
          cd HEARUS-IAC/CICD/overlays/dev/
          kustomize edit set image ${{ steps.login-ecr.outputs.registry}}/${{ steps.image-info.outputs.ecr_repository }}=${{ steps.login-ecr.outputs.registry}}/${{ steps.image-info.outputs.ecr_repository }}:${{ steps.image-info.outputs.image_tag }}
          cat kustomization.yaml

      - name: Commit files
        run: |
          cd HEARUS-IAC
          git config --global user.email "github-actions@github.com"
          git config --global user.name "github-actions"
          git commit -am "UPDATE : Update image tag ${{ steps.image-info.outputs.image_tag }}"
          git push -u origin main
이후 Vue-Frontend 리포지토리의 Github Action 파일에 위 코드를 넣어주면
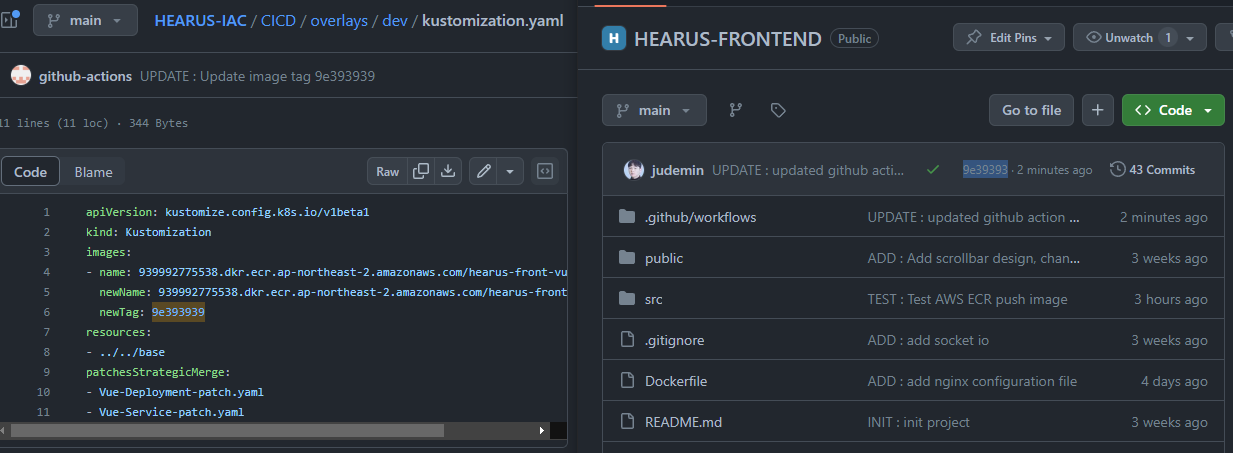 정상적으로 Frontend의 commit의 SHA 식별자인
 steps.image-info.outputs.image_tag로 HEARUS-IAC 리포지토리의 K8s manifest 파일을 업데이트 하여 ECR에서 정상적으로 최신 이미지를 반영하는 것을 볼 수 있다.