fd873630/deep_speech_2_korean
https://github.com/fd873630/deep_speech_2_korean
DeepSpeech 모델을 활용한 KoSpeech의 오픈소스 라이브러리를 참고하였다
git clone https://github.com/judemin/deep_speech_2_korean.git
pip install -r requirements.txt
해당 리포지토리를 fork하고 requirements.txt으로 파일 종속성을 설치한다.
scipy
numpy
soundfile
python-levenshtein
torch
torchelastic
visdom
wget
librosa
tqdm
matplotlib
flask
sox
scikit-learn
soundfile
hydra-core --pre
또한 최신 버전에 맞추어 위와 같이 패키지를 수정하였다.
pip install librosa
pip install sox
pip install Levenshtein
pip install -U six
이후 로컬 환경에서의 반응을 보기 위해 위 요구 라이브러리를 별도로 설치하였다.
docker build -t deep-speech-korean .또한 Dockerfile을 빌드하였을때 발생한 에러들은 아래와 같았다.
Trouble Shooting
43.60 W: GPG error: https://developer.download.nvidia.com/compute/cuda/repos/ubuntu1804/x86_64  InRelease: The following signatures couldn't be verified because the public key is not available: NO_PUBKEY
A4B469963BF863CC
GPG 라이선스 관련 에러로 이는 수동으로 keyserver에 키를 추가하여 해결할 수 있었다.
RUN apt-key adv --keyserver keyserver.ubuntu.com --recv-keys A4B469963BF863CC이후 ubuntu 서버에 connection할 수 없다는 에러가 발생하였다.
63.37 Fetched 10.7 MB in 1min 1s (176 kB/s)
63.37 E: Failed to fetch http://archive.ubuntu.com/ubuntu/pool/main/m/mpdecimal/libmpdec2_2.4.2-1ubuntu1_amd64.deb  403  connecting to archive.ubuntu.com:80: connecting to 91.189.91.83:80: dial tcp 91.189.91.83:80: connectex: A connection attempt failed because the connected party did not properly respond after a period of time, or established connection failed because connected host has failed to respond. [IP: 185.125.190.39 80]
63.37 E: Unable to fetch some archives, maybe run apt-get update or try with --fix-missing?
docker에서의 네트워크 이상유무를 확인하기 위해 아래와 같이 busybox를 실행하였다.
docker run -it --rm busybox nslookup google.com네트워크 자체의 문제에 이상이 없는 것을 확인하고 --network=host 옵션으로 해결할 수 있었다.
docker build --network=host -t deep-speech-korean .또한 이후 No module named 'packaging'에러가 발생하였다.
10.36     File "/tmp/pip-build-env-dxupdnq5/overlay/lib/python3.7/site-packages/setuptools/build_meta.py", line 338, in run_setup
10.36       exec(code, locals())
10.36     File "<string>", line 5, in <module>
10.36   ModuleNotFoundError: No module named 'packaging
이는 cuba의 packaging설치와 pip install시 --no-build-isolation arg를 통해 해결하였다.
# install apex
RUN git clone --recursive https://github.com/NVIDIA/apex.git
RUN apt-get update -y
RUN conda install packaging
RUN cd apex; pip install --no-build-isolation .
이후 수정한 원본 Dockerfile은 아래와 같다.
FROM pytorch/pytorch:1.5.1-cuda10.1-cudnn7-devel
ENV LD_LIBRARY_PATH=/usr/local/lib:$LD_LIBRARY_PATH

WORKDIR /workspace/

# install basics
RUN apt-key adv --keyserver keyserver.ubuntu.com --recv-keys A4B469963BF863CC
RUN apt-get update -y
RUN apt-get install -y git
RUN apt-get install -y curl
RUN apt-get install -y ca-certificates
RUN apt-get install -y bzip2
# need --network=host to install
RUN apt-get install -y cmake
RUN apt-get install -y vim
RUN apt-get install -y tree
RUN apt-get install -y htop
RUN apt-get install -y bmon

RUN apt-get update -y
RUN apt-get install -y iotop
RUN apt-get install -y sox
RUN apt-get install -y libsox-dev
RUN apt-get install -y libsox-fmt-all

# install python deps
RUN pip install cython visdom cffi tensorboardX wget jupyter

# install warp-CTC
ENV CUDA_HOME=/usr/local/cuda
RUN git clone https://github.com/SeanNaren/warp-ctc.git
RUN cd warp-ctc; mkdir build; cd build; cmake ..; make
RUN cd warp-ctc; cd pytorch_binding; python setup.py install

# install ctcdecode
RUN git clone --recursive https://github.com/parlance/ctcdecode.git
RUN cd ctcdecode; pip install .

# install apex
RUN git clone --recursive https://github.com/NVIDIA/apex.git
RUN apt-get update -y
RUN conda install packaging
RUN cd apex; pip install --no-build-isolation .

# install deepspeech.pytorch
ADD . /workspace/deepspeech.pytorch
RUN cd deepspeech.pytorch; pip install -r requirements.txt && pip install -e .

# launch jupyter
RUN mkdir data; mkdir notebooks;
CMD jupyter-notebook --ip="*" --no-browser --allow-root
또한 아래와 같이 포트 포워딩을 통해 실행시키면 Jupyter 클라이언트를 확인할 수 있다.
$ docker run -it -p 8888:8888 --name deep-speech-korean deep-speech-korean

[W 06:59:50.110 NotebookApp] WARNING: The notebook server is listening on all IP addresses and not using encryption. This is not recommended.
[I 06:59:50.119 NotebookApp] Serving notebooks from local directory: /workspace
[I 06:59:50.119 NotebookApp] Jupyter Notebook 6.5.6 is running at:
[I 06:59:50.119 NotebookApp] http://aa13d1ad8675:8888/?token=9eee7302752634f34ebe99dec9366f91a25e8210e08704ab
[I 06:59:50.119 NotebookApp]  or http://127.0.0.1:8888/?token=9eee7302752634f34ebe99dec9366f91a25e8210e08704ab
[I 06:59:50.119 NotebookApp] Use Control-C to stop this server and shut down all kernels (twice to skip confirmation).
[C 06:59:50.125 NotebookApp]

    To access the notebook, open this file in a browser:
        file:///root/.local/share/jupyter/runtime/nbserver-7-open.html
    Or copy and paste one of these URLs:
        http://aa13d1ad8675:8888/?token=9eee7302752634f34ebe99dec9366f91a25e8210e08704ab
     or http://127.0.0.1:8888/?token=9eee7302752634f34ebe99dec9366f91a25e8210e08704ab
[I 07:00:21.224 NotebookApp] 302 GET / (172.17.0.1) 1.820000ms
[I 07:00:21.241 NotebookApp] 302 GET /tree? (172.17.0.1) 2.000000ms
[W 07:00:26.622 NotebookApp] 401 POST /login?next=%2Ftree%3F (172.17.0.1) 2.530000ms referer=http://127.0.0.1:8888/login?next=%2Ftree%3F
이후 정확도와 확장성을 높이기 위한 DeepSpeech STT 모델 제작을 고려해볼 계획이다.
$ docker exec -it deep-speech-korean bash
cd /workspace/deepspeech.pytorch
pip install -U numpy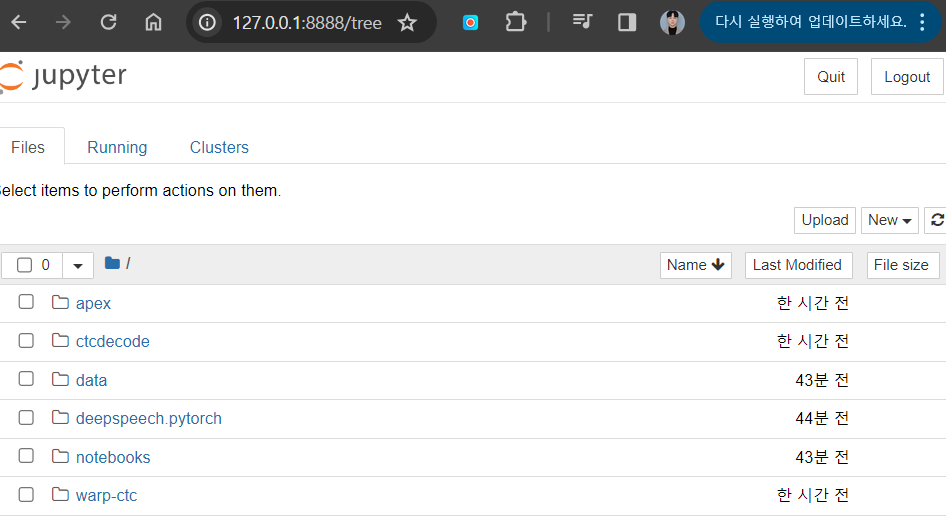
OpenAI Whisper
pip install git+https://github.com/openai/whisper.gitOpenAI의 Whisper 모델은 다른 모델에 비해 완전 무료이며 API 제한 또한 존재하지 않아 해당 모델을 선택하여 프로젝트를 진행하기로 결정하였다. 따라서 먼저 pip로 whisper를 설치한다.
import whisper
import numpy as np
from pydub import AudioSegment
import io

# Choose a model size ("tiny", "base", "small", "medium", "large")
whisper_model = whisper.load_model("base")

@app.route("/transcribe", methods=["POST"])
def transcribe():
    # Get the audio file from the request
    audio_file = request.files["audio"]

    # Convert the audio file to the appropriate format
    audio_format = audio_file.filename.split(".")[-1]
    audio_segment = AudioSegment.from_file(
        io.BytesIO(audio_file.read()), format=audio_format
    )

    # Convert to mono and the required sample rate (16kHz for Whisper)
    audio_segment = audio_segment.set_frame_rate(16000).set_channels(1)

    # Convert to numpy array
    audio_numpy = np.array(audio_segment.get_array_of_samples(), dtype=np.float32)
    audio_numpy = audio_numpy / np.iinfo(audio_segment.array_type).max  # Normalize

    # Transcribe the audio file using Whisper
    result = whisper_model.transcribe(audio_numpy, language="ko")
    transcription = result["text"]

    app.logger.info("Transcription Result: " + transcription)
    return transcription
이후 위와 같이 기존의 .wav파일을 audio_numpy로 변환해 whisper_model에 넣어준다.
이때 정확도 향상을 위해서 모델의 크기를 별도로 결정해줄 수 있다.
def process_text(text_data):
    for item in text_data.get("unProcessedText", []):
        if "라이트" in item[0]:
            item[1] = "highlight"
        elif "설명" in item[0]:
            item[1] = "comment"
            item[2] = "설명이 포함된 단어는 설명이 추가됩니다"

    return text_data
이후 테스트용 nlp 모델을 위와 같이 변경해준다.
FROM python:3.9

COPY requirements.txt requirements.txt
RUN pip install -r requirements.txt
RUN pip install git+https://github.com/openai/whisper.git

COPY . /app

WORKDIR /app

CMD ["python3", "-m", "flask", "run", "--host=0.0.0.0"]
Dockerfile 또한 수정해주면 아래와 같이 상대적으로 높은 정확도의 음성인식 결과를 볼 수 있다.