
❤️ 프로젝트 생성
버전 : Java 17
IDE : IntelliJ
- '스프링 부트 스타터 사이트'로 이동해서 스프링 프로젝트 생성
- 다음과 같이 설정
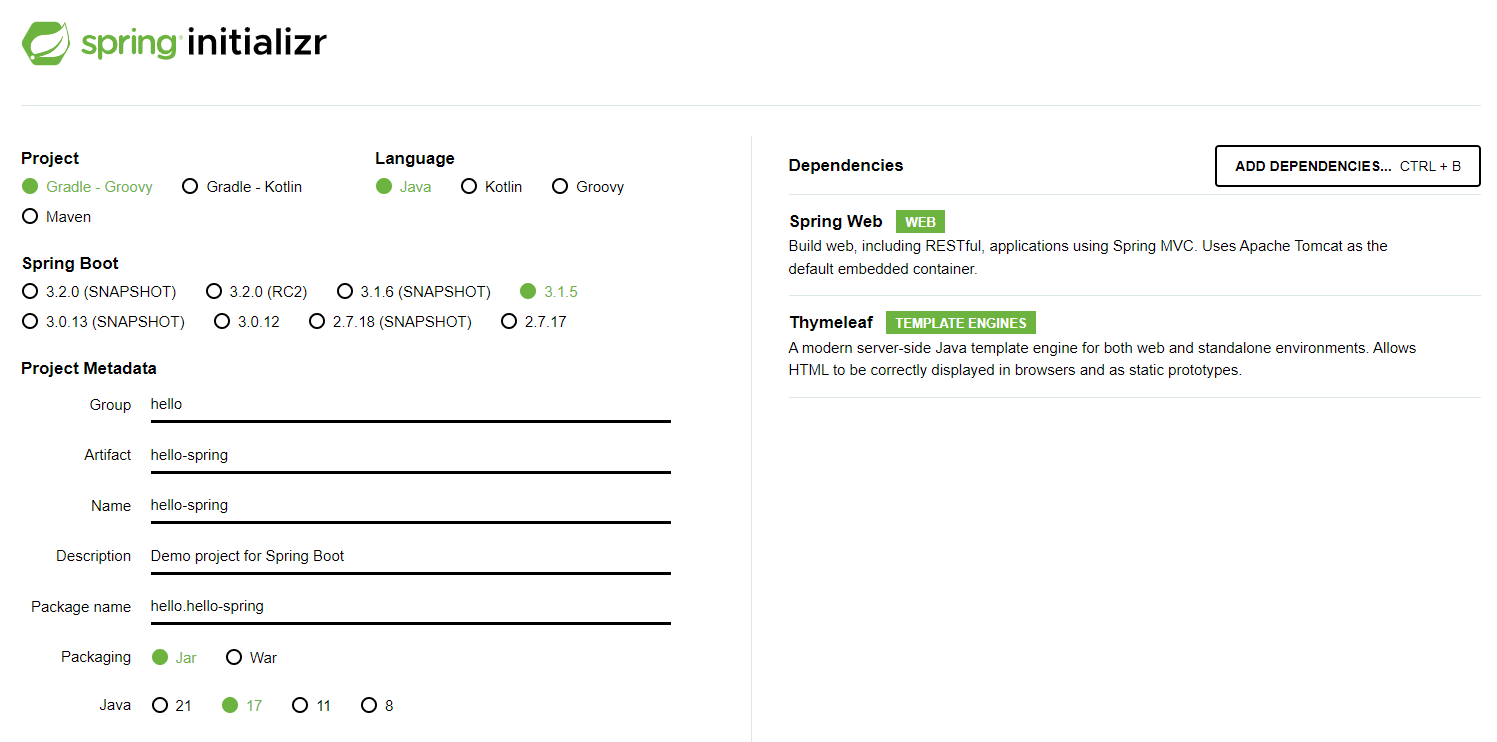
- Maven보다 Gradle이 더 많이 쓰이는 추세 - Gradle 추천
- ❗ Spring Boot 3.0 사용시 주의사항
- Java 17이상 사용할 것
- javax패키지 이름을 jakarta로 변경할 것
- 예시1)
javax.persistence.Entity → jakarta.persistence.Entity - 예시2)
javax.annotation.PostConstruct → jakarta.annotation.PostConstruct
- 예시1)
- H2 데이터베이스 2.1.214 버전 이상 사용할 것
- SNAPSHOT, M1은 미정식 버전, 정식 버전으로 선택할 것
- Dependencies
- 웹 프로젝트 → Spring Web
- Html을 만들어주는 템플릿 엔진 → Thymeleaf
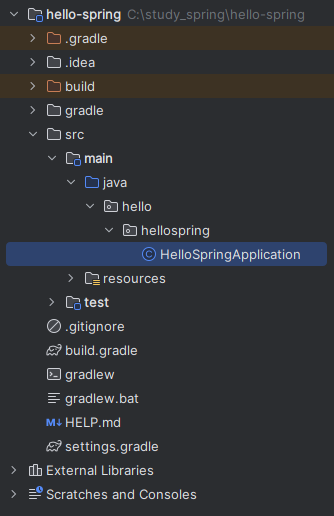
- 프로젝트 생성 후, 압축풀고 IntelliJ에서 열기
open- 압축을 푼 디렉토리에 있는build.gradle선택
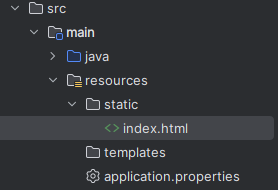
- 생성된 프로젝트 구조
- main클래스를 실행시켜본다
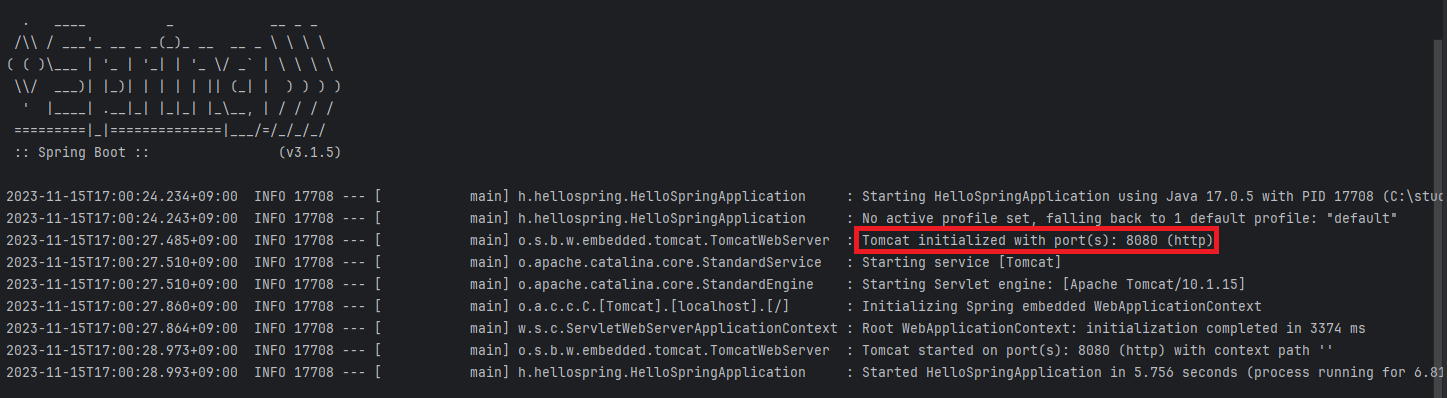
- port 8080으로 접속 시, 다음과 같이 나오면 성공
- 아직 아무것도 없기 때문에 에러 페이지가 뜬다
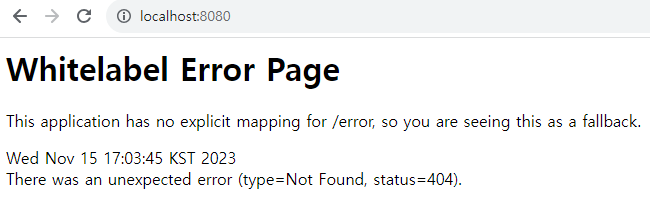
- 아직 아무것도 없기 때문에 에러 페이지가 뜬다
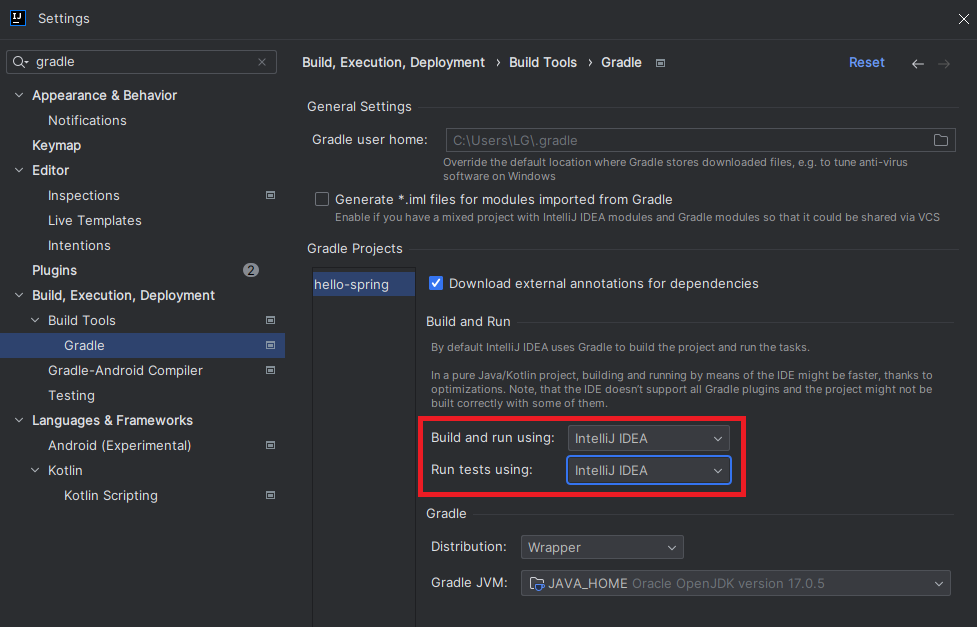
💡 IntelliJ Gradle 대신에 자바 직접 실행
: IntelliJ IDEA 빌드 시, 기본으로 셋팅되어 있는 Gradle 보다 자체 IDEA로 실행하는 게 더 빠름
- setting열기 :
ctrl + alt + sor File → Settings - Build, Execution, Deployment > Build Tools > Gradle
- Build and run 부분을 IntelliJ IDEA로 바꿔주기
❤️ 라이브러리 살펴보기
build.gradle- 추가한 라이브러리들
dependencies {
	implementation 'org.springframework.boot:spring-boot-starter-thymeleaf'
	implementation 'org.springframework.boot:spring-boot-starter-web'
	testImplementation 'org.springframework.boot:spring-boot-starter-test'
}- 우측 상단 Gradle 탭의 Dependencies항목에서 내가 불러온 라이브러리들을 확인할 수 있다
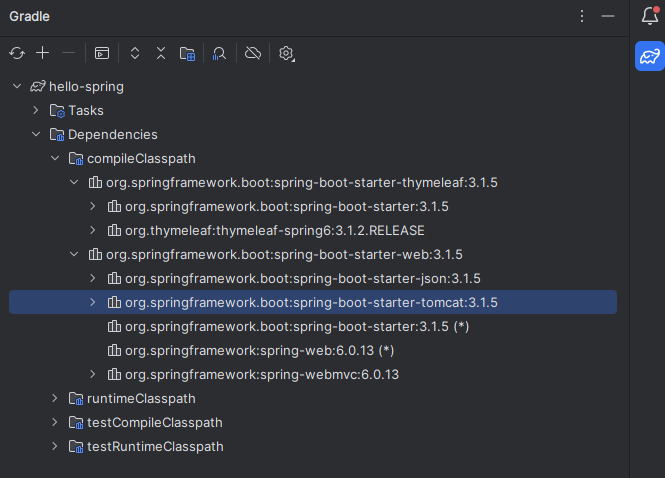
- 프로젝트를 생성할 때 Web, Thymeleaf 라이브러리만 추가했지만 라이브러리 목록들을 보면 다른 라이브러리들도 보이는 것을 확인할 수 있다
- maven, gradle같은 빌드 도구들은 의존 관계를 관리해주기 때문
- 의존 관계가 연결되어 있는 라이브러리들이 함께 자동으로 추가된다 (트리 구조)
Embedded Server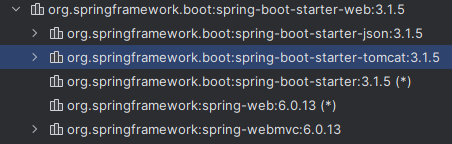
- 예전에는 톰캣을 직접 설치해야했지만 현재는 톰캣이 같이 설치되어 따로 설치해줄 필요가 없음
Logging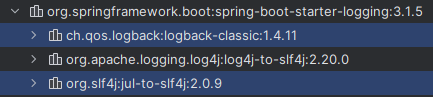
System.out.print()사용을 지양하고 로그파일을 통해 테스트를 할 것slf4j와logback가 있음- 두가지를 함께 사용하는 추세
Test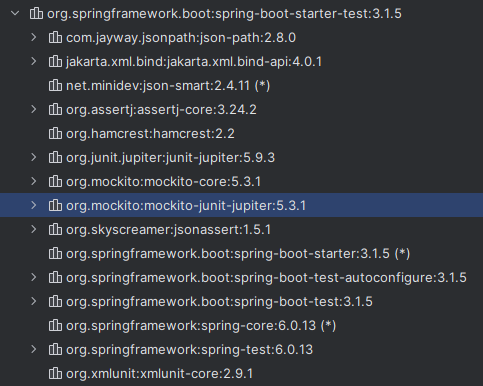
- java에서는 JUnit을 주로 사용
- 4에서 5로 넘어가는 추세
정리
스프링 부트 주요 라이브러리
spring-boot-starter-webspring-boot-starter-tomcat: 톰캣(웹서버)spring-webmvc: 스프링 웹 MVC
spring-boot-starter-thymeleaf: 타임리프 템플릿 엔진(View)spring-boot-starter(공통) : 스프링 부트 + 스프링 코어 + 로깅spring-bootspring-core
spring-boot-starter-logginglogback,slf4j
테스트 라이브러리
spring-boot-starter-testjunit: 테스트 프레임워크mockito: 목 라이브러리assertj: 테스트 코드를 좀 더 편하게 작성하게 도와주는 라이브러리spring-test: 스프링 통합 테스트 지원
❤️ View 환경설정
Welcome Page 만들기

스프링 부트에서 제공하는 Welcome page 기능
src/main/resources/static에index.html파일을 생성
index.html작성<!DOCTYPE HTML> <html> <head> <title>Hello</title> <meta http-equiv="Content-Type" content="text/html; charset=UTF-8" /> </head> <body> Hello <a href="/hello">hello</a> <!-- 링크 클릭 시, 에러 페이지로 이동 --> </body> </html>
thymeleaf 템플릿 엔진
-
src/main/hellospring에Controller패키지 생성 후HelloController.java파일 생성 -
HelloController.java작성- return값으로 "hello" 반환 →
ViewResolver가hello.html을 찾아서 화면에 띄운다 - 스프링 부트 템플릿 엔진 기본 viewName 매핑 :
resources:templates/+ ViewName +.html
package hello.hellospring.controller; import org.springframework.stereotype.Controller; import org.springframework.ui.Model; import org.springframework.web.bind.annotation.GetMapping; @Controller public class HelloController { @GetMapping("hello") public String hello(Model model) { model.addAttribute("data", "hello!!"); return "hello"; } } - return값으로 "hello" 반환 →
-
src/main/resources/template에hello.html생성 후 작성xmlns:th="http://www.thymeleaf.org"로 템플릿 엔진 선언th: thymeleaf 의미- 링크 클릭 시, "안녕하세요. hello!!"가 화면에 나타남
<!DOCTYPE HTML>
<html xmlns:th="http://www.thymeleaf.org">  <!-- 템플릿 엔진 -->
<head>
	<title>Hello</title>
	<meta http-equiv="Content-Type" content="text/html; charset=UTF-8" />
</head>
<body>
	<p th:text="'안녕하세요. ' + ${data}" >안녕하세요. 손님</p>  <!-- data는 model의 키값 -->
</body>
</html>
참고
spring-boot-devtools라이브러리 추가
→html파일을 컴파일만 해주면 서버 재시작 없이 View파일 변경 가능- IntelliJ 컴파일 방법 : 메뉴 build → Recompile
❤️ 빌드하고 실행하기
jar파일 생성 및 실행
- 콘솔로 이동 (프로젝트가 있는 폴더)
./gradlew buildcd build/libs- jar파일 실행 :
java -jar hello-spring-0.0.1-SNAPSHOT.jar - 실행 확인
출처 - 인프런 '스프링 입문' 강의

🦋개발 공부 기록🦋