nestjs 공식문서를 참고하였다.
기본적으로 어떤 요소들이 존재하는지 확인하기 위함이다.
예시 소스 코드는 https://github.com/jujube0/nest-study 에서 확인 가능하다.
Overview
Controller
- 요청 request 를 처리하고 응답 response를 클라이언트에 반환
Provider
ex: service, repository, factory, helper...
→ 종속적으로 주입이 가능한 클래스들
→ 일반적으로 애플리케이션이 생성(bootstrap)되면 인스턴스화되었다가 어플리케이션이 종료될때 삭제된다.
→ @Optional() : dependencies which do not necessarily have to be resolved
→ 주로 constructor를 통해 주입되는 constructor-based injection을 이용하지만, property-based injection 을 만들 수도 있다.
만약 상위 클래스가 여러 provider에 의존하는 경우, sub-class에서 모든 provider들을 전달하는 것보다는 property 수준에서 @Inject() decorator를 이용할 수 있다.
→ Nest에 내장된 injection system을 이용하는 대신
기존 인스턴스를 가져오거나 프로바이더를 동적으로 인스턴스화할 수 있다. → Module Reference
Module
→ @module 데코레이터를 통해 정의된다. 데코레이터는 Nest가 에플리케이션 구조를 구성하는데 사용하는 메타데이터를 제공한다.
→ Nest는 root module에서 시작하여 application graph라는 걸 만들게 된다. 이 application graph를 이용하여 nest는 module-provider relationship과 dependency들을 해결하게 된다.
→ @module 데코레이터는 하나의 single object를 인자로 받게된다. single object는 아래와 같은 property들을 갖게된다.
providers: Nest가 인스턴스화하여 모듈에서 공유될 providercontrollers: 해당 모듈에서 정의된 controller들. 역시 Nest가 인스턴스화한다.imports: 본 모듈에서 필요로하는 provider들을 export하고 있는 모듈들의 리스트exports: 본 모듈의 provider들 중 다른 모듈이 Import하여 이용할 provider들
provider들은 module에 의해 캡슐화되기 때문에 providers property에 포함된 provider(모듈에 직접 포함된 provider)이거나 imports 를 통해 export 된 provider를 가져온 것들만 modue 내에서 이용이 가능하다.
→ Feature Module : 특정 기능과 관련된 코드들을 하나의 모듈에 모아 관리할 수도 있다.
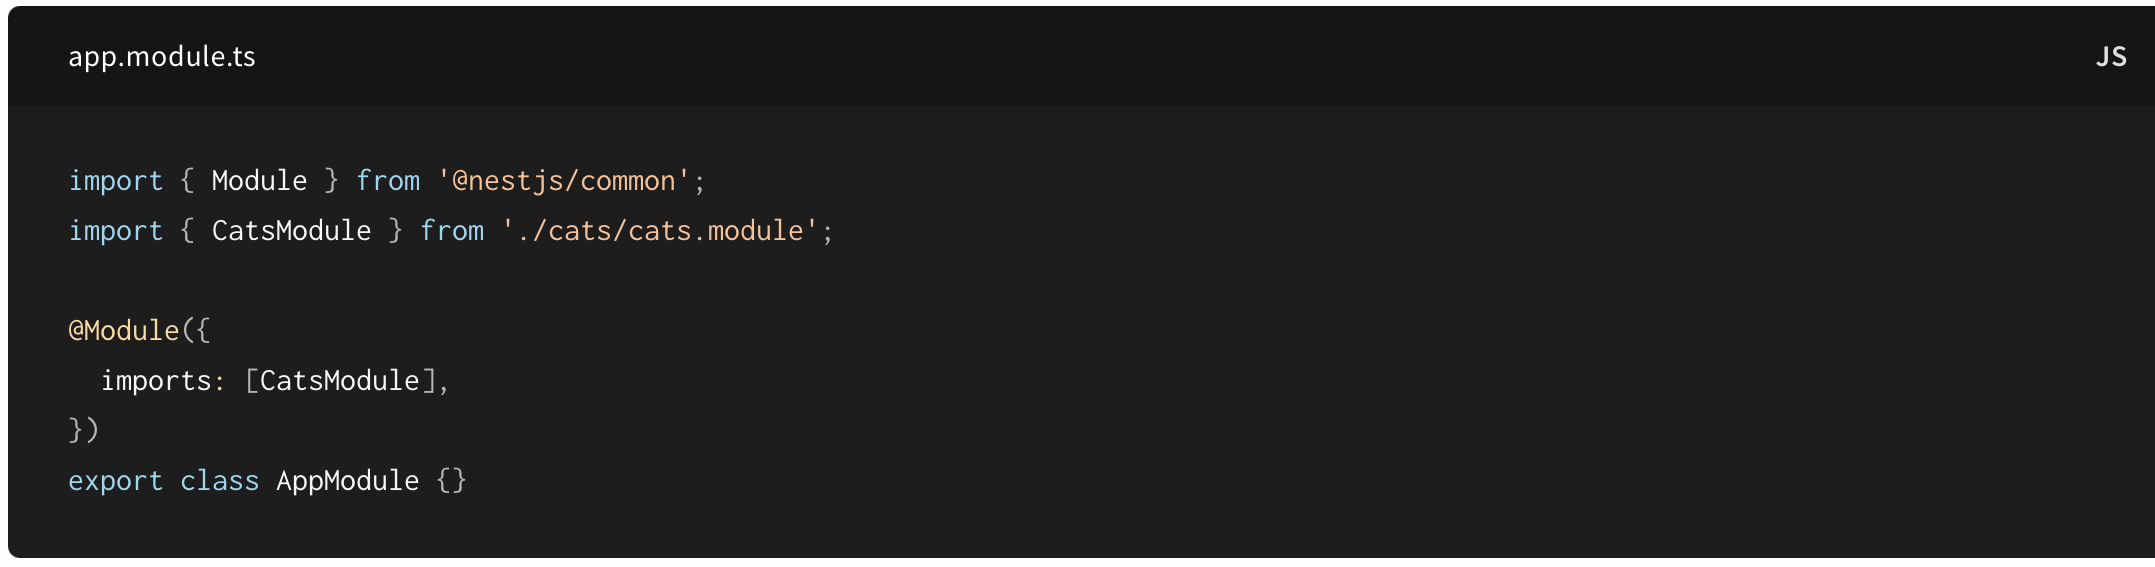
cats.controller와 cats.service를 cats.module에 포함시키고, app.module.ts 파일에 한 번에 import해주는 방식
→ Module Re-exporting
@Module({
  imports: [CommonModule],
  exports: [CommonModule],
})
export class CoreModule {}
위처럼 모듈에서 자신이 import한 것을 다시 export하여서, 자신을 import하는 모듈들이 해당 provider들을 이용할 수 있도록 할 수도 있다.
→ Dependency Injection
: 모듈의 constructor에서도 provider를 inject하여 이용할 수 있다(주로 configuration 목적).
하지만 모듈이 provider처럼 inject될 수는 없는데, circular dependency가 되기 때문이다.
→ Global Module
: @Global 을 통해 모듈의 scope를 global로 확장시킬 수 있다. Global Module은 Root Module 또는 Core Module에 단 한번만 등록되면, 다른 모듈들에서는 import 없이 Global Module의 provider들을 이용할 수 있게된다.
→ Dynamic Module
: customized module, that can register and configure providers dynamically
import { Module, DynamicModule } from '@nestjs/common';
import { createDatabaseProviders } from './database.providers';
import { Connection } from './connection.provider';

@Module({
  providers: [Connection],
})
export class DatabaseModule {
  static forRoot(entities = [], options?): DynamicModule {
    const providers = createDatabaseProviders(options, entities);
    return {
      module: DatabaseModule,
      providers: providers,
      exports: providers,
    };
  }
}
forRoot() 메서드를 통해 dynamic module을 리턴한다.
위에서 DatabaseModule은 기본적으로 Connection provider를 가지고 있으면서, providers 를 export하고 있다.
dynamic module에서 리턴한 property들은 @Module 데코레이터에서 정의된 기본 module metadata를 extend한다.
이를 import하기 위해서는 다음과 같은 방식을 이용한다.
import { Module } from '@nestjs/common';
import { DatabaseModule } from './database/database.module';
import { User } from './users/entities/user.entity';

@Module({
  imports: [DatabaseModule.forRoot([User])],
})
export class AppModule {}
Middleware
a function which is called before the route handler
→ request object과 response object에 접근이 가능하다.
→ Nest middleware는 기본적으로 express와 동일하다.
→ middle ware가 할 수 있는 것들?
- make changes to the request and the response objects
- end the request-response cycle
- call the next middleware function in the stack
- if the current middleware function does not end the request-response cycle, it must call
nextto pass control to the next middleware function. Otherwise, the request will be left hanging
→ @Injectable 데코레이터를 이용하여 함수나 클래스에서 custom middleware를 구현할 수 있다.
클래스에서 middleware를 구현하려면 NestMiddleware 인터페이스를 implement 해야한다.(함수는 상관 없음)
import { Injectable, NestMiddleware } from '@nestjs/common';
import { Request, Response, NextFunction } from 'express';

@Injectable()
export class LoggerMiddleware implements NestMiddleware {
  use(req: Request, res: Response, next: NextFunction) {
    console.log('Request...');
    next();
  }
}
→ Dependency Injection
: they are able to inject dependencies that are available within the same module(by constructor)
→ Applying middleware
: configure method를 이용하여 모듈에서 middleware를 등록할 수 있다. middleware를 포함하는 모듈은 NestModule interface를 구현해야한다.
import { Module, NestModule, MiddlewareConsumer } from '@nestjs/common';
import { LoggerMiddleware } from './common/middleware/logger.middleware';
import { CatsModule } from './cats/cats.module';

@Module({
  imports: [CatsModule],
})
export class AppModule implements NestModule {
  configure(consumer: MiddlewareConsumer) {
    consumer
      .apply(LoggerMiddleware)
      .forRoutes('cats');
  }
} .forRoutes({ path: 'cats', method: RequestMethod.GET }); // #1
.forRoutes(CatsController);// #2
consumer.apply(cors(), helmet(), logger).forRoutes(CatsController); // #3forRoutes 에 path, method property를 가진 객체를 넣어 특정 메서드와 특정 path를 갖는 route에만 한정할 수도 있다. forRoute 에는 하나 이상의 string, 하나 이상의 controller class 들이 , 로 연결되어 들어갈 수 있다.
apply 에도 comma를 통해 여러개의 middlewarre를 연결할 수 있다.(#3)
→ Excluding routes
: 제외할 수도 있다.
consumer
  .apply(LoggerMiddleware)
  .exclude(
    { path: 'cats', method: RequestMethod.GET },
    { path: 'cats', method: RequestMethod.POST },
    'cats/(.*)',
  )
  .forRoutes(CatsController);
→ Functional Middleware
: dependency가 필요하지 않은 middleware를 만들때 유용하다.
import { Request, Response, NextFunction } from 'express';

export function logger(req: Request, res: Response, next: NextFunction) {
  console.log(`Request...`);
  next();
};
consumer
.apply(logger)
.forRoutes(CatsController);→ Global Middleware
: 모든 route에 적용되길 원한다면 main.ts 파일에서 적용이 가능하다.
const app = await NestFactory.create(AppModule);
app.use(logger);
await app.listen(3000);
Exception filters
Nest에서는 개발자가 코드 내에서 처리하지 못한 exception에 대한 처리를 담당하는 exception layer가 존재한다.
이 작업은 HttpException 유형을 처리하는 global exception filter에 의해 수행되게 되고, exception이 HttpException 유형(또는 그 하위 유형)이 아닐 경우에는
{
	"statusCode": 500,
	"message": "Internal server error"
}
위의 JSON response를 보내게 된다.
Throwing standard exceptions
@Get()
async findAll() {
  throw new HttpException('Forbidden', HttpStatus.FORBIDDEN);
}
기본적으로 HttpException은
- JSON 응답 본문을 정의하는
response(string or object) - HTTP status code
status(number) → HttpStatus(from@nestjs/common) enum을 사용하면 좋다.
의 두 가지 인수를 필요로한다.
response 로 object를 넣으면 해당 object가 그대로 return 된다.
else, {"statusCode": status, "message": response} 형태
Exception filters
위에서 설명한 built-in exception filter들을 이용하는 대신, exception을 직접 조작하고 싶을 수도 있다.
예를 들어
- 로깅을 추가하거나
- 경우에 따라 다른 JSON schema를 쓰고 싶어질 수도 있다.
→ **HttpException 클래스의 인스턴스를 캐치하는 exception filter를 만들어보자!**
이를 위해서는 일단 Request, Response 객체가 필요하다.
- Request : original
url을 loggin에 포함시키기 위해서 - Response :
response.json()메서드를 이용하여 응답 전송을 직접 제어하기 위해서
import { ExceptionFilter, Catch, ArgumentsHost, HttpException } from '@nestjs/common';
import { Request, Response } from 'express';

@Catch(HttpException)
export class HttpExceptionFilter implements ExceptionFilter {
  catch(exception: HttpException, host: ArgumentsHost) {
    const ctx = host.switchToHttp();
    const response = ctx.getResponse<Response>();
    const request = ctx.getRequest<Request>();
    const status = exception.getStatus();

    response
      .status(status)
      .json({
        statusCode: status,
        timestamp: new Date().toISOString(),
        path: request.url,
      });
  }
}
→ @Catch(HttpException) exception filter와 필요한 metadata를 연결해준다.
comma로 연결된 list를 인자로 넣을 수도 있다.
→ catch() 의 매개변수들을 살펴보자
exception 은 현재 처리 중인 예외객체이고
host 는 ArgumentsHost 객체이다. 여기에서는 request와 response에 접근하기 위해 이용하고 있다.
→ Binding filters
위에서 작성한 HttpExceptionFilter 를 catsController 의 create함수와 연결해보자!
@Post()
@UseFilters(new HttpExceptionFilter())
async create(@Body() createCatDto: CreateCatDto) {
  throw new ForbiddenException();
}-
UseFilters는@nestjs/commonpackage에서 가져온다→ 하나 이상의 filter instance를 인자로 받는다(by commas). Instance를 넣는 대신 class를 넣을 수도 있는데 이 경우 framework가 instantiation을 맡게되고, DI 가 가능해진다. 또한 이 경우 Nest가 instance를 재활용하기가 쉬워져 메모리 사용량이 적어지게 된다
되도록 클래스를 이용하도록 하자
-
위 예제에서는 exception filter가 method-scope로 쓰였다. 이 외에도 controller-scope, global-scope가 모두 가능하다
-
global-scope로 쓰기 위해서는 main.ts 파일에서
app.useGlobalFilters(new HttpExceptionFilter())를 추가해주면 된다.이 경우, 모든 모듈 context의 외부에서 진행되는 것이기에 dependency를 주입할 수 없다.
해결하기 위해서는,
app.module.ts파일에서 filter를 추가하는 방법이 있다.
Pipes
@Injectable() 데코레이터로 정의된다. PipeTransform 을 구현(implement)해야한다.
주로 두가지의 상황에서 사용된다.
- transformation: input data를 조작
- validation: input data가 valid한지 확인하여 valid하지 않은 경우에는 예외를 던진다.
두 가지 상황 모두 controller route handler 가 처리하는 argument 에 대한 조작이다.
→ 주로 함수가 시작되기 바로 전에 pipe가 실행되어 함수의 argument들에 대한 선처리를 해주는 역할
→ pipe도 exception zone 안에서 작동한다. == pipe가 예외를 던지면 exception layer에 의해 catch되며, 이어지는 controller 메서드는 작동하지 않는다는 것을 기억하자.
Built-in pipes
ValidationPipe(현재 모두싸인에서 이용중)ParseIntPipe- etc
→ ParseIntPipe 를 예시로 살펴보자. 이 친구는 위에서 언급한 두 가지 상황 중 transformation 용도로 이용되어 메서드의 parameter를 integer로 파싱하고, 파싱할 수 없는 경우 exception을 발생시킨다.
@Get(':id')
async findOne(@Param('id', ParseIntPipe) id: number) {
  return this.catsService.findOne(id);
}
method parameter level에서 pipe를 적용시킨 예제이다.
위 예제에서는 class를 전달시켜 DI를 활성화했다. 인스턴스를 전달할 수도 있는데, 주로 option을 추가하여 pipe의 행동을 변화시키고 싶을 때 이용한다.
@Get(':id')
async findOne(
  @Param('id', new ParseIntPipe({ errorHttpStatusCode: HttpStatus.NOT_ACCEPTABLE }))
  id: number,
) {
  return this.catsService.findOne(id);
}
Custom Pipe
import { PipeTransform, Injectable, ArgumentMetadata } from '@nestjs/common';

@Injectable()
export class ValidationPipe implements PipeTransform {
  transform(value: any, metadata: ArgumentMetadata) {
    return value;
  }
}
→ 위 예제는 단순하게 input을 받아 리턴하는 커스텀 파이프이다.
→ PipeTransform<T, R> 는 generic interface이다. T 는 input value 의 타입을, R 은 transform 메서드의 리턴 타입을 명시한다.
→ transform 함수는 PipeTransform 을 구현하기 위한 필수 요소이다. 두 가지의 parameter를 가지게 된다.
-
value: currently processed method argument -
metadata: value의 메타데이터이다. 아래 속성들을 가진다.export interface ArgumentMetadata { type: 'body' | 'query' | 'param' | 'custom'; metatype?: Type<unknown>; data?: string; }
Schema based validation
Joi라이버리를 통해 API를 통해 손쉽게 스키마를 만들 수가 있다. Joi-based schema를 만들어보자
$ npm install --save joi
$ npm install --save-dev @types/joi
import { PipeTransform, Injectable, ArgumentMetadata, BadRequestException } from '@nestjs/common';
import { ObjectSchema } from 'joi';
@Injectable()
export class JoiValidationPipe implements PipeTransform {
constructor(private schema: ObjectSchema) {}
transform(value: any, metadata: ArgumentMetadata) {
const { error } = this.schema.validate(value);
if (error) {
throw new BadRequestException('Validation failed');
}
return value;
}
}→ schema를 constructor의 인수로 받아 schema.validate() 를 통해 유효성을 검증한다.
→ validation pipe이므로 값을 변경하지 않고 그대로 반환하거나, 예외를 던진다.
@Post()
@UsePipes(new JoiValidationPipe(createCatSchema))
async create(@Body() createCatDto: CreateCatDto) {
  this.catsService.create(createCatDto);
}
Class Validator
- decorator 기반의 validation
- processed data의 metadata에 접근할 수 있기 때문에 Pipe와 함께 적용할 때 효과적이다
- Typescript를 이용할때에만 적용할 수 있다.
$ npm i --save class-validator class-transformerimport { IsString, IsInt } from 'class-validator';
export class CreateCatDto {
@IsString()
name: string;
@IsInt()
age: number;
@IsString()
breed: string;
}GitHub - typestack/class-validator: Decorator-based property validation for classes.
- custom validation을 생성할 수 있지만 Nest의 built-in을 사용할 수도 있다.
- 모두사인에서도 built-in을 이용하고 있다.
// validation pipe
  app.useGlobalPipes(
    new ValidationPipe({
      disableErrorMessages: false,
      whitelist: false,
      transform: true,
      validationError: {
        target: false,
        value: false,
      },
      exceptionFactory: errors => new ValidationFailedException(errors),
    }),
);- 모두싸인에서 이용중인 validation pipe,
@nestjs/commonpackage에서 가져온다.
→ disableErrorMessages : if set to true, validation errors will not be returned to the client
→ whitelist: if set to true, validator will strip validated(returned) object of any properties that do not use any validation decorators
*whitelist는 바람직한 것들의 리스트를 의미한다.
→ transform: payload를 지정된 타입으로 자동변환한다.
→ validationError.target : ValidationError 에서 대상을 노출해야하는지의 여부
→ validationError.value : 검증된 값이 ValidationError 에 노출되어야하는지의 여부
TS는 generic이나 interface의 metadata를 저장하지 않기 때문에, DTO에서 이들을 이용할 경우 validationPipe 가 제대로 작동하지 않을 수 있다.
예를 들어, array는 generic을 이용하기 때문에 array를 Input으로 받는 경우 validation이 잘 되지 않는다. → ParseArrayPipe 를 이용해보자.
@Post()
createBulk(
  @Body(new ParseArrayPipe({ items: CreateUserDto }))
  createUserDtos: CreateUserDto[],
) {
  return 'This action adds new users';
}@Get()
findByIds(
@Query('ids', new ParseArrayPipe({ items: Number, separator: ',' }))
ids: number[],
) {
return 'This action returns users by ids';
}ParseArrayPipe 는 위처럼 query parameter를 파싱할 때도 유용하게 이용할 수 있다.
custom pipe가 validation 뿐만 아니라 transformation의 역할도 수행가능함을 기억하자. id를 받아 User entity를 가져오는 것도 pipe를 이용할 수 있다.
Guard
- 역시
Injectable데코레이터 주석을 갖는다. - Guard는
CanActivate인터페이스를 구현(implement)해야한다. - Guard는 런타임에 주어진 특정 조건들(permission, role...)에 따라서 주어진 request가 route handler에 의해 처리될 지의 여부를 결정해준다.
- authorization이라고 불리기도 한다.
- authorization은 전통적인 express 앱에서는 middleware로 다뤄졌죵?
- middleware와의 차이점은, middleware는 다음으로 호출될 route handler에 대한 정보를 알지 못하는 반면, Guard 는
ExecutionContext인스턴스를 통해 handler에 대한 정보를 알 수 있다는 데에 있다!
- middleware 이후에, 하지만 interceptor나 pipe 이전에 동작한다.
import { Injectable, CanActivate, ExecutionContext } from '@nestjs/common';
import { Observable } from 'rxjs';

@Injectable()
export class AuthGuard implements CanActivate {
  canActivate(
    context: ExecutionContext,
  ): boolean | Promise<boolean> | Observable<boolean> {
    const request = context.switchToHttp().getRequest();
    return validateRequest(request);
  }
}- 모든 guard는
canActivate()함수를 구현한다.true를 반환하면 요청이 처리되고,false를 반환하면 요청을 거부한다.
→ 어떻게 이용할까?
역시 controller-scoped, method-scoped, global-scoped 중 하나가 될 수 있다.
controller, method-scoped로 이용하기 위해서는 @UseGuard() 데코레이터를 이용한다.
global-scope로 이용하기 위해서는 app.useGlobalGuard() 메서드를 이용한다.
Authorization Guard에 대해 고민해보자. 특정 route는 모든 user가 이용할 수 있지만, admin만 이용 가능한 route도 존재할 것이다.
custom metadata를 이용하여 role과 route를 연결할 수 있다.
// roles.decorator.ts
import { SetMetadata } from '@nestjs/common';

export const Roles = (...roles: string[]) => SetMetadata('roles', roles);

// cats.controller.ts
@Post()
@Roles('admin')
async create(@Body() createCatDto: CreateCatDto) {
  this.catsService.create(createCatDto);
}
import { Injectable, CanActivate, ExecutionContext } from '@nestjs/common';
import { Reflector } from '@nestjs/core';
@Injectable()
export class RolesGuard implements CanActivate {
constructor(private reflector: Reflector) {}
canActivate(context: ExecutionContext): boolean {
const roles = this.reflector.get<string[]>('roles', context.getHandler());
if (!roles) {
return true;
}
const request = context.switchToHttp().getRequest();
const user = request.user;
return matchRoles(roles, user.roles);
}
}canActivate() 함수가 false 를 리턴하면 ForbiddenException 이 던져진다.
Interceptors
@Injectable() 데코레이터 주석이 필요하며, NestInterceptor 인터페이스를 구현해야한다.
인터셉터의 역할
- bind extra logic before/after method execution
- transform the result returned from a function
- transform the exception thrown from a function
- extend the basic function behavior
- completely override a function depending on specific condition
인터셉터는 intercept() 메서드를 구현해야하는데, 두 개의 인자를 가진다. 첫번째는 ExecutionContext 이고, 두 번째는 CallHandler 인터페이스이다.
CallHandler 는 handle() 메서드를 구현해야하는데, handle() 메서드는 route handler를 작동시키게 된다. → handle() 메서드가 intercept() 에서 호출되지 않으면 route handler는 작동을 하지 않게 된다
추가로 handle() 메서드는 Observable 객체를 리턴하게 되기 때문에 route handler가 작동한 후 인터셉터는 response에 대한 조작도 가능하다.
// logging.interceptor.ts
import { Injectable, NestInterceptor, ExecutionContext, CallHandler } from '@nestjs/common';
import { Observable } from 'rxjs';
import { tap } from 'rxjs/operators';

@Injectable()
export class LoggingInterceptor implements NestInterceptor {
  intercept(context: ExecutionContext, next: CallHandler): Observable<any> {
    console.log('Before...');

    const now = Date.now();
    return next
      .handle()
      .pipe(
        tap(() => console.log(`After... ${Date.now() - now}ms`)),
      );
  }
}

// cats.controller.ts
@UseInterceptors(LoggingInterceptor)
export class CatsController {}
→ @nestjs/common package의 @UseInterceptors() 데코레이터를 이용한다.
역시 controller/class/method-scoped가 모두 가능하다
-
Response mapping
→ library0specific response strategy(
@Res를 이용하는 것)에는 이용할 수 없다.//transform.interceptor.ts import { Injectable, NestInterceptor, ExecutionContext, CallHandler } from '@nestjs/common'; import { Observable } from 'rxjs'; import { map } from 'rxjs/operators'; export interface Response<T> { data: T; } @Injectable() export class TransformInterceptor<T> implements NestInterceptor<T, Response<T>> { intercept(context: ExecutionContext, next: CallHandler): Observable<Response<T>> { return next.handle().pipe(map(data => ({ data }))); } } -
Exception mapping
→ RxJS의
catchError()연산자를 사용하여 던져진 예외를 재정의할 수도 있다.import { Injectable, NestInterceptor, ExecutionContext, BadGatewayException, CallHandler, } from '@nestjs/common'; import { Observable, throwError } from 'rxjs'; import { catchError } from 'rxjs/operators'; @Injectable() export class ErrorsInterceptor implements NestInterceptor { intercept(context: ExecutionContext, next: CallHandler): Observable<any> { return next .handle() .pipe( catchError(err => throwError(new BadGatewayException())), ); } } -
Stream overriding
→ handler를 호출하는 대신 다른 값을 리턴할 수도 있다. 한 예시가 캐시!
import { Injectable, NestInterceptor, ExecutionContext, CallHandler } from '@nestjs/common';
import { Observable, of } from 'rxjs';

@Injectable()
export class CacheInterceptor implements NestInterceptor {
  intercept(context: ExecutionContext, next: CallHandler): Observable<any> {
    const isCached = true;
    if (isCached) {
      return of([]);
    }
    return next.handle();
  }
}
Custom route decorators
An ES2916 decorator is an expression which returns a function and can take a target, name and property descriptor as arguments. You apply it by prefixing the decorator with an @ character and placing this at the very top of what you are trying to decorate. Decorators can be defined for either a class, a method or a property
-
Param Decorator
→ attach properties to the request object
// user.decorator.ts
import { createParamDecorator, ExecutionContext } from '@nestjs/common';

export const User = createParamDecorator(
  (data: unknown, ctx: ExecutionContext) => {
    const request = ctx.switchToHttp().getRequest();
    return request.user;
  },
);

// usage
@Get()
async findOne(@User() user: UserEntity) {
  console.log(user);
}
→ Passing data
import { createParamDecorator, ExecutionContext } from '@nestjs/common';

export const User = createParamDecorator(
  (data: string, ctx: ExecutionContext) => {
    const request = ctx.switchToHttp().getRequest();
    const user = request.user;

    return data ? user?.[data] : user;
  },
);
// usage
@Get()
async findOne(@User('firstName') firstName: string) {
  console.log(`Hello ${firstName}`);
}
Fundamentals
Custom Providers
Dependency Injection 는 Ioc Container(Nest 런타임)에 dependency의 instantiation을 위임히난, inversion of control 기술이다.
- catsService가 적용되는 과정
cats.service.ts파일에서@Injectable()데코레이터를 통해 Nest IoC 컨테이너가 관리할 수 있도록CatsService를 정의한다.CatsController는 constructor injection을 통해CatsService토큰에 대한 종속성을 선언한다.app.module.ts에서CatsService토큰과CatsService클래스를 연결시킨다.- controller의 dependencies들을 찾는다.
CatsServicedependency를 찾으면, token을 통해 클래스를 가져온다.- 새롭게 생성하거나, 이미 존재하는
CatsService인스턴스를 리턴한다.
원래 모듈에서 providers: [CatsService] 로 표현되는 구문은 아래 구문의 shorthand이다.
providers: [
  {
    provide: CatsService,
    useClass: CatsService,
  },
];-
Value providers:
useValue- constant value / external library를 넣거나, 실제 구현항목을 mock으로 대체할 때 유용하다.
-
Non-class-based provider tokens
-
위에서는 클래스 이름을 바로 provider token으로 이용했는데, string이나 symbol을 대신 이용할 수도 있다.
import { connection } from './connection';

@Module({
  providers: [
    {
      provide: 'CONNECTION',
      useValue: connection,
    },
  ],
})
export class AppModule {}

// cats.repository.ts
@Injectable()
export class CatsRepository {
  constructor(@Inject('CONNECTION') connection: Connection) {}
}
이용시에는
@Inject()데코레이터에 토큰 값을 넣어주면 된다.
-
-
Class providers:
useClass-
토큰과 연결할 클래스를 dynamic하게 지정할 수 있다.
const configServiceProvider = {
  provide: ConfigService,
  useClass:
    process.env.NODE_ENV === 'development'
      ? DevelopmentConfigService
      : ProductionConfigService,
};

@Module({
  providers: [configServiceProvider],
})
export class AppModule {}
-
-
Factory providers:
useFactory-
provider를 동적으로 생성할 수 있다.
-
factory function가 리턴한 값이 provider가 된다.
const connectionFactory = { provide: 'CONNECTION', useFactory: (optionsProvider: OptionsProvider) => { const options = optionsProvider.get(); return new DatabaseConnection(options); }, inject: [OptionsProvider], }; @Module({ providers: [connectionFactory], }) export class AppModule {} -
inject프로퍼티를 통해 factory function의 parameter로 전달할 provider의 리스트를 설정할 수 있다. -
inject프로퍼티의 provider 리스트와 factory function의 argument는 같은 순서로 정렬되어야한다.
-
-
Alias providers:
useExisting- 이미 존재하는 provider의 별칭을 설정할 수 있다.
-
Non-service based providers
- Provider는 어떤 값이든 될 수 있다.
-
Exporting
token이나 full provider object를 이용할 수 있다.
Dynamic module
- static module binding → all the information Nest needs to wire together the modules has already been declared in the host and consuming modules
- importing Dynamic module, consuming module can influence(customize) how providers from the host module are configured
- ex : configuration module
Injection scopes
- in Nest, almost everything is shared across incoming requests.
DEFAULT(default): 하나의 인스턴스가 전체 어플리케이션에서 공유된다.
→ 인스턴스의 생명주기는 앱의 생명주기와 동일하며, 어플리케이션이 bootstrap될 때 모든 singleton instance가 초기화된다.
REQUEST: request마다 하나의 인스턴스가 생성된다. request가 종료되면 생성된 인스턴스는 garbage-collected된다.
TRANSIENT: consumer간 절대 공유되지 않는다. 각 consumer는 새로운 instance를 갖게 된다.
import { Injectable, Scope } from '@nestjs/common';

@Injectable({ scope: Scope.REQUEST })
export class CatsService {}- 하위 계층의 scope는 상위 계층에 반영된다.(scope hierarchy)
Circular Dependency
- A circular dependency occurs when two classes depend on each other
- Nest에서는 모듈간 또는 provider간에 이러한 circular dependency가 나타날 수 있다.
Promise vs Observable
-
Promise→ handles a single event when an async operation completes or fails -
Observable→ allows to pass zero or more events where the callback is called for each event
→ cancellable(promise의 경우 success/fail callback 중 하나를 꼭 불러낸다)
→
retry(),replay()등의 함수를 가짐
Module reference
ModuleRefclass to navigate the internal list of providers and obtain a reference using injection token.- way to dynamically instantiate both static and scoped providers
@Injectable()
export class CatsService {
  constructor(private moduleRef: ModuleRef) {}
}get메서드를 통해 현재 모듈의 provider, controller, injectable 들을 가져올 수 있다. 단 transient or request-scoped provider에는 접근할 수 있다.
Lazy-loading modules
-
default → eagerly loading(앱이 시작되자마자 모듈들도 생성됨)
-
lazy loading
: 서버리스 환경같은 특수한 환경에서는 앱이 빠르게 시작되는 것이 중요하다.
필요한 module만 그때그때 로드하여 bootstrap시간을 줄인다.
Lifecycle Events
Dependency Injection
-
종속적 주입,
-
dependencies are services or ojects taht a class need to perform its function
DI is a design pattern in which a class requests dependencies from external sources rather than creating them
-
CQRS 커맨드 쿼리 책임 분리
event publish - subscribe
→ user에 대한 정보를 유지하기 위해 새로 bus를 만든 것
-
event driven
Listener
Execution context
여러 application context → (Http, Microservice, websocket...)
현재 실행 컨텍스트에 대한 정보를 얻기 위한 방법
두 가지 클래스 ArgumentsHost 와 ExecutionContext 가 있다.
-
ArgumentsHost
: 핸들러에 전달되는 인수를 검색하는 메서드를 제공한다. 인수를 검색할 적절한 context(htt, RPC...)를 선택할 수 있다.
일반적으로 인스턴스는
host매개변수로 참조된다.핸들러 인수들(http 애플리케이션의 경우
[request, response, next]배열)을 캡슐화함.const [req, res, next] = host.getArgs();이렇게 바로 접근이 가능하긴 한데, 실행 context에 따라
getArgs의 리턴값도 달라지게 되므로const ctx = host.switchToHttp(); const request = ctx.getRequest<Request>(); const response = ctx.getResponse<Response>();컨텍스트로 전환을 먼저 시키는 방법을 쓰는 것이 안전하다.
-
ExecutionContext
: extends ArgumentsHost
현재 실행 프로세스에 대한 추가 정보를 제공한다.
getHandler() 메서드를 통해 호출될 핸들러의 참조를 반환할 수 있으며, getClass() 메서드를 통해 이 특정 핸들러가 속한 Controller 클래스의 유형을 반환할 수 있다.
→ Guard 또는 Interceptor에서 핸들러 클래스와 메서드의 metadata에 접근하는데에 이용될 수 있다.
→ SetMetadata() 를 통해 라우트 핸들러 또는 클래스에 커스텀 메타데이터를 추가할 수 있있으며, 이러한 metadata에 접근하기 위해서는 Reflector 헬퍼 클래스를 사용한다.(from @nestjs/core)
@Injectable()
export class RolesGuard {
  constructor(private reflector: Reflector) {}
}
→ 메타데이터를 읽기 위해서는
const roles = this.reflector.get<string[]>('roles', context.getHandler());const internalApiGuard: InternalApiGuard = new InternalApiGuard(app.get(Reflector));
internalApiGuard.setApiKey(appConfig.serviceApiKey);
app.useGlobalGuards(internalApiGuard);로 사용한다.
→ controller와 method metadata를 한 번에 가져올 수는 없을까?
@Roles('user')
@Controller('cats')
export class CatsController {
  @Post()
  @Roles('admin')
  async create(@Body() createCatDto: CreateCatDto) {
    this.catsService.create(createCatDto);
  }
}-
getAllAndOverride()
: 만약
user를 default role로 지정하고, 메서드에 있는 것을 override하고 싶은 경우라면const roles = this.reflector.getAllAndOverride<string[]>('roles', [ context.getHandler(), context.getClass(), ]);result :
roles = ['admin'] -
getAllAndMerge
const roles = this.reflector.getAllAndMerge<string[]>('roles', [
  context.getHandler(),
  context.getClass(),
]);
result:
roles = ['user', 'admin']