nest 공식 강의를 참고하였으며,
소스코드는 https://github.com/jujube0/nest-study 에서 확인 가능하다.
시작하기
새로운 프로젝트 만들기 : nest new {project-name}
모듈 생성하기 : 터미널에서 nest g module user
- 같은 방식으로 cli를 통해 controller(
nest g controller user), service(nest g service user)도 만들 수 있다.
또는
nest g resource [name]를 이용하면 기본적인 CRUD가 존재하는 폴더가 생성된다.
$npm install --save @types/express - type definition for express
Controllers
- receive specific requests for the application
- routing
- classes and decorators are used
Routing
import { Controller, Get } from '@nestjs/common';

@Controller('user')
export class UserController {
  @Get()
  findAll(): string {
    return 'returns all users';
  }
}@Controller('user'):/user의 path prefix를 갖도록 한다.@Get(): HTTP request method decorator,
string을 argument로 넣어/user뒤에 올 route path를 추가할 수 있다.
ex :@Get('profile')을 접근하기 위해서는GET /user/profile로 접근한다.
Manipulating Responses
built-in method를 통해 object나 array를 리턴하면 JSON으로 바꾸어 보내준다. status code는 200(POST는 201)이 자동으로 설정된다.@HttpCode(...)데코레이터를 이용하여 변경할 수 있다.
Library-specific
express 등의 라이브러리를 이용할 수 있다. method handler의 input으로@Res데코레이터를 넣어줄 수 있다(e.g.,findAll(@Res() response)).
전송은response.status(200).send()
Request object
handler signature에 @Req()를 추가한다.
import { Controller, Get, Req } from '@nestjs/common';
import { Request } from 'express';

@Controller('user')
export class UserController {
  @Get()
  findAll(@Req() request: Request): string {
    console.log(request);
    return 'returns all users';
  }
}
@Get()
findAll(@Query() paginationQuery) {
const { limit, offset } = paginationQuery;
return `This action returns all coffees Limit: ${limit}, offset: ${offset}`;
}request object는 request query string, parameter, HTTP headers, body property를 가진다.
@Query(key?: string), @Param(key?: string), @Body(key?: string) 등의 decorator로 property에 직접 접근도 가능하다.
HTTP Methods
POST를 사용하는 방법은 다음과 같다.
import { Controller, Get, Post, Req } from '@nestjs/common';
import { Request } from 'express';

@Controller('user')
export class UserController {
  ...

  @Post()
  create(): string {
    return 'This action adds a new user';
  }
}- 같은 방식으로
@Get(),@Post(),@Put(), 등의 HTTP Method를 이용할 수 있다. @All()은 모든 것들을 다루는 endpoint를 생성한다.
Status code
@Post()
@HttpCode(204)
create() {
  return 'This action adds a new user';
}@nestjs/commonpackage- 만약 같은 request에 대해 http code가 다르다면
@Res를 이용한 library-specific method를 이용하자.
Route parameters
@Get(':id')
findOne(@Param() params): string {
  console.log(params.id);
  return `This action returns a #${params.id} user`;
}- 또는 직접 route parameter에 접근할 수도 있다.
@Get('profile/:id')
findProfile(@Param('id') id: string): string {
  console.log(id);
  return `This action returns a #${id} profile`;
}
Asynchronicity
@Get()
async findAll(): Promise<any[]> {
  return [];
}
Request payloads
@Body() 데코레이터를 이용하여 POST route가 클라이언트가 보낸 request body를 읽을 수 있도록 만들어보자.
-
일단 DTO(Data Transfer Object)를 만들어줘야 한다. 클래스나 인터페이스를 이용하여 만들 수 있는데, 클래스가 선호된다(클래스는 런타임에도 존재하지만 인터페이스는 제거됨).
-
cli
nest generate class coffees/dto/create-coffee.dto --no-spec
export class CreatePostDto {
  title: string;
  content: string;
}@Post()
create(@Body() createPostDto: CreatePostDto): string {
return 'This action adds a new post';
}Library-specific approach
import { Body, Controller, Get, HttpStatus, Post, Res } from '@nestjs/common';
import { CreatePostDto } from './create-post.dto';
import { Response } from 'express';

@Controller('post')
export class PostController {
  // library specific approach
  @Get()
  findAll(@Res() res: Response) {
    res.status(HttpStatus.CREATED).send();
  }

  @Post()
  create(@Body() createPostDto: CreatePostDto, @Res() res: Response) {
    res.status(HttpStatus.OK).json(createPostDto);
  }
}- Library-specific approach 단점?
- 코드가 플랫폼에 의존성을 띄게 됨
- 테스트가 어려워짐(response object를 만들어줘야함)
- Nest standard response handling(
@HttpCode(),@Header(), interceptors)을 이용할 수 없음 → 이를 고치기 위해서는@Res({ passthrough: true})를 추가해준다.
Providers
-> it can inject dependency
Error
nestjs/common을 이용하자.
const coffee =  this.coffees.find(item => item.id === +id);
if (!coffee) {
    throw new HttpException(`Coffee #${id} not found`, HttpStatus.NOT_FOUND);
}
return coffee;- 또는
if (!coffee) {
    throw new NotFoundException(`Coffee #${id} not found`);
}
Validation Pipe
async function bootstrap() {
  const app = await NestFactory.create(AppModule);
  app.useGlobalPipes(new ValidationPipe());
  await app.listen(3000);
}
bootstrap() 에 app.useGlobalPipe() 를 추가해준다.
npm i class-validator class-transformer
import { IsString } from "class-validator";

export class CreateCoffeeDto {
    @IsString()
    readonly name: string;

    @IsString()
    readonly brand: string;

    @IsString({ each: true })
    readonly flavors: string[];
}
이제 정상적인 Request body를 보내지 않으면 다음과 같은 json을 리턴한다.
{
  "statusCode": 400,
  "message": [
    "name must be a string",
    "each value in flavors must be a string"
  ],
  "error": "Bad Request"
}
npm i @nestjs/mapped-types
import { PartialType } from "@nestjs/mapped-types";
import { CreateCoffeeDto } from "./create-coffee.dto";

export class UpdateCoffeeDto extends PartialType(CreateCoffeeDto){ }
Docker
- docker-compose.yml
version: "3"
services:
  db:
    image:  postgres
    restart: always
    ports:
      - "5432:5432"
    environment:
       POSTGRES_PASSWORD: pass123
// Start containers in detached / background mode
docker-compose up -d
// Stop containers
docker-compose down
Transaction
event.entity.ts
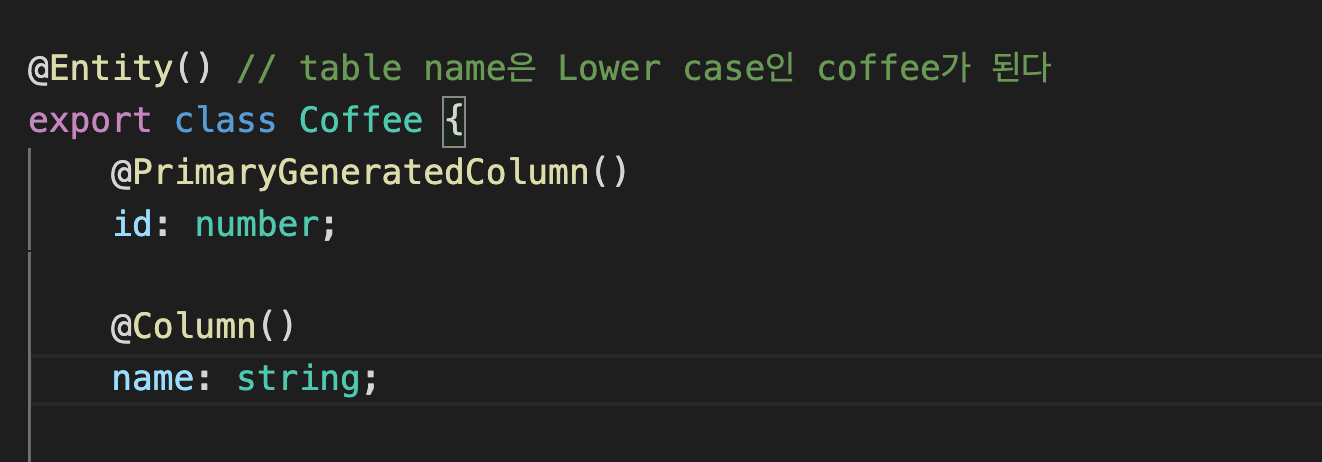
import { Column, Entity, PrimaryGeneratedColumn } from "typeorm";

@Entity()
export class Event {
    @PrimaryGeneratedColumn()
    id: number;

    @Column()
    type: string;

    @Column()
    name: string;

    @Column('json')
    payload: Record<string, any>;
}
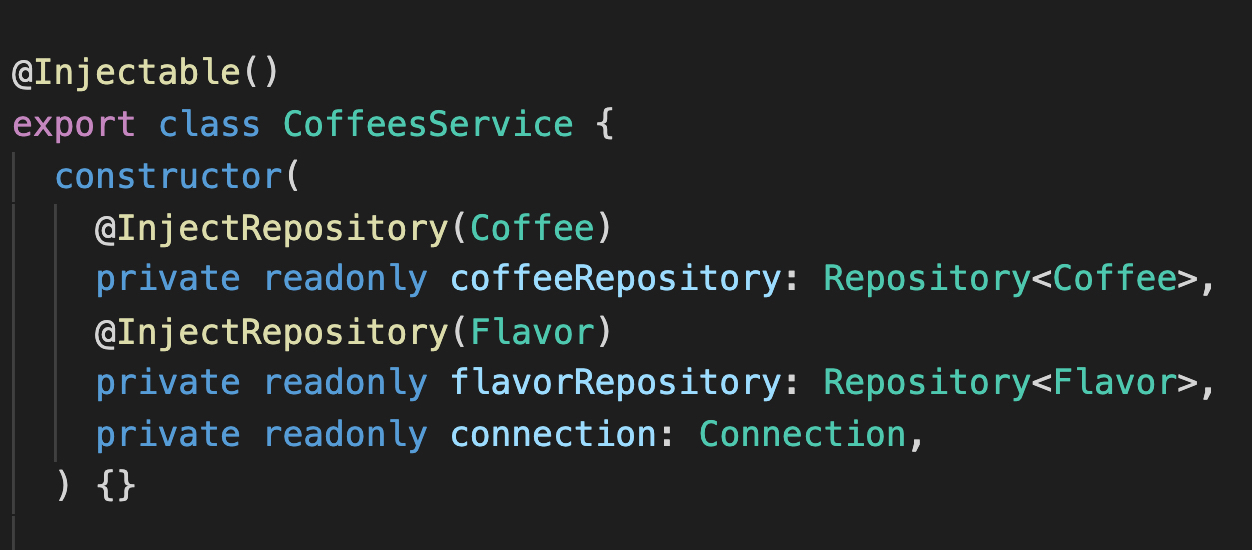
- coffees.service.ts
@Injectable()
export class CoffeesService {
  constructor(
    ...
    private readonly connection: Connection,
  ) {}

  ...
  async recommendCoffee(coffee: Coffee) {
    const queryRunner = this.connection.createQueryRunner();

    await queryRunner.connect();
    await queryRunner.startTransaction();
    try {
      coffee.recommendations++;

      const recommendEvent = new Event();
      recommendEvent.name = 'recommend_coffee';
      recommendEvent.type = 'coffee';
      recommendEvent.payload = { coffeeId: coffee.id };

      await queryRunner.manager.save(coffee);
      await queryRunner.manager.save(recommendEvent);

      await queryRunner.commitTransaction();
    } catch (err) {
      await queryRunner.rollbackTransaction();
    } finally {
      await queryRunner.release();
    }
  }
}
Migration
ormconfig.js 파일 만든 후,
shell에서
npx typeorm migration:create -n CoffeeRefactor
-> src/migration 에 migration file을 만들어줌
coffee entity의
name칼럼을title로 바꾸는 상황을 가정해보자.
단순히 name을 title로 바꿔버린다면, name에 있던 데이터들은 모두 날아가버릴 것이다.
migrations file을 바꿔준다.
import {MigrationInterface, QueryRunner} from "typeorm";

export class CoffeeRefactor1626325978666 implements MigrationInterface {

    public async up(queryRunner: QueryRunner): Promise<void> { // what needs to be changed and how
        await queryRunner.query(
            `ALTER TABLE "coffee" RENAME COLUMN "name" TO "title"`
        )
    }

    public async down(queryRunner: QueryRunner): Promise<void> { // undo or roll back
        await queryRunner.query(
            `ALTER TABLE "coffee" RENAME COLUMN "title" TO "name"`
        )
    }

}
num run build
npx typeorm migration:run
(npx typeorm migration:revert)
typeorm은 db의 entity와 현재 entity 파일을 비교하여 직접 migration 파일을 만들게 할 수도 있다.
npm run build
npx typeorm migration:generate -n SchemaSync
npx typeorm migration:run
Dependency Injection
- technique where we delegated instantiation of dependency, to an "inversion of control"(IpC) container (Nestjs runtime system)
CoffeeService를 참조(dependent)하는 CoffeeRatingService를 만들어보자
- coffees.module.ts에서
CoffeesServiceexport
@Module({
    ...
    exports: [CoffeesService],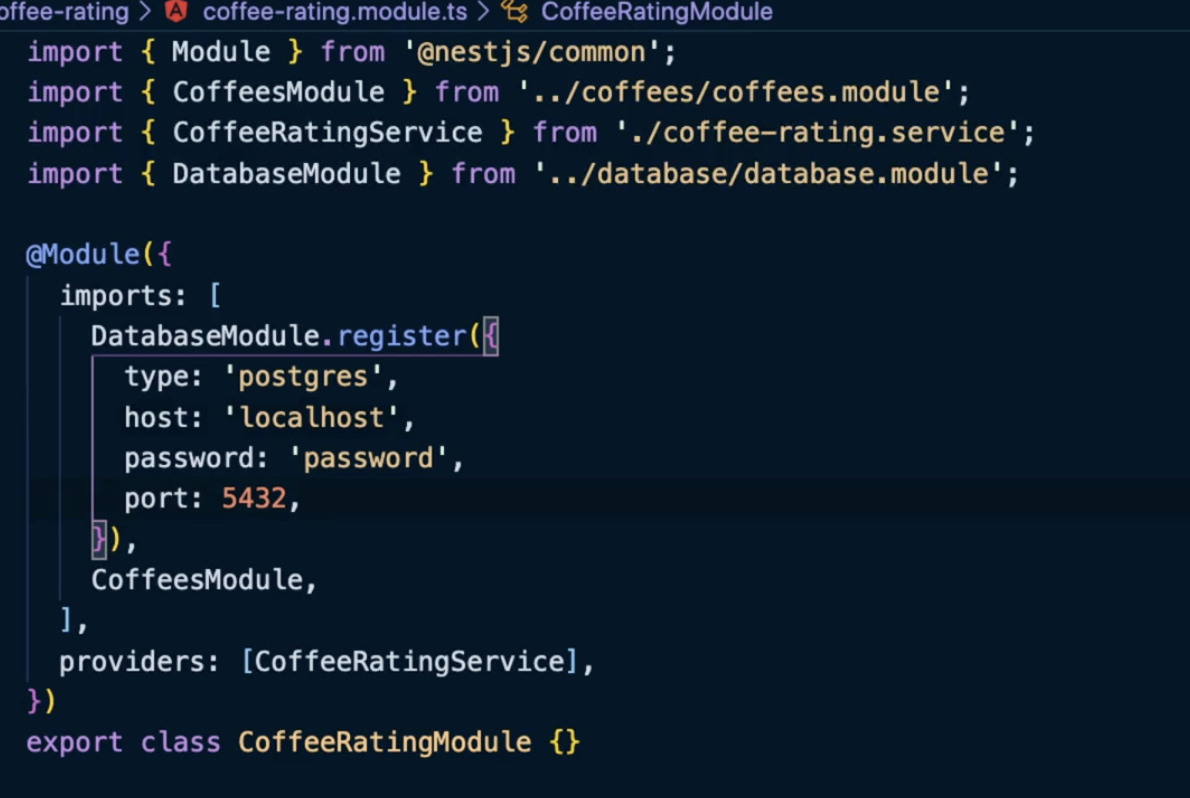
})- coffee-rating.module.ts에서
CoffeesModuleimport
import { Module } from '@nestjs/common';
import { CoffeesModule } from 'src/coffees/coffees.module';
import { CoffeeRatingService } from './coffee-rating.service';

@Module({
  imports: [CoffeesModule],
  providers: [CoffeeRatingService]
})
export class CoffeeRatingModule {}- coffee-rating.service.ts에서
CoffeesServiceimport
import { Injectable } from '@nestjs/common';
import { CoffeesService } from 'src/coffees/coffees.service';

@Injectable()
export class CoffeeRatingService {
    constructor(private readonly coffeeService: CoffeesService) {}
}
모든 module은 provider들을 encapsulate한다 → 다른 module에서 이를 이용하려면 exported 에 직접 명시해주어 API에 포함시켜줘야한다.
Custom Providers
좀 더 복잡한 provider를 이용할 때를 생각해보자.
- Creating a custom instance of our provider instead of having Nest instatiate that class for us
- want to reuse an existing class in a second dependency
- want to overwrite a class with a mock version for testing
- want to use a strategy pattern in which we can provide an abstract class
Value based provider
@Module({
    imports: [TypeOrmModule.forFeature([Coffee, Flavor, Event])],
    controllers: [CoffeesController],
    providers: [{ provide : CoffeesService, useValue: CoffeesService}],
    exports: [CoffeesService],
})
실제 provider 구조는 다음과 같다. 우리가 쓰는 것은 shorthand
그래서
class MockCoffeeService {}

@Module({
    imports: [TypeOrmModule.forFeature([Coffee, Flavor, Event])],
    controllers: [CoffeesController],
    providers: [{ provide : CoffeesService, useValue: new MockCoffeeService()}],
    exports: [CoffeesService],
})
export class CoffeesModule {}
이렇게 이용할 수 있다는 말.
Non-class-based Provider Token
- coffees.module.ts
@Module({
    ...
    providers: [CoffeesService, { provide: 'COFFEE_BRANDS', useValue: ['buddy brew', 'nescafe']}],
})
이용할 때에는
@Injectable()
export class CoffeesService {
  constructor(
    ...
    @Inject('COFFEE_BRANDS') coffeeBrands: string[],
  ) {}
@Inject() 데코레이터 안에 TOKEN을 넣으면 된다.
typo 오류 등을 방지하기 위해서 TOKEN들을 다른 파일에 저장해 놓는 것이 좋다.
Class Provider
- "useClass" syntax
 providers: [
        CoffeesService,
        {
            provide: ConfigService,
            useClass: process.env.NODE_ENV === 'development' ? DevelopmentConfigService: ProductionConfigService
        }
    ],
Factory Provider
- "useFactory" syntax
- can inject other providers needed to compute the returning result
@Module({
    imports: [TypeOrmModule.forFeature([Coffee, Flavor, Event])],
    controllers: [CoffeesController],
    providers: [
        CoffeesService,
        CoffeeBrandsFactory,
        {
            provide: COFFEE_BRANDS,
            useFactory: (brandsFactory: CoffeeBrandsFactory) => brandsFactory.create(),
            inject: [CoffeeBrandsFactory]
        }
    ],
    exports: [CoffeesService],
})
Leverage Async Provider
// Asynchronous "useFactory" (async provider example)
{
  provide: 'COFFEE_BRANDS',
  // Note "async" here, and Promise/Async event inside the Factory function
  // Could be a database connection / API call / etc
  // In our case we're just "mocking" this type of event with a Promise
  useFactory: async (connection: Connection): Promise<string[]> => {
    // const coffeeBrands = await connection.query('SELECT * ...');
    const coffeeBrands = await Promise.resolve(['buddy brew', 'nescafe'])
    return coffeeBrands;
  },
  inject: [Connection],
},
해당 provider에 의존하는 클래스를 instantiate하기 전에 위 promise를 먼저 resolve하게 된다.
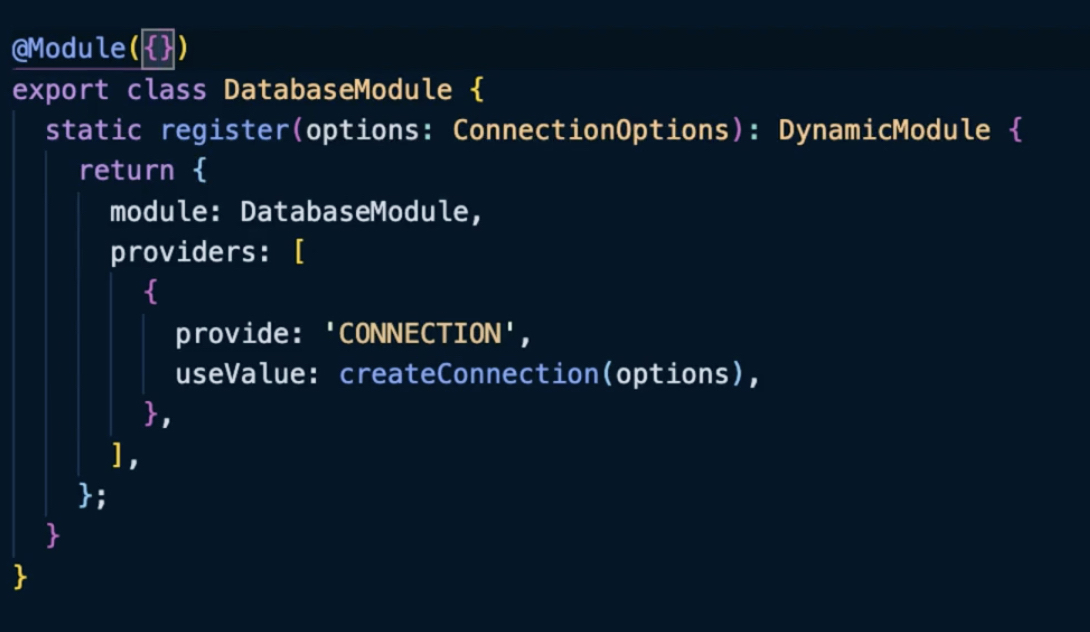
Create a Dynamic Module
위에서 다룬 모듈들은 static module이었다.
static modules can't have their providers be configured by a module that is consuming it
// Generate a DatabaseModule
nest g mo database

// Initial attempt at creating "CONNECTION" provider, and utilizing useValue for values */
{
  provide: 'CONNECTION',
  useValue: createConnection({
    type: 'postgres',
    host: 'localhost',
    port: 5432
  }),
}

// Creating static register() method on DatabaseModule
export class DatabaseModule {
  static register(options: ConnectionOptions): DynamicModule {  }
}

// Improved Dynamic Module way of creating CONNECTION provider
export class DatabaseModule {
  static register(options: ConnectionOptions): DynamicModule {
    return {
      module: DatabaseModule,
      providers: [
        {
          provide: 'CONNECTION', // 👈
          useValue: createConnection(options),
        }
      ]
    }
  }
}

// Utilizing the dynamic DatabaseModule in another Modules imports: []
imports: [
  DatabaseModule.register({ // 👈 passing in dynamic values
    type: 'postgres',
    host: 'localhost',
    password: 'password',
  })
]
Control Providers Scope
- Node는 싱글 스레드임
- Nest에서 모든 provider는 기본적으로 singleton임
@Injectable({ scope: Scope.DEFAULT })
export class CoffeesService {
}- Application이
bootstrap()되면,모든 singleton provider가 instantiate됨. - provider가 request-based lifetime을 갖기를 원하면?
두가지 scope option이 있다.
1. Transient
- NOT shared across consumers
@Injectable({ scope: Scope.TRANSIENT })
export class CoffeesService {- coffeeService를
TRANSIENT로 바꾸면, 해당 provider를 inject하는 컨수머들은 모두 새로운 인스턴스를 갖게된다.
-> 실제로 constructor body에 console을 찍어보면 확인 가능함. - custom provider에서도 scope option을 추가할 수 있다.
- Request-Scoped
- creates a new instance of the provider exclusively for EACH incoming request.
- automately Garbage collected after the request has completed
npm run start를 해도 instance 가 만들어지지 않는다.- REQUEST 를 하나 보낼 떄마다 하나의 instantiated console이 뜬다.
- 근데, service를 이용하는 controller는 아직 싱글톤이자나!!!
-> Injection chain의 bubble-up이 일어난다. Request-scoped에 의존하는 controller 클래스도 Request-scoped가 된다는 것 - also can inject the original Request Object {}
// Injecting the ORIGINAL Request object
@Injectable({ scope: Scope.REQUEST })
export class CoffeesService {
  constructor(@Inject(REQUEST) private request: Request) {} // 👈
}- performance 저하 -> 왠만하면 singleton쓰자.
Introducing the Config Module
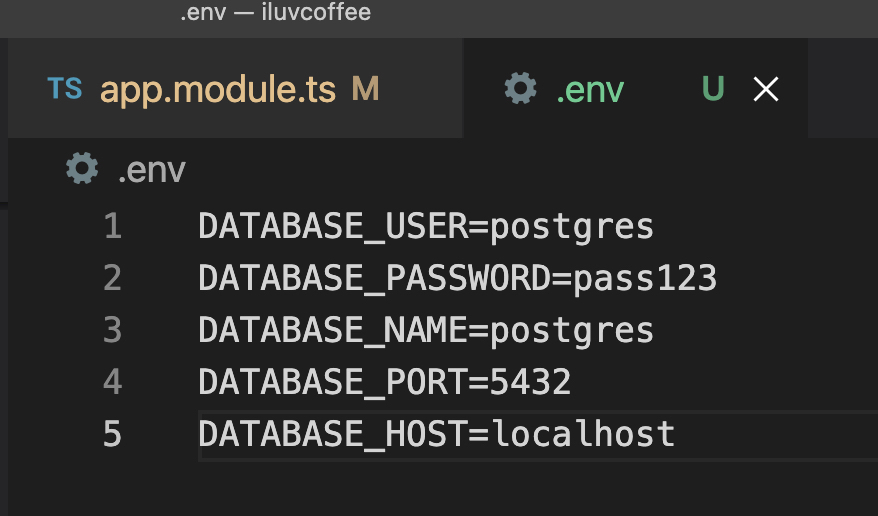
npm i @nestjs/config- root dir에
.env파일을 만들어주자. - env 파일은 key-value로 민감한 정보들 / config 정보들을 저장하게 된다.
- 이런식으로 이용할 수 있다. default로 value는 string으로 가져오게 된다.
TypeOrmModule.forRoot({
      type: 'postgres',
      host: process.env.DATABASE_HOST,
      port: +process.env.DATABASE_PORT,
      username: process.env.DATABASE_USER,
      password: process.env.DATABASE_PASSWORD,
      database: process.env.DATABASE_NAME,
      autoLoadEntities: true,
      synchronize: true,
    }),
Custom Environment File Path
- 기본적으로 ConfigModule은 root 디렉토리의
.env파일을 찾는다. 이를 바꿔주려면?
ConfigModule.forRoot({
  envFilePath: '.environment’,
});- string array를 넘겨줄 수도 있다.
- production 환경에서 추후에 .env파일을 이용하지 않게 된 경우
ignoreEnvFile: true를 옵션으로 넣어주자.
Schema Validation
- env 변수가 존재하지 않거나, 룰을 따르지 않을 경우의 예외처리
- joi package를 이용한다. object schema를 정의할 수 있다.
// Install neccessary dependencies
$ npm install @hapi/joi
$ npm install --save-dev @types/hapi__joi

// Use Joi validation
ConfigModule.forRoot({
  validationSchema: Joi.object({
    DATABASE_HOST: Joi.required(),
    DATABASE_PORT: Joi.number().default(5432),
  }),
}),- by default, 모든 스키마 키는 optional이다.
Joi.required()를 이용하여DATABASE_HOST를 필수로 만들었다.Joi.number로 number로 parsable한 조건을 추가하고, 디폴트 값을 5432로 설정했다.
Config Service
- 모든 config value에 대해
get() - 이용하기 위해서는 해당 모듈에 import 해줘야한다.
@Module({
    imports: [TypeOrmModule.forFeature([Coffee, Flavor, Event]), ConfigModule],
    ...
})
/* Utilize ConfigService */
import { ConfigService } from '@nestjs/config';
constructor(
private readonly configService: ConfigService, // 👈
) {}
/* Accessing process.env variables from ConfigService */
const databaseHost = this.configService.get<string>('DATABASE_HOST');
console.log(databaseHost);- get에 default value를 second param으로 넣어줄 수 있다.
Custom Configuration Files
- group related settings
- 하나의 파일에 한 그룹을 관리해보도록 하자 .
- /src/config에 app.config.ts 파일 생성
/* /src/config/app.config.ts File */
export default () => ({
  environment: process.env.NODE_ENV || 'development',
  database: {
    host: process.env.DATABASE_HOST,
    port: parseInt(process.env.DATABASE_PORT, 10) || 5432
  }
});
/* Setting up "appConfig" within our Application */
import appConfig from './config/app.config';

@Module({
  imports: [
    ConfigModule.forRoot({
      load: [appConfig], // 👈
    }),
  ],
})
export class AppModule {}

// ---------

/**
 * Grabbing this nested property within our App
 * via "dot notation" (a.b)
 */
const databaseHost = this.configService.get('database.host', 'localhost');- default value를 설정하거나, parsing을 할 수도 있다.
- 이용하기 위해서는 app.module에
load옵션을 추가해준다. - configService.get에 들어가는 param은 path가 된다.
Configuration Namespaces and Partial Registration
- when we have very complex project structure
/* /src/coffees/coffees.config.ts File */
export default registerAs('coffees', () => ({ // 👈
  foo: 'bar', // 👈
}));

/* Partial Registration of coffees namespaced configuration */
@Module({
  imports: [ConfigModule.forFeature(coffeesConfig)], // 👈
})
export class CoffeesModule {}

// ---------
// ⚠️ sub optimal ways of retrieving Config ⚠️

/* Grab coffees config within App */
const coffeesConfig = this.configService.get('coffees');
console.log(coffeesConfig);

/* Grab nested property within coffees config */
const foo = this.configService.get('coffees.foo');
console.log(foo);

// ---------
// 💡 Optimal / Best-practice 💡

constructor(
  @Inject(coffeesConfig.KEY)
  private coffeesConfiguration: ConfigType<typeof coffeesConfig>,
) {
  // Now strongly typed, and able to access properties via:
  console.log(coffeesConfiguration.foo);
}
-> 실제 도메인과 가까운 곳에 config파일을 위치시킬 수 있다.
- type inference가 가능하고, key로 직접 접근하기 때문에 typo 오류 등의 자잘한 오류를 방지할 수 있다.
Asynchronously Configure Dynamic Modules
@Module({
  imports: [
    ConfigModule.forRoot({
      load: [appConfig]
    }),
    CoffeesModule,
    TypeOrmModule.forRoot({
      type: 'postgres',
      host: process.env.DATABASE_HOST,
      port: +process.env.DATABASE_PORT,
      username: process.env.DATABASE_USER,
      password: process.env.DATABASE_PASSWORD,
      database: process.env.DATABASE_NAME,
      autoLoadEntities: true,
      synchronize: true,
    }),
    CoffeeRatingModule,
],- 위의 app.module.ts 파일에서 ConfigModule과 TypeormModule을 import해주는 순서를 바꿔주면 에러가 난다. → process.env파일에서 key 값을 가져올 수 없기 때문.
- 이를 해결하기 위해서 비동기적으로 configuration option을 가져오는
forRootAsync()method를 이용할 수 있다.
/* forRootAsync() */
TypeOrmModule.forRootAsync({ // 👈
  useFactory: () => ({
    type: 'postgres',
    host: process.env.DATABASE_HOST,
    port: +process.env.DATABASE_PORT,
    username: process.env.DATABASE_USER,
    password: process.env.DATABASE_PASSWORD,
    database: process.env.DATABASE_NAME,
    autoLoadEntities: true,
    synchronize: true,
  }),
}),
Other Building Blocks
- Exception filters
handling and processing unhandled exceptions - Pipes
handle transformation(transform input data to the desired output) and validstion(invalidate input data) - Guard
determine whether a given Request meets certain conditions, like authentication, authorization, roles, ACLs... - @ Interceptors
bind extra logic before or after the method call
transform the result returned from a method
extend basic method behavior
override a method
Understanding Binding Techniques
- GLOBAL-scoped
- CONTROLLER-scoped
- METHOD-scoped
- PARAM-scoped(Pipes only)
-> useful when the validation logic concern ONLY ONE specific parameter
UsePipes

Catch Exceptions with Filters
- NESTJS의 built-in exception layer
- 우리가 처리하지 않은 예외는 자동으로 위의 레이어로 이동한다.
// Generate Filter with Nest CLI
nest g filter common/filters/http-exception

// Catch decorator
@Catch(HttpException)

/* HttpExceptionFilter final code */
import { Catch, HttpException, ExceptionFilter, ArgumentsHost } from "@nestjs/common";
import { Response } from 'express';

@Catch(HttpException)
export class HttpExceptionFilter<T extends HttpException> implements ExceptionFilter {
  catch(exception: T, host: ArgumentsHost) {
    const ctx = host.switchToHttp();
    const response = ctx.getResponse<Response>();

    const status = exception.getStatus();
    const exceptionResponse = exception.getResponse();
    const error =
      typeof response === 'string'
        ? { message: exceptionResponse }
        : (exceptionResponse as object);

    response.status(status).json({
      ...error,
      timestamp: new Date().toISOString(),
    });
  }
}- HttpExeption이 일어날 때마다 하고 싶은 행동을 추가할 수 있다.
Protect Routes With Guards
-
request에 permission/roles/ACLs 등이 필요할 때
-
AUthentication / Authorization
-
authorization Header에 API_KEY가 존재하는지 확인하고,
-
접근한 route가 public인지 확인해보자
// Generate ApiKeyGuard with Nest CLI
nest g guard common/guards/api-key

// Apply ApiKeyGuard globally
app.useGlobalGuards(new ApiKeyGuard());

/* ApiKeyGuard code */
import { CanActivate, ExecutionContext, Injectable } from '@nestjs/common';
import { Request } from 'express';
import { Observable } from 'rxjs';

@Injectable()
export class ApiKeyGuard implements CanActivate {
  canActivate(
    context: ExecutionContext,
  ): boolean | Promise<boolean> | Observable<boolean> {
    const request = context.switchToHttp().getRequest<Request>();
    const authHeader = request.header('Authorization');
    return authHeader === process.env.API_KEY;
  }
}canActivate: 현 request가 허용되었는지의 여부를 boolean으로 리턴한다.- Promise를 추가할 수도 있다.
- false이면 403 forbidde을 리턴한다.
Using Metadata to Build Generic Guards or Interceptors
- create custom Metadata by
@SetMetadata('key', 'value'); - value에는 type이 들어간다.
/* public.decorator.ts FINAL CODE */
import { SetMetadata } from '@nestjs/common';

export const IS_PUBLIC_KEY = 'isPublic';

export const Public = () => SetMetadata(IS_PUBLIC_KEY, true);

/* ApiKeyGuard FINAL CODE */
import { CanActivate, ExecutionContext, Injectable } from '@nestjs/common';
import { ConfigService } from '@nestjs/config';
import { Reflector } from '@nestjs/core';
import { Request } from 'express';
import { Observable } from 'rxjs';
import { IS_PUBLIC_KEY } from '../decorators/public.decorator';

@Injectable()
export class ApiKeyGuard implements CanActivate {
  constructor(
    private readonly reflector: Reflector,
    private readonly configService: ConfigService,
  ) {}

  canActivate(
    context: ExecutionContext,
  ): boolean | Promise<boolean> | Observable<boolean> {
    const isPublic = this.reflector.get(IS_PUBLIC_KEY, context.getHandler());
    if (isPublic) {
      return true;
    }
    const request = context.switchToHttp().getRequest<Request>();
    const authHeader = request.header('Authorization');
    return authHeader === this.configService.get('API_KEY');
  }
}- Reflector : allow to retrieve metadata within a specific context
- global guards that depend on other classes must be registered within a @Module context
useGlobalGuard는 다른 모듈에 의존성을 갖지 않을 때만 이용이 가능하다.- public 인 문서에는 API_KEY 없이 접근 가능해졌다!!(왕씬끼)
Add Pointcuts with Interceptors
-
interceptor : 코드를 수정하지 않으면서 기능을 추가할 수 있다
-
- method 실행 전/ 후로 로직을 추가하거나,
-
- 결과를 transform
-
- exeption transform
-
- override method
-
- extend basic method behavior
-
모든 response에 결과가 data property로 들어가길 원한다고 가정해보자.
-
rxjs : alternative to Promise or callbacks
// Generate WrapResponseInterceptor with Nest CLI
nest g interceptor common/interceptors/wrap-response

/* WrapResponseInterceptor FINAL CODE */
import {
  CallHandler,
  ExecutionContext,
  Injectable,
  NestInterceptor,
} from '@nestjs/common';
import { Observable } from 'rxjs';
import { map } from 'rxjs/operators';

@Injectable()
export class WrapResponseInterceptor implements NestInterceptor {
  intercept(context: ExecutionContext, next: CallHandler): Observable<any> {
    console.log('Before...');

    return next.handle().pipe(map(data => ({ data })));
  }
}

// Apply Interceptor globally in main.ts file
app.useGlobalInterceptors(new WrapResponseInterceptor());
Handling Timeouts with Interceptors
- another technique with interceptor
/* Generate TimeoutInterceptor with Nest CLI */
nest g interceptor common/interceptors/timeout

/* Apply TimeoutInterceptor globally in main.ts file */

app.useGlobalInterceptors(
  new WrapResponseInterceptor(),
  new TimeoutInterceptor(), // 👈
);

/* Add manual timeout to force timeout interceptor to work */
await new Promise(resolve => setTimeout(resolve, 5000));

/* TimeoutInterceptor FINAL CODE */
import {
  CallHandler,
  ExecutionContext,
  Injectable,
  NestInterceptor,
  RequestTimeoutException,
} from '@nestjs/common';
import { Observable, throwError, TimeoutError } from 'rxjs';
import { catchError, timeout } from 'rxjs/operators';

@Injectable()
export class TimeoutInterceptor implements NestInterceptor {
  intercept(context: ExecutionContext, next: CallHandler): Observable<any> {
    return next.handle().pipe(
      timeout(3000),
      catchError(err => {
        if (err instanceof TimeoutError) {
          return throwError(new RequestTimeoutException());
        }
        return throwError(err);
      }),
    );
  }
}
Creating Custom Pipes
Pipes have two typical use cases:
Transformation: where we transform input data to the desired output
& validation: where we evaluate input data and if valid, simply pass it through unchanged. If the data is NOT valid - we want to throw an exception.
In both cases, pipes operate on the arguments being processed by a controller’s route handler.
NestJS triggers a pipe just before a method is invoked.
Pipes also receive the arguments meant to be passed on to the method. Any transformation or validation operation takes place at this time - afterwards the route handler is invoked with any (potentially) transformed arguments.
- Imcoming string을 Int로 바꾸는 파이프를 만들어보자
// Generate ParseIntPipe with Nest CLI
nest g pipe common/pipes/parse-int

/* ParseIntPipe FINAL CODE */
import {
  ArgumentMetadata,
  BadRequestException,
  Injectable,
  PipeTransform,
} from '@nestjs/common';

@Injectable()
export class ParseIntPipe implements PipeTransform {
  transform(value: string, metadata: ArgumentMetadata) {
    const val = parseInt(value, 10);
    if (isNaN(val)) {
      throw new BadRequestException(
        `Validation failed. "${val}" is not an integer.`,
      );
    }
    return val;
  }
}- value : input value
- metadata: metadata of currently processed value
Add Request Logging with Middleware
Middleware functions have access to the request and response objects, and are not specifically tied to any method, but rather to a specified route PATH.
Middleware functions can perform the following tasks:
- executing code
- making changes to the request and the response objects.
- ending the request-response cycle.
- Or even calling the next middleware function in the call stack.
When working with middleware, if the current middleware function does not END the request-response cycle, it must call the next() method, which passes control to the next middleware function.
Otherwise, the request will be left hanging - and never complete.
- could be either function or class
class : stateless, can not inject dependency
// Generate LoggingMiddleware with Nest CLI
nest g middleware common/middleware/logging

// Apply LoggingMiddleware in our AppModule
consumer
  .apply(LoggingMiddleware)
  .forRoutes(‘*’);

/* LoggingMiddleware FINAL CODE */
import {
  Injectable,
  NestMiddleware,
} from '@nestjs/common';

@Injectable()
export class LoggingMiddleware implements NestMiddleware {
  use(req: any, res: any, next: () => void) {
    console.time('Request-response time');
    console.log('Hi from middleware!');

    res.on('finish', () => console.timeEnd('Request-response time'));
    next();
  }
}- common.module.ts
@Module({
  imports: [ConfigModule],
  providers: [{ provide: APP_GUARD, useClass: ApiKeyGuard }]
})
export class CommonModule implements NestModule {
  configure(consumer: MiddlewareConsumer) {
    consumer.apply(LoggingMiddleware).forRoutes('*');
    //OR
    //     consumer.apply(LoggingMiddleware).forRoutes({ path: 'coffees', method: RequestMethod.GET});

  }
}
Create Custom Param Decorators
// Using the Protocol decorator
@Protocol(/* optional defaultValue */)

/* @Protocal() decorator FINAL CODE */
import {
  createParamDecorator,
  ExecutionContext,
} from '@nestjs/common';

export const Protocol = createParamDecorator(
  (data: unknown, ctx: ExecutionContext) => {
    const request = ctx.switchToHttp().getRequest();
    return request.protocol;
  },
);@Protocol(data)에 넣은 data는 createParamDecorator의 첫번째 인자가 된다.
Generating OpenAPI Specification
Swagger Module
-> use the OpenAPI specification. The OpenAPI specification is a language-agnostic definition format used to describe RESTful APIs.
An OpenAPI document allows us to describe our entire API, including:
- Available operations (endpoints)
- Operation parameters: Input and output for each operation
- Authentication methods
- Contact information, license, terms of use and other information.
/**
 * Installing @nestjs/swagger
 * & Swagger UI for Express.js (which our application uses)
 * 💡 Note: If your application is using Fastiy, install `fastify-swagger` instead
 */
npm install --save @nestjs/swagger swagger-ui-express

// Setting up Swagger document main.ts bootstrap()
const options = new DocumentBuilder()
  .setTitle('Iluvcoffee')
  .setDescription('Coffee application')
  .setVersion('1.0')
  .build();

const document = SwaggerModule.createDocument(app, options);

SwaggerModule.setup('api', app, document);

/**
 * With the App running (npm run start:dev if not)
 * To view the Swagger UI go to:
 * http://localhost:3000/api
 */
Testing
// For unit tests
npm run test

// For unit tests + collecting testing coverage
npm run test:cov

// For e2e tests
npm run test:e2e
*.spec.ts
import { Test, TestingModule } from '@nestjs/testing';
import { CoffeesController } from './coffees.controller';

describe('CoffeesController', () => {
  let controller: CoffeesController;

  beforeEach(async () => {
    const module: TestingModule = await Test.createTestingModule({
      controllers: [CoffeesController],
    }).compile();

    controller = module.get<CoffeesController>(CoffeesController);
  });

  it('should be defined', () => {
    expect(controller).toBeDefined();
  });
});describe(): blockbeforeEach(): test 전에 할 행동
Unit Tests
/*
  coffees-service.spec.ts - FINAL CODE
*/
import { Test, TestingModule } from '@nestjs/testing';
import { CoffeesService } from './coffees.service';
import { Connection, Repository } from 'typeorm';
import { getRepositoryToken } from '@nestjs/typeorm';
import { Flavor } from './entities/flavor.entity';
import { Coffee } from './entities/coffee.entity';
import { NotFoundException } from '@nestjs/common';

type MockRepository<T = any> = Partial<Record<keyof Repository<T>, jest.Mock>>;
const createMockRepository = <T = any>(): MockRepository<T> => ({
  findOne: jest.fn(),
  create: jest.fn(),
});

describe('CoffeesService', () => {
  let service: CoffeesService;
  let coffeeRepository: MockRepository;

  beforeEach(async () => {
    const module: TestingModule = await Test.createTestingModule({
      providers: [
        CoffeesService,
        { provide: Connection, useValue: {} },
        {
          provide: getRepositoryToken(Flavor),
          useValue: createMockRepository(),
        },
        {
          provide: getRepositoryToken(Coffee),
          useValue: createMockRepository(),
        },
      ],
    }).compile();

    service = module.get<CoffeesService>(CoffeesService);
    coffeeRepository = module.get<MockRepository>(getRepositoryToken(Coffee));
  });

  it('should be defined', () => {
    expect(service).toBeDefined();
  });

  describe('findOne', () => {
    describe('when coffee with ID exists', () => {
      it('should return the coffee object', async () => {
        const coffeeId = '1';
        const expectedCoffee = {};

        coffeeRepository.findOne.mockReturnValue(expectedCoffee);
        const coffee = await service.findOne(coffeeId);
        expect(coffee).toEqual(expectedCoffee);
      });
    });
    describe('otherwise', () => {
      it('should throw the "NotFoundException"', async (done) => {
        const coffeeId = '1';
        coffeeRepository.findOne.mockReturnValue(undefined);

        try {
          await service.findOne(coffeeId);
          done();
        } catch (err) {
          expect(err).toBeInstanceOf(NotFoundException);
          expect(err.message).toEqual(`Coffee #${coffeeId} not found`);
        }
      });
    });
  });
});