> Highlighter를 찾아서...
계획은 이러하였다.
- 파일을 텍스트로 읽는다.
- (html의 경우)
htmlparser2패키지로 문자열의 코드를 DOM 형식의 객체로 파싱한다. - validator를 직접 제작하고 검사 결과에 따른 클릭 함수와 스타일링을 DOM 형식의 객체에 담아준다.
- 외부 Highlighter를 사용하여 코드 블럭을 구현한다.
- 코드 수정을 제안할 부분에 클릭 이벤트와 스타일링을 적용한다.
하지만 계획은 완전히 망가졌다. 여러 Highlighter을 찾아보았다. syntax-highlighting 과 ace-editor 정도로 추렸다. 그러나 두 패키지 모두 클릭 이벤트와 스타일링을 부여하기 어려웠다. 전체적인 스타일은 커스텀할 수 있으나 조건에 따른 특정 영역에 스타일링을 부여하기엔 쉽지 않았다.
그래도 억지로 부여하려면 할 수는 있었으나 클릭 이벤트는 도저히 답이 없었다. 두 Highlighter 모두 전체 영역에 대한 클릭 이벤트밖에 줄 수 없었다. ace-editor의 경우는 전체 영역 중 특정 조건을 만족하는 부분을 타겟으로 잡을 수는 있었는데, 문제는 클릭이 일어난 곳 이후의 부분만 탐색이 가능했다.
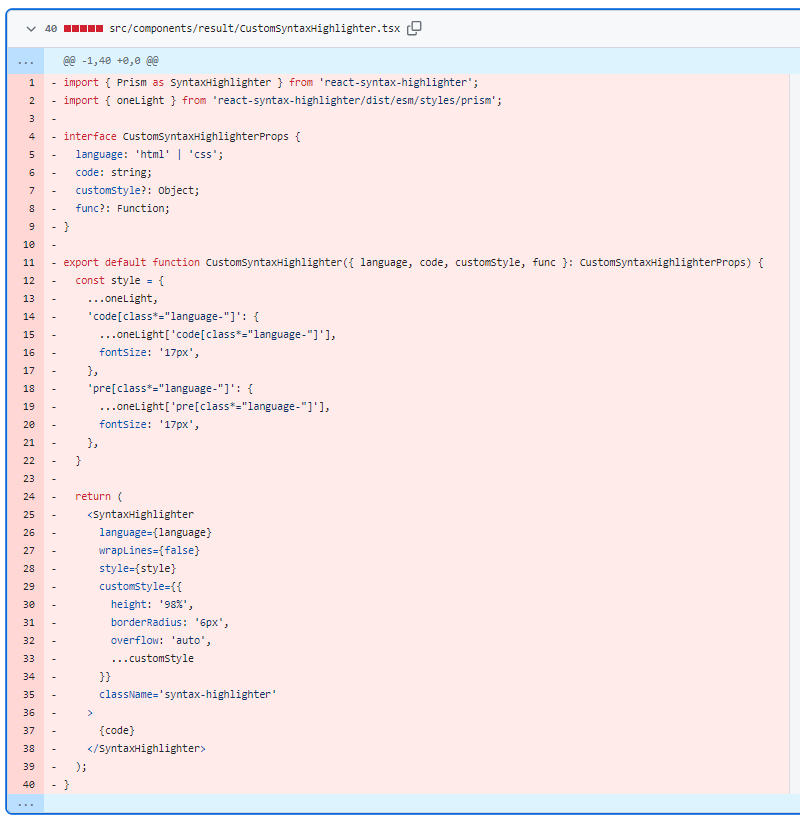
(↑샛별이 되어버린 Custom Highlighter)
> 직접 제작하자
고민 후에 결국 Highlighter를 직접 만들기로 했다. 생각보다 엄청 복잡하진 않았다. 그냥 tag인지 text인지 구분하고, 속성인지 값인지 구분하고, 여는 태그와 닫는 태그를 구분해 주면 되었다.
import { ChildNode, Text, Element, ProcessingInstruction } from 'domhandler';

const OpeningTag = ({ name }: { name: string }) => {
  return (
    <>
      <span className='lt-gt'>{`<`}</span>
      <span className='tag-name'>{`${name}`}</span>
    </>
  );
}

const ClosingTag = ({ name }: { name: string }) => {
  return (
    <>
      <span className='lt-gt'>{`</`}</span>
      <span className='tag-name'>{name}</span>
      <span className='lt-gt'>{`>`}</span>
    </>
  );
}

const Attribs = ({ attribs }: { attribs: Object }) => {
  const attribsArr = Object.entries(attribs);
  return (
    <>
      {
        attribsArr.map(([key, value], i) => {
          return (
            <>
              <span className='attribs-key'>{` ${key}`}</span>
              <span className='text'>=</span>
              {i === 0 && <span className='attribs-value'>'</span>}
              <span className='attribs-value'>{`${value}`}</span>
              {<span className='attribs-value'>{i === attribsArr.length - 1 ? `'` : ` `}</span>}
            </>
          );
        })
      }
      <span className='lt-gt'>{`>`}</span>
    </>
  );
}

const DOCTYPE = () => {
  return (
    <>
      <span className='lt-gt'>{`<!`}</span>
      <span className='tag-name'>DOCTYPE</span>
      <span className='attribs-key'>{` `}html</span>
      <span className='lt-gt'>{`>`}</span>
    </>
  );
}

const TextNode = ({ data }: { data: string }) => {
  return <span className='text'>{data}</span>
}

const ElementNode = ({ name, attribs, children }: { name: string, attribs: Object, children?: ChildNode[] }) => {

  return (
    <>
      <OpeningTag name={name} />
      <Attribs attribs={attribs} />
      {children && (
        <>
          {children.map(item => getHighlightedNode(item))}
          <ClosingTag name={name} />
        </>
      )}
    </>
  );
}

const getHighlightedNode = (item : Node) => {
  if (item instanceof ProcessingInstruction) {
    return <DOCTYPE />
  }

  if (item instanceof Text) {
    return <TextNode data={item.data} />
  }

  if (item instanceof Element) {
    return <ElementNode name={item.name} attribs={item.attribs} children={item?.children} />
  }
}

export default function Highlighter({ dom }: { dom: ChildNode[] }) {

  const highlightedCode = dom.map((item, i) => {
    return getHighlightedNode(item);
  });

  return (
    <>
      {highlightedCode}
    </>
  );
}
파싱된 DOM 형식의 객체는 type 속성이 있었고 크게 text와 tag로 구분되었다. 그리고 tag의 경우 name과 attribs(tag의 속성), children이 있었다. 여는 태그와 닫는 태그, name과 attribs에 해당하는 컴포넌트를 만들고 이를 조합하여 각 node를 만들었다.
파싱된 DOM 형식의 객체는 정확히 말하면 type 속성을 가진 객체들로 이루어진 배열이었는데, 객체를 받아 실제 화면에 그릴 node로 변경해 주는 함수를 만들고(getHighlightedNode) DOM 배열에 map을 통해 item들을 getHighlightedNode 함수의 인자로 넘겨 호출하였다. 이때 children이 있으면 getHighlightedNode를 재귀로 호출하여 자식 노드까지 만들었다.
> CSS는 어떡하지?
html 파일을 문자열로 받아 DOM으로 parsing하고 이를 하이라이트하는 것까진 완료했다. 이젠 css 차례다. 우선 문자열 css를 object로 변환해주는 라이브러리를 찾아보았다. css, css-to-object, jss 등이 나왔다. 하지만 셋 다 문제가 있었다.
css 라이브러리는 처음엔 아래와 같은 에러가 나왔다.
Could not find a declaration file for module 'css'. 'c:/ ... /node_modules/css/index.js' implicitly has an 'any' type.
Try npm i --save-dev @types/css if it exists or add a new declaration (.d.ts) file containing declare module 'css';ts(7016)
타입스크립트 호환이 되지 않는 다는 소리다. 에러에 있는 메세지처럼 npm i --save-dev @types/css 명령어를 실행해주면 된다. 하지만 그럼에도 아래와 같은 에러가 나왔다.
Can't resolve 'fs' in '.\node_modules\css\lib\stringify' when buildingfs 모듈이 없다는 에러로, 원래는 fs 모듈을 설치해주면 되는 일이지만 fs 뿐만 아니라 여러 모듈이 없다고 시끄럽게 울어댔다. 이건 모듈을 하나하나 설치할 일이 아니라 애초에 패키지가 잘못되었다는 뜻이다.
알고보니 css 라이브러리는 node.js 환경에서만 사용하는 라이브러리었다. css 뿐만 아니라 css-to-object와 jss 모두 비슷한 문제가 있었다.
> 해결책을 찾긴 했는데...
어떻게 해야 하나, 다시 한 번 직접 구현해야 하나 고민하던 중에 css-to-json라는 라이브러리를 발견하게 된다. 다짜고짜 설치부터 하고 사용법을 보았는데...
// To JSON
var json = CSSJSON.toJSON(cssString);

// To CSS
var css = CSSJSON.toCSS(jsonObject);
...
이게 전부였다. 음...? 일단 CSSJSON을 import 하고 저렇게 사용하면 되겠지~ 했는데 import가 되지 않았다. 무슨 일인가 하고 살펴보니
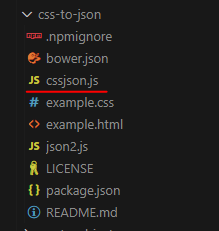
세상에 css-to-json은 그냥 바닐라 js로 된 라이브러리었다. 심지어 es5 문법이었다.
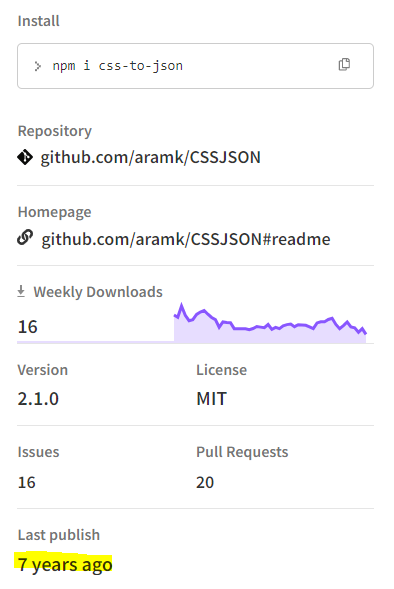
export 따위의 키워드가 있을 리가 없다. CSSJSON 객체는 그냥 전역으로 선언되어 있던 것이다. 그렇다면 직접 css-to-json 코드를 가져다가 쓰면 되는 것이 아닌가? 직접 파일을 하나 만들고 거기에 기존의 코드를 타입스크립트로 변형만 해주면 되지 않을까. 그리하여 탄생한 2024년 버전 css-to-json이다.
import { CssNode } from 'utils/types';

interface Args {
    ordered: boolean;
    comments: boolean;
    stripComments: boolean;
    split: boolean;
}

interface Obj {
    name?: string;
    value?: CssNode | string;
    type?: string;
}

// const selX = /([^\s\;\{\}][^\;\{\}]*)\{/g;
// const endX = /\}/g;
// const lineX = /([^\;\{\}]*)\;/g;
const commentX = /\/\*[\s\S]*?\*\//g;
const lineAttrX = /([^\:]+):([^\;]*);/;

// This is used, a concatenation of all above. We use alternation to
// capture.
const altX = /(\/\*[\s\S]*?\*\/)|([^\s\;\{\}][^\;\{\}]*(?=\{))|(\})|([^\;\{\}]+\;(?!\s*\*\/))/gmi;

// Capture groups
let capComment = 1;
let capSelector = 2;
let capEnd = 3;
let capAttr = 4;

function isEmpty (x: any) {
    return typeof x === 'undefined' || x.length === 0 || x === null;
};

function trim(str: string) {
    return str.replace(/^\s+|\s+$/g, '');
}

export function cssToJson(cssString: string, args?: Args): CssNode {
    const node: CssNode = {
        children: {},
        attributes: {},
    };
    let match = null;
    let count = 0;

    if (typeof args === 'undefined') {
        args = {
            ordered: false,
            comments: false,
            stripComments: false,
            split: false
        };
    }

    if (args.stripComments) {
        args.comments = false;
        cssString = cssString.replace(commentX, '');
    }

    while ((match = altX.exec(cssString)) != null) {
        if (!isEmpty(match[capComment]) && args.comments) {
            // Comment
            let add = trim(match[capComment]);
            node[count++] = add;
        } else if (!isEmpty(match[capSelector])) {
            // New node, we recurse
            let name = match[capSelector].trim();
            // This will return when we encounter a closing brace
            let newNode = cssToJson(cssString, args);
            if (args.ordered) {
              let obj: Obj = {};
              obj['name'] = name;
              obj['value'] = newNode;
              // Since we must use key as index to keep order and not
              // name, this will differentiate between a Rule Node and an
              // Attribute, since both contain a name and value pair.
              obj['type'] = 'rule';
              node[count++] = obj;
            } else {
              let bits;
              if (args.split) {
                bits = name.split(',');
              } else {
                bits = [name];
              }
              for (let i in bits) {
                let sel = trim(bits[i]);
                if (sel in node.children) {
                  for (let att in newNode?.attributes) {
                    node.children[sel].attributes[att] = newNode.attributes[att];
                  }
                } else {
                  node.children[sel] = newNode;
                }
              }
            }
          } else if (!isEmpty(match[capEnd])) {
            // Node has finished
            return node;
          } else if (!isEmpty(match[capAttr])) {
            let line = trim(match[capAttr]);
            let attr = lineAttrX.exec(line);
            if (attr) {
              // Attribute
              let name = trim(attr[1]);
              let value = trim(attr[2]);
              if (args.ordered) {
                let obj: Obj = {};
                obj['name'] = name;
                obj['value'] = value;
                obj['type'] = 'attr';
                node[count++] = obj;
              } else {
                if (name in node.attributes) {
                  let currVal = node.attributes[name];
                  if (!(currVal instanceof Array)) {
                    node.attributes[name] = [currVal];
                  }
                  node.attributes[name].push(value);
                } else {
                  node.attributes[name] = value;
                }
              }
            } else {
              // Semicolon terminated line
              node[count++] = line;
            }
          }
    }
    return node;
}
사실 문자열의 css를 json으로 파싱하는 부분만 타입스크립트 코드로 변형하였으며, 코드 전체를 전반적으로 이해하고 변형한 것은 아니다. 다음 기회에 소스를 좀 더 면밀하게 분석 후 css-to-object의 타입스크립트 버전을 제대로 제작해 봐야겠다.
> 끝
현재 html과 css 파일 모두 문자열로 읽어들여 객체로 파싱하는 것까지 완료했고 html 코드에 대한 Highlighter까지 구현한 상태다. (줄바꿈, 들여쓰기 제외) 다음에는 css 코드에 대한 Highlighter와 줄바꿈, 들여쓰기를 구현해보도록 하자.
👉 현재까지 작업한 폴더 구조
📦web-accessibility-validator
 ┣ 📂src
 ┃ ┣ 📂components
 ┃ ┃ ┣ 📂main
 ┃ ┃ ┃ ┣ 📜Guideline.tsx
 ┃ ┃ ┃ ┣ 📜Title.tsx
 ┃ ┃ ┃ ┗ 📜Uploader.tsx
 ┃ ┃ ┣ 📂result
 ┃ ┃ ┃ ┣ 📜Box.tsx
 ┃ ┃ ┃ ┣ 📜BoxTitle.tsx
 ┃ ┃ ┃ ┣ 📜CodeBlock.tsx
 ┃ ┃ ┃ ┣ 📜Left.tsx
 ┃ ┃ ┃ ┣ 📜Result.tsx
 ┃ ┃ ┃ ┗ 📜Right.tsx
 ┃ ┃ ┗ 📜Header.tsx
 ┃ ┣ 📂pages
 ┃ ┃ ┣ 📜main.tsx
 ┃ ┃ ┗ 📜result.tsx
 ┃ ┣ 📂utils
 ┃ ┃ ┣ 📜cssjson.ts
 ┃ ┃ ┗ 📜types.ts
 ┃ ┣ 📂validator
 ┃ ┃ ┗ 📜Highlighter.tsx
 ┃ ┣ 📜App.tsx
 ┃ ┣ 📜globals.css
 ┃ ┣ 📜index.tsx
 ┃ ┗ 📜react-app-env.d.ts
 ┣ 📜.gitignore
 ┣ 📜package-lock.json
 ┣ 📜package.json
 ┣ 📜postcss.config.js
 ┣ 📜README.md
 ┣ 📜tailwind.config.js
 ┣ 📜tsconfig.json
 ┣ 📜web-accessibility-validator.pptx
 ┣ 📜webpack.config.js
 ┗ 📜yarn.lock