
◾ Diffuse Shading
- Diffuse and Per-vertex Shading with a Single Point Light Sources
◾ Diffuse reflection
- Light vector와 normal vector를 내적하여 밝기 결정
- : 광원의 밝기
- : 산란되는 입사광의 비율을 나타내는 diffuse 반사계수


- 내적값<0인 조명의 반대편은 완전 검정이다
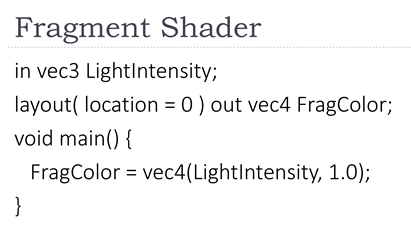
📃 Code
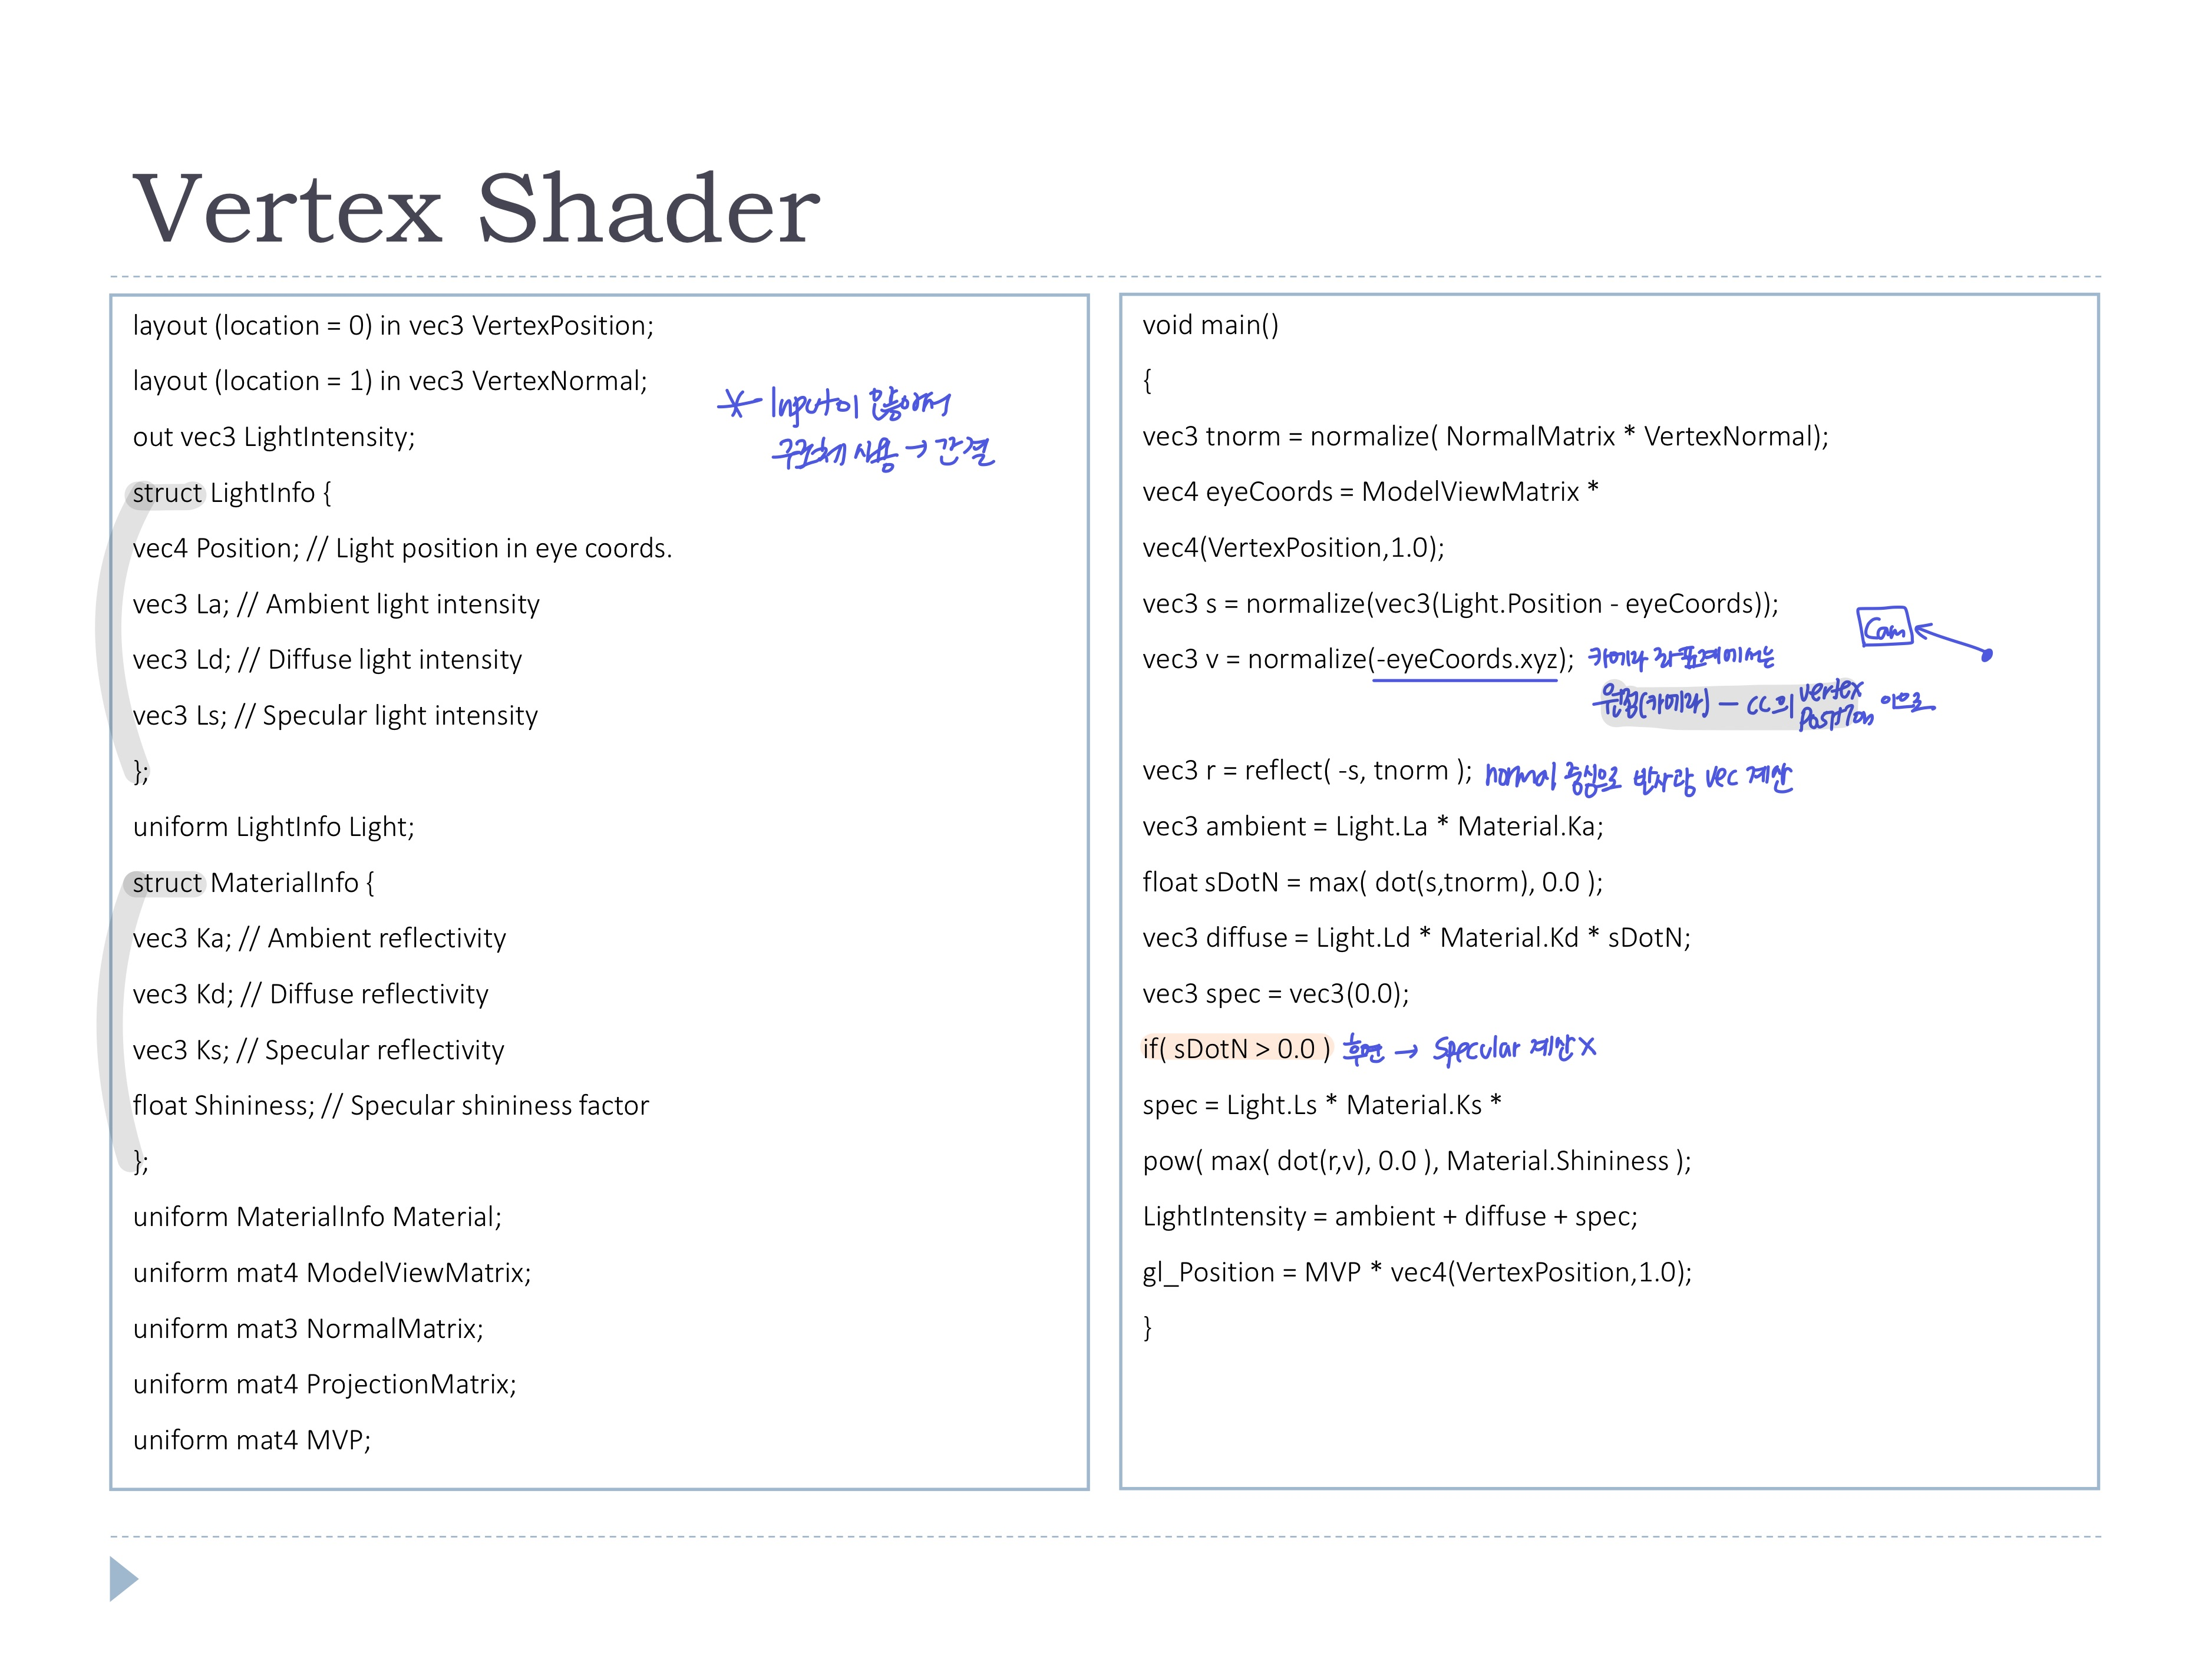
- 버텍스와 normal을 Camera coordinate로 변환
- Diffuse shading 계산 시 음수가 나오지 않도록 최소값 0으로 설정
- (보통 reflection은 vertex가 아닌 fragment에서 하긴 하는데,, 여기선 vertex에서 함 -> fixed pipeline에서는 per-vertex로 계산하긴 했었다..)

- vertex shader에서 계산된 LightIntensity가 Input으로 들어오고, 그대로 내보냄
◾ Transforming Normals
- Position
A,B와 그 표면에 대한 노멀N - Polygon
AB가 변환이 생겼을 때 (x축으로 2배) - 변환된 Polygon에 맞게 normal도 변환 필요
(rotation만 있는 경우는 라 polygon변환과 같게 해주면 되지만, Scaling도 들어가면 이라 추가 계산 필요)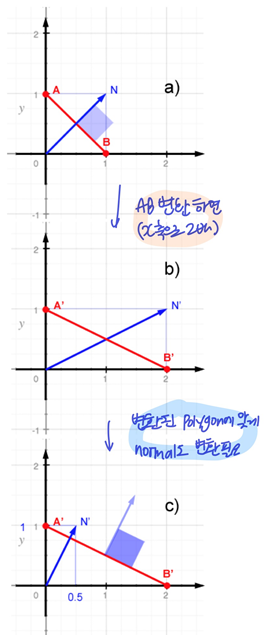

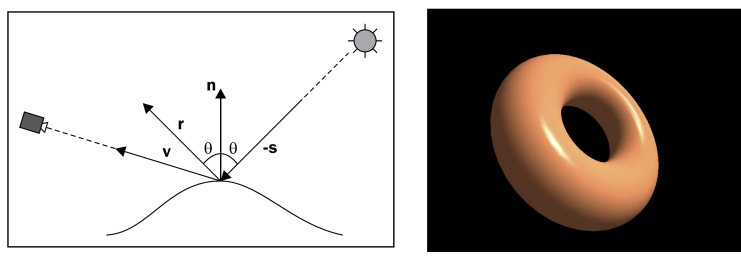
◾ Phong reflection model
- diffuse뿐만 아니라 ambient, specular (3개의 term)으로 이루어진 reflection model

📃 Code
- 위와 거의 동일, 계산만 다름
- Input이 많아서 구조체 사용
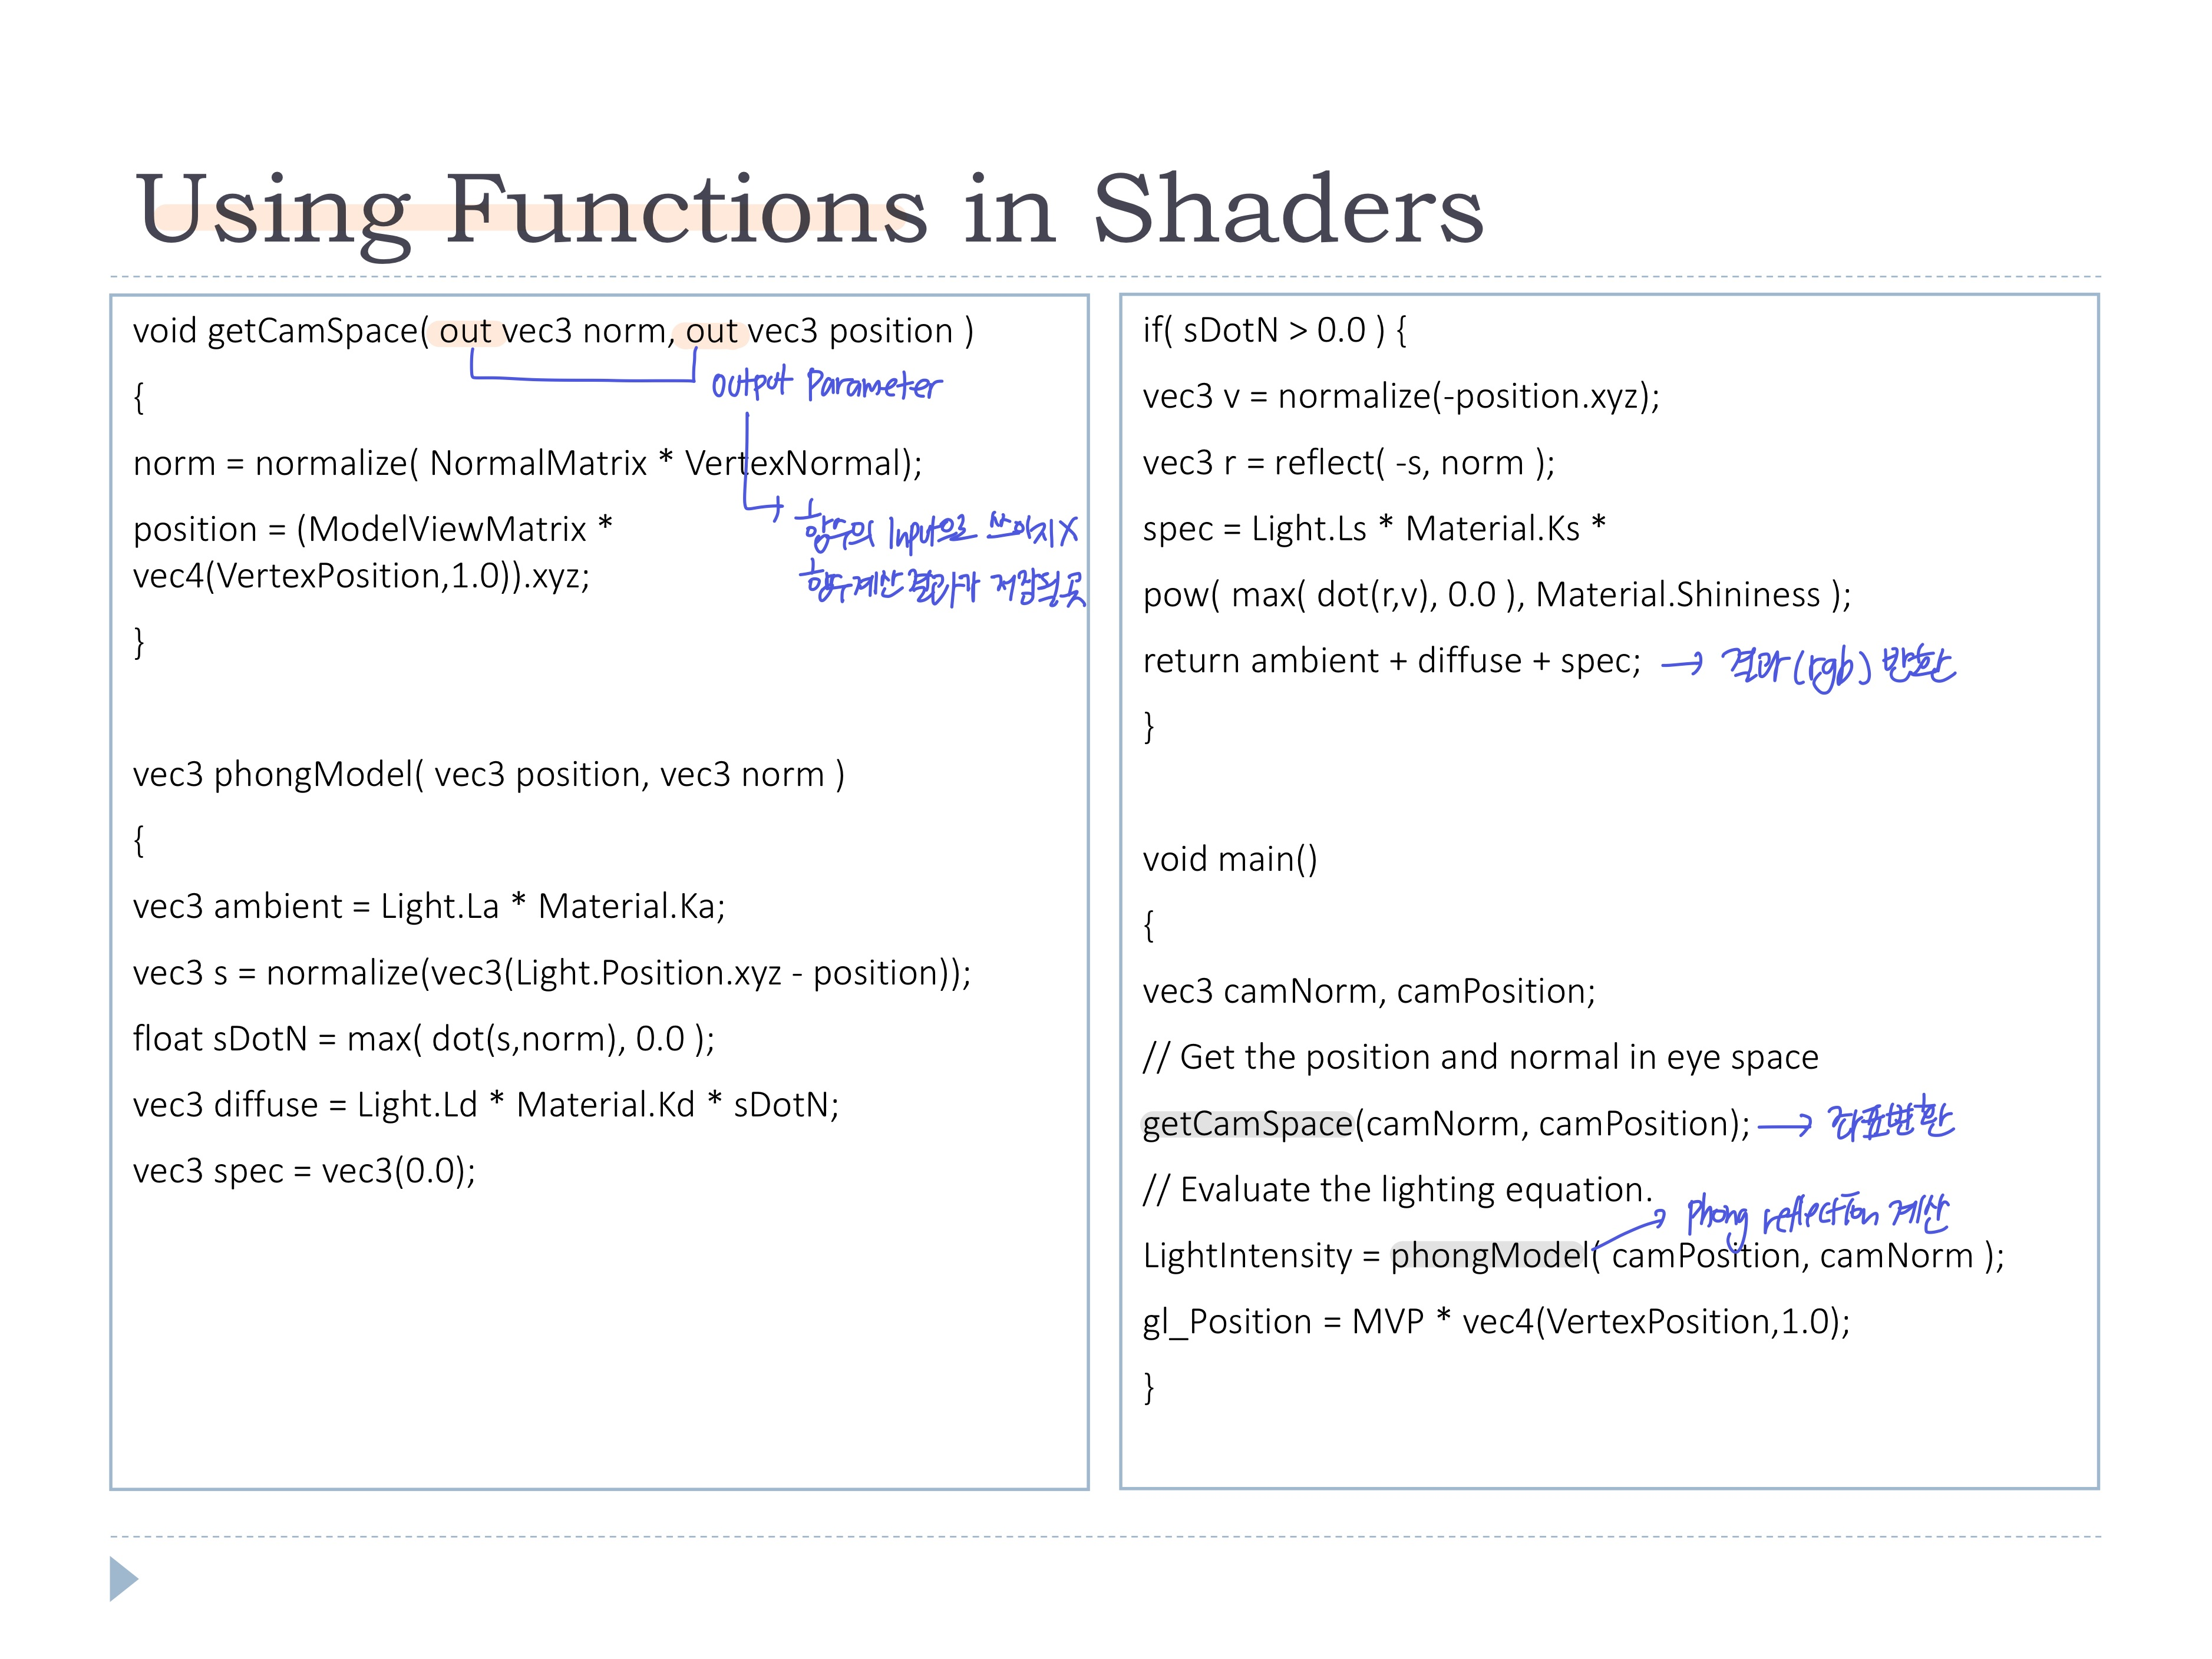
◾ Functions in shaders
- const qualifier: input 매개변수가 함수 내에서 값이 바뀌지 않도록 (not with out or inout)
- Function overloading: 같은 이름을 가진 함수가 여러개 있을 수 있음
- 배열/구조체를 함수로 보내는 경우: call by value방식(복사)이라 메모리 문제가 생길 수 있음, 가능하면 global 변수로 보내는 것이 좋다
📃 Code
- 위의 phong reflection model의 코드를 함수를 사용해서 나타내면 아래와 같다 (간결!)
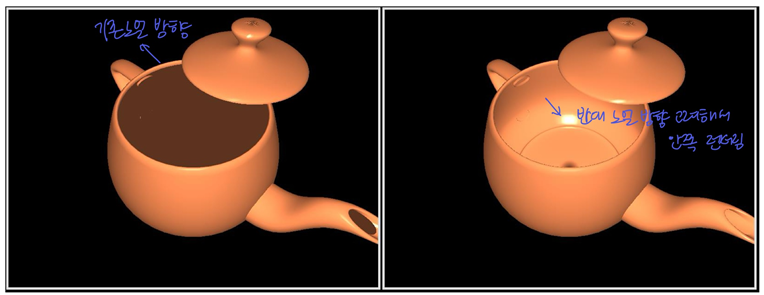
◾ Two-sided Shading
- 뒷면까지 렌더링하기 위해서, 기존 노멀 방향을 뒤집어서 반대 노멀 방향까지 고려해야함
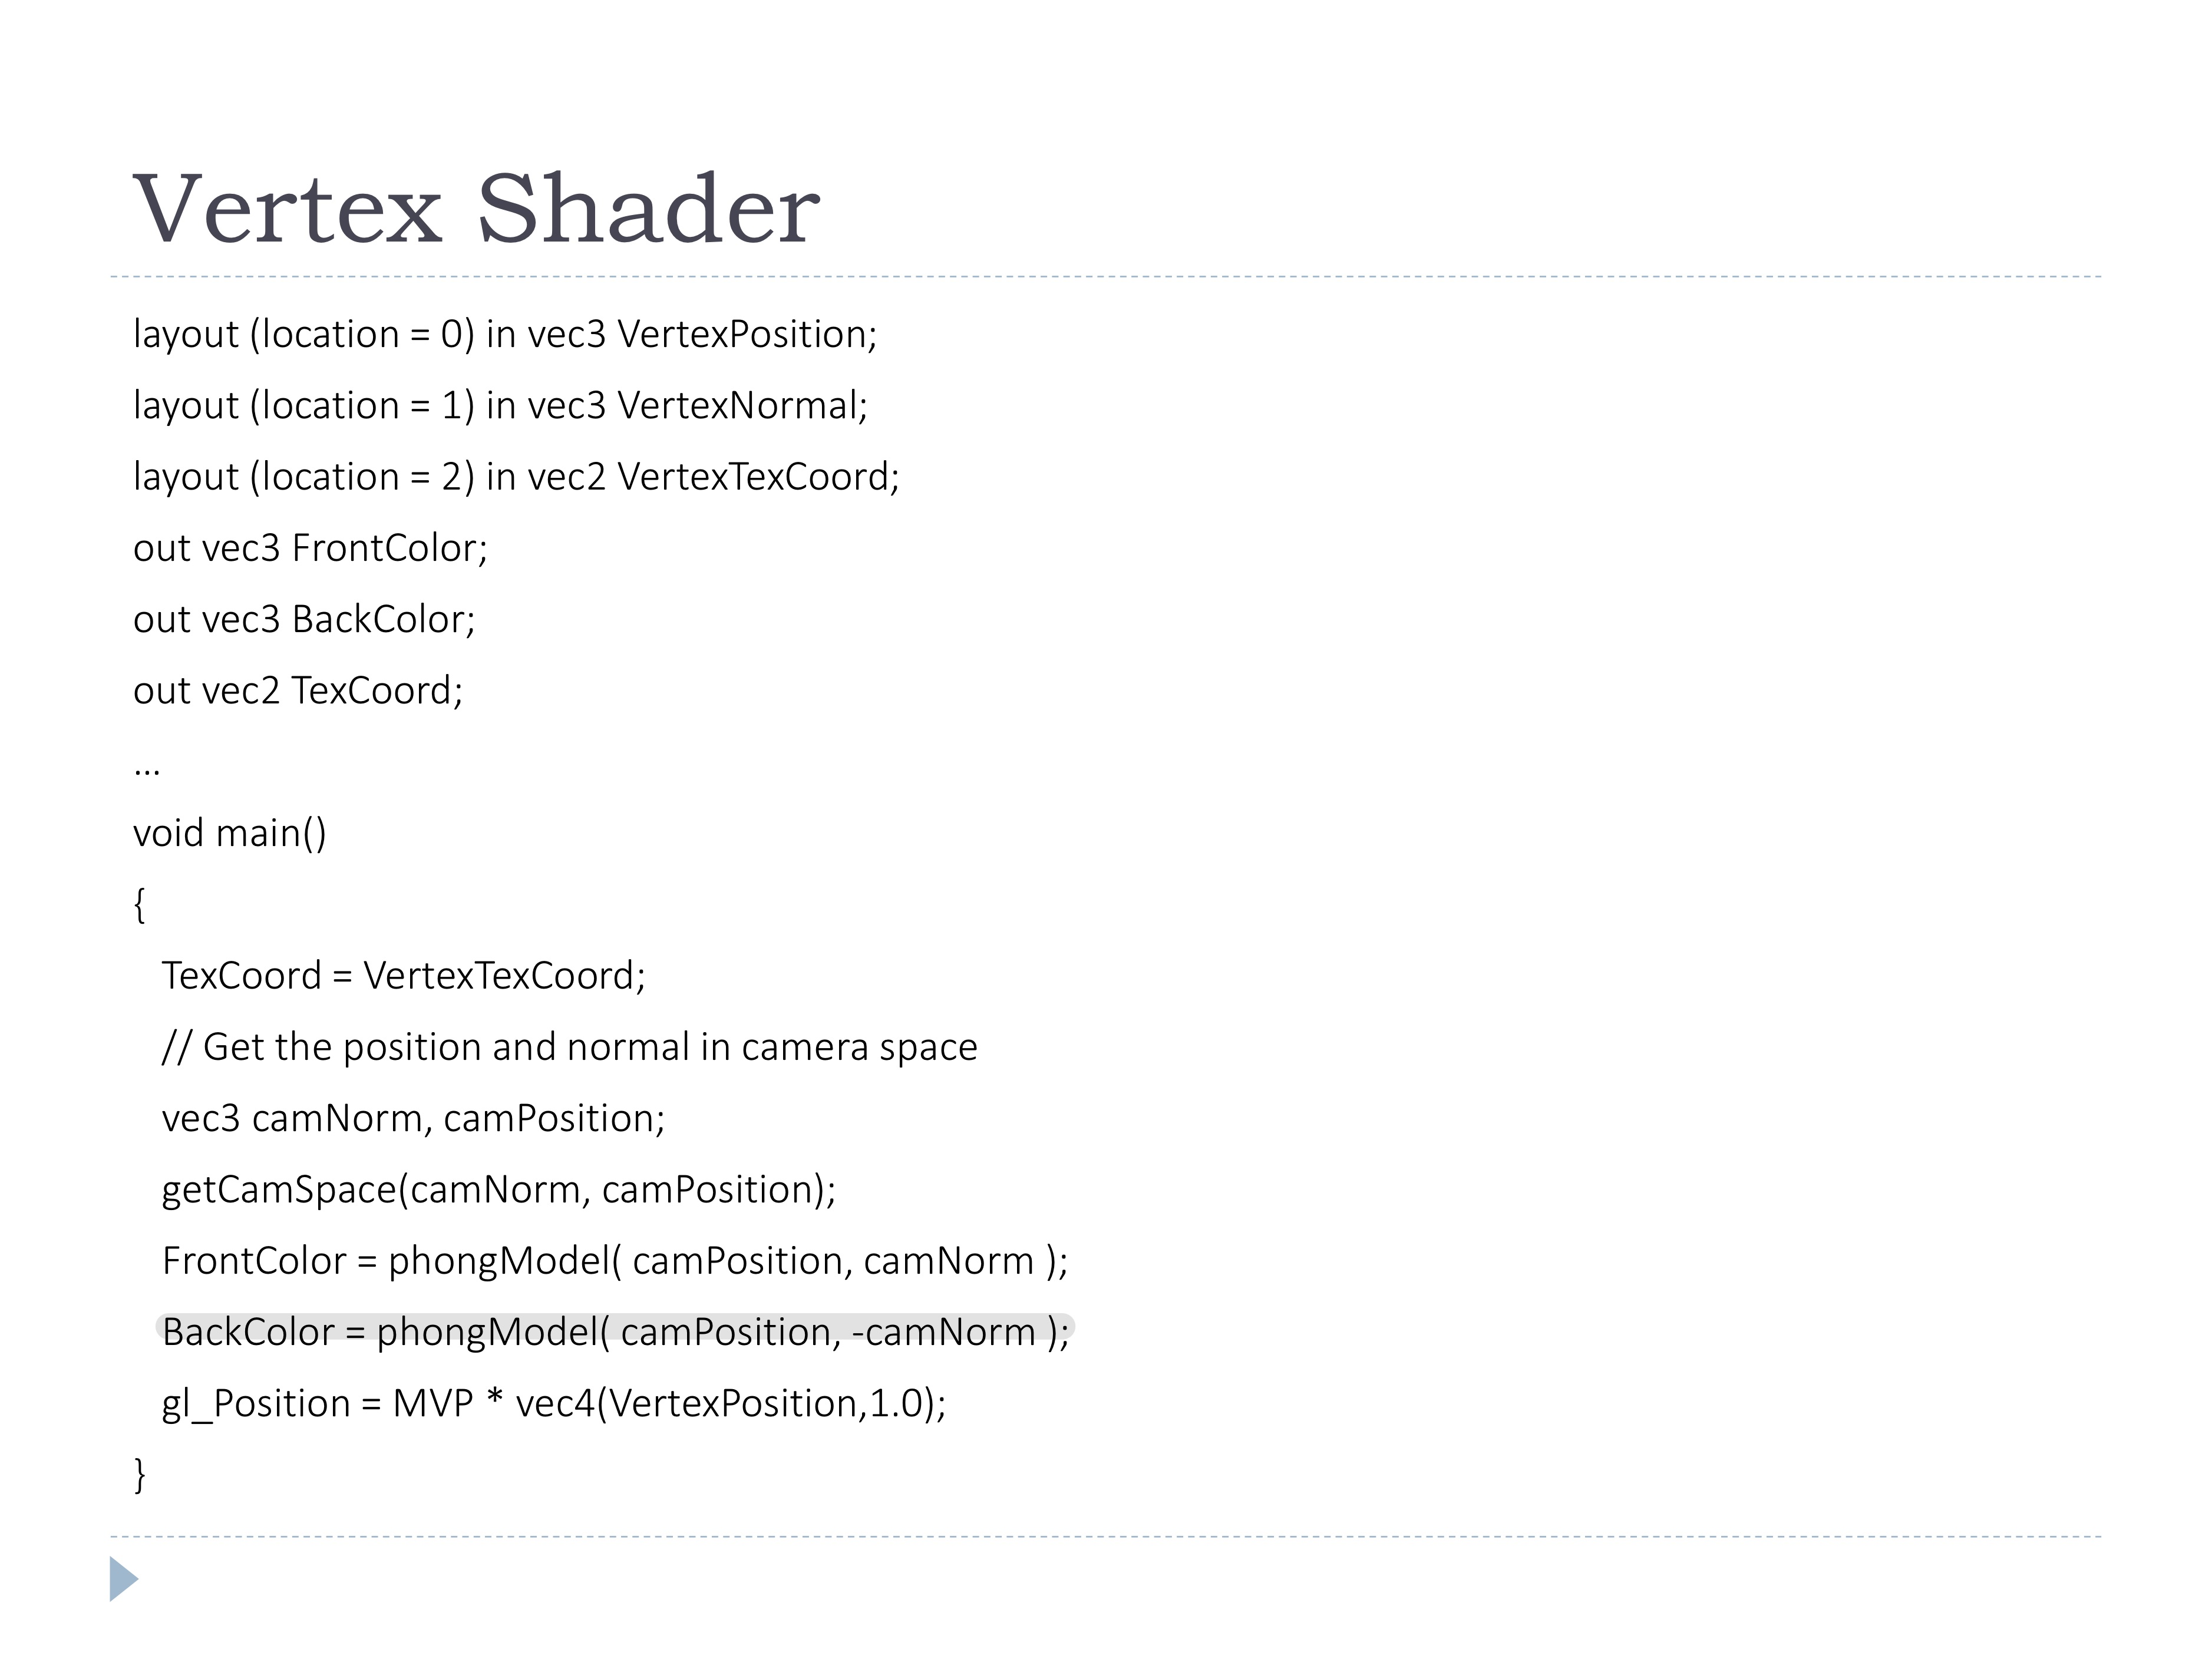
📃 Code
- normal을 반전시켜 phongModel 계산해서 뒷면의 color를 얻음
- 어떤 경우에 front/back color를 칠할지 고려해야함
-> 전/후면 구별 필요 (2가지 방법)
- gl_ForntFacing (fragment shader)
- index buffer에 저장된 정보 중 Polygon의 버텍스가 그려지는 순서(winding)을 보고 구별
- Polygon 단위 정보이므로 fragment에서만 알 수 있다
-> color 계산 후 전/후면 판별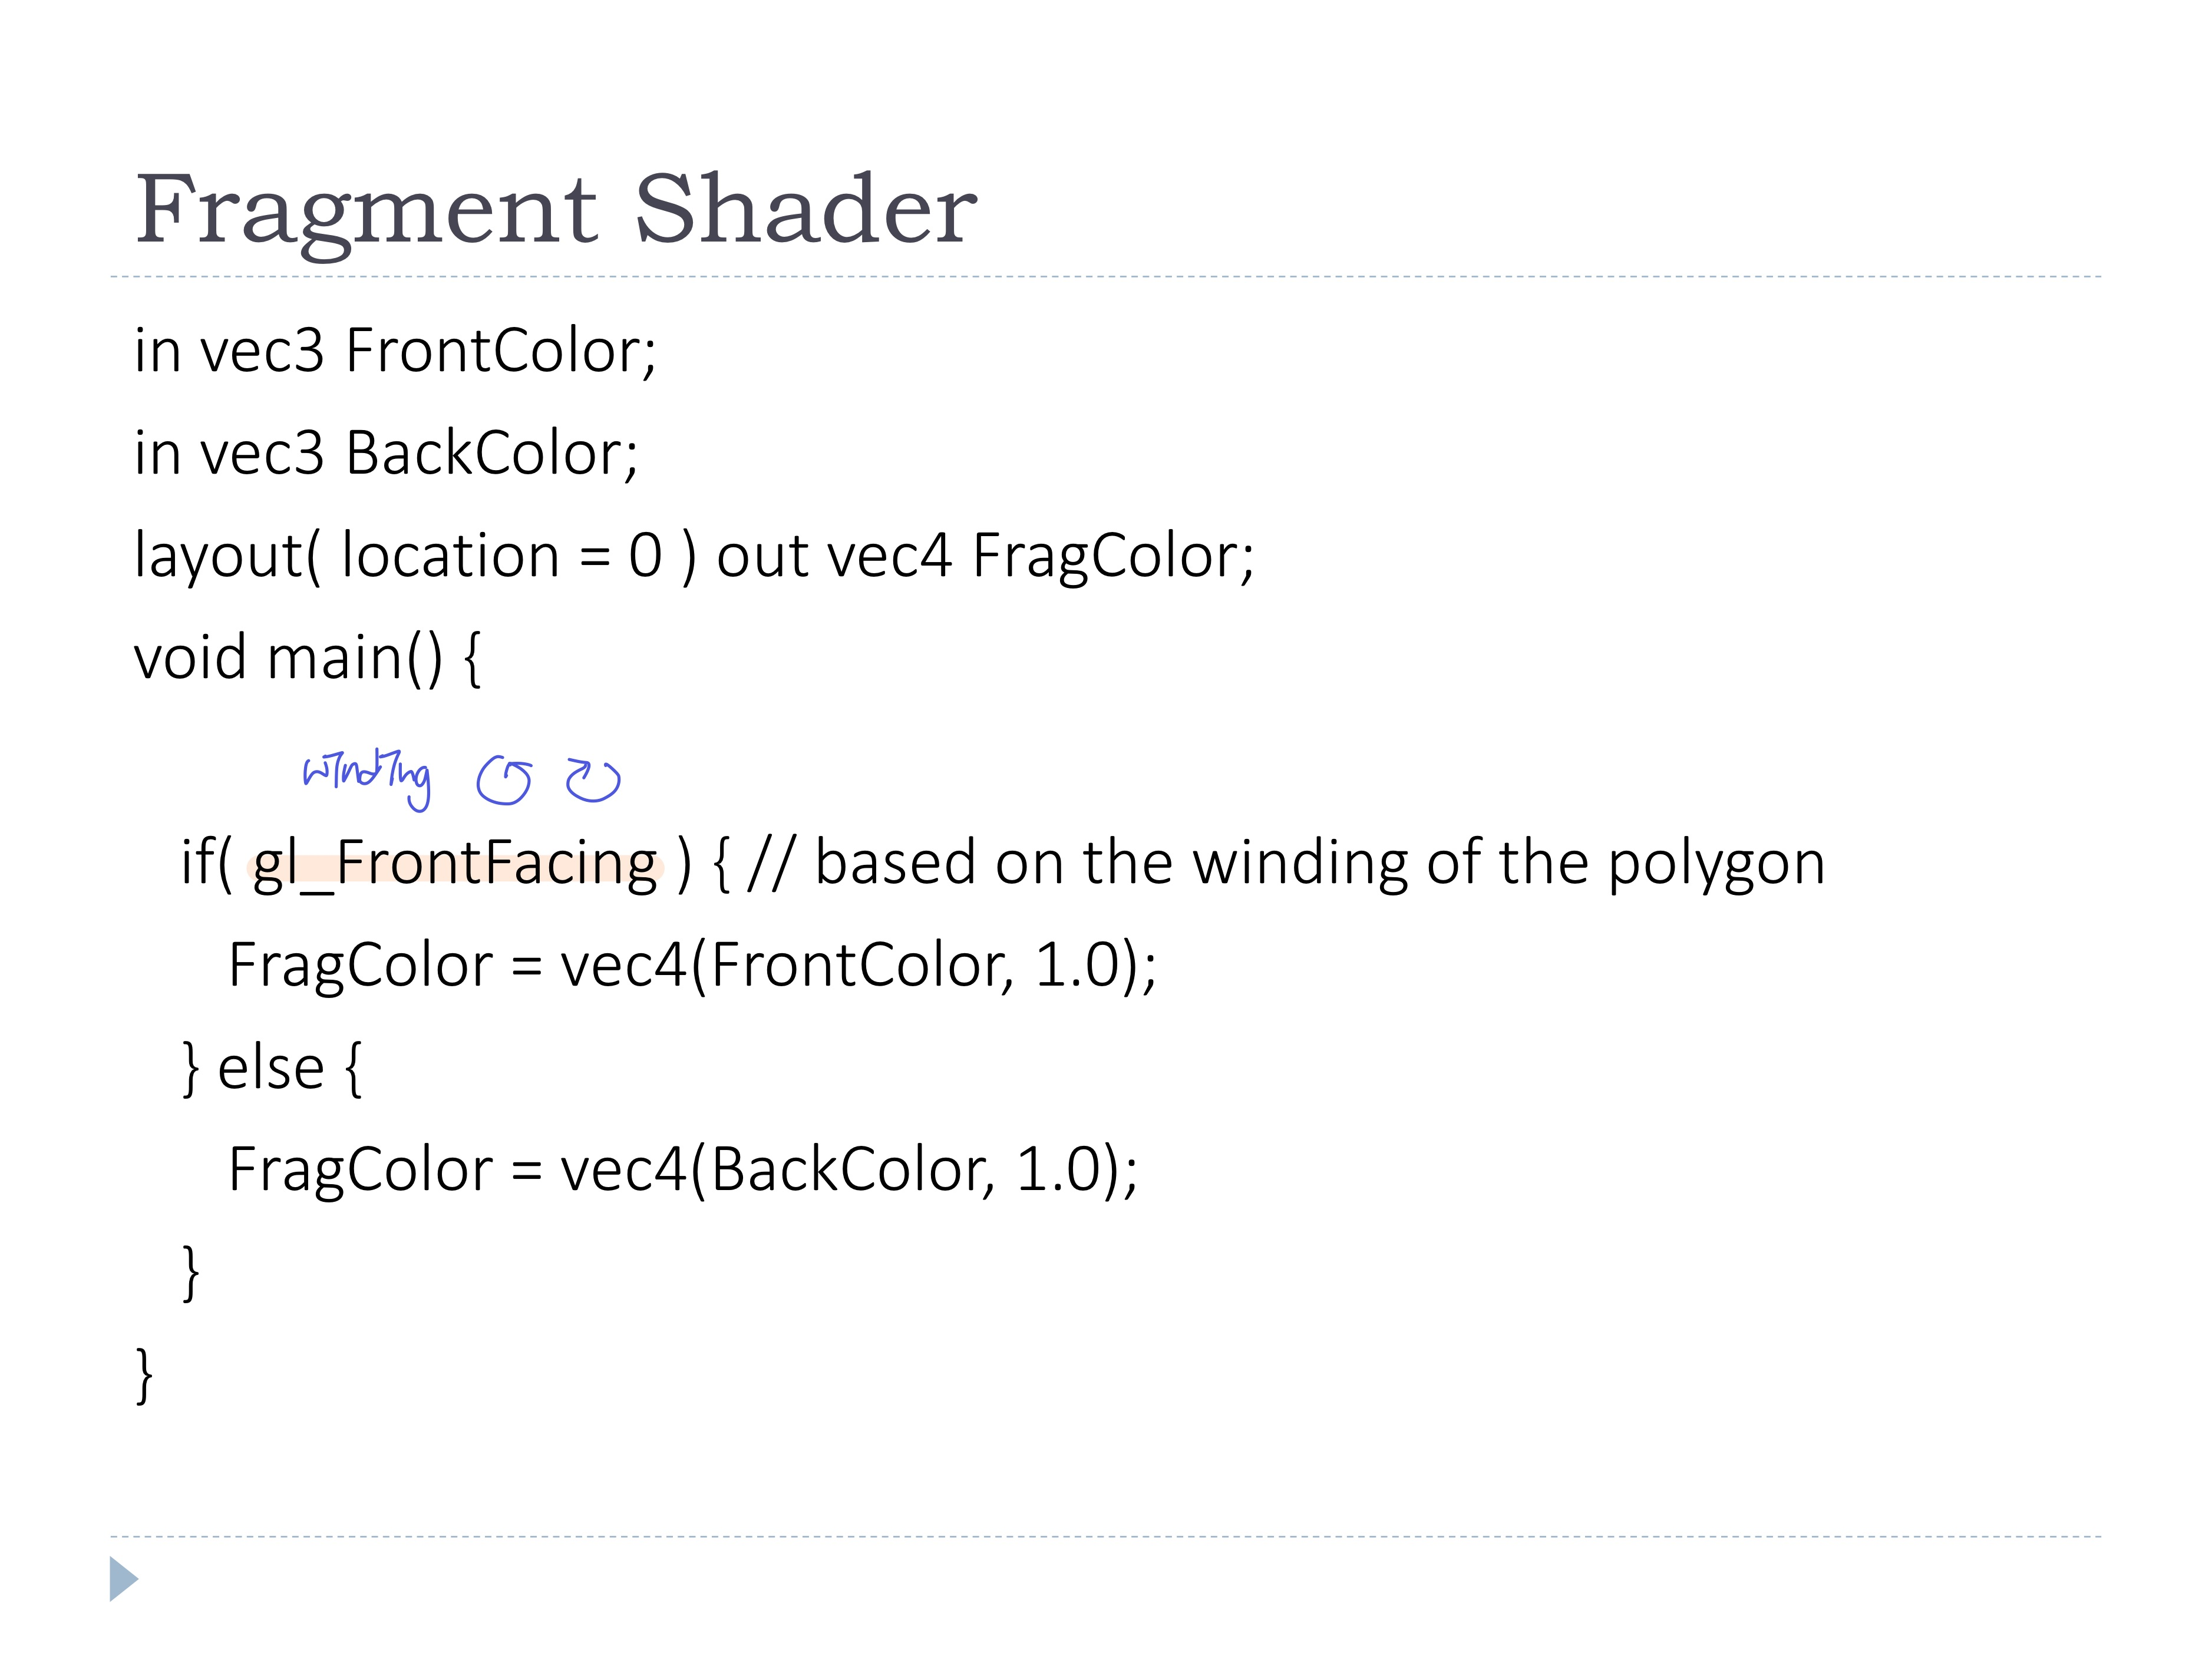
- Alternative Choice (vertex shader)
- winding이 잘 안되있는 경우도 존재, 그럴때는 기존 normal과 view dir을 내적하여 확인
- vertex에서 알 수 있음
-> 전/후면 판별하면서 color 계산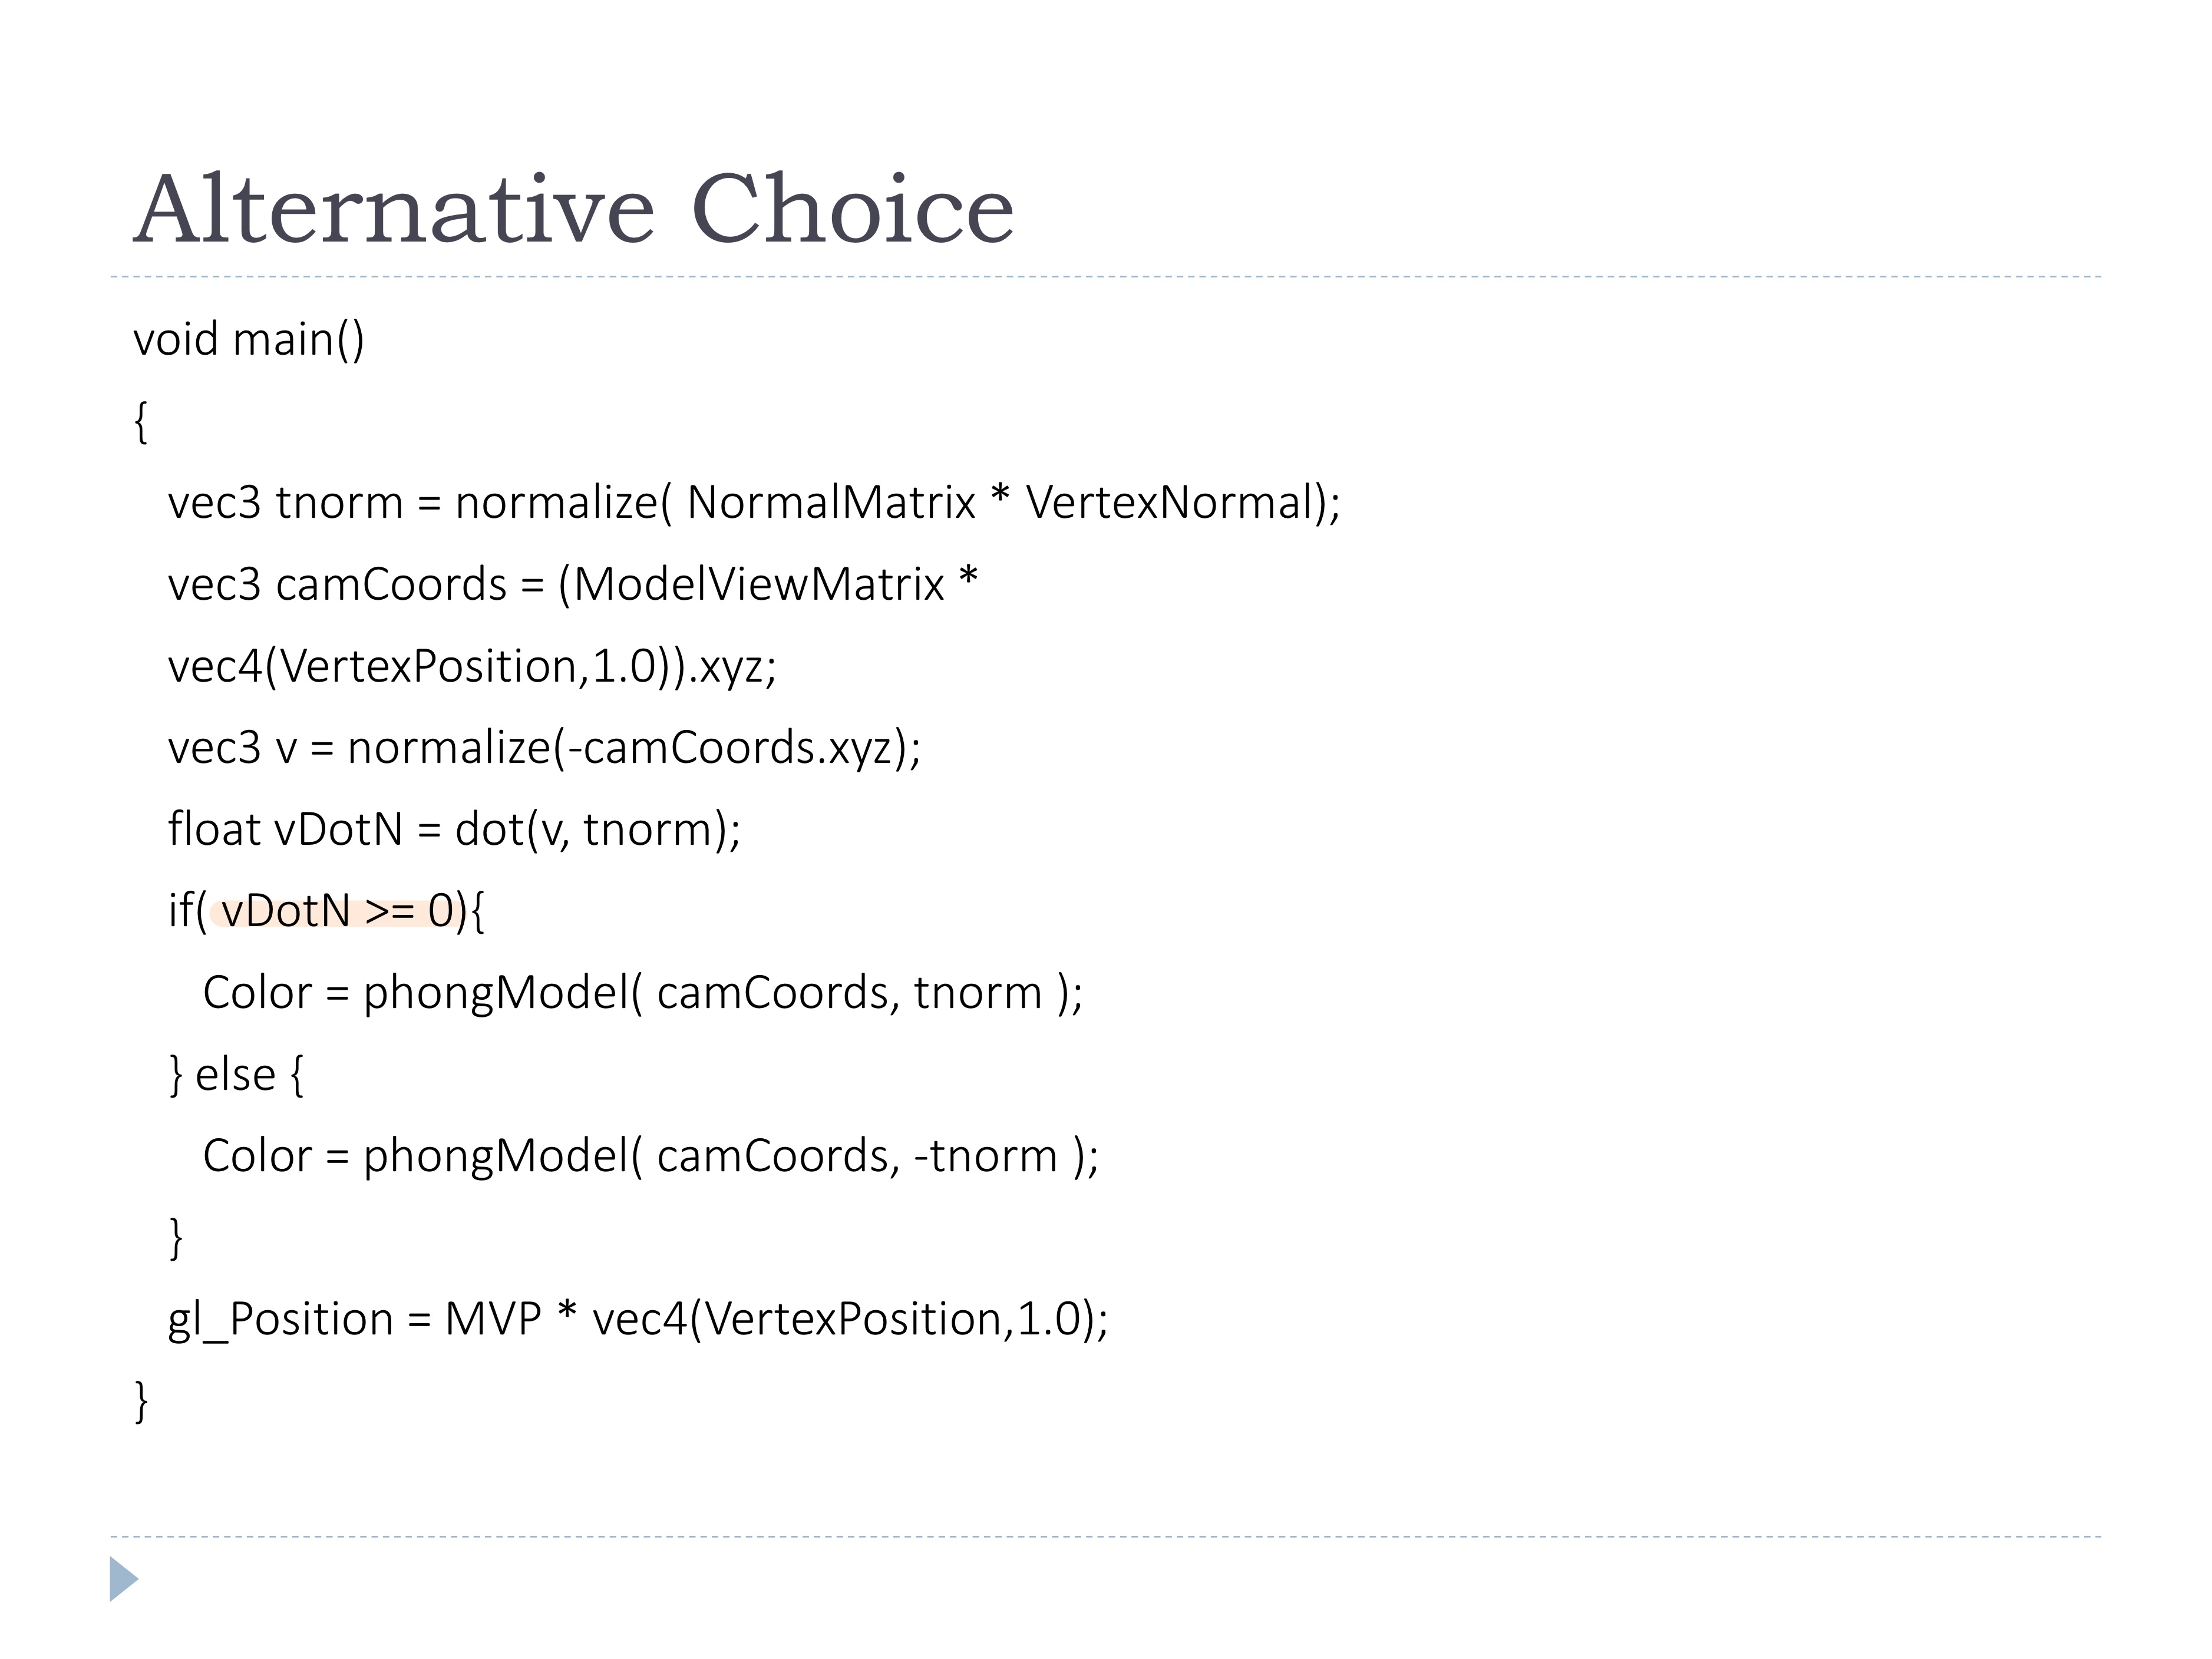
Debugging
- color로 확인하는 경우가 많다
- winding이 잘 돼있는지 확인하기 위해 후면인 경우 빨강으로 그려본,,~ (원래 색이랑 좀 mix한 상태, 하지 않으면 너무 평면처럼 보여서 오히려 파악이 더 어려움)
◾ Flat Shading
- 한 polygon에 같은 색
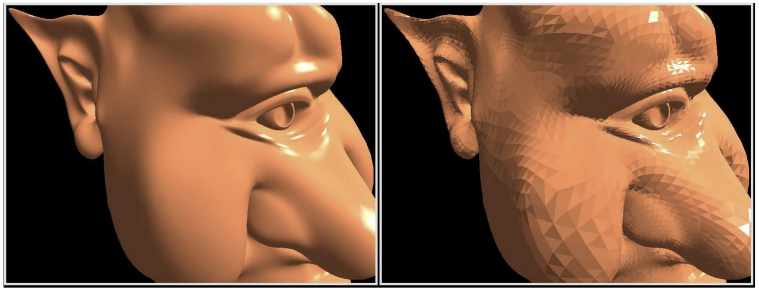
- fixed pipeline에서는 버텍스마다 똑같은 color를 파이프라인에 보내준다 ?
- Polygon의 vertex 중 하나만 선택하여 색을 결정하게 됨 (Provoking vertex)
(원래는 vertex에서 fragment로 넘어갈 때, interpolation해서 색 결정됨) - vertex shader의 out, fragment shader의 in variable에
flatqualifier 사용
- Polygon의 몇 번째 vertex를 사용할 것인지 (default: 첫번째 vertex)

- flat 효과 뿐만 아니라, 한 polygon에 vertex 상관없이 동일한 값을 주고싶은 경우 등.. 활용 가능
◾ Subroutines
- select shader functionality
- 상황에 따라 렌더링을 다르게하기 위해 Uniform변수를 조건으로 활용하여 함수 mappinig
(조건문 느낌-if문은 시간이 좀 걸려서.. 요새는 아니긴 하지만)- OpenGL Application에서 shader별로 프로그램 만들어서 if문으로 하는 방법도 있긴 있음
- Shader 코드에서는 Subroutine Type Uniform변수를 받아 그에따른 함수 실행
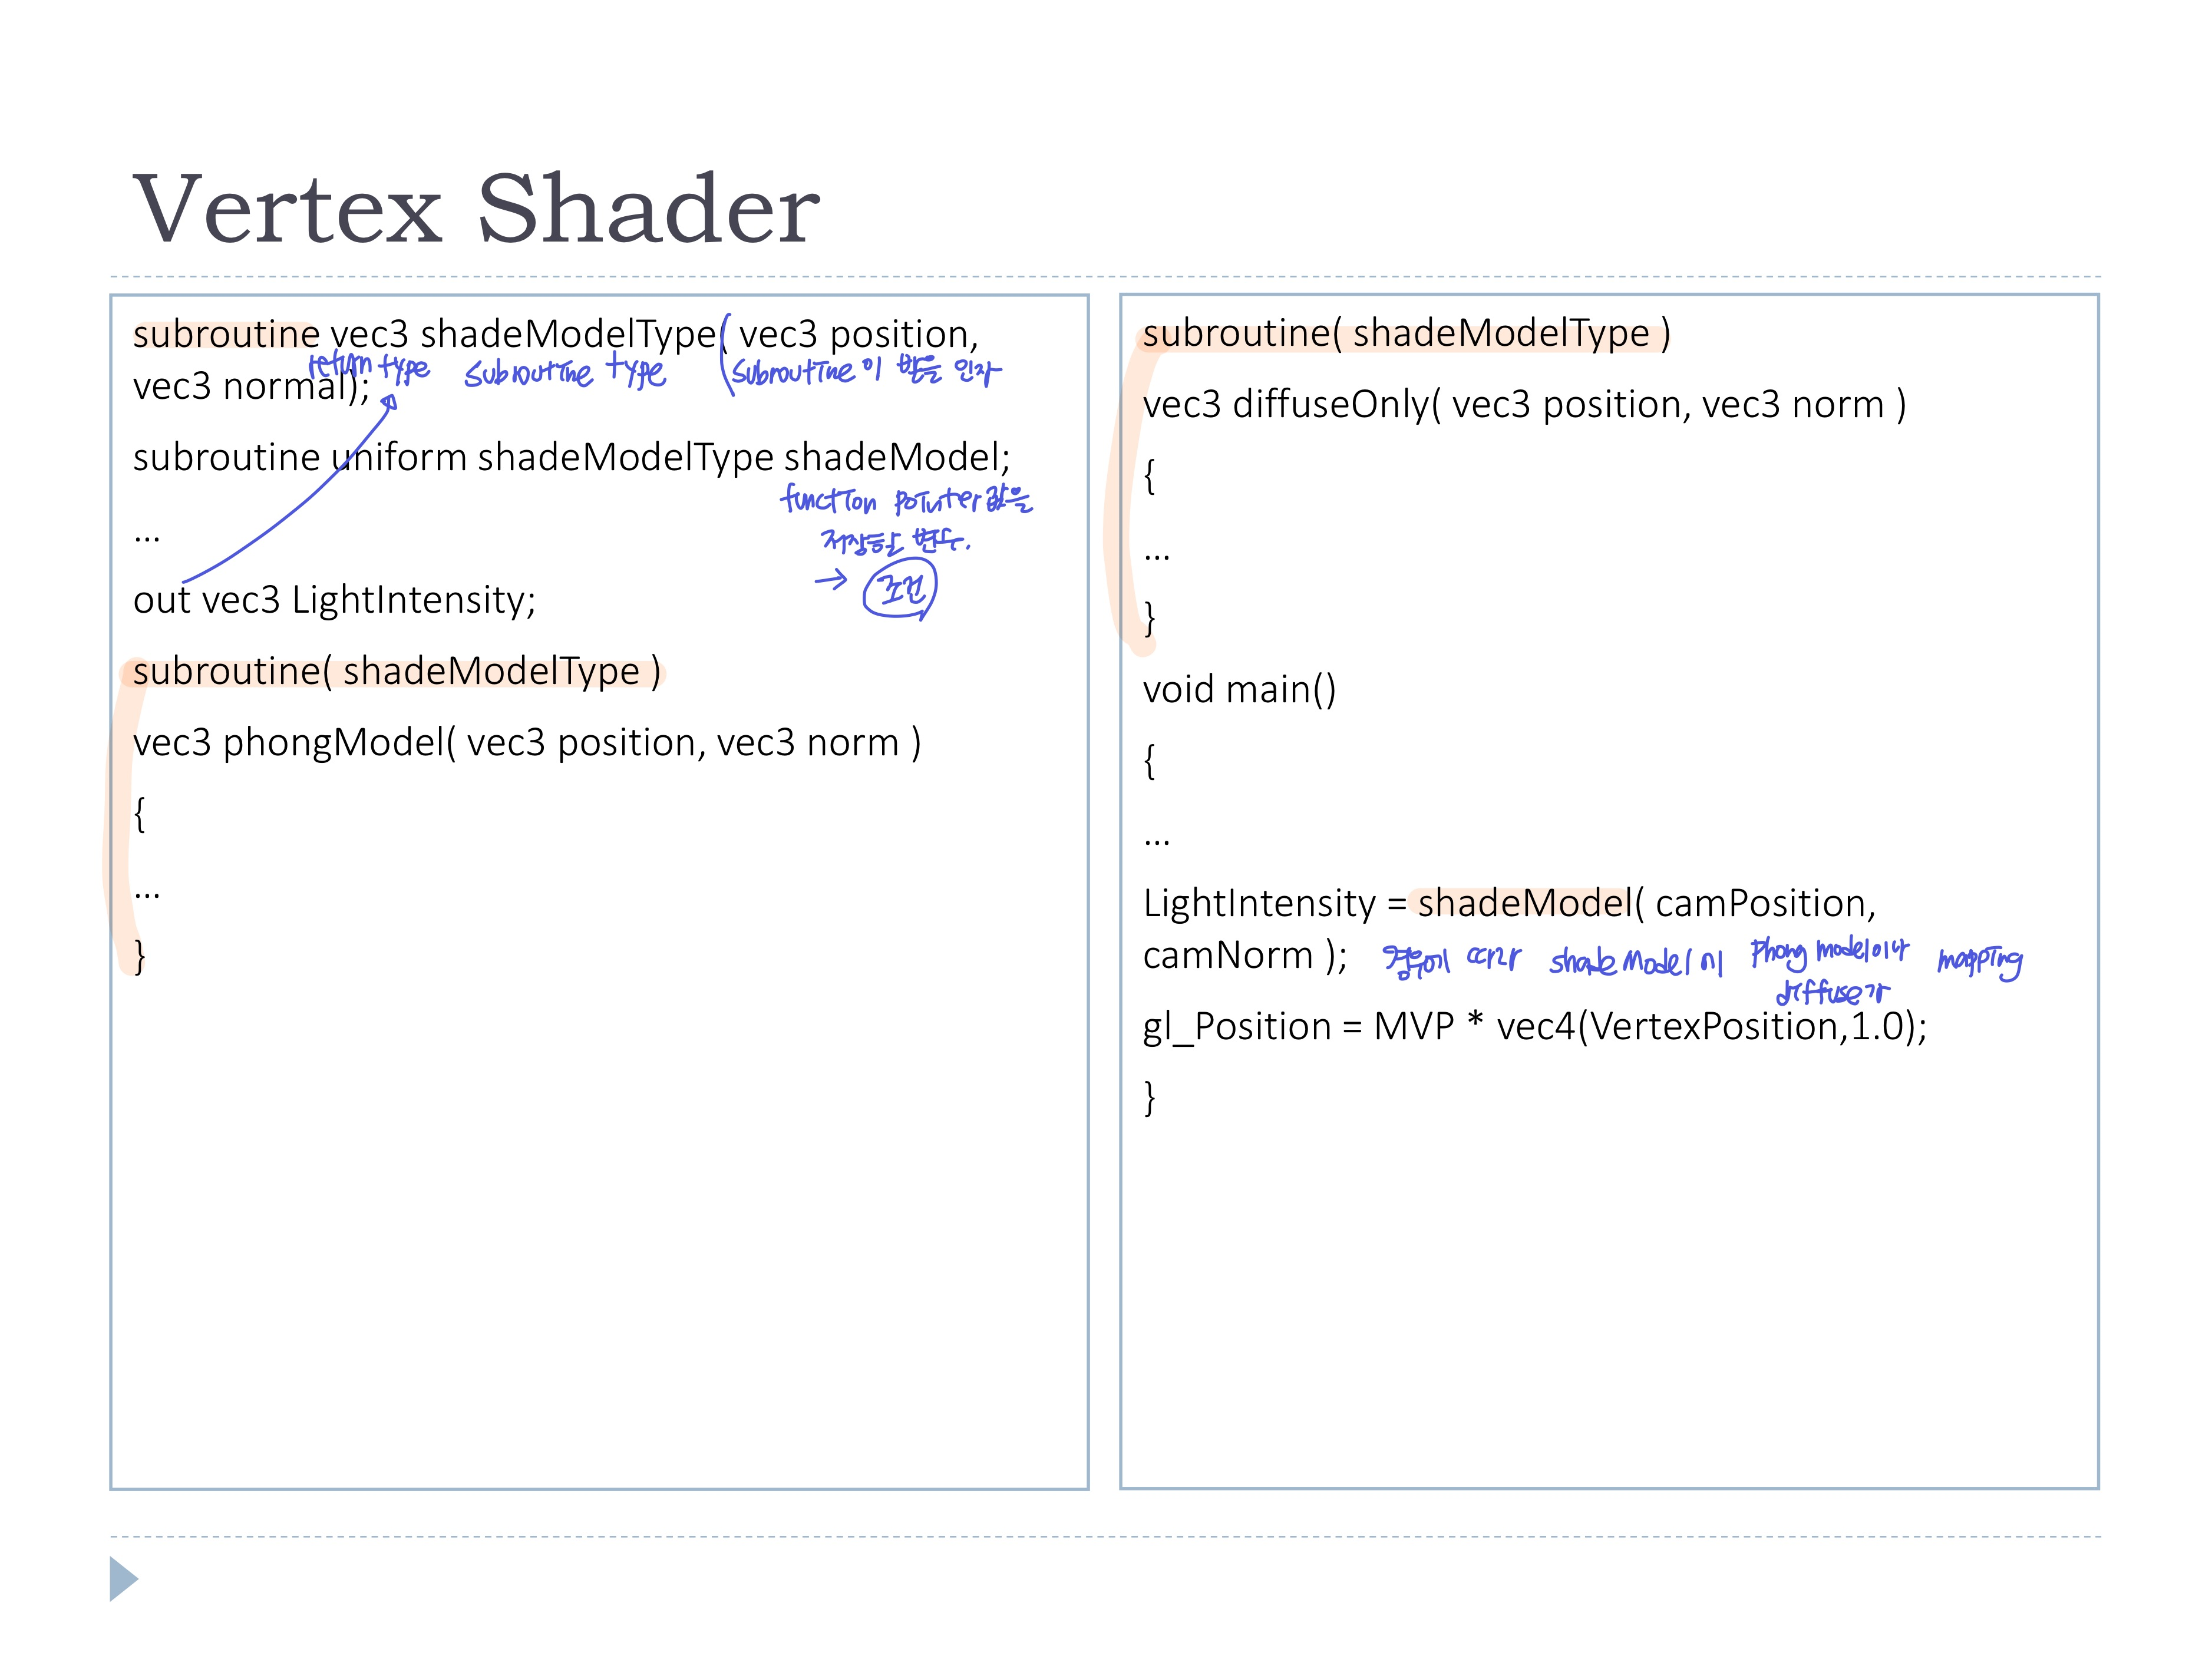
- OpenGL Application에서는 Uniform변수에 따른 함수 mapping
- 해당 shader program의 handle값을 사용하여 특정 함수의 index값을 받아온다
- 그 index값으로 subroutine에 mapping할 함수를 지정한다
(mapping할 함수는 여러개 지정할 수 있어서 주소값으로 전달)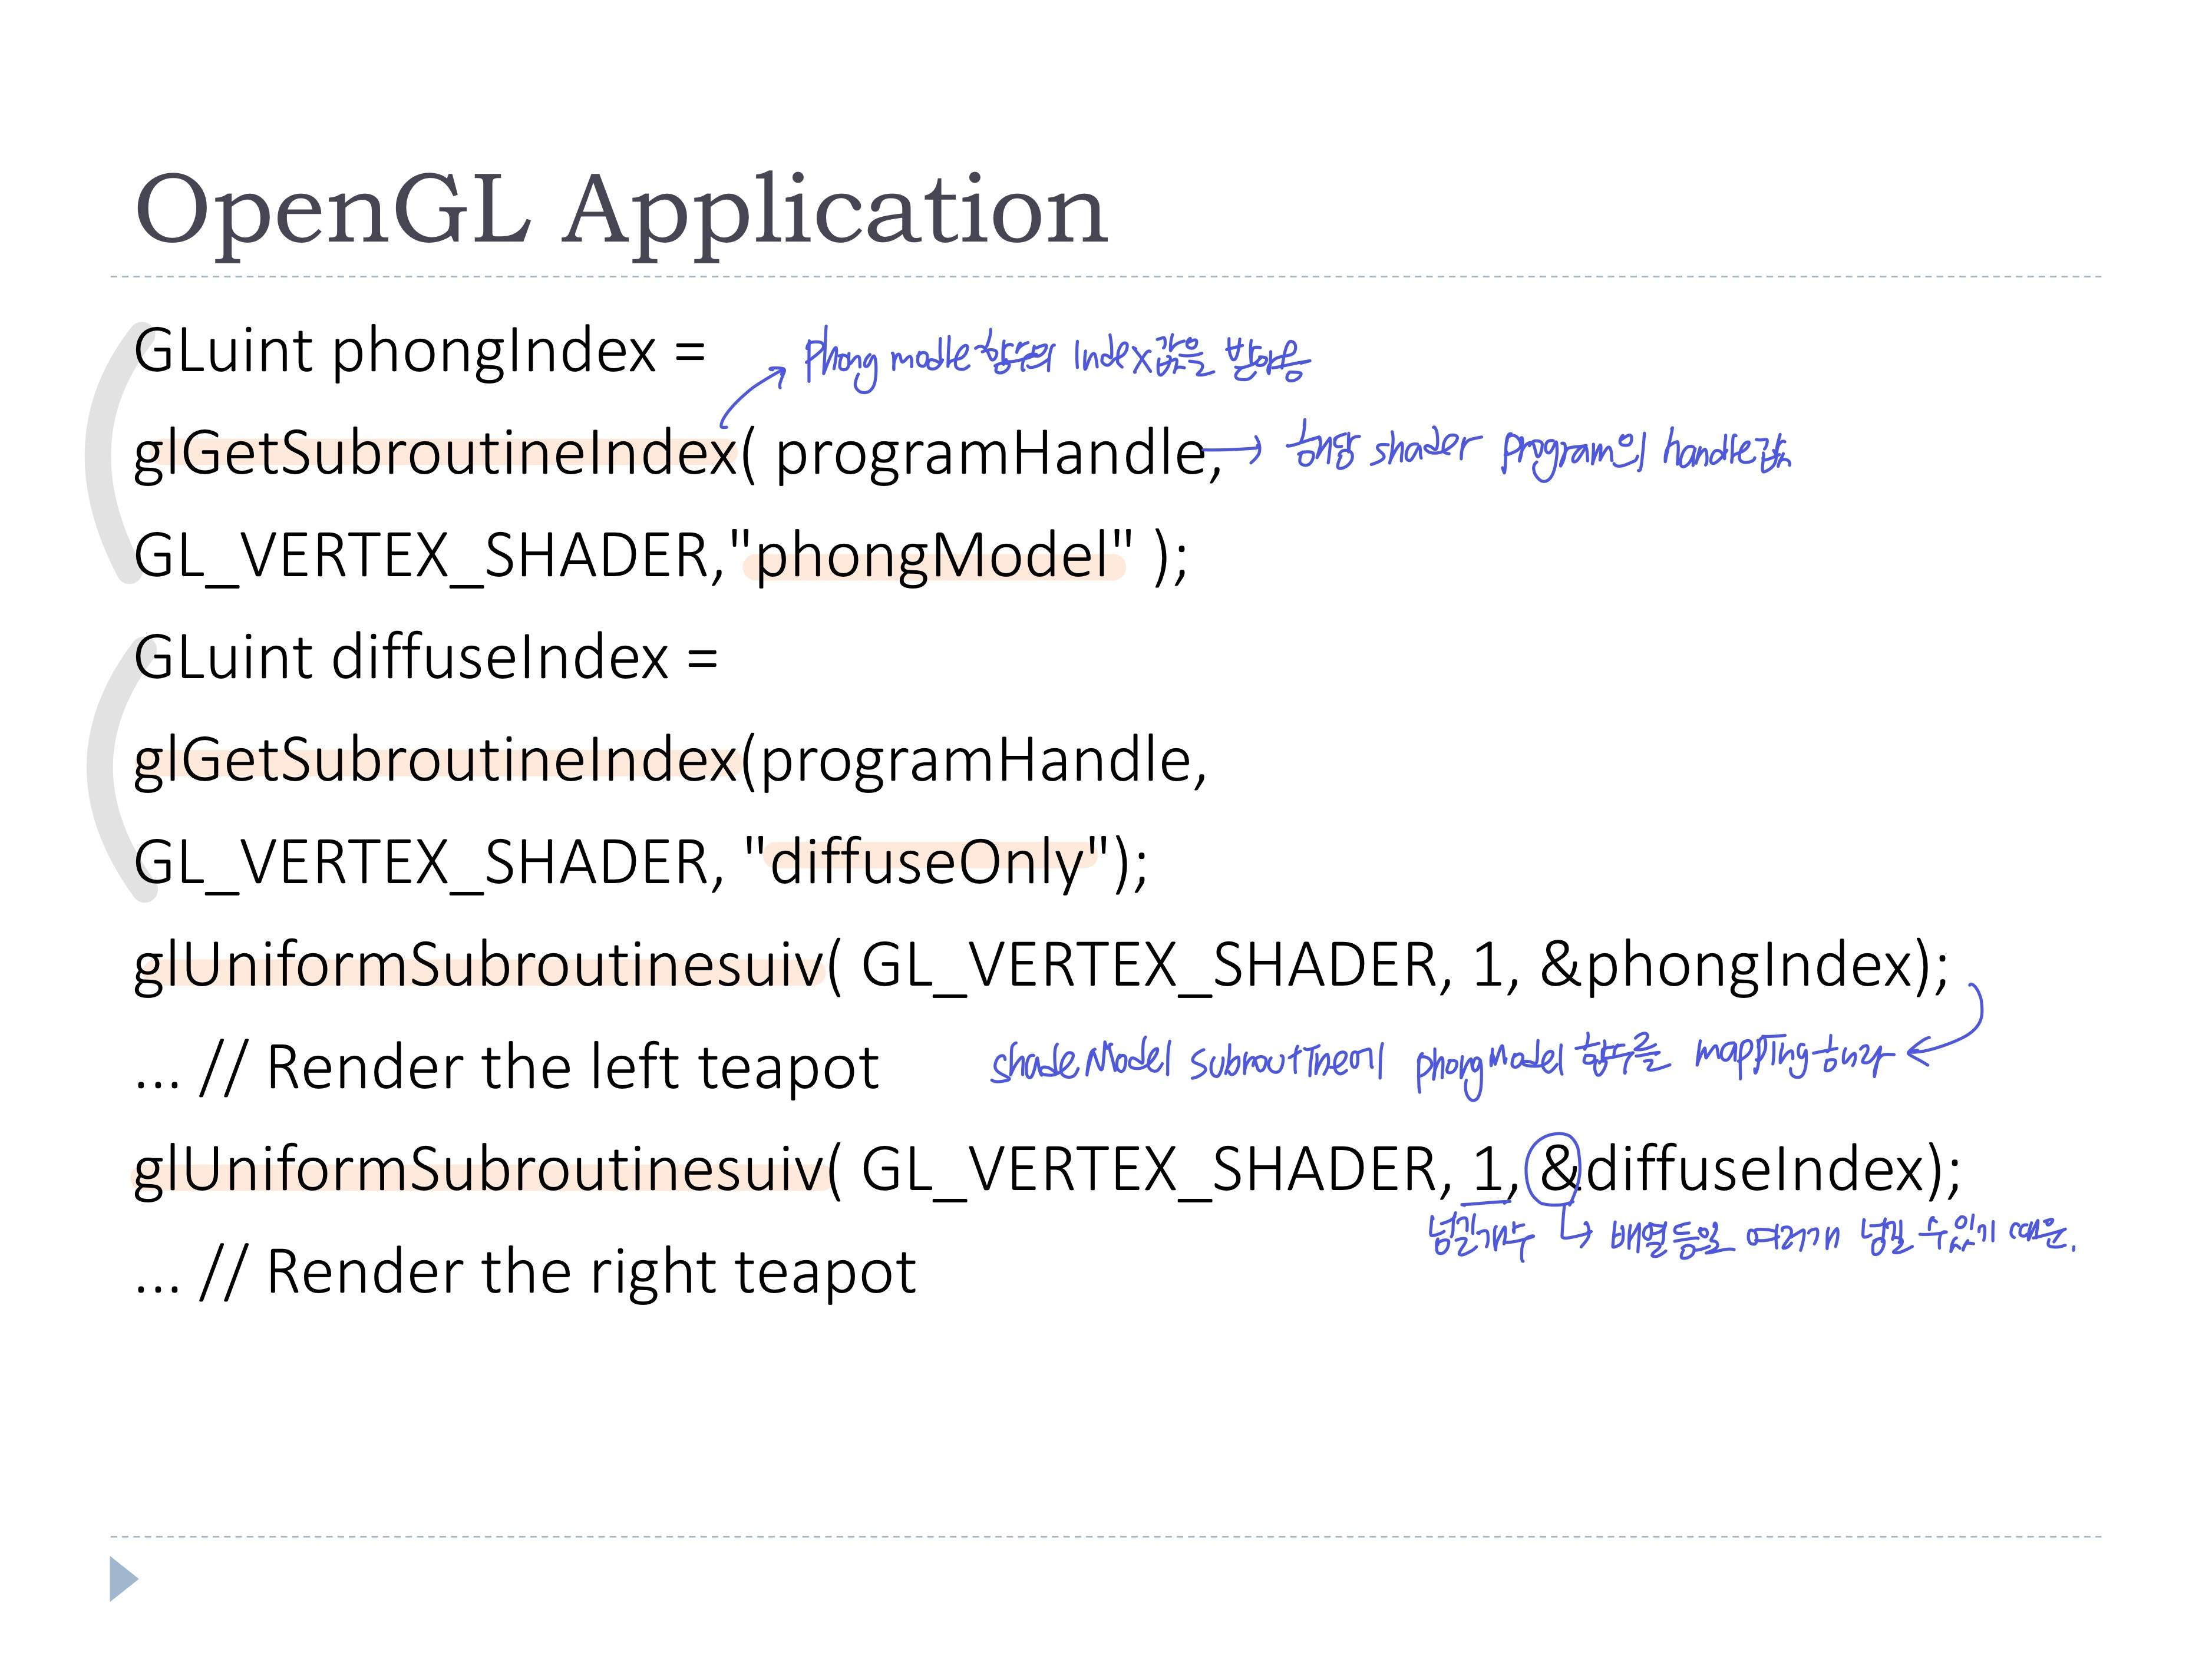
- Subroutine uniform변수를 지정하고 넘겨주는 부분이 없음 (기존 uniform변수처럼 주소값 받아서 넘겨주는..)
-> Subroutine Type이 default로 0, 1, ..로 지정되기 때문
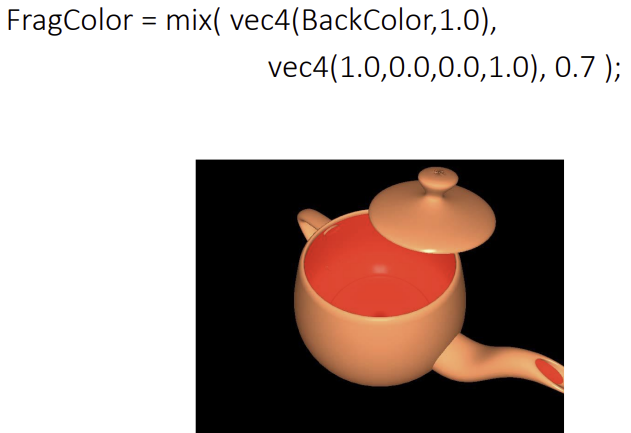
◾ Discarding Fragments
- to create a perforated look
- fragments를 버리는 것 -> 구멍 (배경을 먼저 그리기 때문에 배경이 보임)
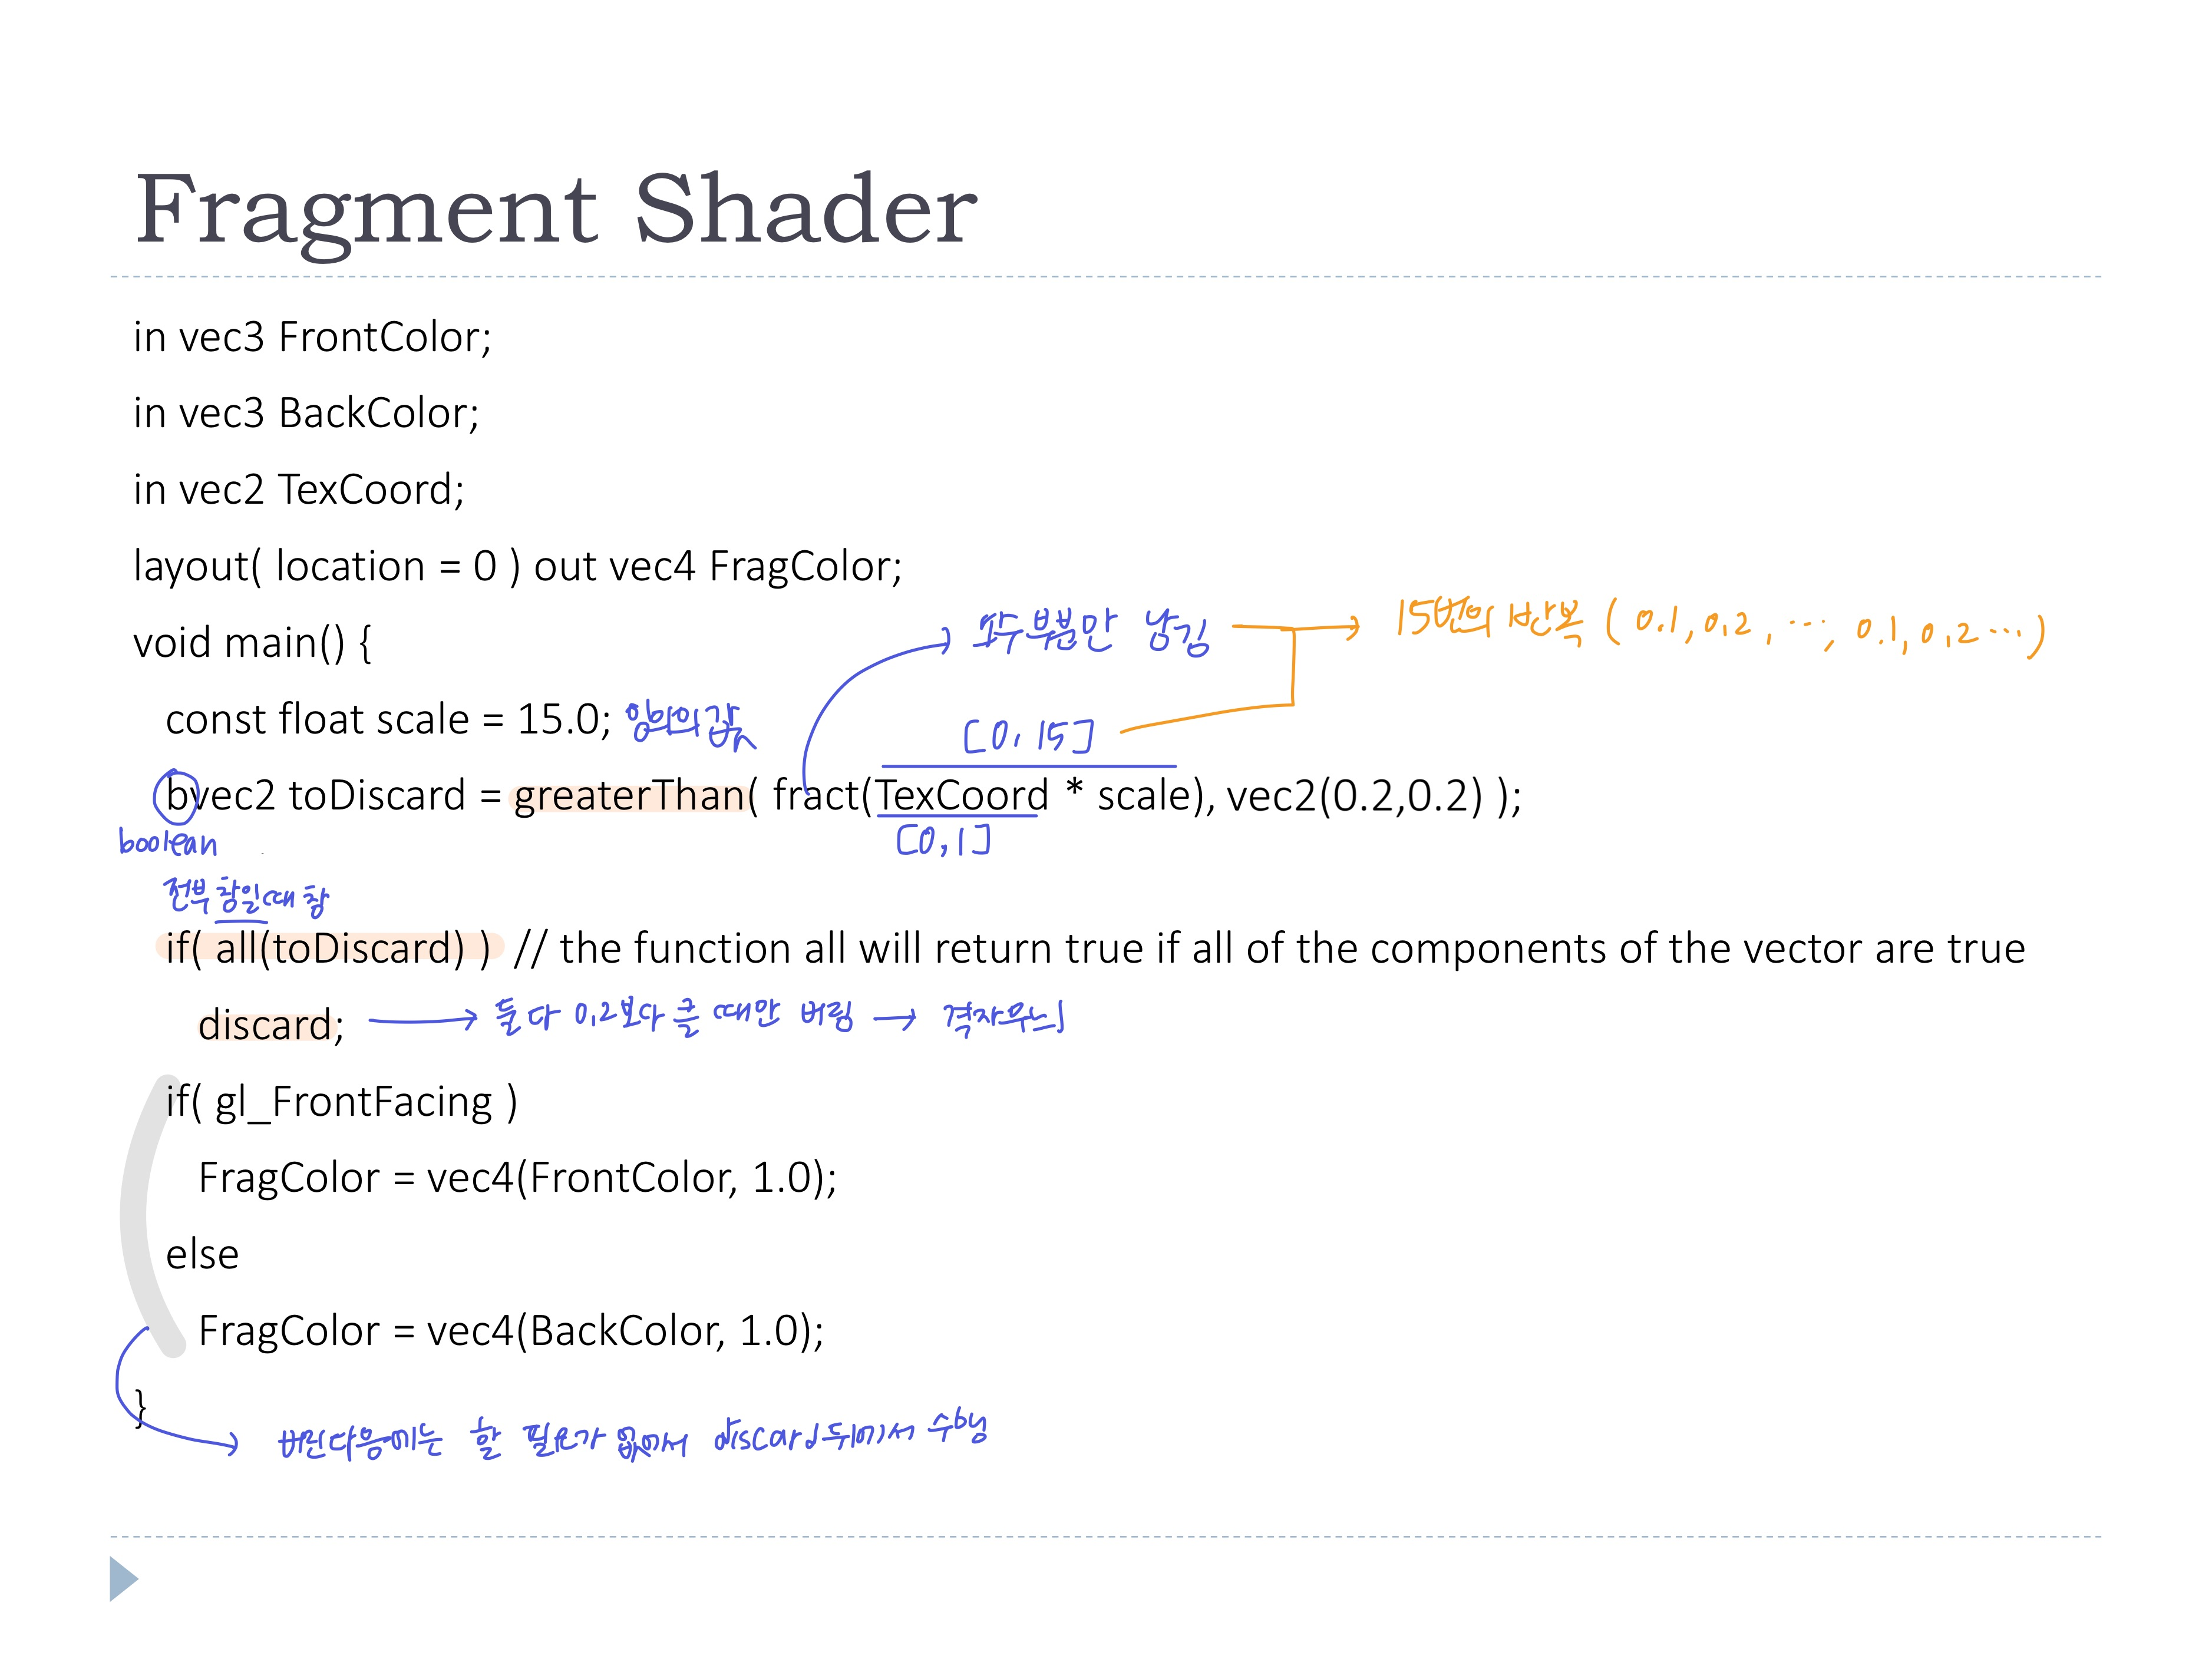
📃 Code
- 뚫린 부분으로 보이는 뒷부분(안쪽)을 칠해주기 위해 backColor도 계산
- Texture coordinate를 사용해서 일정하게 뚫리도록 함
- TexCoord에 15를 곱해서 [0, 15]범위로 만든 뒤, 소수부분만 남겨서 0~0.9가 15번 반복되도록 한다
- 그 TexCoord를 vec(0.2, 0.2)와 비교하여 0.2보다 큰 경우에 fragments를 버린다 -> 격자무늬
- color를 그리는 과정은 버려지지 않은 fragments에만 하면 되므로 버린 뒤에 진행한다

( •̀ .̫ •́ )✧