
이미지 업로드 미리보기
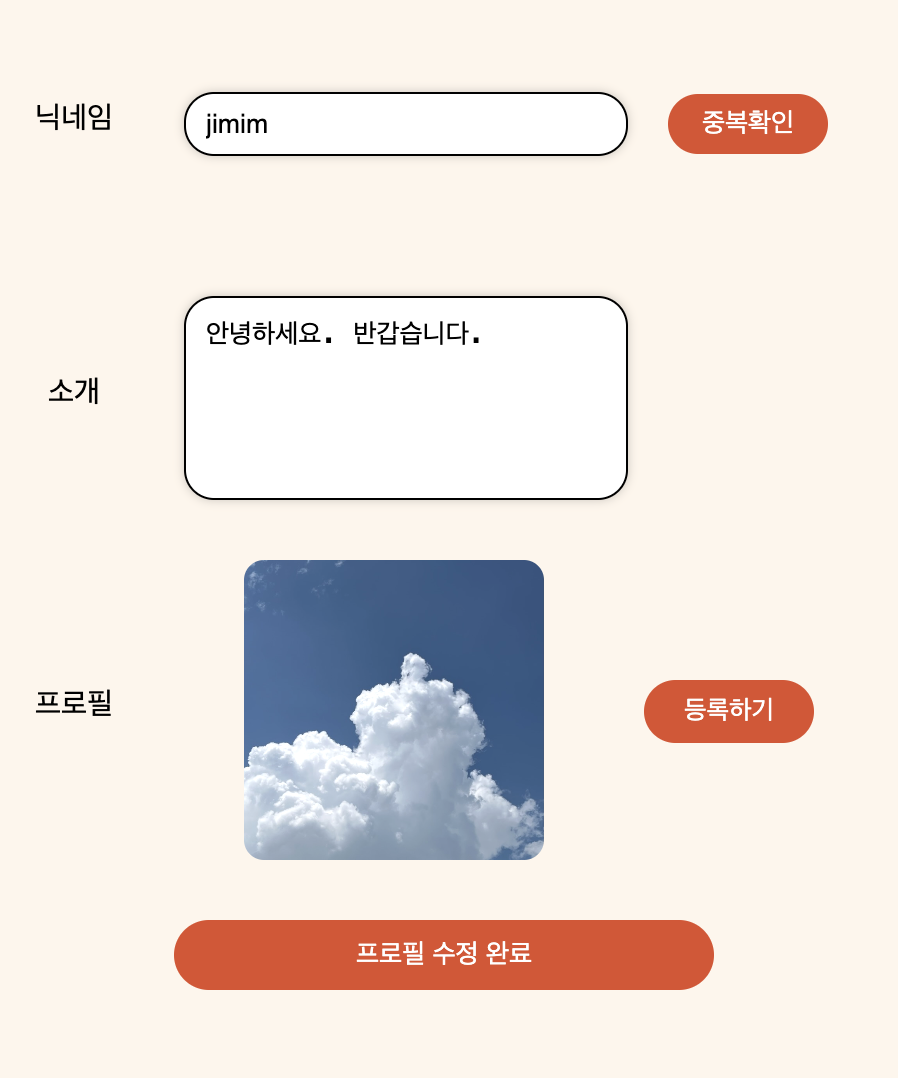
프로필 업로드 또는 업데이트와 같이 업로드 한 사진을 등록하기 전에 확인할 수 있도록 해줘야 하는 경우 필요한 코드를 적어보려고 한다.
나는
- React 환경
- styled-components
를 사용하여 코드를 구현하였다
1. <input type="file"/> 을 사용해서 이미지를 업로드 할 수 있는 input태그를 만든다.
<input type='file' accept='image/*' />2. Input 을 label요소를 이용해서 숨겨준다
 //HTML요소
 return
 <input type='file' id='profileImg' accept='image/*'/>
 <Button3 htmlFor='profileImg' type='button'>
   등록하기
</Button3>


  //styled component

  const StImg = styled.input`
    height: 25px;
    width: 75px;
    border-radius: 10px;
    background-color: white;
    display: none;
`;


  const Button3 = styled.label`
    border-radius: 17px;
    background-color: #e14d2a;
    width: 80px;
    height: 30px;
    color: white;
    padding: 8px 20px 8px 20px;
    font-size: 13px;
    cursor: pointer;
    &:hover {
        transform: scale(1.1);
        transition: all 0.3s;
    }
input의 id 요소와 label의 htmlFor요소를 사용하여 연결시켜준 후 input은 css의 display none 요소를 사용해서 숨겨준다.
3. img 태그를 사용하여 이미지가 보여질 곳을 만든다.
<input type='file' id='profileImg' accept='image/*'  />
 <Button3 htmlFor='profileImg' type='button'>
   등록하기
</Button3>
<StImage alt='이미지를 넣어주세요' src={} accept='image/*' />


  //styled component

  const StImg = styled.input`
    height: 25px;
    width: 75px;
    border-radius: 10px;
    background-color: white;
    display: none;
`;


  const Button3 = styled.label`
    border-radius: 17px;
    background-color: #e14d2a;
    width: 80px;
    height: 30px;
    color: white;
    padding: 8px 20px 8px 20px;
    font-size: 13px;
    cursor: pointer;
    &:hover {
        transform: scale(1.1);
        transition: all 0.3s;
    }

    const StImage = styled.img`
    width: 150px;
    height: 150px;
    border-radius: 10px;
    object-fit: cover;
`;
.
4. state를 선언하고 onChange 함수를 만들어 각 input태그에 적용한 후 img 태그의 src에 fileImage를 넣어준다.
- URL,CreateObjectURL 메소드를 사용하여 e.target.value를 감싸줘야 이미지를 미리 볼 수 있다
//State
  const [fileImage, setFileImage] = useState();

// 업로드된 파일을 감지할 수 있는 함수
 const saveFileImage = (e) => {
        setFileImage(URL.createObjectURL(e.target.files[0]));}

 //HTML요소
 return
 <input type='file' id='profileImg' accept='image/*' onChange={saveFileImage} />
 <Button3 htmlFor='profileImg' type='button'>
   등록하기
</Button3>
<StImage alt='이미지를 넣어주세요' src={fileImage} accept='image/*' />


  //styled component

  const StImg = styled.input`
    height: 25px;
    width: 75px;
    border-radius: 10px;
    background-color: white;
    display: none;
`;


  const Button3 = styled.label`
    border-radius: 17px;
    background-color: #e14d2a;
    width: 80px;
    height: 30px;
    color: white;
    padding: 8px 20px 8px 20px;
    font-size: 13px;
    cursor: pointer;
    &:hover {
        transform: scale(1.1);
        transition: all 0.3s;
    }

    const StImage = styled.img`
    width: 150px;
    height: 150px;
    border-radius: 10px;
    object-fit: cover;
`;
완성!!
1인분 하고 싶은 코린이