최근 UIButton의 contentEdgeInsets 프로퍼티를 사용하던중 경고창이 하나 떴습니다.
'contentEdgeInsets' was deprecated in iOS 15.0 iOS15 이후 버전에서는 해당 프로퍼티가 deprecated 되었다는 경고문구 였는데요 확인해보니 지난번 WWDC21 - Meet the UIKit button system 에서 발표가 되었던 부분이였습니다.
Deprecated
이것 말고도 deprecated된 UIButton의 property & method 들을 확인해 보자면 아래와 같았습니다.
- reversesTitleShadowWhenHighlighted
- adjustsImageWhenHighlighted
- adjustsImageWhenDisabled
- showsTouchWhenHighlighted
- contentEdgeInsets
- titleEdgeInsets
- imageEdgeInsets
- backgroundRect(forBounds:)
- contentRect(forBounds:)
- titleRect(forContentRect:)
- imageRect(forContentRect:)
New Features
그렇다면 iOS15 버전에서 UIButton에 어떤것들이 추가 되었는지 확인해 봅시다.
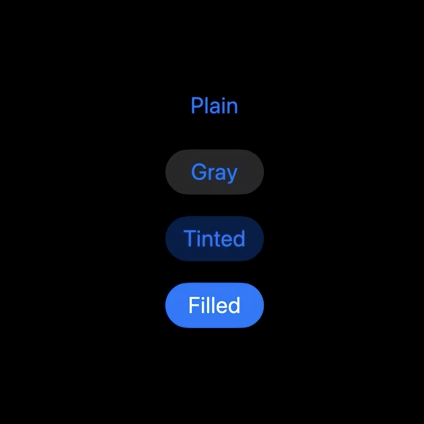
1. 새로운 스타일의 버튼들이 추가 됨
plain, gray, tinted, filled 스타일의 버튼이 추가 되었습니다.
이 외에도 스토리보드가 아닌 코드로 UIButton을 생성할때에는 borderless, bordered, borderedTinted, borderedProminent 스타일을 기본으로 제공합니다.
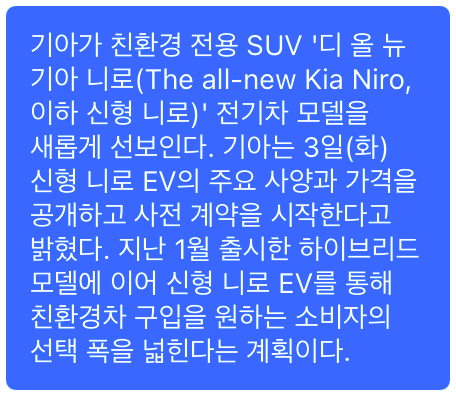
2. mutilineText가 지원됩니다.
한 줄로 길게 텍스트를 작성하더라도 버튼의 크기에 맞춰 multiline이 적용되어 나타납니다.
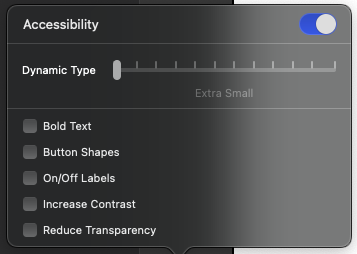
3. Dinamic Type을 지원합니다.
기존에는 버튼의 텍스트 크기를 IB에서 Font 설정을 통해 변경을 했다면 이번 업데이트를 통해
Font 설정이 사라지고 Dynamic Type을 통해 조절을 할 수 있습니다.
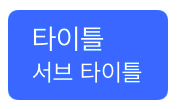
4. SubTitle을 지원합니다.
기존에 버튼에 들어갈 수 있는것은 타이틀과 이미지가 있었지만 이번 업데이트를 통해 SubTitle까지 지원하게 되었습니다.
5. Configuration이 추가되었습니다.
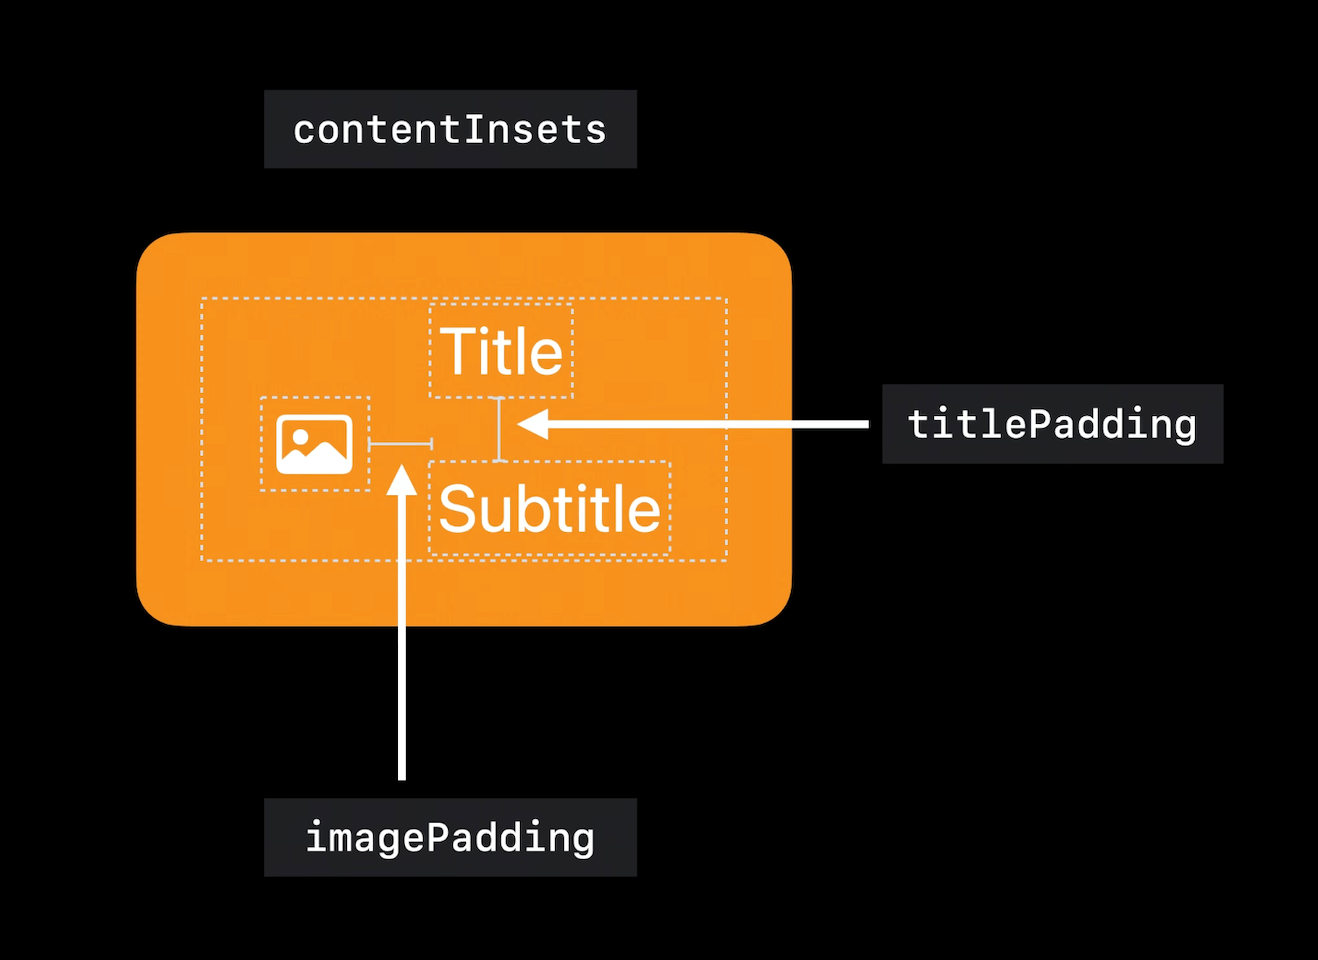
configuration으로 많은것들을 설정할 수 있는데, 기존에 button 객체에서 설정하던 title, image 와 더불어 subtitle 까지 설정 하실 수 있습니다.
이 외에도 cornerStyle, buttonSize, titleAlingment, titlePadding, imagePadding, title, subtitle, image, etc... 다양하게 설정 하실 수 있습니다.
우선 기본적으로 UIButton에 Configuration을 적용하는 두 가지 방법을 알아보도록 합시다.
#1.
let button = UIButton(type: .system)
button.configuration = .filled()

#2.
var configuration = UIButton.Configuration.filled()
let button = UIButton(configuration: configuration, primaryAction: nil)
이렇게 두 가지의 방법이 있지만, 위에 방법은 처음 configuration의 여러 설정들을 세팅할 수 없기 때문에 아래와 같은 방법이 선호되는거 같다(?)
그리고 두번째 방법을 통해 이미지와 타이틀을 세팅하는 방법은 아래와 같습니다.
var configuration = UIButton.Configuration.filled()
/// 버튼의 타이틀 설정
configuration.title - "삭제"
/// 버튼의 이미지 설정
configuration.image = UIImage(systemName: "trash.fill")
/// 버튼 이미지의 위치 설정
/// top, bottom, leading, tralling
configuration.imagePlacement = .leading
/// 버튼의 이미지 padding 값 설정
configuration.imagePadding = 10
let button = UIButton(configuration: configuration, primaryAction: nil)
그리고 설정된 Configuration은 configurationUpdateHandler에서 수정이 가능합니다. 해당 핸들러는 UIButton의 State가 업데이트 될 때 호출이 됩니다.
또는, 수동으로 호출을 하기 위해서는 UIButton의 setNeedsUpdateConfigruation()을 호출하면 됩니다.
#1.
button.configurationUpdateHandler = { [unowned self] button in
	guard var config = button.configuration else { return }
    config.subtitle = self.itemDescription
    config.image = button.isHighlighted
    	? UIImage(systemName: "trash.fill")
        : UIImage(systemName: "trash")

    button.configuration = config
}

#2.
var itemDescription = String? {
	didSet {
    	self.button.setNeedsUpdateConfiguration()
    }
}
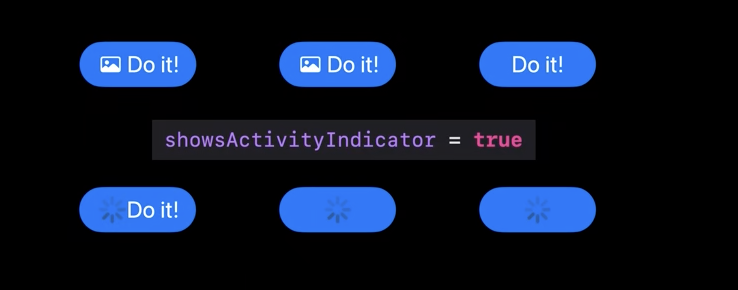
5-1. Activity Indicator가 추가되었습니다.
이제부터 버튼에서 indicator가 보이도록 할 수 있습니다.
간단하게 config.showsActivityIndicator 값을 true로 설정해주면 됩니다.
필요한 경우에는 버튼의 이미지를 대체하기도 합니다.
해당 값은 configurationUpdateHandler에서 업데이트 해주면 좋을거 같습니다.
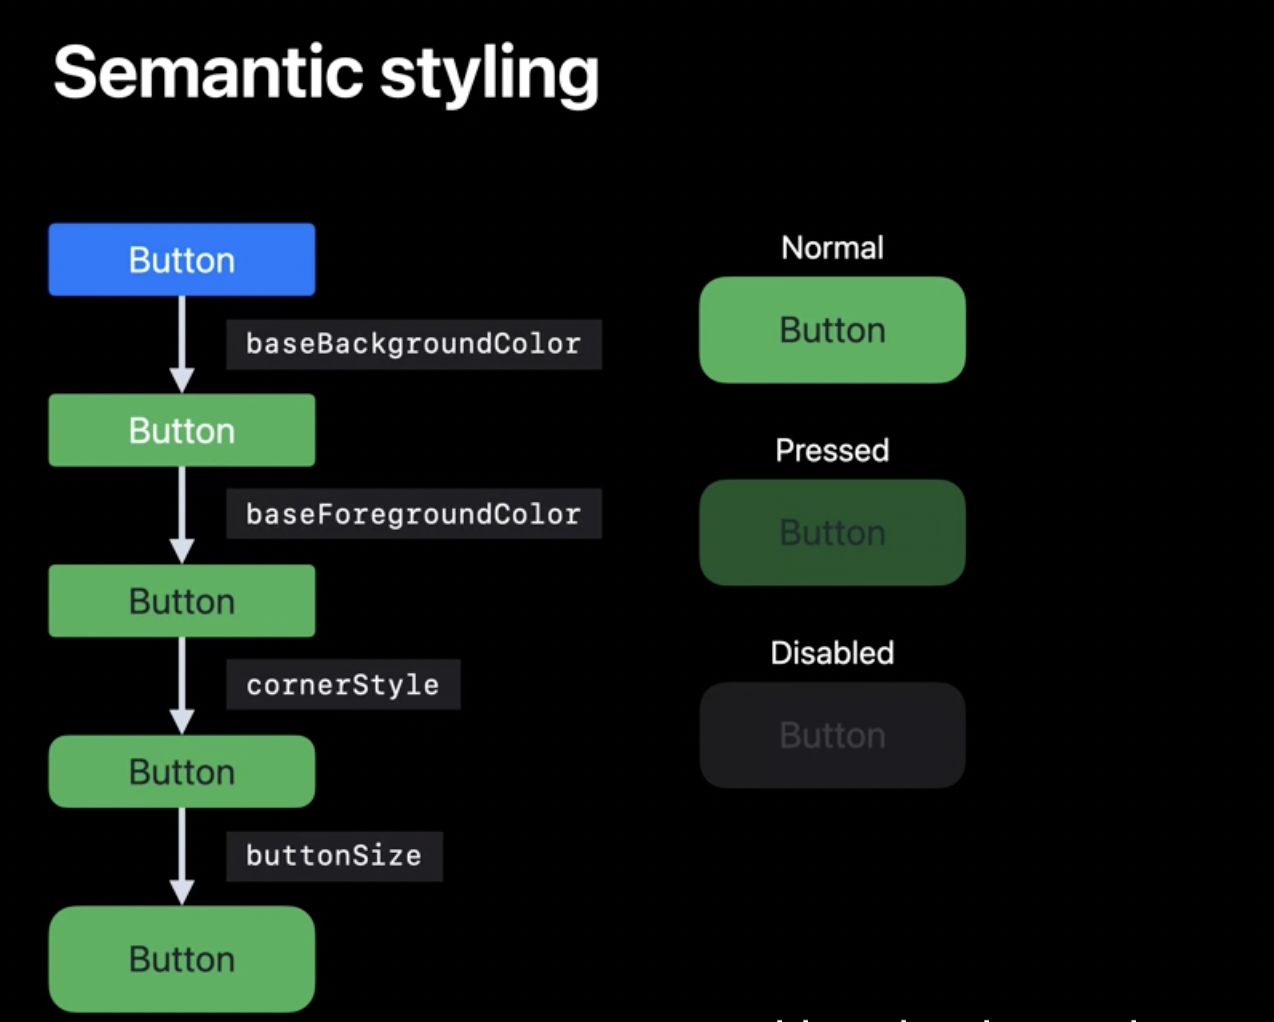
5-2. Semantic Style
이제는configuration을 통해 버튼의 스타일을 세팅해두면 그에 맞는 상태에 따른 디자인이 자동으로 생성되어 적용이 됩니다.
6. Pop-up Buttons
팝업 버튼은 기존에 iOS14 에서 업데이트 되었던 Pull-Down Button의 확장판입니다.
기존에는 여러 선택지를 동시에 선택할 수 있었다면 팝업 버튼은 한가지만 선택 가능합니다.
기존의 코드에서 showsMenuAsPrimaryAction, changesSelectionAsPrimaryAction 두 가지를 추가로 설정해주면 사용이 가능합니다.
let updateClosure: UIActionHandler = { [unowned self] action in
	self.updateTitle(action.title)
}

self.button.menu = UIMenu(children: [
	UIAction(title: "삭제", state: .on, handler: updateClosure),
	UIAction(title: "추가", handler: updateClosure)
])

self.button.showsMenuAsPrimaryAction = true
self.button.changesSelectionAsPrimaryAction = true


/// 코드를 통해 직접 현재 선택 된 메뉴를 변경 하는것도 가능하다.
(self.button.menu?.children[selectedColorIndex()] as? UIAction)?.state = .on

또한 메뉴아래에 메뉴를 추가하는것 역시 가능합니다.
// Single selection menu

// The sort menu
let sortMenu = UIMenu(title: "Sort By", options: .singleSelection, children: [
	UIAction(title: "Title", handler: sortClosure),
	UIAction(title: "Date", handler: sortClosure),
	UIAction(title: "Size", handler: sortClosure)
])

// The top menu
let topMenu = UIMenu(children: [
	UIAction(title: "Refresh", handler: sortClosure),
	UIAction(title: "Account", handler: sortClosure),
	sortMenu
])

self.button.menu = topMenu
Reference
https://zeddios.tistory.com/1291
https://hereismyblog.tistory.com/32
https://nyancoder.tistory.com/37
Review
'contentEdgeInsets' was deprecated in iOS 15.0 라는 경고 문구를 보고 생긴 호기심에서 출발한 공부였지만 최근 업데이트 된 내용을 숙지하지 않고 있엇다는 점에서 반성해야 할거 같다...
업데이트 이후에는 반드시 WWDC를 공부하거나 어느정도 숙지하고 있는것이 앞으로 프로그래머로써 생명을 유지하는데에 큰 도움이 될테니까...