
📌 Intro
UITableView는 UIKit으로 App의 UI를 구성할 때 가장 기본이 되는 Class로, UIScrollView를 상속받는다.
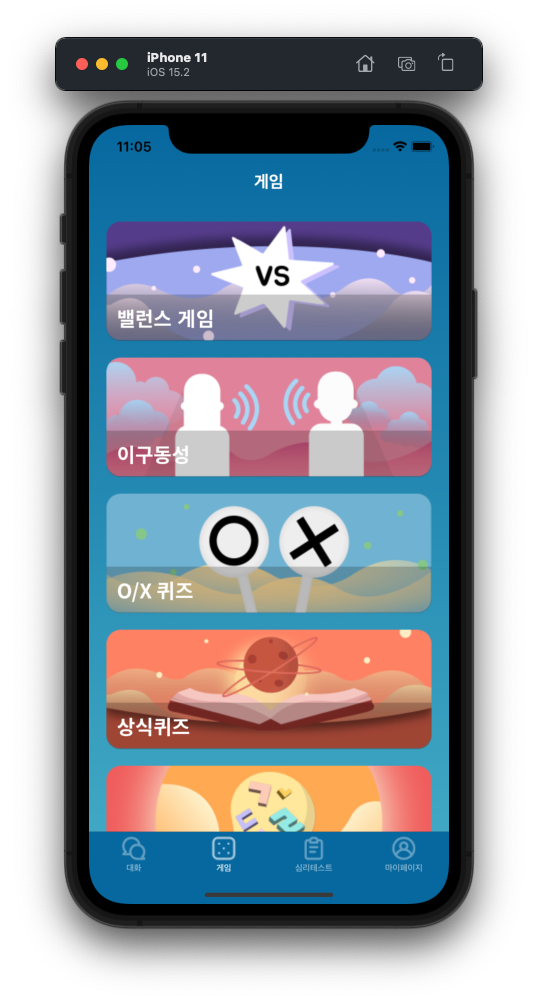
오늘은 이 UITableView와 Custom Cell을 활용하여 다음과 같은 화면을 구성해볼 것이다.
Storyboard와 xib파일을 활용하여 UITableView와 UITableViewCell을 각각 구성하였고, UIKit에 기본적인 지식이 있다는 가정 하에 작성되었다.
💻 Implementation
1. Model(더미데이터) 구성
UITableView를 구성할 데이터를 먼저 준비해보자. 따로 서버에서 가져오진 않고, Game.swift 파일을 만들어 더미데이터를 넣어주었다.
import UIKit

struct Game {
    let title: String
    let image: String
}

extension Game {
    static var data = [
        Game(title: "밸런스 게임", image: "game1"),
        Game(title: "이구동성", image: "game2"),
        Game(title: "O/X 퀴즈", image: "game3"),
        Game(title: "상식퀴즈", image: "game4"),
        Game(title: "초성게임", image: "game5")
    ]
}
2. UITableView 구성
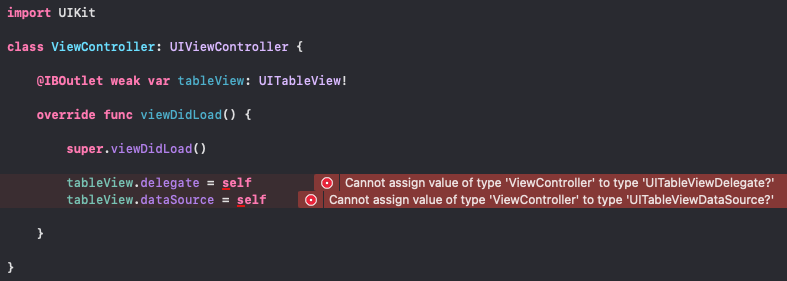
우선, Storyboard에서 UITableView를 View에 추가해주고, ViewController에 IBOutlet으로 연결해준다.
import UIKit

class GameTabViewController: UIViewController {

    // UITableView 연결
    @IBOutlet weak var tableView: UITableView!

    override func viewDidLoad() {

        super.viewDidLoad()

    }

}
연결한 UITableView의 객체 tableView의 delegate와 datasource를 설정해주면, 아래와 같이 오류가 나타날 것이다. 둘 다 Fix를 눌러주면 알아서 필요한 클래스를 상속해주고 함수를 생성해준다.
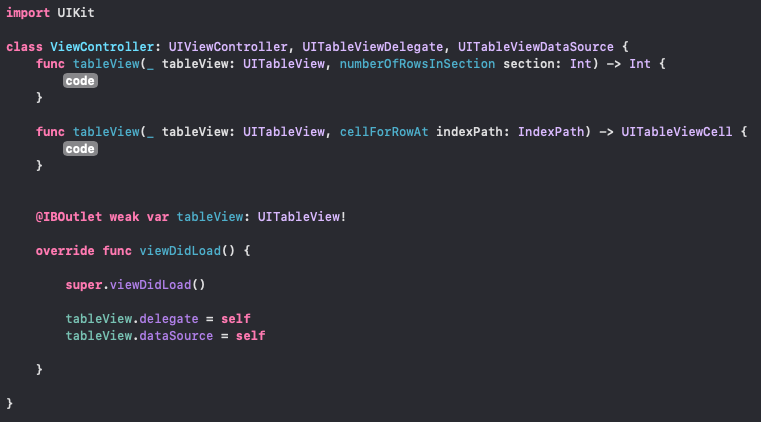
생성된 함수 중 위의 것은 UITableView의 Section 당 들어갈 Row의 수를 정하는 것이고, 아래는 UITableViewCell에 대한 설정을 해주는 함수이다.
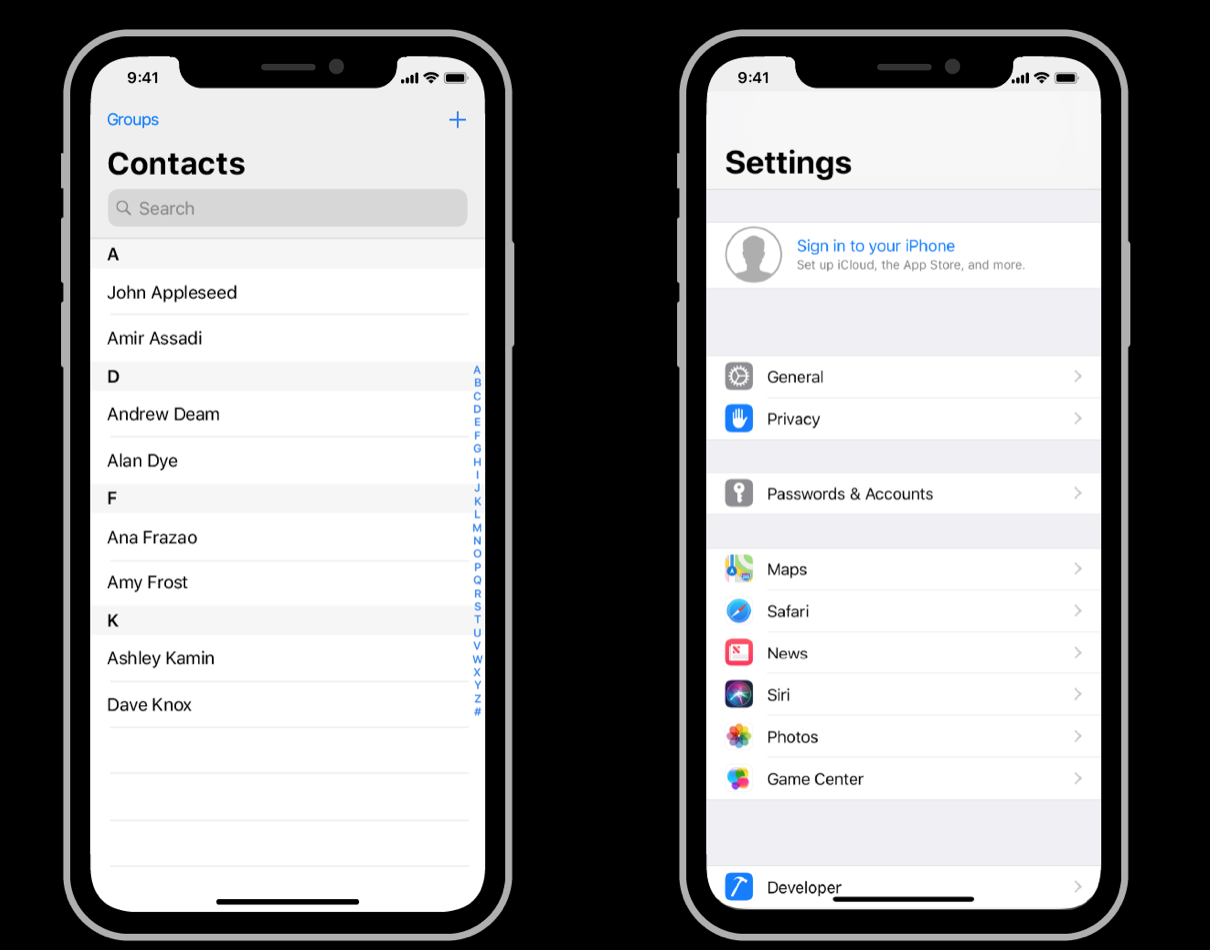
UITableView에서는 Row들이 리스트를 구성하고, Row들의 리스트가 하나의 Section을 구성한다. 아래의 왼쪽 사진을 보면 A, D, F, K 4개의 Section과 각 Section에 Row들이 위치해 있는 것을 볼 수 있다.
Cell에 대한 설정은 Custom Cell을 작성한 뒤에 해주도록 하고, Row 수를 설정해보자.

UITableView에 대해 공부하면서 느낀 점이, 각 Row 사이의 간격을 설정해주기가 매우 불편하다는 것이다. 그래서 위와 같은 간격을 깔끔하게 주기 위해, 하나의 편법..?을 사용해보았다.
각 Section을 Row 하나만으로 구성하고, 섹션 사이의 간격을 설정해줄 것이다.
따라서, 아래와 같이 코드를 작성했다.
import UIKit

class ViewController: UIViewController, UITableViewDelegate, UITableViewDataSource {

    @IBOutlet weak var tableView: UITableView!

    // 데이터 불러오기
    let gameList = Game.data
    let cellSpacingHeight: CGFloat = 1

    // Section 당 Row의 수
    func tableView(_ tableView: UITableView, numberOfRowsInSection section: Int) -> Int {
        return 1
    }

    // Section의 수
    func numberOfSections(in tableView: UITableView) -> Int {
        return gameList.count
    }

    // 각 Section 사이의 간격 설정
    func tableView(_ tableView: UITableView, heightForHeaderInSection section: Int) -> CGFloat {
        return cellSpacingHeight
    }

    func tableView(_ tableView: UITableView, cellForRowAt indexPath: IndexPath) -> UITableViewCell {
        <#code#>
    }

    override func viewDidLoad() {

        super.viewDidLoad()

        tableView.delegate = self
        tableView.dataSource = self

    }

}
3. Custom Cell 만들기
이제, UITableView를 구성할 Cell을 꾸며보도록 하자.
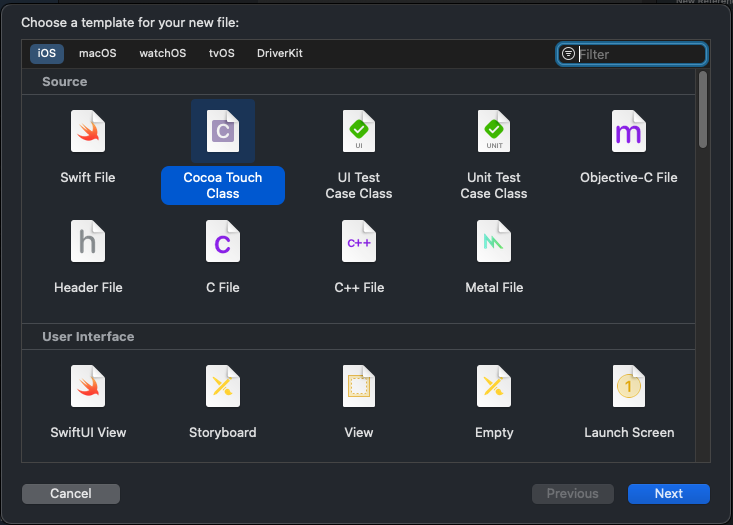
Cell을 만들고 싶은 위치에 Cocoa Touch Class로 파일을 생성한다.
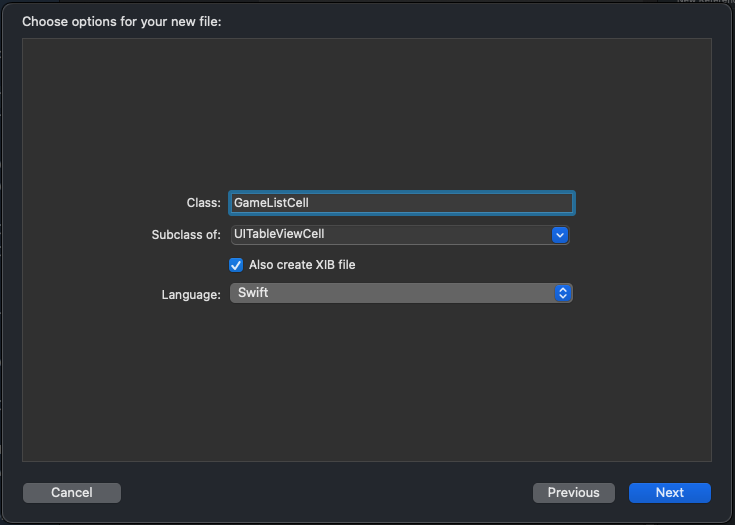
Cell의 이름을 정하고, Subclass를 UITableViewCell로 정해준다.
.xib 파일을 통해 Cell을 만들 것이므로 체크박스도 체크해주자.
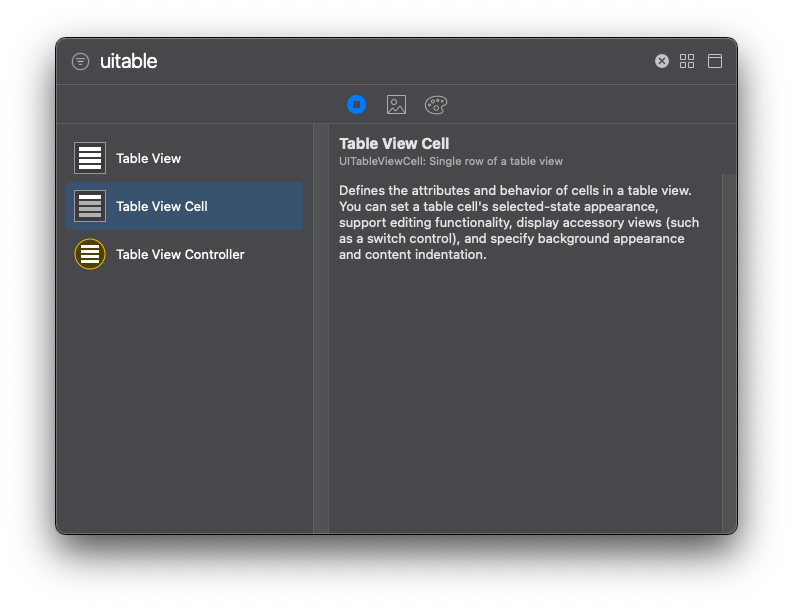
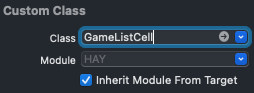
이제 생성된 .xib파일에 UITableViewCell을 추가해주고, 원하는 요소들을 추가해준 다음 Class와 IBOutlet을 연결해주자.
ViewController에서 .xib를 Register 해줄 것이기 때문에 Custom class로 연결하였다.
import UIKit
class GameListCell: UITableViewCell {
@IBOutlet weak var gameImage: UIImageView!
@IBOutlet weak var gameLabel: UILabel!
override func awakeFromNib() {
super.awakeFromNib()
// Initialization code
}
override func setSelected(_ selected: Bool, animated: Bool) {
super.setSelected(selected, animated: animated)
// Configure the view for the selected state
}
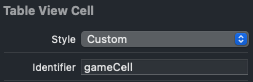
}마지막으로, 만든 cell을 인식하는데 사용할 reuseIdentifier를 설정해주자.
4. Custom Cell Register
만든 Custom Cell을 UITableView가 들어 있는 ViewController에서 사용하려면, nib을 Register 해주어야 한다.
let cellName = "GameListCell"
let cellReuseIdentifier = "gameCell"

private func registerXib() {
    let nibName = UINib(nibName: cellName, bundle: nil)
    tableView.register(nibName, forCellReuseIdentifier: cellReuseIdentifier)
}
위와 같이 만든 함수를, viewDidLoad() 안에서 호출해주면 된다.
5. Custom Cell 적용
이제, 아까의 함수를 구현해주면 Custom Cell을 적용할 수 있다.
func tableView(_ tableView: UITableView, cellForRowAt indexPath: IndexPath) -> UITableViewCell {
    let cell = tableView.dequeueReusableCell(withIdentifier: cellReuseIdentifier, for: indexPath) as! GameListCell
    let target = gameList[indexPath.section]

    let img = UIImage(named: "\(target.image).png")
    cell.gameImage?.image = img
    cell.gameLabel?.text = target.title
    cell.backgroundColor = UIColor.clear.withAlphaComponent(0)

    return cell
}
Row가 아닌 Section에 데이터를 대응시키기 때문에 indexPath.section으로 인덱싱해주었다.
6. 실행
이제 실행시키면, 아래와 같은 아름다운 화면을 마주할 수 있다.
전체 코드는 다음과 같다.
import UIKit

class ViewController: UIViewController, UITableViewDelegate, UITableViewDataSource {

    @IBOutlet weak var tableView: UITableView!

    let gameList = Game.data
    let cellSpacingHeight: CGFloat = 1
    let cellName = "GameListCell"
    let cellReuseIdentifier = "gameCell"

    func tableView(_ tableView: UITableView, numberOfRowsInSection section: Int) -> Int {
        return 1
    }

    func numberOfSections(in tableView: UITableView) -> Int {
        return gameList.count
    }

    func tableView(_ tableView: UITableView, heightForHeaderInSection section: Int) -> CGFloat {
        return cellSpacingHeight
    }

    func tableView(_ tableView: UITableView, cellForRowAt indexPath: IndexPath) -> UITableViewCell {
        let cell = tableView.dequeueReusableCell(withIdentifier: cellReuseIdentifier, for: indexPath) as! GameListCell
        let target = gameList[indexPath.section]

        let img = UIImage(named: "\(target.image).png")
        cell.gameImage?.image = img
        cell.gameLabel?.text = target.title
        cell.backgroundColor = UIColor.clear.withAlphaComponent(0)

        return cell
    }

    @IBOutlet weak var background: UIView!

    override func viewDidLoad() {

        super.viewDidLoad()

        background.setGradient(color1: .primary ?? .white, color2: .subPrimary ?? .black)

        registerXib()

        tableView.delegate = self
        tableView.dataSource = self
        tableView.backgroundColor = UIColor.clear.withAlphaComponent(0)
    }

    private func registerXib() {
        let nibName = UINib(nibName: cellName, bundle: nil)
        tableView.register(nibName, forCellReuseIdentifier: cellReuseIdentifier)
    }

}
📌 Outro
Custom Cell과 UITableView를 사용하여 간단한 화면을 구성해보았다.
UITableView는 이러한 List를 보여주는 것 말고도 화면 전체의 틀을 잡을 때 범용적으로 사용할 수 있는 Class이므로, 여러 방향으로 구현해보는게 좋을 것 같다.
다음에는 Custom Cell과 UICollectionView로 UI를 구성해보도록 하겠다.
printf("Thank You!\n");
printf("Posted by Thirsty Developer\n");
2개의 댓글

Jake was always drawn to the flashy lights and captivating sounds of slot machines, but he had never taken them seriously. On a quiet Saturday, he decided to explore an online casino he’d heard about from a friend. Choosing a slot game https://casinomateau1.com/ with an adventurous treasure hunt theme, Jake initially played with small bets, simply enjoying the game’s graphics and sound effects. His sessions were filled with minor wins and playful losses, giving him a relaxed yet engaging experience.
잘 보고 갑니다