
만약 안드로이드 스튜디오를 처음 이용한다면, 다음과 같이 설정해보세요!
File - Settings - Editor - General - Auto Import 에서
자신이 사용중인 언어의 Auto Import 옵션을 켜 줍니다.
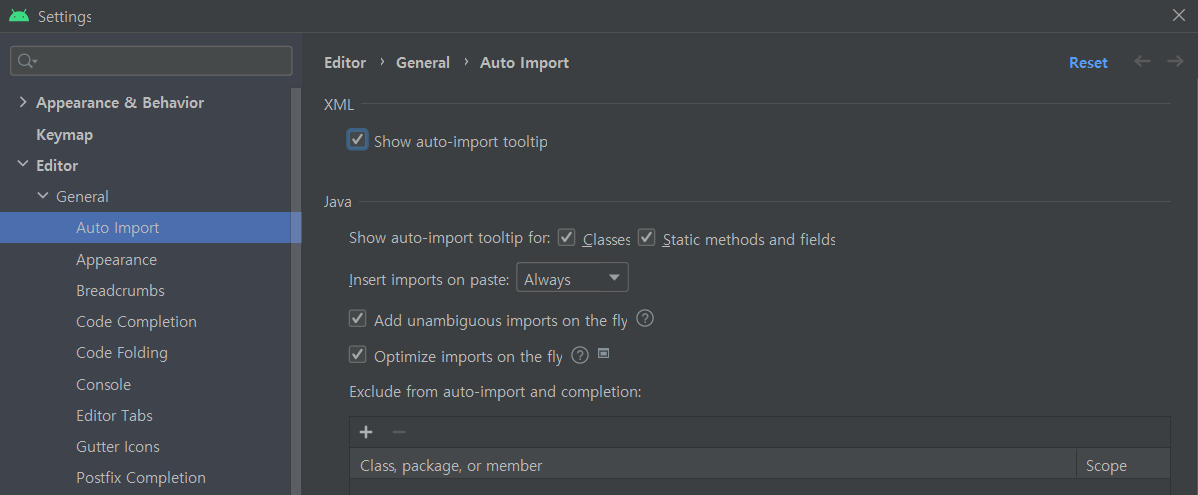
저는 Java 언어의 두 옵션을 체크해 주었답니다.
이제 번거롭게 Import를 찾아가며 넣지 않아도 IDE가 알아서 해줄 거에요!
그럼 바로 Google STT를 만들어볼게요 :-)
-
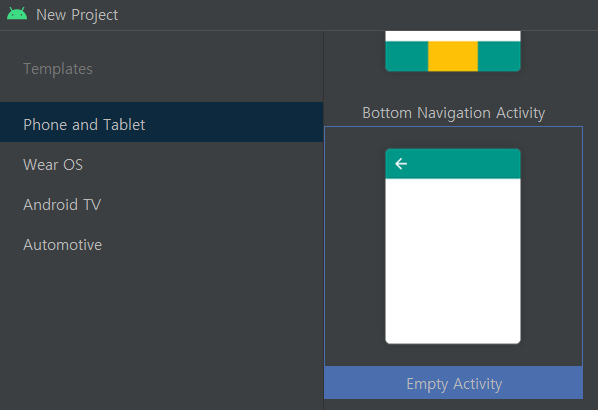
Empty project를 생성합니다.
-
manifests - AndroidManifest.xml 에 권한을 추가해줍니다.
<uses-permission android:name="android.permission.INTERNET" />
<uses-permission android:name="android.permission.RECORD_AUDIO" />- res - layout - activity_main.xml 에 앱의 레이아웃을 그려넣어줍니다.
간단하게 STT 입력을 시작할 버튼과 결과를 표기할 TextView만 넣어볼게요!
androidx.constraintlayout.widget.ConstraintLayout 내부에 넣어주세요.
<LinearLayout xmlns:android="http://schemas.android.com/apk/res/android"
        xmlns:app="http://schemas.android.com/apk/res-auto"
        xmlns:tools="http://schemas.android.com/tools"
        android:layout_width="match_parent"
        android:layout_height="match_parent"
        android:gravity="center"
        android:orientation="vertical"
        tools:context=".MainActivity">
        <TextView
            android:id="@+id/sttResult"
            android:layout_width="wrap_content"
            android:layout_height="wrap_content"
            android:text="STT 결과가 여기 표시됩니다." />
        <Button
            android:id="@+id/sttStart"
            android:layout_width="wrap_content"
            android:layout_height="wrap_content"
            android:text="텍스트 변환 시작" />
</LinearLayout>- Java - com.example.[프로젝트명] - MainActivity.java 에 동작을 넣어줍니다.
MainActivity class 내부에 넣어주세요.
	Intent intent;
    SpeechRecognizer mRecognizer;
    Button sttBtn;
    TextView textView;
    final int PERMISSION = 1;

    @Override
    protected void onCreate(Bundle savedInstanceState) {
        super.onCreate(savedInstanceState);
        setContentView(R.layout.activity_main);

        if ( Build.VERSION.SDK_INT >= 23 ){
            // 권한 확인
            ActivityCompat.requestPermissions(this, new String[]{Manifest.permission.INTERNET,
                    Manifest.permission.RECORD_AUDIO},PERMISSION);
        }

        textView = (TextView)findViewById(R.id.sttResult);
        sttBtn = (Button) findViewById(R.id.sttStart);

        intent = new Intent(RecognizerIntent.ACTION_RECOGNIZE_SPEECH);
        intent.putExtra(RecognizerIntent.EXTRA_CALLING_PACKAGE,getPackageName());
        intent.putExtra(RecognizerIntent.EXTRA_LANGUAGE,"ko-KR");

        sttBtn.setOnClickListener(v -> {
            mRecognizer=SpeechRecognizer.createSpeechRecognizer(this);
            mRecognizer.setRecognitionListener(listener);
            mRecognizer.startListening(intent);
        });

    }

    private RecognitionListener listener = new RecognitionListener() {
        @Override
        public void onReadyForSpeech(Bundle params) {
            Toast.makeText(getApplicationContext(),"음성인식을 시작합니다.",Toast.LENGTH_SHORT).show();
        }

        @Override
        public void onError(int error) {
            String message;

            switch (error) {
                case SpeechRecognizer.ERROR_AUDIO:
                    message = "오디오 오류";
                    break;
                case SpeechRecognizer.ERROR_CLIENT:
                    message = "앱 오류";
                    break;
                case SpeechRecognizer.ERROR_INSUFFICIENT_PERMISSIONS:
                    message = "권한이 없습니다.";
                    break;
                case SpeechRecognizer.ERROR_NETWORK:
                    message = "네트워크 에러";
                    break;
                case SpeechRecognizer.ERROR_NETWORK_TIMEOUT:
                    message = "네트워크 타임아웃";
                    break;
                case SpeechRecognizer.ERROR_NO_MATCH:
                    message = "다시 시도해 주세요.";
                    break;
                case SpeechRecognizer.ERROR_RECOGNIZER_BUSY:
                    message = "RECOGNIZER가 바쁨";
                    break;
                case SpeechRecognizer.ERROR_SERVER:
                    message = "서버 오류";
                    break;
                case SpeechRecognizer.ERROR_SPEECH_TIMEOUT:
                    message = "대기시간 초과";
                    break;
                default:
                    message = "알 수 없는 오류 발생";
                    break;
            }
            Toast.makeText(getApplicationContext(), "에러가 발생하였습니다. : " + message,Toast.LENGTH_SHORT).show();
        }

        @Override
        public void onResults(Bundle results) {
            // 말을 하면 ArrayList에 단어를 넣고 textView에 단어를 이어줍니다.
            ArrayList<String> matches =
                    results.getStringArrayList(SpeechRecognizer.RESULTS_RECOGNITION);

            for(int i = 0; i < matches.size() ; i++){
                textView.setText(matches.get(i));
            }
        }
};- 이제 끝입니다. 우측 상단의 초록색 시작 버튼을 눌러 멋진 결과를 확인하세요 :-)

컴퓨터공학과 학부생