백버튼을 눌러서 EditText포커스 해제하기
저번 포스팅에서 눈버튼을 눌렀을때 비밀번호를 표시를 했었는데 문제가 하나 있었다
엔터키가 눌렀을때는 setOnKeyListener 를 사용하여서 키보드를 내리고 포커스를 지우는 과정을 진행을 했다.
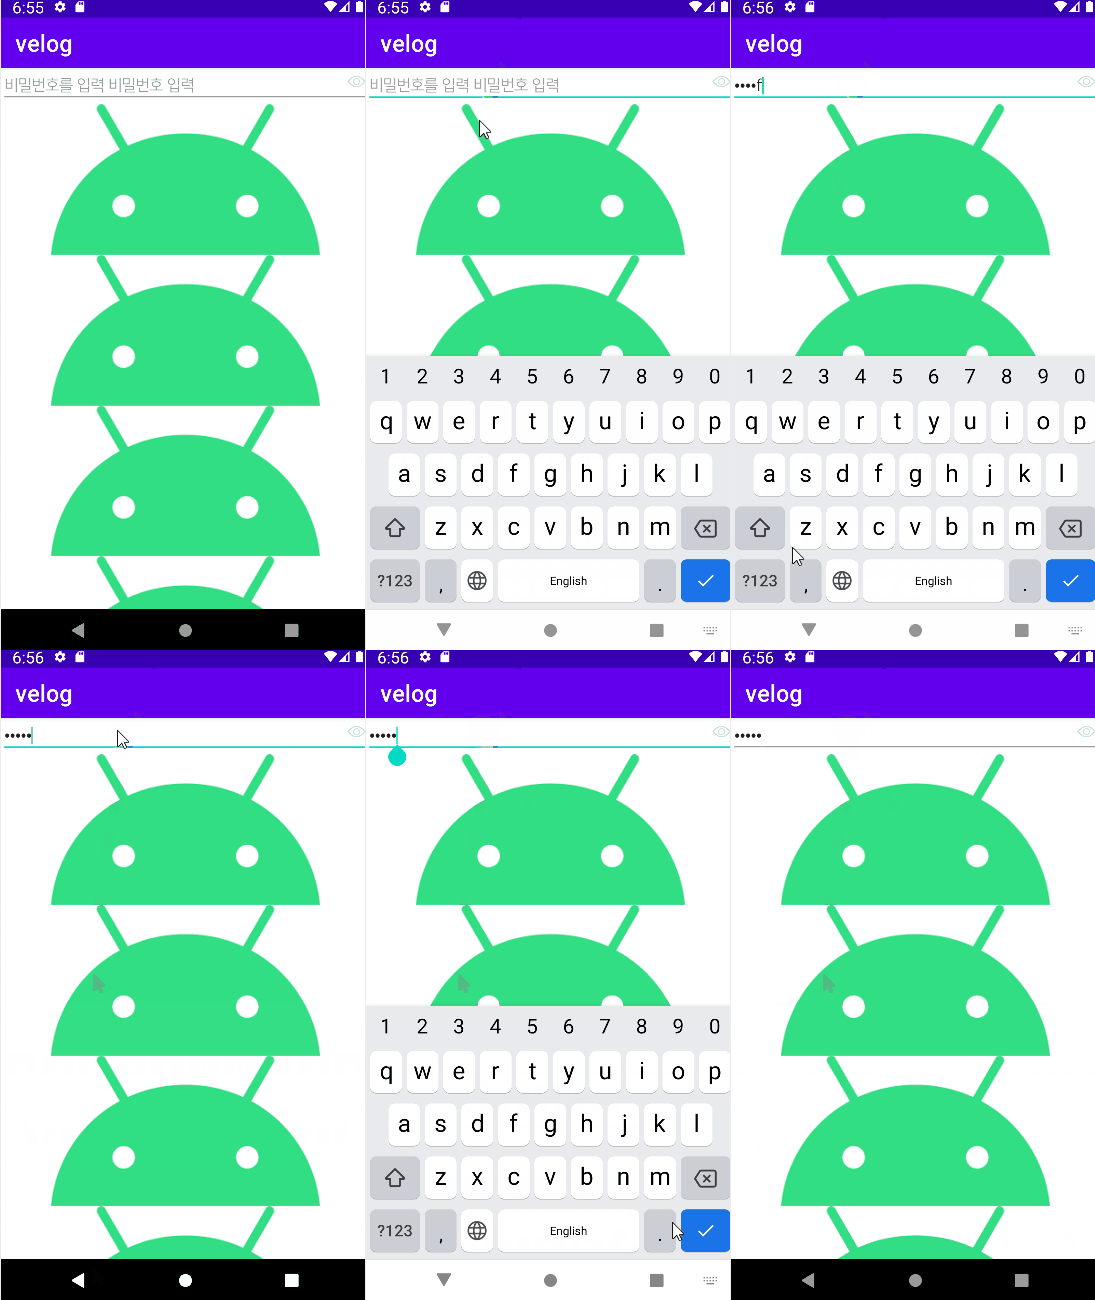
하지만 위 조건에 백버튼이 눌렀을때의 조건을 추가 했는데 동작이 되지 않는다는 문제가 있었다 이번 포스팅에선 이 문제를 작성하도록 하겠다.
- 해결전 동작 gif

1.setOnKeyListener 백버튼 누름 조건 추가
setOnKeyListener 안에 백버튼을 눌렀을때의 조건을 추가해보자
etx1.setOnKeyListener(new View.OnKeyListener() {
            @Override
            public boolean onKey(View v, int keyCode, KeyEvent event) {
                if (event.getAction() == KeyEvent.ACTION_DOWN) {
                    if (keyCode == KeyEvent.KEYCODE_ENTER || keyCode == KeyEvent.KEYCODE_ENTER) {
                        etx1.clearFocus();
                        InputMethodManager imm =
                                (InputMethodManager)getSystemService(Context.INPUT_METHOD_SERVICE);
                        imm.hideSoftInputFromWindow(etx1.getWindowToken(), 0);
                        return true;
                    }
                }
                return false;
            }
        });
이렇게 setOnKeyListener 안에 조건을 수정해도 동작이 되지 않는것을 확인할수있다
그 이유는 무엇일까?
왜 setOnKeyListener에 조건을 추가해도 동작이 처리 되지 않는가?
그 이유는 에딧텍스트의 디폴트 동작이 있기 때문이다 그러면 이방법을 해결하기 위해선 어떻게 해야할까?
2.새로운 EditText 클래스 정의
- setOnKeyListener 에 조건이 적용이 되지 않은 이유
위의 문제를 해결하기 위해선 우리는 새로운 에딧 텍스트 클래스를 정의하여야 한다
이유는 셋온키 리스너에서는 백버튼 동작을 추가하여도 동작하지 않고 onKeyPreIme 메소드를 재정의 한 에딧텍스트를 적용하여야하기 때문이다
- MbEditText.java
import android.content.Context;
import android.util.AttributeSet;
import android.view.KeyEvent;

public class MbEditText extends androidx.appcompat.widget.AppCompatEditText {
    private static final String TAG = "실행된것?";

    public MbEditText(Context context ) {
        super( context );
    }
    public MbEditText(Context context, AttributeSet attrs ) {
        super( context, attrs );
    }
    public boolean onKeyPreIme( int keyCode, KeyEvent event ) {
        if (event.getAction() == KeyEvent.ACTION_DOWN) {
            if (keyCode == KeyEvent.KEYCODE_BACK) {
                this.clearFocus();
                // Focus_Helper.releaseFocus (etx_email_input);
            }
        }
        return super.onKeyPreIme( keyCode, event );
    }

}
그럼 이제 커스텀 에딧텍스트를 작성했으니 xml파일에 이 위젯을 적용하고 main액티비티에서 이 커스텀 위젯을 가져와 보자
해결후 코드
- text_input_layout.xml
<?xml version="1.0" encoding="utf-8"?>
<ScrollView xmlns:app="http://schemas.android.com/apk/res-auto"
    xmlns:android="http://schemas.android.com/apk/res/android"
    android:layout_width="match_parent"
    android:layout_height="match_parent"
    android:fillViewport="true"
    android:overScrollMode="never"
    android:orientation="vertical"
    android:focusable="true"
    android:focusableInTouchMode="true">

    <LinearLayout
        android:layout_width="match_parent"
        android:layout_height="wrap_content"
        android:orientation="vertical">
        <FrameLayout
            android:id="@+id/passwordr_case"
            android:layout_width="match_parent"
            android:layout_height="wrap_content"
            app:layout_constraintLeft_toLeftOf="parent"
            app:layout_constraintTop_toBottomOf="@+id/password_case">

            <com.example.velog.MbEditText
                android:id="@+id/password"
                android:layout_width="match_parent"
                android:layout_height="wrap_content"
                android:inputType="textPassword"
                android:maxLines="1"
                android:hint="비밀번호를 입력 비밀번호 입력"
                android:textSize="18dp"/>

            <ImageButton
                android:id="@+id/viewPassword"
                android:layout_width="20dp"
                android:layout_height="20dp"
                android:layout_gravity="right|center_vertical"
                android:layout_marginRight="5dp"
                android:layout_marginBottom="5dp"
                android:background="@android:color/transparent"
                android:scaleType="centerInside"
                android:src="@drawable/visibleeye"/>
        </FrameLayout>

        <ImageView
            android:layout_width="match_parent"
            android:layout_height="wrap_content"
            android:src="@drawable/android_picture"/>
        <ImageView
            android:layout_width="match_parent"
            android:layout_height="wrap_content"
            android:src="@drawable/android_picture"/>
        <ImageView
            android:layout_width="match_parent"
            android:layout_height="wrap_content"
            android:src="@drawable/android_picture"/>
        <ImageView
            android:layout_width="match_parent"
            android:layout_height="wrap_content"
            android:src="@drawable/android_picture"/>
        <ImageView
            android:layout_width="match_parent"
            android:layout_height="wrap_content"
            android:src="@drawable/android_picture"/>
        <ImageView
            android:layout_width="match_parent"
            android:layout_height="wrap_content"
            android:src="@drawable/android_picture"/>
        <ImageView
            android:layout_width="match_parent"
            android:layout_height="wrap_content"
            android:src="@drawable/android_picture"/>
        <ImageView
            android:layout_width="match_parent"
            android:layout_height="wrap_content"
            android:src="@drawable/android_picture"/>
        <ImageView
            android:layout_width="match_parent"
            android:layout_height="wrap_content"
            android:src="@drawable/android_picture"/>
    </LinearLayout>
</ScrollView>
- main.java
import android.content.Context;
import android.graphics.Typeface;
import android.os.Bundle;
import android.text.InputType;
import android.view.KeyEvent;
import android.view.MotionEvent;
import android.view.View;
import android.view.inputmethod.InputMethodManager;
import android.widget.EditText;
import android.widget.ImageButton;

import androidx.annotation.Nullable;
import androidx.appcompat.app.AppCompatActivity;

import org.w3c.dom.Text;

public class main extends AppCompatActivity {
    @Override
    protected void onCreate(@Nullable Bundle savedInstanceState) {
        super.onCreate(savedInstanceState);
        setContentView(R.layout.text_input_layout);

        final MbEditText etx1 = findViewById(R.id.password);
        Typeface typeFace = Typeface.createFromAsset(getAssets(), "nanumsquare.ttf");
        etx1.setTypeface(typeFace);
        final ImageButton see_pw = findViewById(R.id.viewPassword);

        etx1.setOnKeyListener(new View.OnKeyListener() {
            @Override
            public boolean onKey(View v, int keyCode, KeyEvent event) {
                if (event.getAction() == KeyEvent.ACTION_DOWN) {
                    if (keyCode == KeyEvent.KEYCODE_ENTER) {
                        etx1.clearFocus();
                        InputMethodManager imm =
                                (InputMethodManager)getSystemService(Context.INPUT_METHOD_SERVICE);
                        imm.hideSoftInputFromWindow(etx1.getWindowToken(), 0);
                        return true;
                    }
                }
                return false;
            }
        });

        see_pw.setOnTouchListener(new View.OnTouchListener() {
            @Override
            public boolean onTouch(View view, MotionEvent motionEvent) {
                // 터치 동작에 따라 텍스트 인풋 타입 변경
                switch (motionEvent.getAction()){
                    case MotionEvent.ACTION_DOWN:
                        etx1.setInputType(InputType.TYPE_CLASS_TEXT|InputType.TYPE_TEXT_VARIATION_VISIBLE_PASSWORD); // 보이는 비밀번호
                        // 위에서 inpuType을 변경하게 되면 커서가 맨 앞으로 오는 문제가 발생하므로
                        // 전체 택스트의 길이만큼 커서를 뒤로 이동 시킨다
                        etx1.setSelection(etx1.length());
                        etx1.setTypeface(typeFace);
                        see_pw.setImageResource(R.drawable.invisibleeye);
                        break;
                    case MotionEvent.ACTION_UP:
                        etx1.setInputType(InputType.TYPE_CLASS_TEXT|InputType.TYPE_TEXT_VARIATION_PASSWORD); // 암호인 텍스트
                        etx1.setSelection(etx1.length());
                        etx1.setTypeface(typeFace);
                        see_pw.setImageResource(R.drawable.visibleeye);
                        break;
                    case MotionEvent.ACTION_CANCEL:
                        etx1.setInputType(InputType.TYPE_CLASS_TEXT|InputType.TYPE_TEXT_VARIATION_PASSWORD); // 암호인 텍스트
                        etx1.setSelection(etx1.length());
                        etx1.setTypeface(typeFace);
                        see_pw.setImageResource(R.drawable.visibleeye);
                        break;
                }
                return true;
            }
        });
    }
}
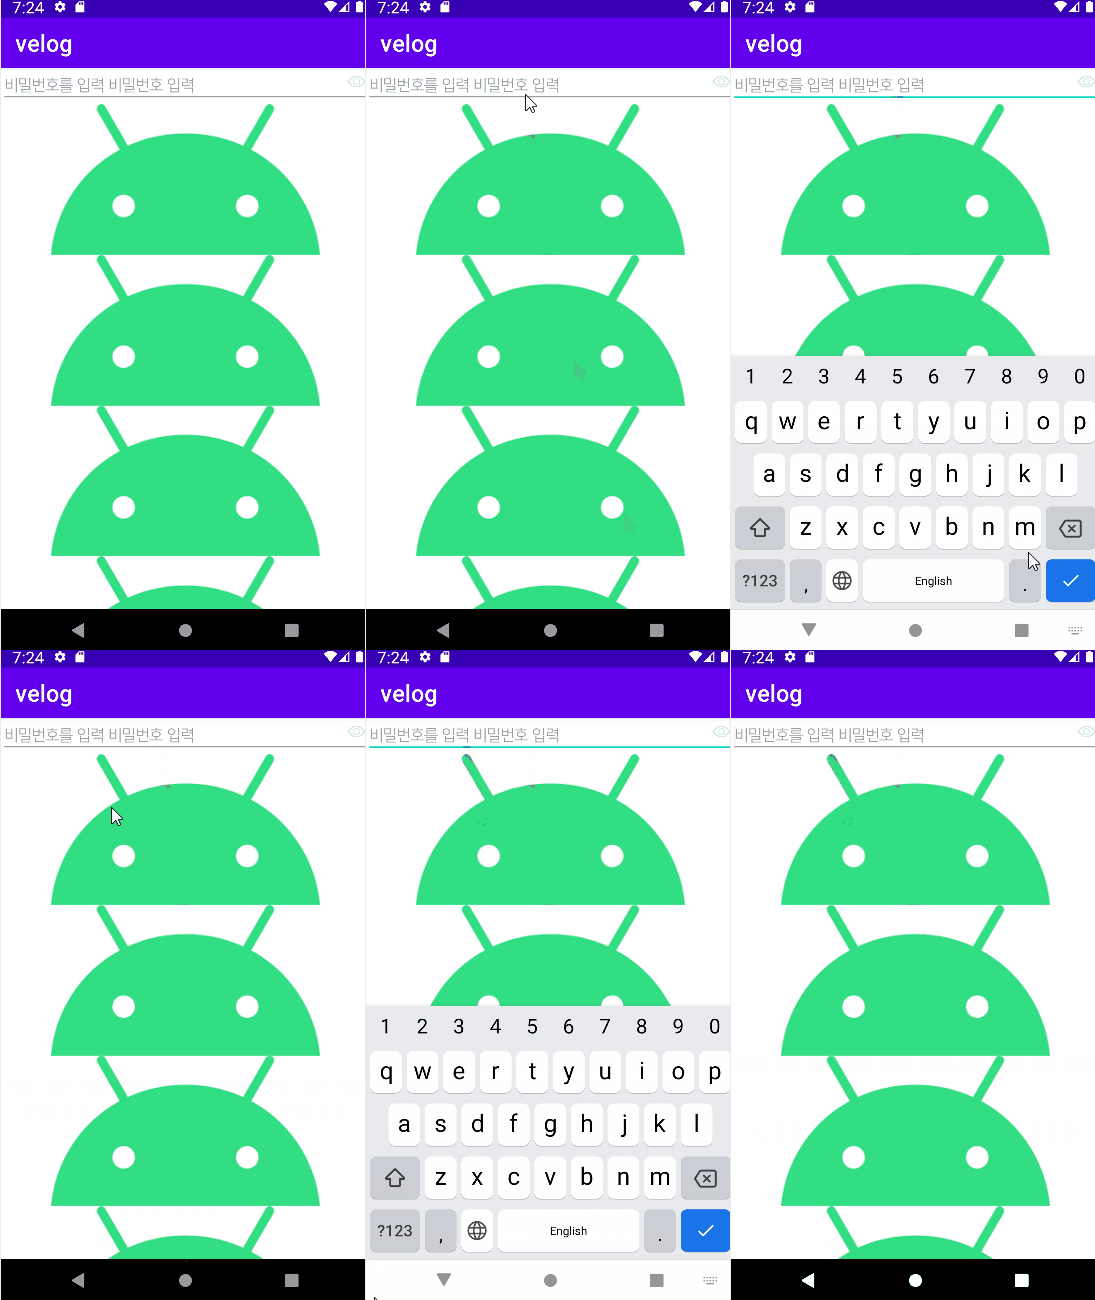
위 코드를 적용하고 나면 올바르게 동작하는 것을 확인할 수 있다
- 완성시 동작 gif

마치면서
셋온키 리스너에 백버튼 동작을 추가했는데 동작이 되지 않아 당황했지만 구글링을 하고 정보를 검색하고 나서 온키프라임 메소드가 셋온키 리스너보다 먼저 리턴된다는 사실을 이 문제를 해결하면서 알게 되었다
앞으로도 내가 원하는 동작이 실행되지 않으면 위젯에 메소드 동작 순서를 살펴보아야 겠다
