에딧텍스트를 버튼을 눌러서 패스워드 표시하기
이번 포스팅에서는 버튼을 눌러서 패스워드를 보이게 하는 효과를 얻고 싶을때는 구글링을 해봤는데 자료가 많이 없어서 포스팅을 직접 해본다!
text_input_layout.xml
<?xml version="1.0" encoding="utf-8"?>
<ScrollView xmlns:app="http://schemas.android.com/apk/res-auto"
    xmlns:android="http://schemas.android.com/apk/res/android"
    android:layout_width="match_parent"
    android:layout_height="match_parent"
    android:fillViewport="true"
    android:overScrollMode="never"
    android:orientation="vertical">
    <LinearLayout
        android:layout_width="match_parent"
        android:layout_height="wrap_content"
        android:orientation="vertical">
        <FrameLayout
            android:id="@+id/passwordr_case"
            android:layout_width="match_parent"
            android:layout_height="wrap_content"
            app:layout_constraintLeft_toLeftOf="parent"
            app:layout_constraintTop_toBottomOf="@+id/password_case">

            <EditText
                android:id="@+id/password"
                android:layout_width="match_parent"
                android:layout_height="wrap_content"
                android:inputType="textPassword"
                android:maxLines="1"
                android:hint="비밀번호를 입력 비밀번호 입력"
                android:textSize="18dp"
                android:fontFamily="@font/font_nanumsquare"/>

            <ImageButton
                android:id="@+id/viewPassword"
                android:layout_width="20dp"
                android:layout_height="20dp"
                android:layout_gravity="right|center_vertical"
                android:layout_marginRight="5dp"
                android:layout_marginBottom="5dp"
                android:background="@android:color/transparent"
                android:scaleType="centerInside"
                android:src="@drawable/visibleeye"/>
        </FrameLayout>

        <ImageView
            android:layout_width="match_parent"
            android:layout_height="wrap_content"
            android:src="@drawable/android_picture"/>
        <ImageView
            android:layout_width="match_parent"
            android:layout_height="wrap_content"
            android:src="@drawable/android_picture"/>
        <ImageView
            android:layout_width="match_parent"
            android:layout_height="wrap_content"
            android:src="@drawable/android_picture"/>
        <ImageView
            android:layout_width="match_parent"
            android:layout_height="wrap_content"
            android:src="@drawable/android_picture"/>
        <ImageView
            android:layout_width="match_parent"
            android:layout_height="wrap_content"
            android:src="@drawable/android_picture"/>
        <ImageView
            android:layout_width="match_parent"
            android:layout_height="wrap_content"
            android:src="@drawable/android_picture"/>
        <ImageView
            android:layout_width="match_parent"
            android:layout_height="wrap_content"
            android:src="@drawable/android_picture"/>
        <ImageView
            android:layout_width="match_parent"
            android:layout_height="wrap_content"
            android:src="@drawable/android_picture"/>
        <ImageView
            android:layout_width="match_parent"
            android:layout_height="wrap_content"
            android:src="@drawable/android_picture"/>
    </LinearLayout>
</ScrollView>

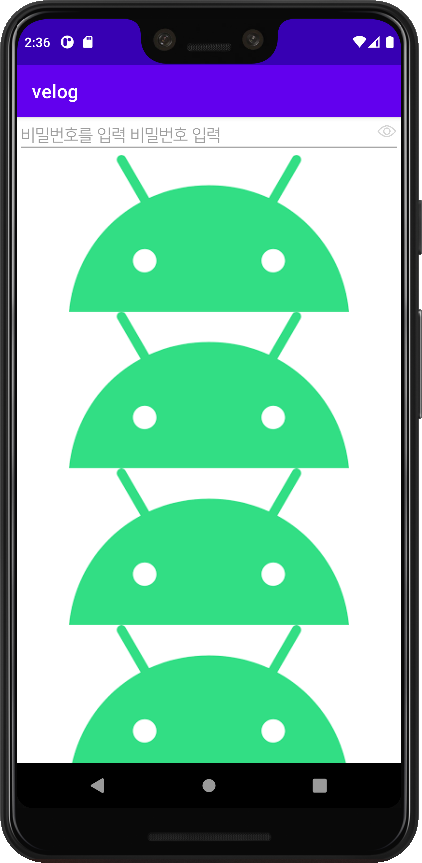
위와 같이 뷰를 작성하게 되면 스크롤뷰 안에 에딧텍스트와 이미지뷰가 나열된 상태이다
main 액티비티
import android.graphics.Typeface;
import android.os.Bundle;
import android.text.Editable;
import android.text.InputType;
import android.view.MotionEvent;
import android.view.View;
import android.widget.EditText;
import android.widget.ImageButton;
import android.widget.TextView;

import androidx.annotation.Nullable;
import androidx.appcompat.app.AppCompatActivity;

import org.w3c.dom.Text;

public class main extends AppCompatActivity {
    @Override
    protected void onCreate(@Nullable Bundle savedInstanceState) {
        super.onCreate(savedInstanceState);
        setContentView(R.layout.text_input_layout);

        final EditText etx1 = findViewById(R.id.password);
        //Typeface typeFace = Typeface.createFromAsset(getAssets(), "nanumsquare.ttf");
        //etx1.setTypeface(typeFace);
        final ImageButton see_pw = findViewById(R.id.viewPassword);

	/*etx1.setOnKeyListener(new View.OnKeyListener() {
            @Override
            public boolean onKey(View v, int keyCode, KeyEvent event) {
                if (event.getAction() == KeyEvent.ACTION_DOWN) {
                    if (keyCode == KeyEvent.KEYCODE_ENTER) {
                        etx1.clearFocus();
                        InputMethodManager imm =
                                (InputMethodManager)getSystemService(Context.INPUT_METHOD_SERVICE);
                        imm.hideSoftInputFromWindow(etx1.getWindowToken(), 0);
                        return true;
                    }
                }
                return false;
            }
        });*/

        see_pw.setOnTouchListener(new View.OnTouchListener() {
            @Override
            public boolean onTouch(View view, MotionEvent motionEvent) {
                // 클릭에 따라 텍스트 인풋 타입 변경
                switch (motionEvent.getAction()){
                    case MotionEvent.ACTION_DOWN:
                        etx1.setInputType(InputType.TYPE_TEXT_VARIATION_VISIBLE_PASSWORD); // 보이는 비밀번호
                        etx1.setSelection(etx1.length()); // 커서를 끝에 위치시키기
                        //etx1.setTypeface(typeFace);
                        see_pw.setImageResource(R.drawable.invisibleeye);
                        break;
                    case MotionEvent.ACTION_UP:
                        etx1.setInputType(InputType.TYPE_CLASS_TEXT|InputType.TYPE_TEXT_VARIATION_PASSWORD); // 암호인 텍스트
                        etx1.setSelection(etx1.length());
                        //etx1.setTypeface(typeFace);
                        see_pw.setImageResource(R.drawable.visibleeye);
                        break;
                    /*case MotionEvent.ACTION_CANCEL:
                        etx1.setInputType(InputType.TYPE_CLASS_TEXT|InputType.TYPE_TEXT_VARIATION_PASSWORD); // 암호인 텍스트
                        etx1.setSelection(etx1.length());
                        //etx1.setTypeface(typeFace);
                        see_pw.setImageResource(R.drawable.visibleeye);
                        break;*/
                }
                return true;
            }
        });

    }
}
에딧 텍스트와 패스워드를 지정한 id로 가지고 온다
눈버튼에 터치 리스너를 붙여주고 모션이벤트에 ACTION_DOWN-누를때, ACTION_UP-땔때 를 처리한다
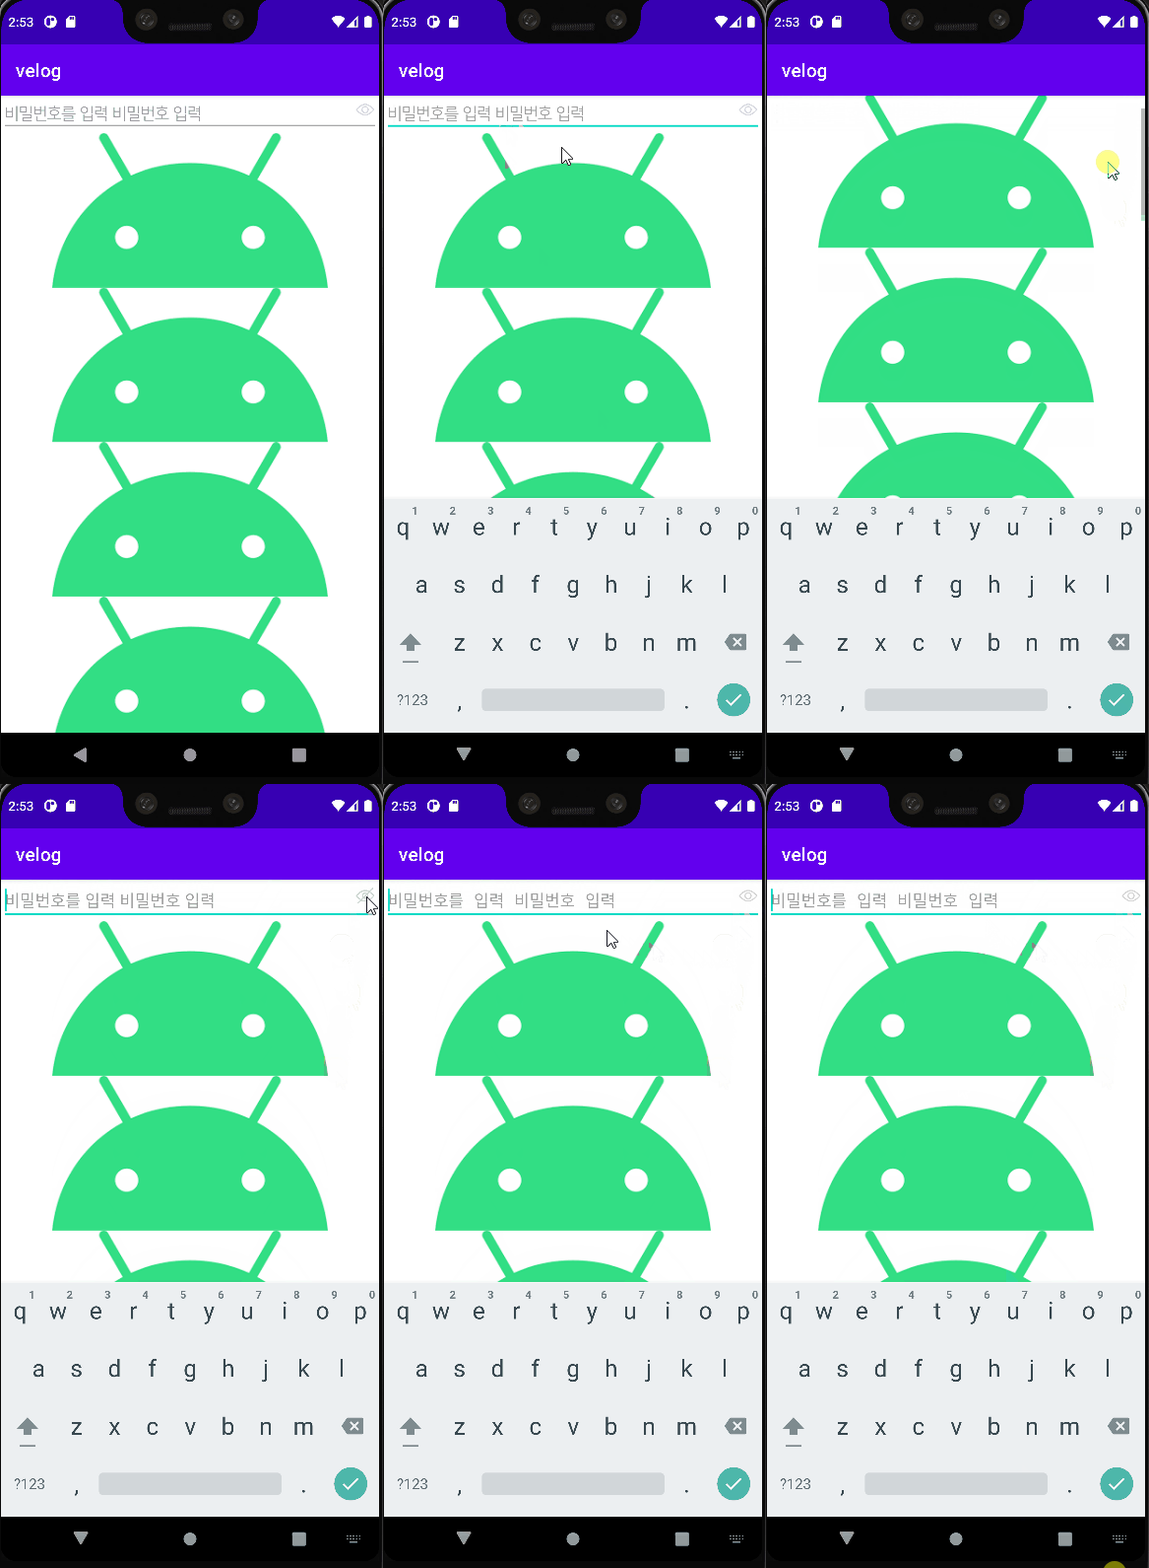
이상태로 실행하게 되면 아래와 같이 동작하게 된다

문제점
위의 상황에서 두가지의 문제점과 하나의 의문이 들것이다
- 액션다운이되고 스크롤을 하게되면 액션업 이벤트가 일어나지 않게 된다
- 액선다운이되고 inputype이 TYPE_TEXT_VARIATION_VISIBLE_PASSWORD 로 바뀌는데 까지는 자간이 문제없이 적용되는데 액션 업 이벤트가 일어나게 되면서 inputtype이 TYPE_TEXT_VARIATION_PASSWORD 변하게 되면 자간이 변동되는 것을 확인할 수 있다.
그리고 나서 다시 액션다운이 되면 자간이 원래대로 변동되는 것을 확인할 수 있다
- setOnKeyListener과 etx1.setSelection(etx1.length()); 코드를 추가한 이유?
inputtype이 무엇인가?
위의 두 링크를 참고하면 inputtype에 대한 설정을 알수 있다
https://recipes4dev.tistory.com/95#21-%ED%85%8D%EC%8A%A4%ED%8A%B8-%EC%9E%85%EB%A0%A5%EA%B8%B0ime-%EC%A2%85%EB%A5%98-%EB%B0%8F-%EC%9C%A0%ED%98%95-%EC%84%A0%ED%83%9D%ED%95%98%EA%B8%B0-inputmethod-inputtype
https://ddolcat.tistory.com/653
간단하게 사용된 inputtype 을 설명해보면
textPassword - 암호인 텍스트
코드값-InputType.TYPE_CLASS_TEXT|InputType.TYPE_TEXT_VARIATION_PASSWORD
textVisiblePassword - 보이는 암호인 텍스트
코드값-InputType.TYPE_CLASS_TEXT|InputType.TYPE_TEXT_VARIATION_VISIBLE_PASSWORD
1번문제 해결하기
이 문제를 해결하기 위해서는 우리는 온터치 리스너가 어떻게 작동하는지 알아야 합니다
액션 다운 이벤트 - 해당 뷰에 터치가 눌러졌을때
액션 업 이벤트 - 터치된 상태에서 해당 뷰에 터치 범위가 있고 터치가 때졌을때
액션 캔슬 이벤트 - 터치된 상태에서 터치범위가 해당 뷰를 벗어났을때
액션 캔슬 이벤트를 적용하게 되면 터치된 상태에서 스크롤을 하거나 누른 상태로 해당뷰를 벗어나게 되도 이벤트가 발생하는 것을 볼 수 있다
2번문제 해결하기
이 문제를 해결하기 위해선 인풋타입이 변동됨에 따라 폰트의 typeface가 변경되는 것에 대한 이해가 필요하다
inputType, setTypeface와 font와의 관계
위의 작성된 xml 파일을 확인해 보면
android:fontFamily="@font/font_nanumsquare" 로 폰트가 설정된 것을 확인할 수 있다
위와같이 fontFamily 로 xml파일에서 정적으로 폰트를 적용하게 되면 에딧텍스트가 textPassword 상태일때 자간이 변동되는 문제를 확인할 수 있다
이 문제를 해결하기 위해선 코드상에서 settypeface로 설정을 하게되면 이 문제가 해결된다
코드상에서 폰트를 변경하는 방법은 아래 포스팅을 확인하기 바란다
https://velog.io/@kbs95123/%EC%95%88%EB%93%9C%EB%A1%9C%EC%9D%B4%EB%93%9C-%EB%8F%99%EC%A0%81%ED%8F%B0%ED%8A%B8%EC%84%A4%EC%A0%95
코드상에서 폰트를 변경하는 방법을 적용하게 되면 xml파일의 fontFamily 의 속성을 해제하고 자바 코드에서 typeface 관련 코드를 적용하면 다음과 같다
간단하게 적용하는 코드를 설명하자면 다음과 같다
// 적용할 폰트를 typeFace 로 정의 한다
Typeface typeFace = Typeface.createFromAsset(getAssets(), "nanumsquare.ttf");
// 폰트가 적용된 typeFace 로 위젯의 글꼴을 변경한다
etx1.setTypeface(typeFace);
왜 fontfamily 속성을 적용하게 되면 문제가 발생하는가?
이 문제가 왜 발생했는 알게 된다면 내용을 추가할 예정이다
3번 코드 추가한 이유는?
우리는 기본적인 에딧텍스트에 셋온 키리스너 설정을 하지 않으면 엔터키, 백버튼을 눌러도 포커스가 해제되지 않는것을 확인할 수 있다
뒤로가기 버튼을 누르면 포커스가 해제되어야 하는데 위의 셋온키리스너에 백버튼이 누른다면 조건을 추가해도 포커스가 해제 되지 않는 것을 확인할 수 있다 이에 대한 문제는 이 시리즈 다음 포스팅에서 작성할예정이다
그렇기 때문에 우리는 에딧텍스트에 셋온키리스너를 붙여주어서 엔터키가 눌렸을때 포커스를 해제시켰다 그리고 InputMethodManager 를 이용하여서 키보드를 내리는 동작을 추가하였다
etx1.setSelection(etx1.length()); 코드를 추가한 이유는 에딧텍스트의 inputType이 변화할때 커서가 맨앞으로 가는 현상이 발생한다 이 문제를 해결하고자 전체 택스트의 길이만큼 커서를 뒤로 이동 시킨다 라는 위 코드를 추가하게 되었다
위의 문제를 해결한 자바코드와 xml파일은 다음과 같다
xml파일
<?xml version="1.0" encoding="utf-8"?>
<ScrollView xmlns:app="http://schemas.android.com/apk/res-auto"
    xmlns:android="http://schemas.android.com/apk/res/android"
    android:layout_width="match_parent"
    android:layout_height="match_parent"
    android:fillViewport="true"
    android:overScrollMode="never"
    android:orientation="vertical">
    <LinearLayout
        android:layout_width="match_parent"
        android:layout_height="wrap_content"
        android:orientation="vertical">
        <FrameLayout
            android:id="@+id/passwordr_case"
            android:layout_width="match_parent"
            android:layout_height="wrap_content"
            app:layout_constraintLeft_toLeftOf="parent"
            app:layout_constraintTop_toBottomOf="@+id/password_case">

            <EditText
                android:id="@+id/password"
                android:layout_width="match_parent"
                android:layout_height="wrap_content"
                android:inputType="textPassword"
                android:maxLines="1"
                android:hint="비밀번호를 입력 비밀번호 입력"
                android:textSize="18dp"/>

            <ImageButton
                android:id="@+id/viewPassword"
                android:layout_width="20dp"
                android:layout_height="20dp"
                android:layout_gravity="right|center_vertical"
                android:layout_marginRight="5dp"
                android:layout_marginBottom="5dp"
                android:background="@android:color/transparent"
                android:scaleType="centerInside"
                android:src="@drawable/visibleeye"/>
        </FrameLayout>

        <ImageView
            android:layout_width="match_parent"
            android:layout_height="wrap_content"
            android:src="@drawable/android_picture"/>
        <ImageView
            android:layout_width="match_parent"
            android:layout_height="wrap_content"
            android:src="@drawable/android_picture"/>
        <ImageView
            android:layout_width="match_parent"
            android:layout_height="wrap_content"
            android:src="@drawable/android_picture"/>
        <ImageView
            android:layout_width="match_parent"
            android:layout_height="wrap_content"
            android:src="@drawable/android_picture"/>
        <ImageView
            android:layout_width="match_parent"
            android:layout_height="wrap_content"
            android:src="@drawable/android_picture"/>
        <ImageView
            android:layout_width="match_parent"
            android:layout_height="wrap_content"
            android:src="@drawable/android_picture"/>
        <ImageView
            android:layout_width="match_parent"
            android:layout_height="wrap_content"
            android:src="@drawable/android_picture"/>
        <ImageView
            android:layout_width="match_parent"
            android:layout_height="wrap_content"
            android:src="@drawable/android_picture"/>
        <ImageView
            android:layout_width="match_parent"
            android:layout_height="wrap_content"
            android:src="@drawable/android_picture"/>
    </LinearLayout>
</ScrollView>
main 액티비티
import android.content.Context;
import android.graphics.Typeface;
import android.os.Bundle;
import android.text.InputType;
import android.view.KeyEvent;
import android.view.MotionEvent;
import android.view.View;
import android.view.inputmethod.InputMethodManager;
import android.widget.EditText;
import android.widget.ImageButton;

import androidx.annotation.Nullable;
import androidx.appcompat.app.AppCompatActivity;

import org.w3c.dom.Text;

public class main extends AppCompatActivity {
    @Override
    protected void onCreate(@Nullable Bundle savedInstanceState) {
        super.onCreate(savedInstanceState);
        setContentView(R.layout.text_input_layout);

        final EditText etx1 = findViewById(R.id.password);
        Typeface typeFace = Typeface.createFromAsset(getAssets(), "nanumsquare.ttf");
        etx1.setTypeface(typeFace);
        final ImageButton see_pw = findViewById(R.id.viewPassword);

        etx1.setOnKeyListener(new View.OnKeyListener() {
            @Override
            public boolean onKey(View v, int keyCode, KeyEvent event) {
                if (event.getAction() == KeyEvent.ACTION_DOWN) {
                    if (keyCode == KeyEvent.KEYCODE_ENTER) {
                        etx1.clearFocus();
                        InputMethodManager imm =
                                (InputMethodManager)getSystemService(Context.INPUT_METHOD_SERVICE);
                        imm.hideSoftInputFromWindow(etx1.getWindowToken(), 0);
                        return true;
                    }
                }
                return false;
            }
        });

        see_pw.setOnTouchListener(new View.OnTouchListener() {
            @Override
            public boolean onTouch(View view, MotionEvent motionEvent) {
                // 터치 동작에 따라 텍스트 인풋 타입 변경
                switch (motionEvent.getAction()){
                    case MotionEvent.ACTION_DOWN:
                        etx1.setInputType(InputType.TYPE_CLASS_TEXT|InputType.TYPE_TEXT_VARIATION_VISIBLE_PASSWORD); // 보이는 비밀번호
                        // 위에서 inpuType을 변경하게 되면 커서가 맨 앞으로 오는 문제가 발생하므로
                        // 전체 택스트의 길이만큼 커서를 뒤로 이동 시킨다
                        etx1.setSelection(etx1.length());
                        etx1.setTypeface(typeFace);
                        see_pw.setImageResource(R.drawable.invisibleeye);
                        break;
                    case MotionEvent.ACTION_UP:
                        etx1.setInputType(InputType.TYPE_CLASS_TEXT|InputType.TYPE_TEXT_VARIATION_PASSWORD); // 암호인 텍스트
                        etx1.setSelection(etx1.length());
                        etx1.setTypeface(typeFace);
                        see_pw.setImageResource(R.drawable.visibleeye);
                        break;
                    case MotionEvent.ACTION_CANCEL:
                        etx1.setInputType(InputType.TYPE_CLASS_TEXT|InputType.TYPE_TEXT_VARIATION_PASSWORD); // 암호인 텍스트
                        etx1.setSelection(etx1.length());
                        etx1.setTypeface(typeFace);
                        see_pw.setImageResource(R.drawable.visibleeye);
                        break;
                }
                return true;
            }
        });
    }
}
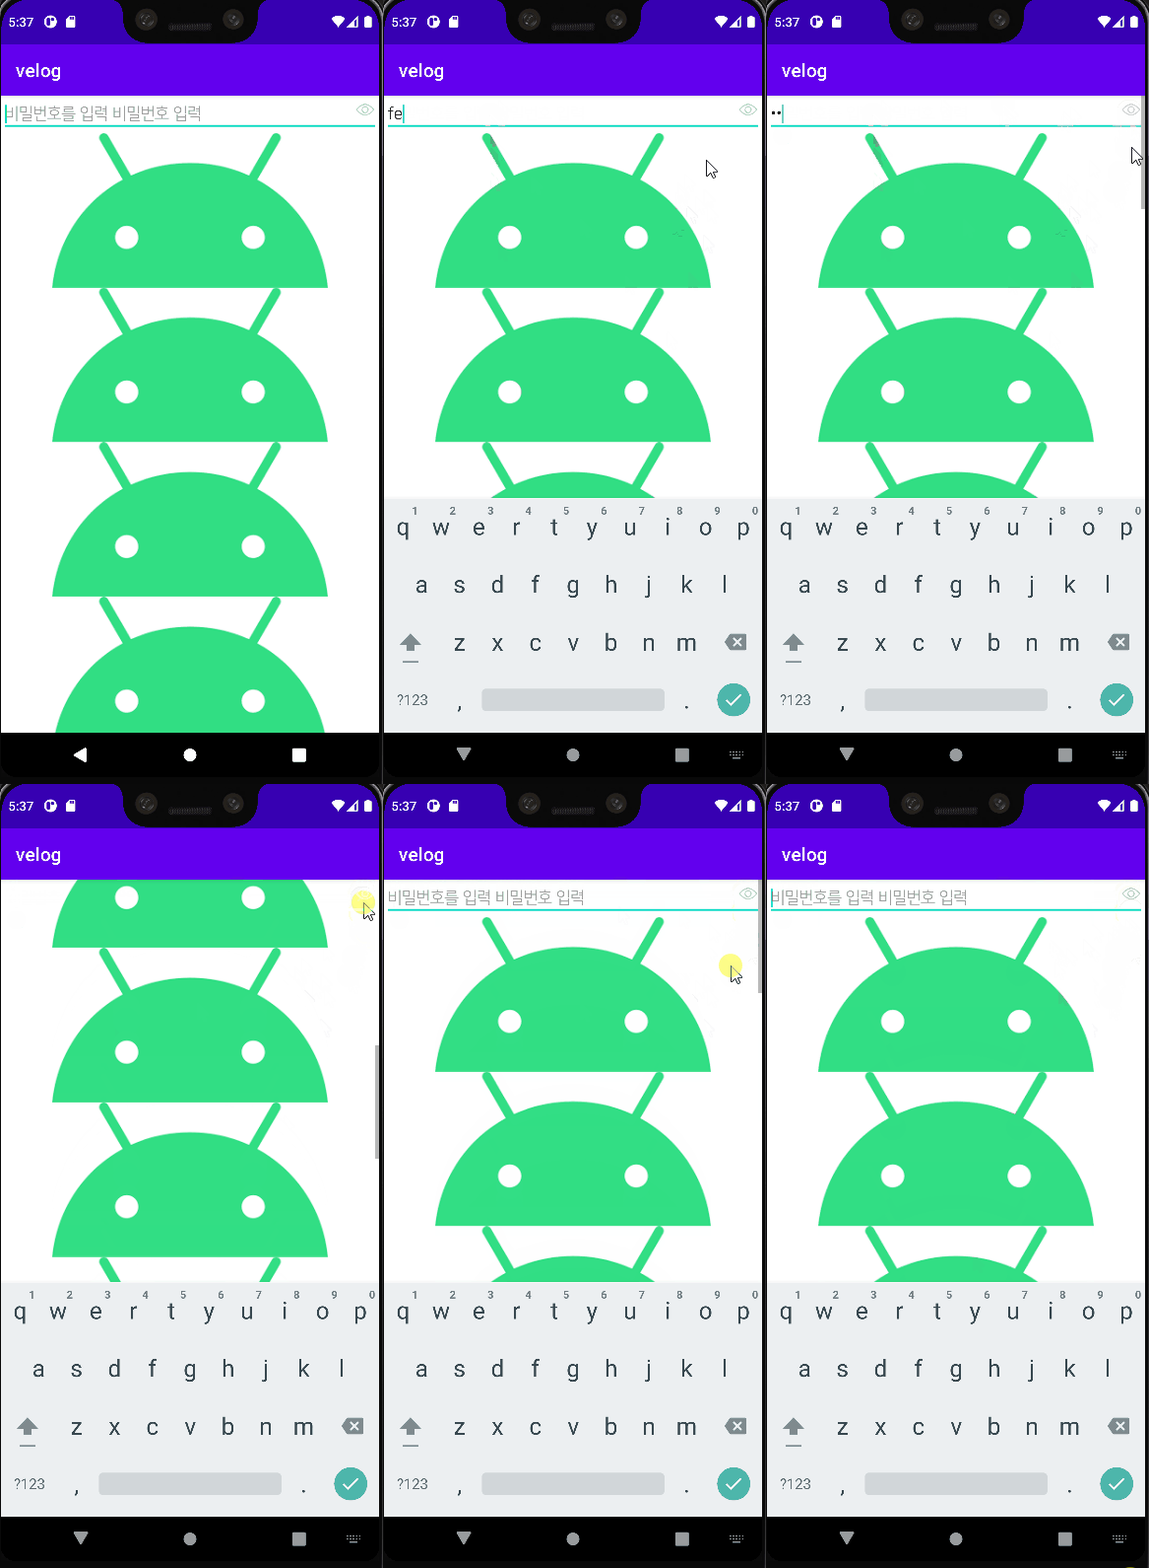
실행화면(완성)

마치면서
택스트가 단순히 password가 되고 text로 변경되면서 발생하는 문제점이 생각보다 많았고 inputtype에도 다양한 옵션이 있다는 것을 알게 되었다
이 시리즈 다음포스팅에서는 백버튼을 눌렀을때도 포커스를 해제시키는 동작을 추가하는 것을 포스팅 할 예정이다
해결되지않은 문제
위의 과정을 포스팅하면서 알은 사실인데 셀렉터로 적용해보면 올바르게 눈버튼의 이미지가 수정되지 않았다 이 문제가 해결되면 셀렉터 시리즈를 만들어서 추가로 포스팅을 할 예정이다

속성에 대한 궁금한것이 있다면 댓글 달아주시면 답변드리겠습니다!