로그인, 회원가입, 데시보드, 게시판
웹서비스의 기본이되는 기능들로 웹사이트개발시마다 재사용 가능하도록 기본기능을 구현해 보려고 한다.
사용 기술
BACKEND - Nest.js, Typeorm, GraphQL
FRONTEND - React.js
BackEnd
우선은 백엔드를 먼저 구현하도록 한다.
가장 기본이 되는 프레임워크 Nest.js부터 설치해준다.
cli를 설치후 프로젝트 생성
$ npm i -g @nestjs/cli     // nestjs 설치
$ nest new Boilerplate-BE// nestjs 프로젝트 생성
모듈은 npm으로 사용하도록 합니다.
프로젝트가 생성되었으면 기본서버 설정을 위해 GraphQL, TypeOrm 모듈을 설치해준다
// GraphQL
$ npm i @nestjs/graphql graphql-tools graphql apollo-server-express
// TypeOrm
$ npm install @nestjs/typeorm typeorm mysql2해당 설치가 끝났으면 src/app.module.ts 에 모듈 설정을 해준다.
(최상위에는 app.module.ts, main.ts 를 제외하고 삭제한다.)
import { Module } from '@nestjs/common';
import { GraphQLModule } from '@nestjs/graphql';
import { TypeOrmModule } from '@nestjs/typeorm';

@Module({
  imports: [
    GraphQLModule.forRoot({
      autoSchemaFile: true,     //스키마를 메모리에서 즉시 생성
      sortSchema: true,         //스키마를 사전 순으로 정렬
      debug: true,              //디버그 모드 끄고싶을때 false
      playground: true,         //playground 끄고싶을때 false
    }),
    TypeOrmModule.forRoot({
			type: 'mysql',
      host: 'localhost',
      port: 3306,
      username: 'root',
      password: 'root',
      database: 'test',
      synchronize: true,
			entities: [],
    })
  ],
  controllers: [],
  providers: [],
})
export class AppModule {}
GraphQLModule, TypeOrmModule 로 각각 설정해주고 db정보는 각자 알아서...
여기까지가 기본 설정은 완료하였다 . 설정을 완료하였으니 실행을 한번 해본다
$ npm run start:devGraphQLError: Query root type must be provided....... 이런 에러가 나올것이다.
graphQl 에서 쿼리가 없어서 발생하기 때문에 쿼리를 하나 만들어 주자
UserResolver 를 하나 생성해준다.
$ nest g r users
// nest cli 설치했으니 알차게 사용해준다..
// $ nest 실행하면 정보들이 나오니까 참고하자
Resolver를 만들었으니 테스트 쿼리를 하나 만들어 준다.
import { Query, Resolver } from '@nestjs/graphql';

@Resolver()
export class UsersResolver {
  @Query(returns => String)        // 해당 쿼리의 리턴값 확인
  hi(){
    return 'hi';
  }
}
위와 같이 만들어주고 나면 정상적으로 실행되는 걸 볼수있다.
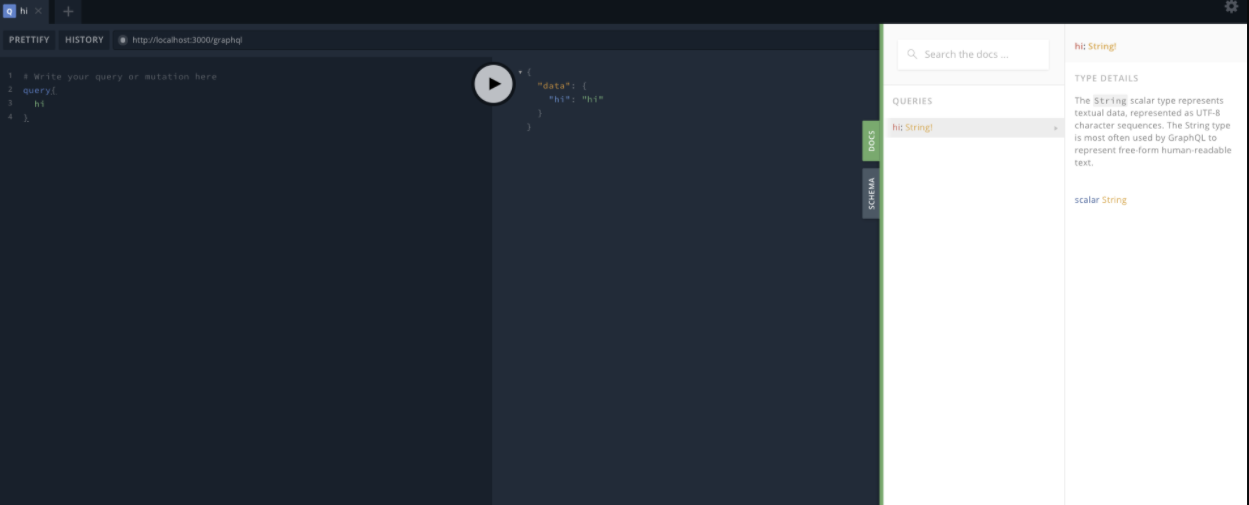
여기서 플레이그라운드를 한번 확인하고 가자. DOSC를 확인하면 우리가 만들어 놓은 query가 나오느걸 볼수있고 요청한 값이 정상적으로 출력된것을 볼수 있다.

이번에는 typeorm의 기본사용을 한번 알아보도록 하겠다.
제일 기본이 되는 entity 를 생성해줘야 한다.
그전에 모듈을 만들어서 폴더 정리를 하여준다. ( users.module.ts 에는 UsersResolver, appModule > UsersModule)
그 후 entities 폴더를 생성하여 user.entity.ts 파일을 생성해준다.
import { Field, InputType, ObjectType } from "@nestjs/graphql";
import { Column, CreateDateColumn, Entity, PrimaryGeneratedColumn, UpdateDateColumn } from "typeorm";

@InputType()
@ObjectType()
@Entity()
export class User {
  @PrimaryGeneratedColumn()
  @Field(() => Number)
  id: number;

  //TypeORM Special Columns
  @CreateDateColumn()
  @Field(() => Date)
  createdAt: Date;

  @UpdateDateColumn()
  @Field(() => Date)
  updatedAt: Date;

  @Column()
  @Field(type => String)
  email: string;

  @Column()
  @Field(type => String)
  password: string;

}
entity 정보를 typeorm 뿐만 아니라 graphql 도 함께 사용하도록 한다.
entity를 생성했으면 해당 엔티티를 typeorm에 추가하며 본다 .
app.module.ts
entities: [User], //엔티티 파일 경로추가하여 재 실행 되면 자동으로 디비에 테이블이 생성되고 설정한 컬럼도 정상적으로 들어간 것을 볼수 있다.

오늘은 여기까지 기본적이 설정을 완료 하였다.
