🍑 클래스 사용방법
🧅 1. 삼항연산자
<h1 :class="isActive ? 'active' : '' " class="title">{{msg}} </h1>vue data부분의 isActive가 true나 false일때 사용가능
🧅 2. {}로 묶기 (여러개 작성)
객체 리터럴과 key value 형식으로 작성
<h1 :class="{ active : isActive , large : isLarge} " class="title">{{msg}} </h1>=> isActive와 isLarge가 각각 true false에 따라 class에 active / large가 추가
<h1 :class="{ active , large} " class="title">{{msg}} </h1>key 와 value가 같은 값이라면 생략도 가능하다.
- 추가로 해당 부분은 보간을 통해서도 사용이 가능하다.
<h1 :class="` active :${ isActive} , large : ${isLarge}` " class="title">{{msg}} </h1>🧅 3. BEM 표기법 사용
<h1 :class="{ active : isActive , '.title--large' : isLarge} " class="title">{{msg}} </h1>BEM 표기법을 위해 key부분을
''를 묶어서 사용한다.
(웬만한것은 1번처럼 해도되지만--가 붙거나 하는 경우에 3번을 사용)
<h1 :class="{ active : isActive , 'title--large color--orange' : isLarge} " class="title">{{msg}} </h1>괄호를 묶을 경우 이와같이 `title--large와 color--orange 클래스 속성을 isLarge가 true이면 각각 추가가 가능하다.
🧅 4. 하나의 obj로 묶을 때
1) 잘못된 사용법
<div id="app">
  <button @click="toggle">Toggle</button>
<h1 :class="styleObj" class="title">{{msg}} </h1>
</div>
</body>
<script>

  const App = {
    data() {
      return {
          msg : 'Hello Vue',
          active:false,
          small:true,
          styleObj:{
            active:false,
            'title--small color--orange' : true
          }
      }
    },
    methods : {
      toggle(){
        this.active = !this.active
        this.isLarge = !this.isLarge
      }
    }
  }
  const vm = Vue.createApp(App).mount('#app')
</script>
active라는 데이터에 연결해놓은 값을
toggle이라는 메소드를 통해 갱신하는데
실제 styleObj는 active가 해당 데이터로 연결된 것이 아니라 false 값 자체로 되어있기때문에 정상적인 동작이 되지않는다.
2) 해결 방법1
    methods : {
      toggle(){
        this.styleObj.active = !this.styleObj.active
        this.isLarge = !this.isLarge
      }
    }
method부분을 this.active가 아닌 정확한 대상인 this.styleObj.active로 지칭한다.
3) 해결 방법2 (일반 데이터가 아닌 계산된 데이터로 처리)
<div id="app">
  <button @click="toggle">Toggle</button>
<h1 :class="styleObj" class="title">{{msg}} </h1>
</div>
</body>
<script>

  const App = {
    data() {
      return {
          msg : 'Hello Vue',
          active:false,
          small:true,
      }
    },
    computed : {
      styleObj(){
        return {
          active:this.active,
          'title--small color--orange' : this.small
        }
      }
    },
    methods : {
      toggle(){
        this.active = !this.active
        this.isLarge = !this.isLarge
      }
    }
  }
  const vm = Vue.createApp(App).mount('#app')
</script>
즉, 반응형 데이터로 사용하기 위해서는 (this.~를 사용하기 위해서는)
미리 계산된computed옵션을 사용해야한다.
🍑 스타일 사용방법
- 기본적으로 vue에서는
fontSize backgroundColor이런것들이 저절로
font-size , background-color로 바뀐다.
🧅 1. 가장 간단한 방법
<div id="app">
  <h1 :style="{
    color:'royalblue' ,
    backgroundColor : 'orange',
     fontSize : '40px',
     fontWeight:'bold'
  }">abc </h1>
</div>
</body>
<script>
  const App = {
    data() {
      return {
      }
    },
  }
  const vm = Vue.createApp(App).mount('#app')
</script>
style안에 괄호로 묶어서 전부 처리
🧅 2. vue data부분으로 값 옮기기
<div id="app">
  <h1 :style="{color , backgroundColor , fontSize , fontWeight}">abc </h1>
</div>
</body>
<script>
  const App = {
    data() {
      return {
          color:'royalblue' ,
          backgroundColor : 'orange',
          fontSize : '40px',
          fontWeight:'bold'
      }
    },
  }
  const vm = Vue.createApp(App).mount('#app')
</script>
🧅 3. vue data의 각각의 obj로
<div id="app">
  <h1 :style="[styleObj , fontObj]">abc </h1>
</div>
</body>
<script>
  const App = {
    data() {
      return {
        styleObj : {
          color:'royalblue' ,
          backgroundColor : 'orange',
        },
        fontObj : {
          fontSize : '40px',
          fontWeight:'bold'
        }
      }
    },
  }
  const vm = Vue.createApp(App).mount('#app')
</script>
주의할 점은 style 부분이 각각의 객체를 다루기 위해 배열로 묶어있다.
조건부 렌더링
🧅 if에서 true와 false
-
true
빈배열 , 0빼고 숫자 ,빈문자열 뺀 문자열
-
false
null , 빈문자열 , 0
🧅 간단한 v-if v-else-if v-else
- v-if와 v-else 태그 사이에 v-else-if를 제외한 다른 태그 요소가 들어가지않게 주의
<div id="app">
  <h1 v-if="0">h1</h1>
  <h2 v-else-if="''">h2</h2>
  <h3 v-else="[]">h3</h3>
</div>
</body>
<script>
  const App = {
    data() {
      return {
      }
    },
  }
  const vm = Vue.createApp(App).mount('#app')
</script>
if는 0으로 태그를 출력하지않고
else if는 빈문자열로 태그를 출력하지않고
else는 빈배열로 태그를 출력한다.
🧅 조건부 태그안에 많은 태그를 넣고 싶을 때
<div id="app">
  <h1 v-if="0">h1</h1>
  <h2 v-else-if="''">h2</h2>
  <div v-else="[]">
    <h3>나는 div로부터 나왔어</h3>
    <h3> 지금은 21년 9월 24일 오전 12:48분 졸려</h3>
  </div>
</div>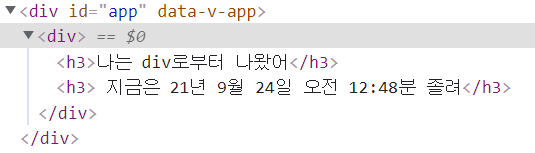
원하는 else문이 나오기는 했는데 div라는 태그로 묶여서 나와
해당 div태그안에 존재하지않게 하고싶을때는 아래 방법을 사용한다.
🧅 template 태그
<div id="app">
  <h1 v-if="0">h1</h1>
  <h2 v-else-if="''">h2</h2>
  <template v-else="[]">
    <h3>나는 div로부터 나왔어</h3>
    <h3> 지금은 21년 9월 24일 오전 12:48분 졸려</h3>
  </template>
</div>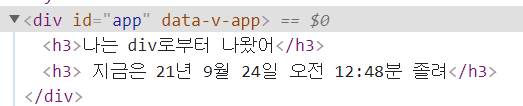
해당 내용이 태그로 묶인 부분이 사라지게 할 수 있다.
🧅 v-if / v-show 차이점
| 제목 | v-if | v-show |
|---|---|---|
| 초기렌더링 | 구조적으로 생성 X | 구조적으로 생성 O |
| 초기렌더링 비용 | 낮다 | 높다 |
| 태그가 true로 적용될 때 | 주석에서 태그가 추가 | display:none이 제거되며 태그가 보인다 |
| 전환 비용 | 태그를 생성하여 높다 | display만 수정하여 낮다 |
v-show의 단점
초기렌더링 시 구조적으로 만들고 본다.
=>{{ msg }}이런상태가 UI에서 보일 수가있다.
🧅 v-show와 v-cloak (v-show 단점 해결)
v-cloak
표현식을 요구하지 않습니다.
컴포넌트 인스턴스가 준비될 때 까지 컴파일 되지 않은 mustache 바인딩을 숨기는데 사용할 수 있습니다
간단히{{ msg }}이런 상태를 렌더링시 UI에 보여주는것을 막아주는 역할을 담당한다.
v-cloak 사용법
<style>
  [v-cloak] {
  display: none;
}
</style>

<div v-cloak>
  {{ message }}
</div>
<div>은 컴파일이 완료 될 때까지 표시되지 않습니다
🧅 v-for와 v-if
v-for를 쓴 엘리먼트에 절대 v-if를 사용하지 말라고 공식 사이트에 나와있다.
v-for와 v-if를 적용하는 방법
- 안좋은 예시 : 같은 태그에 v-for와 v-if를 사용
<ul>
  <li
    v-for="user in users"
    v-if="user.isActive"
    :key="user.id"
  >
    {{ user.name }}
  </li>
</ul>- 좋은 예시 : template 태그에는 v-for를 li태그에는 v-if를 사용
<ul>
  <template v-for="user in users" :key="user.id">
    <li v-if="user.isActive">
      {{ user.name }}
    </li>
  </template>
</ul>
🍑 출처