react-router-dom
route를 사용 할 수 있게 하는 것
react-router-dom 사용법
yarn add react-router-dom명령어 실행index.js파일에 App컴포넌트를 Browser 컴포넌트로 감싸기App.js파일에 App import한 Router, Switch와 같은 컴포넌트 사용하기
예시 코드 1
- index.js
import React from "react";
import ReactDOM from "react-dom";
import "./index.css";
import App from "./App";
import reportWebVitals from "./reportWebVitals";
import { BrowserRouter } from "react-router-dom";

ReactDOM.render(
  <React.StrictMode>
    <BrowserRouter>
      <App />
    </BrowserRouter>
  </React.StrictMode>,
  document.getElementById("root")
);

// If you want to start measuring performance in your app, pass a function
// to log results (for example: reportWebVitals(console.log))
// or send to an analytics endpoint. Learn more: https://bit.ly/CRA-vitals
reportWebVitals();
기존
npx create-react-app의 부분에서BrowserRouter부분을 추가해서 App을 감쌌다.
- App.js
import { Route, Switch } from "react-router";
import About from "./pages/About";
import Profile from "./pages/Profile";

export default function App() {
  return (
    <div>
      <Switch>
        <Route path="/">
          <h1>HOme</h1>
        </Route>
      </Switch>
    </div>
  );
}
Route와 Switch를 이용해 해당 부분을 감싸서 처리했다.

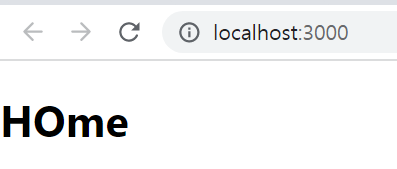
- 해당 루트부분은 이와같이 나타난다.
예시 코드2
예시 코드1과 다르게 index.js를 수정하지않고 기존꺼에서 App.js만 수정해본다.
- index.js
import React from "react";
import ReactDOM from "react-dom";
import "./index.css";
import App from "./App";
import reportWebVitals from "./reportWebVitals";

ReactDOM.render(
  <React.StrictMode>
    <App />
  </React.StrictMode>,
  document.getElementById("root")
);

// If you want to start measuring performance in your app, pass a function
// to log results (for example: reportWebVitals(console.log))
// or send to an analytics endpoint. Learn more: https://bit.ly/CRA-vitals
reportWebVitals();
<BrowserRouter>부분이 빠진것을 볼 수 있다.
- App.js
import React from "react";
import { BrowserRouter as Router, Switch, Route } from "react-router-dom";
import About from "./pages/About";
import Profile from "./pages/Profile";

export default function App() {
  return (
    <Router>
      <Switch>
        <Route path="/about">
          <About></About>
        </Route>
        <Route path="/profile">
          <Profile></Profile>
        </Route>
      </Switch>
    </Router>
  );
}
대신에 해당부분을 Router라는 이름으로 App.js에서 묶어서 사용을 한다.
Context-API 적용해보기
필요한 파일
- store/users.js
- pages/About.js
- pages/Profile.js
- App.js
1. store/users.js
import { createContext } from "react";

export const UserContext = createContext();

const UserStore = (props) => {
  const users = {
    name: "khw",
    job: "college student",
  };
  return (
    <UserContext.Provider value={users}>{props.children}</UserContext.Provider>
  );
};

export default UserStore;
creatContext로 Context를 UserContext라는 값으로 지정하고
UserStore라는 부분에 users라는 필요한 값이 존재하고 해당 부분이 Provider를 통해 리턴한 컴포넌트로 처리되고있다.
2. pages/About.js
import React,{useContext} from 'react'
import { UserContext } from '../store/users'

export default function About() {
  const context = useContext(UserContext)
  console.log(context)

  return (
    <div>
      <h3>{context.name}</h3>
    </div>
  )
}
useContext를 통해 import한UserContext부분의 컨텍스트를 사용할수 있게 하였고 해당 부분을context.속성값을 이용하여 다룰 수있다.
3. pages/Profile.js
import React, { useContext } from "react";
import { UserContext } from "../store/users";
export default function Profile() {
  const context = useContext(UserContext);
  console.log(context);

  return (
    <div>
      <h3>{context.job}</h3>
    </div>
  );
}
2.번과 마찬가지로 job 속성을 이용하였다.
4. App.js
import React from "react";
import { BrowserRouter as Router, Switch, Route } from "react-router-dom";
import About from "./pages/About";
import Profile from "./pages/Profile";
import UserStore from "./store/users";

export default function App() {
  return (
    <UserStore>
      <Router>
        <Switch>
          <Route path="/about">
            <About></About>
          </Route>
          <Route path="/profile">
            <Profile></Profile>
          </Route>
        </Switch>
      </Router>
    </UserStore>
  );
}
전체를 UserStore로 묶어 Provider를 사용할 수 있게 하였다.
결과


url에 따라 원하는 데이터가 props를 사용하지않고 옮겨질 수 있다.
