이전 과정: [AWS] Client VPN 만들기
개요
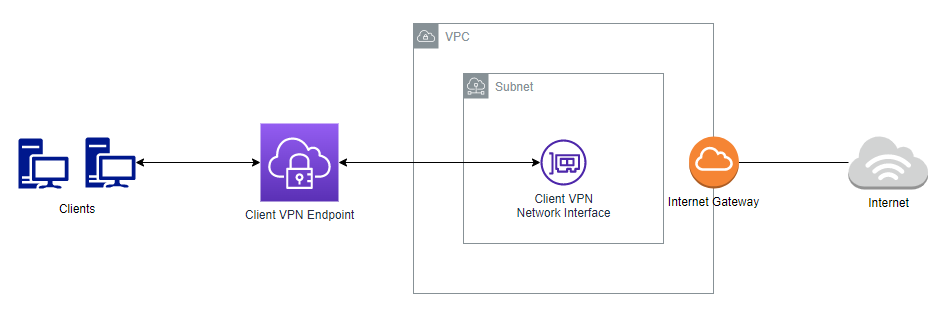
- VPC를 원격에서 VPN으로 접속할 수 있도록
Client VPN Endpoint를 테라폼을 통해 구성해봅시다.
아키텍처
전체 과정
- 쉘 스크립트로 서버, 클라이언트 인증서를 생성하고
AWS ACM으로Import합니다. - 테라폼으로
클라이언트 VPN 엔드포인트를 구성합니다.
1. 인증서 생성 후 AWS ACM으로 Import
import_cert_for_client_vpn.sh
#!/bin/bash

# read metadata
read -p "AWS Profile: " profile

# profile exception process
if [ -z $profile ]
then
        echo "You must type profile"
        echo "ex) default"
        exit 0
fi

export AWS_PROFILE=$profile

mkdir my-new-ca
cd my-new-ca
git clone https://github.com/OpenVPN/easy-rsa.git

# pki start
cd easy-rsa/easyrsa3
./easyrsa init-pki

# Create CA
./easyrsa build-ca nopass

# Server cert / key
./easyrsa build-server-full server nopass

# Client cert / key
./easyrsa build-client-full client1.domain.tld nopass

# Copy cert
mkdir ../my-keys
cp pki/ca.crt ../my-keys
cp pki/issued/server.crt ../my-keys
cp pki/private/server.key ../my-keys
cp pki/issued/client1.domain.tld.crt ../my-keys
cp pki/private/client1.domain.tld.key ../my-keys
cd ../my-keys

# Import cert on AWS ACM
aws acm import-certificate --certificate fileb://server.crt --private-key fileb://server.key --certificate-chain fileb://ca.crt
aws acm import-certificate --certificate fileb://client1.domain.tld.crt --private-key fileb://client1.domain.tld.key --certificate-chain fileb://ca.crt
2. 테라폼으로 클라이언트 VPN 엔드포인트 구성
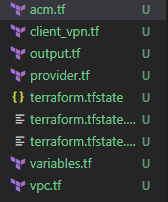
acm.tf
이전 단계에서 생성한 서버, 클라이언트 인증서를 가져옵니다.
# 서버 인증서 가져오기
data "aws_acm_certificate" "server" {
  domain = "server"
}

# 클라이언트 인증서 가져오기
data "aws_acm_certificate" "client" {
  domain = "client1.domain.tld"
}
vpc.tf
VPN과 연결하기 원하는 VPC와 서브넷을 가져옵니다.
# VPC 불러오기
data "aws_vpc" "example" {
  id = local.vpc_id
}

# 서브넷 불러오기
data "aws_subnet" "example" {
  id = local.subnet_id
}
client_vpn.tf
먼저 클라이언트 VPN 엔드포인트를 생성합니다. server_certificate_arn에 ACM에서 가져온 서버 인증서의 arn을 넣습니다. 상호 인증을 위해 authentication_options 안에 root_certificate_chain_arn 속성에 클라이언트 인증서의 arn을 넣습니다. client_cidr_block 속성에는 클라이언트 VPN의 원하는 CIDR를 설정합니다. 이 CIDR는 연결하려는 VPC의 CIDR와 겹치면 안됩니다. 인터넷 연결을 위해 dns_servers에 도메인 서버를 지정합니다. 마지막으로 연결 로깅(connection_log_options)은 비활성화합니다(연결 로깅은 필수 속성입니다).
# 클라이언트 VPN 엔드포인트 생성
resource "aws_ec2_client_vpn_endpoint" "example" {
  description            = "terraform-clientvpn-example"
  server_certificate_arn = data.aws_acm_certificate.server.arn
  client_cidr_block      = "10.0.0.0/22"
  dns_servers = [
    "8.8.8.8"
  ]

  # 상호 인증
  authentication_options {
    type                       = "certificate-authentication"
    root_certificate_chain_arn = data.aws_acm_certificate.client.arn
  }

  # 연결 로깅
  connection_log_options {
    enabled = false
    # cloudwatch_log_group  = aws_cloudwatch_log_group.lg.name
    # cloudwatch_log_stream = aws_cloudwatch_log_stream.ls.name
  }
}
엔드포인트가 생성되었으면 이제 엔드포인트와 서브넷을 연결해줍니다.
# 서브넷과 VPN 연결(대상 네트워크 연결)
resource "aws_ec2_client_vpn_network_association" "example" {
  client_vpn_endpoint_id = aws_ec2_client_vpn_endpoint.example.id
  subnet_id              = data.aws_subnet.example.id
}
권한 부여 규칙에서는 VPN으로 접속할 때 접근 가능한 주소를 설정합니다. 전체 VPC 내 리소스에 접근 가능하게 하고, 인터넷에 접근할 수 있도록 했습니다.
# 권한 부여 규칙 설정
resource "aws_ec2_client_vpn_authorization_rule" "vpc" { # VPC 내 리소스 접근
  client_vpn_endpoint_id = aws_ec2_client_vpn_endpoint.example.id
  target_network_cidr    = data.aws_vpc.example.cidr_block
  authorize_all_groups   = true
}
resource "aws_ec2_client_vpn_authorization_rule" "internet" { # 인터넷 접근
  client_vpn_endpoint_id = aws_ec2_client_vpn_endpoint.example.id
  target_network_cidr    = "0.0.0.0/0"
  authorize_all_groups   = true
}
마찬가지로 라우팅 테이블 설정을 통해 인터넷 접근이 가능하도록 했습니다. 엔드포인트를 서브넷과 연결할 때 VPC 라우팅은 자동으로 생성됩니다.
# 라우팅 테이블 설정
resource "aws_ec2_client_vpn_route" "example" { # 인터넷 접근
  client_vpn_endpoint_id = aws_ec2_client_vpn_endpoint.example.id
  destination_cidr_block = "0.0.0.0/0"
  target_vpc_subnet_id   = aws_ec2_client_vpn_network_association.example.subnet_id
  description            = "Internet"
}
Devops Engineer